Browsing Category

Grains Nuts and Seeds

Gorgonzola & Black Rice Stuffed Peppers

August 13, 2009


Growing up, I never really liked my mom’s stuffed peppers (sorry Mom). I’m not sure what it was about the combination of tomato, rice and beef, but it was never appealing as a kid. Now, I enjoy those flavors more, but when it comes to stuffing veggies I like to branch out and try some different combinations.

I picked up some green bell peppers at the market last week. While the red and yellow varieties are much more to my liking, I often buy green to toss in recipes and to top our salads. Bell peppers in general are full of vitamin C and vitamin A, and I figure a few extra antioxidants here and there certainly can’t hurt.

I also learned an interesting tidbit of info when I was refreshing my nutrient knowledge. By the way, I typically research foods on WHFoods.com. It is such a great site that pulls together the latest research articles on all kinds of foods. Anyway, apparently bell peppers contain a recessive gene that eliminates the compound capsaicin which is responsible for heat in other varieties of peppers. I guess I found this especially interesting because I’m not all that familiar with the dominant and recessive genes of my fruits and veggies.

Moving on. Instead of adding these peppers to another dish, I decided a stuffed pepper sounded good for dinner last night. Given my so-so view of the traditional stuffed pepper, I took stock of what I had available and got to work. I had some black rice that needed to be used up. I love Gorgonzola cheese with walnuts so that gave me the idea that the nuttiness of the black rice might go well with a sprinkle of the cheese.

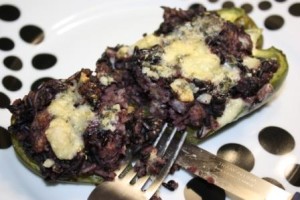
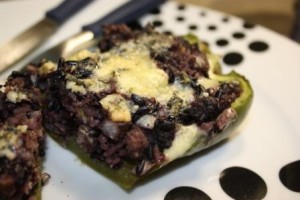
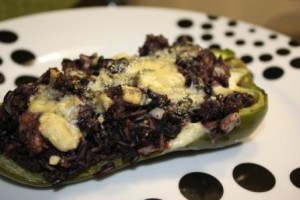
What I ended up with was a green bell pepper stuffed with black and long grain white rice, topped with savory Gorgonzola. The flavors went so well together – lightly nutty and salty with a touch of sweetness from the pepper.

I have a feeling this will now be my go-to recipe for stuffed peppers. My husband enjoyed it because the texture had a hearty, meaty taste without the dish actually containing meat. It is an ideal meat-free dish to incorporate into your week.

Gorgonzola & Black Rice Stuffed Peppers
4 small round green bell peppers, or two longer peppers
1 cup cooked long grain rice (wild or brown would work too)
¼ cup onion, finely chopped
2 cloves garlic, minced
¾ cup bread crumbs (white, wheat, spelt)
¼ cup chicken stock
½ cup cooked black rice
1 egg, beaten
½ tsp salt
¼ tsp black pepper
2 oz Gorgonzola cheese, crumbled

Preheat the oven to 350 degrees F and lightly coat the surface of a square glass baking dish with olive oil. In a large bowl mix together the white rice, onion, garlic and bread crumbs. Add in the chicken stock (or use water if you prefer a vegetarian option) and stir to moisten. Stir in the black rice (this will turn the mixture a dark purple). Mix in the egg and season with salt and pepper. If the mixture is too dry to stuff the peppers add a little more chicken stock.

Cut the tops off of your 4 round peppers or split your 2 longer peppers in halves. Clean out the seeds and large veins. Place them in the greased baking dish and fill each with the rice mixture. Top each with an equal amount of the cheese by pressing the crumbles into the rice. Bake for 45 to 60 minutes, until the pepper begins to brown and is tender. Serves 4.

Nutty Grain Beer Bread

July 29, 2009

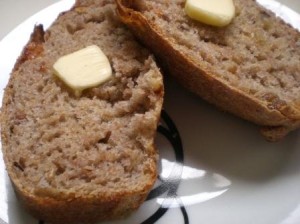
Oats, wheat berries, ground flaxseed, sesame seeds and walnuts. These are a few of the things I had sitting around the apartment that were begging to be used. When I stopped by the supermarket on Monday and walked past the beer aisle I caught a glimpse of what all these ingredients had the potential to become – whole grain beer bread!

Much of the dark beer here in Brazil is Malzbier. It’s very low alcohol and some compare it more to root beer than traditional beer. I used to enjoy it when we first arrived, but it is rather sweet. I can’t even think of anything that equates to it in the US. It can be enjoyable as a dessert, but lately I’ve found that it’s just too sweet for my preferences. However, I have learned it is a great addition to beer bread.

Hungry for a nutty, grainy bread to complement my breakfast, and as a base for my overconsumption of goiaba (guava) fruit jam I decided it was time to use of my stash of ingredients and see what would happen.

I did a quick search for a beer bread to guide me and found Peanut Butter Boy’s Whole Grain Beer Bread. This got me off to a good start.

I used mascavo sugar (unrefined cane sugar) and cut back on it a bit due to the sweetness of the beer. Then I soaked my steel cut oats and wheat berries for a ½ hour. Threw everything together and let ‘er bake.

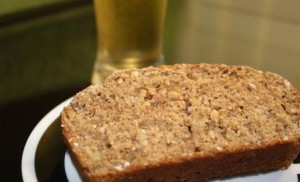
A definite winner. I’ll be making this one again and again. However, I would suggest soaking the grains a bit longer, perhaps 45 minutes, because there were still some rather hard bites to be found. I guess you could choose to sprout them as well, but I didn’t go that far. Also, any dark beer will do.

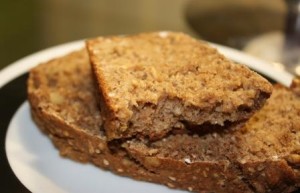
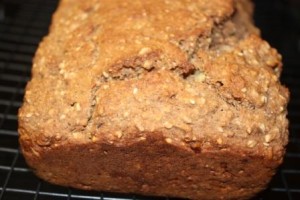
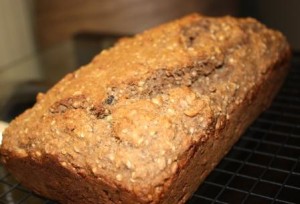
Fresh from the oven or toasted with jam the bread is full of crunchy texture with the mild sweetness of the dark beer. Hearty, healthy and filling – exactly what I was going for.

Nutty Grain Beer Bread

Adapted from Peanut Butter Boy’s Whole Grain Beer Bread

3 cups whole wheat flour
1 T mascavo sugar
1 T baking powder
1 t salt
2 T sesame seeds
¼ cup chopped walnuts
2 T ground flaxseed
1/3 cup steel cut oats (soaked and drained)
1/3 cup wheat berries (soaked and drained)
1 can (350 ml beer)

Preheat the oven to 375 degrees F and grease a 9 x 5 inch loaf pan. In a large bowl, gently mix together the flour, sugar, baking powder and salt. Stir in the sesame seeds and flaxseed. Next pour in the oats and wheat berries. It is fine if a bit of the soaking liquid goes in to add moisture. Mix well and then begin pouring in the beer a little at time as you stir until the can is empty. Then stir until the dough is well combined.

Pour into your baking pan, spread evenly and bake for 45 min to 1 hr. Once browned and baked through, remove from the oven and cool on a wire rack for about 10 minutes. De-pan and enjoy!

Zucchini Quiche with Whole Wheat Crust

July 9, 2009

There was a time when the egg yolk rarely made it into my diet. I hastily followed the crowd when this food made the spotlight for being high in cholesterol. The truth is I enjoy egg whites just as much as the whole egg. I also tend to enjoy just eating the white and not the yolk when eggs are hard boiled.
However, I disliked that nagging voice in my head telling me that I shouldn’t be enjoying the whole egg on rare occasions. Fortunately, as seems to be happening with a lot of foods previously labeled unhealthy, the nutrition news changed and eggs came back as being a food now known for its healthy attributes which outweigh any nutritional shortcomings.
I gradually started eating the whole egg again and said good bye to that nagging voice. I knew my great grandfather couldn’t have been all wrong considering he lived into his 90s and ate almost a dozen fresh from the farm eggs a day.
The main thing that got my attention concerning health and the egg was choline. Egg yolks are one of the richest sources of choline, which is part of the B vitamin family. The most important benefit for me being that it is necessary for brain health.
I have eggs often and many times I will include one yolk and multiple egg whites when I just want the protein, but don’t want a lot of calories. The whole egg has about 70 while the white has about 17. That way I can still benefit from the choline and have a filling meal with a lot of protein.

One of the best ways to use whole eggs is in a quiche. I have always enjoyed quiche with its buttery crust and airy texture. You can also fill it with all kinds of vegetables and flavorful cheeses which is a huge bonus.

Earlier this week I had a zucchini that needed to be used up so I decided shredding it for a quiche would be a great way to enjoy it. I also had some smoked provolone cheese which is one of the better cheeses I find here and offers so much flavor to many of the things I make from pizza to a green salad.
But what about the crust? I wanted something partially healthy, but still rich and buttery. I haven’t had access to a rolling pin for two years. It is tucked away in a storage unit in the US, so I’ve become a big fan of pat-in- the-pan crusts. I decided to take the one I regularly use from the Joy of Cooking and make it whole wheat.
It turned out great! Still buttery, but with a crumbly texture and a flavor that really paired nicely with the eggs, veggies and cheese. In fact, I think I am going to attempt at making a sweet version of it soon for a pie adding some spices such as cinnamon and nutmeg.
Zucchini Quiche with Whole Wheat Crust

1 ½ cups whole wheat flour
½ tsp salt
½ cup butter, softened
Milk
¼ cup onion, finely chopped
¾ cup zucchini, shredded
1/3 cup smoked provolone, shredded
4 eggs
1 tbsp flour
1 cup of milk
½ tsp salt
¼ tsp black pepper
½ tsp cumin
½ tsp hot paprika
Preheat the oven to 350 degrees F. In a bowl mix together whole wheat flour and salt, cut in the butter and mix with a fork or pastry blender until butter is incorporated and dough is crumbly. Slowly add milk, one tablespoon at a time until the mixture forms a dry, yet cohesive dough. Press the dough evenly into bottom and sides of a deep, 9 inch pie pan.
Sprinkle the onion, zucchini and cheese evenly over the crust and set aside.
In a bowl or in a blender combine the eggs, flour and milk. Mix well with a whisk or in the blender. Add the remaining seasonings and whisk or blend again until the mixture is somewhat frothy. Pour the mixture over the vegetables and cheese in the pie crust. If your pan is not deep enough you may want to cut back on the milk to make less egg mixture. Leave at least a ¼ inch of crust visible around the edge.
Bake for about 45 minutes to an hour. The egg will rise a bit and the top should be slightly browned and the center set. Allow to cool for five minutes, slice and serve. Makes six to eight servings.

Tropical Wheat Berry Salad

July 1, 2009

I’m still on a bit of a wheat berry kick. I brought some back with me when I returned to Brazil and lately I’ve been thinking about what I could do with them. After picking up a pineapple and then splurging on a pomegranate at the market the other day, I finally had my answer.
I wanted something sweet, not savory, for this experiment and I thought I could pull it off with a wheat berry fruit salad using tropical flavors.
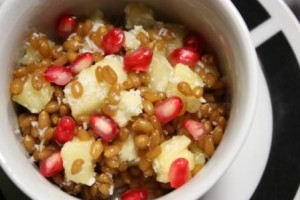
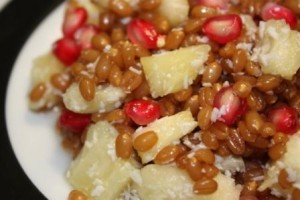
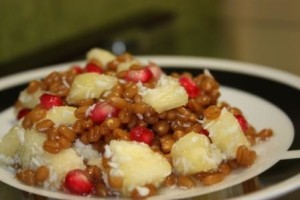
I simply combined honey, lime and coconut for a dressing. Tossed some diced pineapple with cooked and cooled wheat berries. Pomegranate arils came about for color.
I really enjoyed this sweet twist on a healthy grain. It’s great for a cool, but hearty breakfast on a hot morning or maybe a new salad to take to a picnic.
Tropical Wheat Berry Salad
½ cup dry wheat berries
1 ¾ cup water
1/3 cup pineapple, finely chopped
2 tbsp honey
Juice of two limes
2 tbsp finely ground coconut
¼ cup pomegranate arils
I cooked the wheat berries according to package directions which was ½ cup in 1 ¾ cup of water. Bring to a boil, reduce heat and simmer, covered, for about an hour until tender. Drain them if necessary and let them cool.
Once cool, toss the pineapple with the wheat berries. Whisk together the honey and lime juice. Taste to determine if you need more sweet or sour depending on your preferences. Whisk in the coconut.
Pour dressing over the wheat berries and toss to coat. Garnish with the pomegranate.

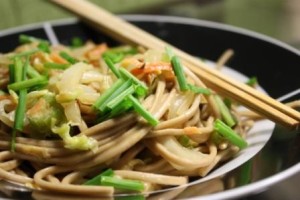
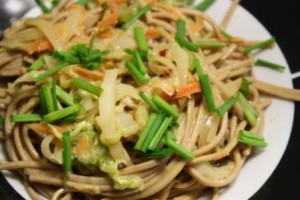
Soba with Spicy Peanut Sauce

June 23, 2009

So, I’m beginning to think that getting settled back in is an illusion. I can’t seem to get completely organized and feel like I’ve been about two steps behind since returning to Brazil almost three weeks ago.

The research and providing you with any valuable health info has certainly been lacking, but the effort is still ongoing. I’m determined to have a post up about coconut oil this week and I have a few other topics that are begging me to look into them.
I may not have had much time to do research, but I am still cooking so a simple recipe will have to suffice until I get my act together.
I am infatuated with spicy peanut sauce. My husband can’t stand it. My husband was away on business last night. So what do you think I had for dinner? Yep, spicy peanut sauce.
I had never cooked with soba noodles until coming to Brazil. I’m not sure why that is. I guess I wasn’t really familiar with them. Soba noodles are a Japanese noodle made of buckwheat and wheat flours. I think they have more of a unique texture than flavor and I like to cook them until just barely tender.
I should mention that while I have made soba noodles I have yet to do anything culturally accurate with them. I plan to make spicy soba at some point, but haven’t taken on the challenge yet. Two Peas and Their Pod posted a wonderful recipe a few days ago for soba which is what got the noodles on my mind in the first place, but I didn’t have all the ingredients to complete that dish. I went another direction.
Soba with Spicy Peanut Sauce

1 Tbsp olive oil
2 cloves garlic, minced
¼ of a large onion, thinly sliced
½ cup carrot, shredded
1 cup zucchini, shredded
1 cup Napa cabbage, shredded or thinly sliced
Salt and pepper to taste
250 g soba noodles, cooked
2 Tbsp chives or scallions, sliced

Sauce:

2 Tbsp (generous) creamy peanut butter
1 Tbsp soy sauce
1 tsp sesame oil
1/8 cup water
1 clove garlic, minced
½ tsp ground ginger
½ tsp crushed red pepper (less or more depending on taste)

Heat oil in a sauce pan and cook garlic, onion, carrots, zucchini and cabbage until tender. Salt and pepper to taste, but remember that the peanut butter will add much salty flavor.
Whisk peanut butter, soy sauce and sesame oil in a small bowl. Gradually pour in water while whisking. It will be thick, but moisture from your cooked veggies will thin it more. Whisk in garlic, ginger and red pepper.
Pour the peanut sauce over the warm veggies in the skillet and toss to coat. Next toss in the soba noodles. Heat if it has cooled. Garnish with chives or scallions and serve.
Makes about 3 servings, depending on how hungry you are. As in if you just got back from a big workout, maybe only 2.

**Season the final dish to taste. You may find it needs more salt, pepper or red pepper once together. Also, an added teaspoon of sugar or a brown sugar will sweeten the peanut sauce if you prefer.

______________
P.S. My Cafe & Cream Shortbread is in the running for a French press coffee maker over at the lovely blog, My Food and Life Encounters. If you liked it, I’d love to have your vote over there via a comment. You should check out the blog if you haven’t, voting or not. Lots of great recipes!
Update: I won, I won!!!! Thank you to all who voted – Tangled Noodle, Cinnamon & Spice, Jefferson’s Table, 5 Star Foodie, So what are you making for dinner?, Mei and The Yeast I Could Do!
Hope I didn’t miss anyone. I owe you all a cafezinho!

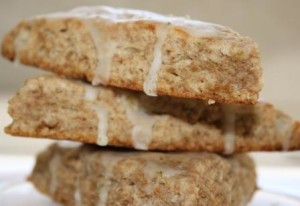
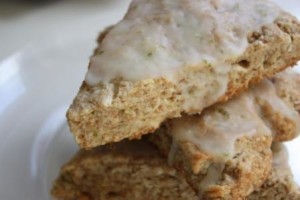
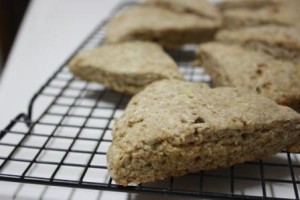
Coconut and Lime Wheat Scones

June 18, 2009

I think my love of scones has been pretty well established. I just can’t get enough of them. A donut? Eh, maybe. A bagel? Well, okay. Scones? Yes! Bring them on over. It is with these treats that I love to do my breakfast splurging.

I’ve had the coconut and lime combo on my mind lately so I decided I would give it a shot with scones. I found a few recipes online, but not quite what I was looking for. I knew I wanted to utilize the zest of the lime as well as the juice and I really wanted to use some coconut milk. On top of that I did have health on my mind, wanting to play around with a whole wheat version.
Well, this is what I got. I have to say that I taken aback a bit by my husband’s raving praises. He often thinks my food is good, but raving about how good is a new step for him. Maybe I am on to something.
Coconut and Lime Wheat Scones
1 ¾ cup whole wheat flour
2 ¼ tsp baking powder
2 tbsp mascavo sugar (unrefined cane sugar)
½ tsp salt
1 tbsp lime zest (about half from one lime)
¼ cup finely ground unsweetened coconut
¼ cup unsalted butter, cold
1/3 cup coconut milk
¼ to ½ cup milk or heavy cream
¾ cup powdered sugar
Juice of one lime
1 Tbsp lime zest
In a mixing bowl combine the flour, baking powder, sugar, salt, zest and coconut. Add the butter in small pieces. Blend with two knives or a pastry gadget until the pieces of butter are about the size of peas and evenly distributed. Add the coconut milk and combine. It will likely be dry.
Add enough milk or cream so that the dough comes to a manageable consistency, a bit drier than a bread dough, but to a point where it can be kneaded.
Turn the dough out onto a floured countertop. Knead gently to bring the dough together and shape it into a circle about ¼ to ½ inch thick. Cut into eight pieces.
Bake on a lightly greased sheet pan at 400 degrees F for 15 minutes or until the edges are slightly browned. Remove and allow to cool on a rack.


Add ½ cup powdered sugar to a small bowl. Add the juice of one lime and whisk until smooth. Whisk in the lime zest and enough of the remaining powdered sugar to reach desired consistency. It should be slightly thick, but still thin enough to drizzle and glaze.

Pour glaze over each scone and allow it to harden. Enjoy!

***If you prefer not to use powdered sugar and want to omit the glaze I would suggest adding some more sugar to the scone dough as it is not very sweet at all. The glaze is really what brings the sweet, salty, sour flavors together.

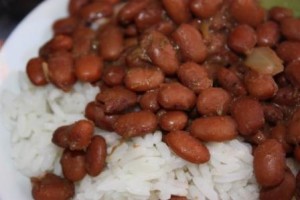
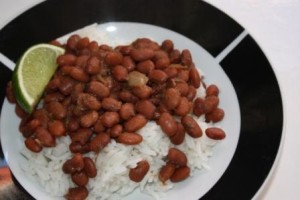
Rice and Beans: A Not-Quite-Brazilian Version

June 16, 2009

I was fond of rice and beans before moving to Brazil, but I must admit that they typically came from a can and a box which often had the term “instant” or “minute” somewhere on it.
I have yet to find someone here to show me the proper way to make Brazilian rice and beans. It seems to be a method and recipe you are born with and few people my age or younger prepare them. Through my own trial and error I’ve got the rice pretty well down, but the beans remain a mystery. I do know many people use pressure cookers, but others don’t. I remain in the camp that doesn’t because they scare me a bit.
The first time I made my own rice and beans here I patterned it off a recipe from the Joy of Cooking Cookbook for Brazilian Black Beans. Funny thing is I’ve never had any beans here that taste anything like that recipe. Maybe they are like that in the north, I’m not sure. I think they were trying to mimic feijoada, but that isn’t it either. Over time I’ve taken that recipe and added my own touches to create rice and beans that I’m happy with.
I made them yesterday and realized I’d never shared it before so here you go. The beans are mildly spicy which I enjoy. A great addition would be some chopped jalapenos or you could use some colored bell peppers as well. Black beans are used for feijoada, but when it comes to plain rice and beans a red/white bean is used. I’ve asked friends here what kind of beans they are and the response I typically get is, “I don’t know, they are beans.”
Rice and Beans (The Not-Quite-Brazilian Version)

4 cups red/white beans, soaked overnight in 8 cups water
8 cups water
1 ½ cups chicken stock
1 Tbsp olive oil
1/2 large onion, chopped
1 small green pepper, chopped
4 cloves garlic minced
1 tsp cumin
¼ tsp crushed red pepper
½ tsp hot paprika
½ tsp salt
¼ tsp black pepper
Juice of one lime
1 Tbsp olive oil
1 cup long grain rice
2 cups water

For the beans:

Drain beans and return to cooking pot. Cover in 8 cups of water, bring to a boil and then simmer for 1 ½ hours.

Meanwhile heat the olive oil in a sauce pan and cook onion, green pepper and garlic until tender. Stir in cumin, red pepper, paprika, salt and pepper. Set aside.

Usually at about 1 hour 15 minutes the liquid is about gone in my beans. At this point I add the chicken stock. At 1 ½ hours I add the onions and peppers, then cook for an additional 30 minutes or until tender.

Once cooked squeeze the juice of one lime over the beans and mix in. This makes a lot of beans likely enough to feed six.

For the rice:

In a deep pan, heat olive oil, add rice and cook for about two minutes. Add water and bring to a boil. Reduce heat and simmer covered for 15 minutes. *You may need to double the recipe to have enough for all your beans. I tend to use my beans in soups and wraps too so I don’t need a lot of rice.

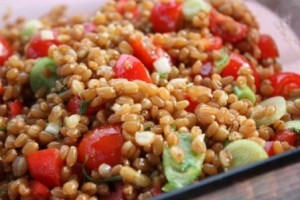
Savory Wheat Berry Salad

June 5, 2009

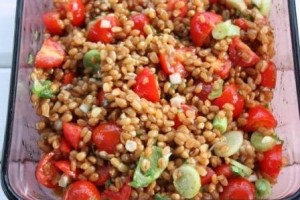
Well, I’ve finally crossed over into the world of wheat berries. You know, I get to experience a lot of new foods due to my living abroad, but at the same time I miss out on some new and upcoming things here in the US. Wheat berries have been all over food blogs the past few months and I have yet to find them where we live in Brazil. So during this visit I picked some up to cook and to take back with me so I can experiment some more.
I tried them for the first time a couple weeks ago. I was in Whole Foods and needed a quick, to-go dinner so I stopped by their deli and decided to get a bit of their wheat berry salad made with curry. The consensus – love them! Not that I had any doubts. I’m a huge fan of grains and grain-based salads.
Because wheat berries are the whole wheat kernel without the hull they provide the nutritional benefit of the bran, germ and endosperm, much of which is missing from the processed variety. Wheat berries are a very good source of fiber and manganese, and a good source of magnesium. The presence of the germ also gives you a boost of B vitamins and vitamin E.
Some other interesting research that has arisen the past few years is that whole grains may hold as much antioxidant power through phytochemicals as fruits and veggies. Phenolics are a group of antioxidants present in whole grains in their bound form, unlike those in fruits and veggies which are free. What may have been overlooked in the past is that the bound phenolics in whole grains are released during digestions so we still benefit from them.
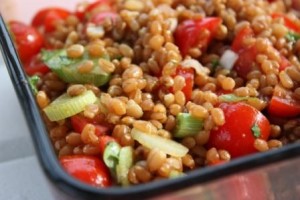
It took me a while to decide what to make with my wheat berries. There is no shortage of recipes on the web and I loved the curry flavor in the salad I had from Whole Foods. What I didn’t like was the added fruit. I’m not a big fan of golden raisins in grain salads. I wanted something that was savory all the way. So using some things from the garden this is what I came up with.
Savory Curry Wheat Berry Salad

1 cup wheat berries
3 ½ cups water
1 cup grape tomatoes, chopped
1 spring onion, sliced
1 tbsp fresh parsley, chopped
5 tbsp extra virgin olive oil
3 tbsp lemon juice
2 tsp curry powder
Salt and pepper to taste

Place wheat berries in a large sauce pan and cover with water. Bring to a boil, reduce heat and simmer, covered for 45 min to one hour. Drain and rinse with cool water.

In a bowl whisk together olive oil, lemon juice, curry powder, salt and pepper. Set aside.

In a serving bowl toss together wheat berries, tomatoes, onion and parsley. Pour dressing over salad, toss to coat and serve. Makes about six servings.

More on the health benefits of whole grains and references for this post – WHFoods: Whole Wheat

Finally Tried It: Black Rice

March 31, 2009
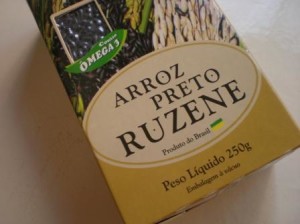
A few months ago I posted about an article regarding the attention black foods have been receiving in relation to their health benefit. Since then I kept telling myself that if I came across black rice I just had to give it a try. Lucky me, I just happened to find some at the Japanese market here in town a couple weeks ago.

So, why this interest in black rice?
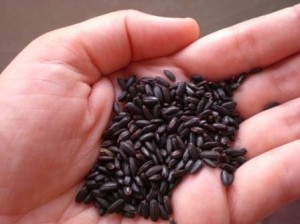
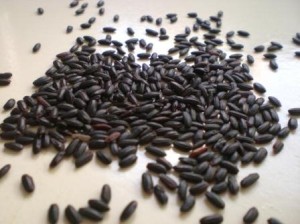
Well, first of all it is different; perhaps not to Asian cultures, but certainly different and rather exotic to those of us not incredibly familiar with all Asian foods. Second, the dark color is an indicator of nutrients. Specifically, anthocyanins, which give the rice its dark purple, almost black appearance.
Anthocyanins are believed to have anti-inflammatory properties and the ability to improve serum lipid profiles which includes cholesterol and triglyceride readings. Studies have analyzed the action of anthocyanin-extract specifically from black rice and have found the above beliefs to be supported.
In addition the iron content in black rice is higher than for other varieties of rice. However, when we consider iron from plant sources such as rice, we also have to consider the bioavailability of the iron. Iron from plant sources is considered non-heme iron and is not always readily absorbed by the body. It is good to know, however, that consuming adequate amounts of vitamin C helps our body absorb more non-heme iron.
Along with its interesting nutritional makeup, black rice has a very rich history that is quite difficult to verify. It is believed that in ancient times it was only to be consumed by Emperors of China giving it the name, forbidden rice. Fortunately for us it is no longer forbidden. It is becoming more and more popular and easier to find in supermarkets.


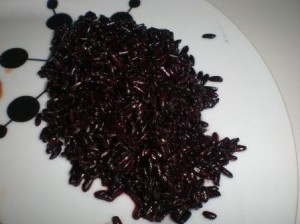
I decided that this time around I really just wanted to taste and experience the rice itself so I didn’t add it to a complex recipe. I actually pulled a tip from the recipe for Forbidden Black Rice Salad from Lotus Foods. I didn’t have any of the veggies in for the full salad so I simply tossed my rice in sesame oil and soy sauce after it cooked.

Black rice is a medium grain rice so I didn’t cook it much differently than I do the white rice we use so often in Brazil. I cooked one cup of the rice for a few minutes in a bit of olive oil. Then I added 2 cups of water and allowed to it simmer, covered, stirring it occasionally. It took about 25 minutes for it to cook.

The first thing you will notice when cooking it is the smell. It was amazing, filling the apartment with a warm, nutty aroma. It immediately told me that I was not going to be disappointed with this find.


After it had cooked I tossed the rice in the combination of oil and soy sauce. The flavor was perfect. The dressing gave it an even greater nutty, salty taste and it went very well with the salmon I was having for lunch.

Have you tried black rice yet?

Here are a couple interesting posts about black rice from around the blogging world. Enjoy!

We Heart Stuff – Trend: Black Rice

Live to Eat: Forbidden Rice Pudding

Bread Success!

March 26, 2009

Despite my past work in bread bakeries I rarely have bread success at home. I’m not sure what it is – atmosphere, yeast, lack of talent. My mom makes amazing bread and I’ve always strived to develop a similar skill at making it.
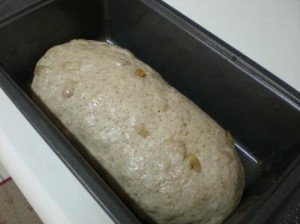
Good news! I think I finally had a bread success.
I will admit it came after a few failures, though. I had a simple baguette recipe I found in a book a long while back that I play with occasionally. It has never turned out well. One reason is that it has too much salt. I never could get used to the flavor. I decided, however, that the recipe had potential if adjusted it enough and if I set my sites on more of a loaf as opposed to a baguette.
I had some golden raisins left from my scones and a bread from my past came to mind today – Cinnamon Raisin Walnut. It has been forever since I’ve had it so I decided to give my base recipe one last attempt at being successful.
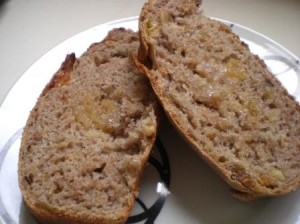
I am so happy about the loaf I ended up with. It has a hard, crusty outside and a soft inside just the way I like my bread. The cinnamon and raisins add just a touch of sweetness without being too overwhelming. I had to wrap it up and push it to the corner of the kitchen after two pieces for fear it would be gone before the end of the day.
I will warn you in advance that this is an all-day kind of bread, or at least all morning. It might be a good idea to leave this one for a relaxing weekend. My next mission will be to increase the whole wheat flour (I was almost out) and incorporate some different grains.
Cinnamon Raisin Nut Bread
1 ¼ cups warm water
1 tsp instant dry yeast
1 ½ cups white flour
1 ½ cups whole wheat flour
¾ tsp salt
1 ½ tsp cinnamon
½ cup golden raisins
1/3 cup walnuts
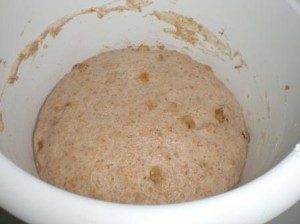
Mix the yeast with water and let it sit while you mix the other ingredients. Combine the flour, salt, cinnamon, raisins and walnuts in a mixing bowl. Pour in yeast and mix with a spoonula until combined. Turn the dough out on a floured surface and knead for five to eight minutes. Form the dough into a round loaf and place in a greased bowl. Let rise for about one hour or until it has doubled in size.


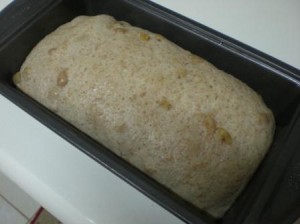
Punch down the dough and form it into a long loaf. Place it in a greased loaf pan. It will look something like this.


Let it rise for 2 more hours at which point it will look more like this.


Bake at 400 degrees Fahrenheit for about 25 minutes or until the loaf is nicely browned on the outside. Remove from oven and use a knife to loosen the sides and de-pan immediately. Let cool on a wire rack.

Want to create beautiful food and product photos that you can't wait to share?!
Discover your style, control the light, and shoot using the tool you know how to use (yes, your phone included). Learn about free resources, Live Q&As with Lori, and online courses you can take from anywhere in the world!
We respect your privacy. Unsubscribe at any time.