Browsing Category

Grains Nuts and Seeds

Happy Valentine’s Day!

February 14, 2010

Whether you celebrate it or not, have a special Valentine, love it or hate it I’m wishing you a beautiful day! The kind of day that is perfect for a giveaway.

I don’t review a lot of products on my site mainly because there are few packaged foods out there that are natural enough that I don’t classify them as processed. However, when I find one that I love I want to share it with you and help you score some of your own in the process.

Soon after I reviewed Tropical Traditions Gold Label Virgin Coconut Oil, I was contacted to see if I’d like to review another one of their products. My eye had been on the coconut peanut butter since I discovered the company so I certainly didn’t pass up the opportunity.

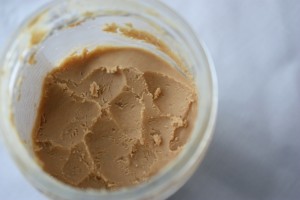
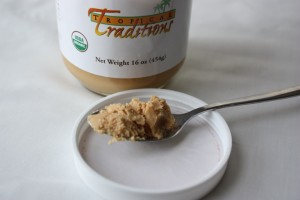
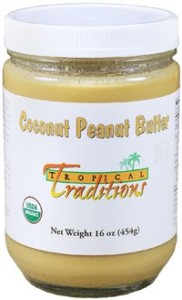
Tropical Traditions Coconut Peanut Butter has two ingredients – 100% organic dried coconut from the Philippines and 100% organic roasted Valencia peanuts from the US.

The combination of the two creates a spread, more dense than peanut butter, with a sweet flavor that makes you think there has to be sugar in there, or salt, or something. Nope, just two ingredients.


I love snacking on it by the spoonful, but spread on warm toast it is even better. The second the peanut butter hits the bread the coconut oils kick in and it turns into a smooth, melty topping worthy of dessert status.
This Coconut Peanut Butter will be making a regular appearance in my kitchen and will likely turn into a gift for some of the nut butter and coconut lovers in my life.
Lucky for you I’ve got one for your kitchen too!
Tropical Traditions will give away one jar of their Coconut Peanut Butter to one of my readers. The contest is open to those with a US or Canada address.
As requested by my giveaway givers you’ll need to subscribe to the Tropical Traditions Newsletter to enter. Tell me you did so or already do in the comments.

For additional entries follow me on Twitter, follow my blog, tweet about the contest or blog about it. Leave a comment for each thing you do (as well as your Twitter name and link as it applies) if you want it to be counted as a separate entry.
Good luck! Entry deadline is 12:00 pm EST Friday, February 19, 2010. I’ll select the winner randomly that afternoon.

Disclaimer: Tropical Traditions provided me with a free sample of this product to review, and I was under no obligation to review it if I so chose. Nor was I under any obligation to write a positive review or sponsor a product giveaway in return for the free product.

Homemade Tortillas

January 22, 2010

When I announced on Twitter last night that I was going to try making my own tortillas one of the responses I received was that once I had them, I’d never go back to the packaged version.
Well, it only took one bite to prove that statement true.
I was tortilla deprived while we were in Brazil. When I visited the US I would always bring back a couple packages in my suitcase and we’d go through them in a week or two. Because this was my only option I stuck with the packaged version, but I knew I wanted to make my own.
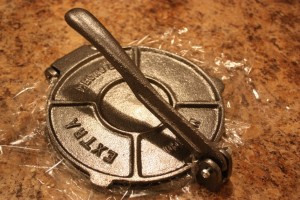
So when my brothers asked me what I wanted for my belated birthday gift during my visit home over the holidays, I immediately said a tortilla press. There was some confusion and I had to clarify that is was not a quesadilla maker I was speaking of. Once we established that the contraption wasn’t to actually cook the tortillas, but to press them, we began looking for one at stores each time we were out finding none.
Finally at about 8:00 pm the night before I left to come back to Kentucky my brothers (two of the three) announced that they were going out for a bit. Considering strange ideas aren’t all that uncommon in my family, no one paid any attention.
About an hour later they walked in the door announcing they were home, and laid a bag on the kitchen counter with a clanging thud.
My tortilla press!
It turns out that a Mexican restaurant they favor had just opened a market next door. They went in just before closing and found the last tortilla maker. Their descriptions of the look the cashier gave them were pretty funny. He seemed surprised that two gringo men (who also ordered chips and salsa to-go, by the way) would need such an item.
I finally got some corn masa flour last week and pulled out the press last night for my first attempt at making tortillas. I opted for a half batch of eight. The instructions called for 1 cup of the flour, 1/8 tsp salt and 1/3 cup water. The label mentioned that more water could be added if the dough was dry. Mine was dry so I added about 2 tbsp more of water.
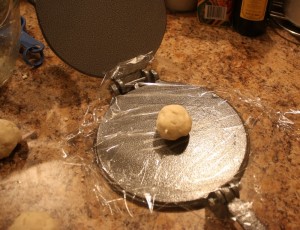
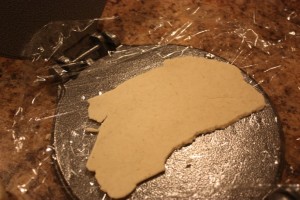
I rolled the dough into eight balls as instructed, covered the press with plastic wrap on both sides, placed the dough ball in the middle and pressed down the dough.

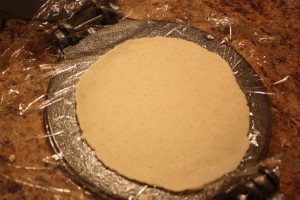
As you can see, not so good on my first try. It wasn’t round at all. I decided to flatten the ball out a bit before pressing to encourage it to go round and this is what I got. Success!


I popped them on a hot griddle pan for about one minute on each side and kept the cooked tortillas warm and soft by covering the plate with a wet paper towel.
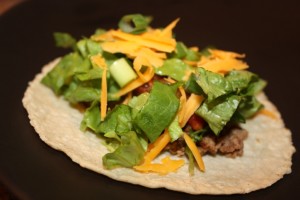
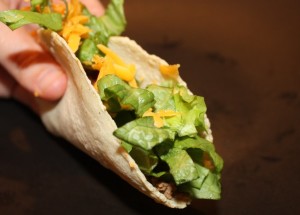
I went for the standard fillings this time, but the exciting part was that I got to try my first purchase of grass fed and finished ground beef from Pike Valley Farm. Delicious! I seasoned it up with cumin, chili powder, salt and pepper.
Oh, and crushed red pepper. About the crushed red pepper…be sure you check your cap before sprinkling it in. Yep, pulled the whole unscrewed-the-cap-when-it-was-a-flip-top and poured in about a ½ cup of red pepper. With my husband’s help, I spent about 10 minutes washing it off with water. Fortunately we managed to get it down to a tolerable level of spiciness.
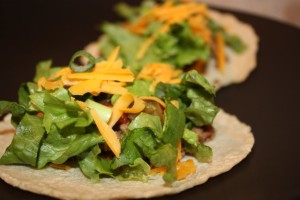
After we saved the meat I topped the tacos with lettuce, cheddar cheese, chopped jalapenos, salsa, olives and green onion.


I was taken a bit by surprise with my husband’s reaction to the dinner. He raved about the flavor of both the tortillas and the beef saying that all the flavors came out perfectly. I have to agree. The texture of the tortillas was excellent too, soft, yet firm and they didn’t break apart.

No more packaged tortillas for us. The extra 15 minutes it took to make them myself was worth every second!

Pumpkin Cheddar Risotto with Shrimp

January 19, 2010

Over the holidays our first visit back home after officially living back in the States was for Thanksgiving. At that time I was presented with all kinds of goodies from my Dad’s garden that my Mom had froze for me. I’m still making my way through the pumpkin, raspberries and blackberries with plenty to last me until spring.
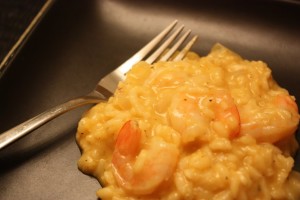
Since what come to mind when I think of these things is often sweets and breads I’ve been challenging myself to use them in more savory dishes specifically the pumpkin. A few years ago I found a recipe for shrimp, corn and cheddar risotto and I’ve made it several times since. It came to mind when I was trying to figure out what to do with the pumpkin and this recipe is what developed.
I think risotto is sometimes perceived as a dish that takes a long time to make and this really isn’t the case. I had this meal done in 30 to 40 minutes. You do have to stand by the stove, but I usually use that time to multi-task keeping a magazine open to page through while I stir or even the laptop nearby to catch up on blog reading.( I know. I go a little extreme with the multi-tasking.)
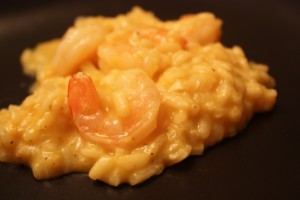
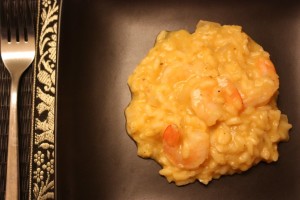
However, if you put in the time, what results is a creamy, pasta-like dish full of vitamins from the pumpkin and carbs to fuel exercise with added protein from the shrimp and cheese. The risotto is so creamy that you need very little cheddar, just enough to add some rich flavor. At the end of cooking I decided to add in some spicy brown mustard and it really topped off the dish well.
Pumpkin Cheddar Risotto with Shrimp

1 tbsp olive oil
½ cup onion, chopped
2 cloves garlic, minced
1 cup Arborio rice
3 ½ cups chicken stock, warmed (I used my first batch of homemade!)
1 cup pumpkin puree (thawed if frozen)
1/3 cup sharp cheddar cheese, shredded
½ tbsp spicy brown mustard
15 to 20 shrimp, cooked (thawed if previously frozen)
1 tsp sea salt
½ tsp black pepper
In a large pot, heat the olive oil over medium-high heat. Add the onion and garlic and cook for about 3 minutes. Add the rice and stir to coat with the oil and cook 3 to 5 minutes longer. Begin adding the chicken stock about a ½ cup at a time, stirring the rice. Reduce the heat to medium. Ensure that all the liquid is absorbed before adding the next ½ cup of stock. Continue this process until the risotto is tender. It takes about 20 minutes.
Stir in the pumpkin, then add the cheese and stir until melted and evenly incorporated. Add the mustard, and then stir in the shrimp. Season with salt and pepper and continue to cook 1 or 2 minutes until everything is heated through. Makes 3 to 4 servings if you have other sides. Perhaps 2 to 3 if it is a main dish or if you are two incredibly hungry runners.

Walnut Crusted Tilapia

January 13, 2010

Whenever I visit a coastal location overflowing with fresh fish and seafood I tend to fantasize a bit about what it would be like to live there. I think about how creative I could be in the kitchen and even how my health would benefit. I’ve experienced this daydreaming all across the world, a couple years ago while visiting Howth, Ireland, last October in Hong Kong and then again in November in San Francisco.
Central Kentucky is pretty far away from all of these places and while I may live in a coastal location someday, I certainly don’t right now. Even though our fish isn’t always coming straight from the ocean, I’ve been trying to keep it regularly on our menu lately.
I still have a lot to learn. This goes for both proper preparation methods and sustainable practices. I’ve got a good grasp on the best sources for meats and poultry, but fish is an area I’m still learning about – the benefits, the risks, the best sources, the most sustainable options.
For now I’m settling for the frozen options we have available here, most often salmon and tilapia. I prefer the former, my husband the latter. Well, last night was his night and we enjoyed some tilapia.
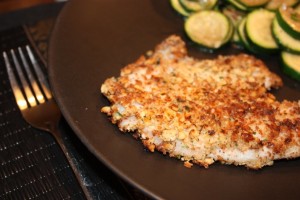
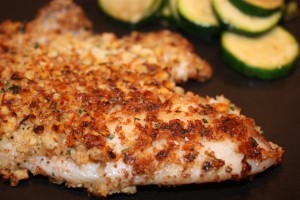
When it comes to crunchy coatings on fish, I tend to always reach for the pecans. Last night I was feeling like I wanted something different so I thought I would give walnuts a try. In addition to that, I’ve been trying to cook with my virgin coconut oil more so I saw this as the perfect opportunity.
I used egg to help coat the fish, but I’m sure buttermilk or something similar would work fine too. The walnuts were every bit as good as pecans and the coconut oil made the coating nice and crunchy giving it only a slight coconut flavor. I’m thinking this is something that would work great on salmon and chicken too.
Walnut Crusted Tilapia

3 tilapia fillets, fresh or thawed
¾ cup walnuts, finely chopped
¼ cup bread crumbs
½ tsp garlic powder
½ teaspoon dried parsley
½ tsp sea salt
¼ tsp black pepper
1 egg, beaten
1 tbsp virgin coconut oil
Combine the walnuts, bread crumbs, and seasonings on a plate and set aside. Gently coat the fish in egg and place the fillets in the bread crumb mixture. This makes enough to cover one side generously or the whole fillet sparingly.
Heat the coconut oil in a skillet on medium high heat. Place the fillet in the skillet, coating side down if you just covered one side. Gently press the fish into the pan with a spatula. Allow it to cook about 3 minutes, then flip and cook 3 minutes more. The fish is done when it turns from opaque to white and begins to flake. You may need to reduce the heat a bit if your coating begins to darken too quickly before the fish is fully cooked. Serves 3, or for us, 2 for dinner and 1 for lunch sometime later this week.

Whole Grain Biscotti

December 18, 2009

Do you have one of those foods or recipes that you are known for in your inner circle of friends and family?

For me, it is biscotti.

I started making it when I first began working in an office place out of grad school. I used the Banana Chocolate Chip Biscotti Recipe from the Betty Crocker’s Cookbook Bridal Edition and altered it over time to make it my own. My original version that became so popular with my coworkers included white chocolate chips, walnuts, almond extract instead of vanilla and no banana.
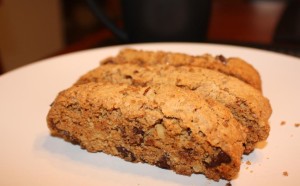
I still love that biscotti and will make it again, but I wanted to play with the recipe a bit and see if I could get buy using whole wheat flours and unrefined sugars. Like the Pecan Shortbread, I was so happy with how it turned out! Of course, it isn’t exactly like my old version, but it is every bit as good in its own unique way.
Whole Grain Chocolate Walnut Biscotti

1 cup demerara sugar
½ cup butter, softened
1 tsp vanilla
2 eggs
2 cups white whole wheat pastry flour
¾ cup whole wheat flour
3 tsp baking powder
¼ tsp salt
½ cup semi-sweet chocolate, chopped or chips
½ cup walnuts, chopped
Extra sugar for sprinkling
Preheat the oven to 350 degrees F. Cream together the butter and sugar. I give it a little extra time because the sugar is such a coarse granule. Next, blend in the eggs and vanilla. Gradually incorporate the flours, baking powder and salt. Finally stir in the chocolate chips and walnuts.
Transfer the dough to an ungreased baking sheet. Separate it into two pieces and mold the dough into a rectangular shape about one inch thick. Sprinkle each with a bit of demerara sugar. Bake for 25 minutes. Remove from the oven and allow to cool for about 15 minutes.
Transfer to a cutting board and cut (I use a serrated bread knife) the biscotti into pieces about one inch wide. Place the pieces back on the baking sheet, cut side up. Bake 10 to 12 minutes longer. Remove from the oven and carefully flip each piece over so the other cut side is exposed. Bake an additional 10 minutes. Allow to cool and enjoy! Makes about 24 pieces of biscotti.

What food or special dish are you known for?

Sweet Potato Flax Muffins

December 8, 2009

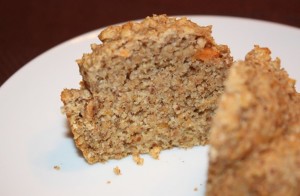
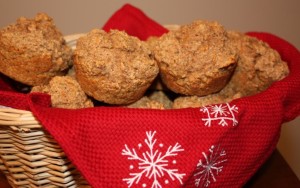
These muffins were inspired by Off Her Cork. I read Andrea’s Thanksgiving Day recap and the idea of putting bananas in sweet potato casserole to sweeten it caught my attention right away. I had wanted to make some muffins with some hearty, healthy ingredients that were also relatively low in added sugar and this gave me a great idea to work with.
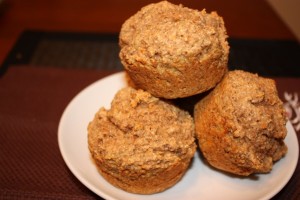
These muffins are made with the flesh of a mashed sweet potato, banana and maple syrup for sweetness, and flax and whole wheat flour for an extra nutritional boost. They are slightly sweet with a hearty texture. The banana comes through and the sweet potato adds a special richness.
Sweet Potato Flax Muffins

2 cups whole wheat flour
¼ cup ground flaxseed meal
4 tsp baking powder
½ tsp salt
1 egg, beaten
¼ cup maple syrup
¼ cup butter, softened
1 ripe banana, mashed
1 sweet potato, flesh only, mashed
½ cup milk
Preheat the oven to 375 degrees F and lightly grease a 12 muffin pan. In a large bowl mix together the flour, flaxseed, baking powder and salt. In a separate bowl mix together the egg, maple syrup and butter. Combine well and add in the mashed banana, sweet potato and milk. Slowly incorporate the dry ingredients mixing gently just until they are incorporated into the batter. Divide the batter evenly into each muffin tin. Bake 15 to 18 minutes.

My Pecan Shortbread

December 2, 2009

I’ve mentioned that I’ve been doing a lot of experimenting lately. I haven’t even purchased white sugar and flour since we’ve been back in the U.S. I’m on the search for alternative sugars and flours to use in my baking to mix things up a bit and improve nutritional value. Right now I’m using demerara sugar (unrefined cane sugar) and whole soft white wheat pastry flour.
I’m co-hosting a cookie exchange this weekend so that is giving me plenty of opportunity to play around in the kitchen using my new ingredients. Last night as I was flipping through recipes I came across one my mom gave me a few years back. It is for a homemade version of the pecan shortbread cookies made by that popular cookie company with elves. You know, those packaged cookies that remain in the aisle I no longer go down at the supermarket.
Those cookies are darn good though and I have made the original recipe before, but of course this time I wanted to try out my new choices of sugar and flour. I tried making a cake last week and it didn’t turn out so well hence it wasn’t blog material. I was anxious to see how it would do in the cookies.
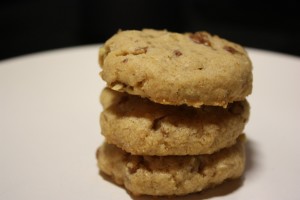
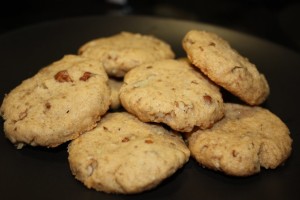
They turned out great! So close to the original version that I would not even be tempted to switch back. The cookie is soft and tender just the way I like my shortbread and I upped the pecans a bit so that you get at least one piece in each bite.
I’m sure this week I’ll end up buy the white flour and sugar for the party because there are a few things I want to make without experimenting, but these cookies are a great start for treats with fewer processed ingredients.
My Pecan Shortbread
½ cup unsalted butter, softened
¼ cup demerara sugar
1 tsp vanilla
1 cup whole soft white wheat pastry flour (I use Bob’s Red Mill)
¾ cup pecans, chopped
Cream the butter and sugar. I give this a little extra time because the sugar has a much larger grain than refined white sugar. I want to make sure it is incorporated as much as possible. Add in the vanilla. Mix in the flour and blend well. Finally mix in the chopped pecans.
Preheat oven to 350 degrees F. The dough will be slightly dry and crumbly. Form into a ball, wrap in plastic wrap or place in a container and chill for 30 minutes. Grease your cookie sheet lightly with butter and remove the dough from the fridge. Roll pieces of the dough into 1-inch balls and flatten slightly. Place on the cookie sheet and bake for 12 to 15 minutes. Mine came out in 12 because I don’t like them too done. Makes about one dozen with a couple to spare.
*If you want to try the original use white sugar and cake flour.

I’m submitting these cookies to Food Blogga’s Eat Christmas Cookies Season 3. Check out the blog to submit your own. Then head over to the ongoing round-up post for all the the cookie recipes you could possibly need this holiday season.

Peanut Butter Wheat Berry Pancakes

September 21, 2009

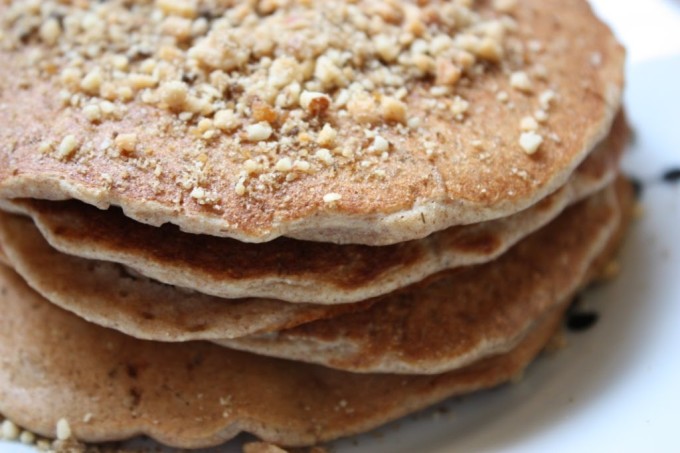
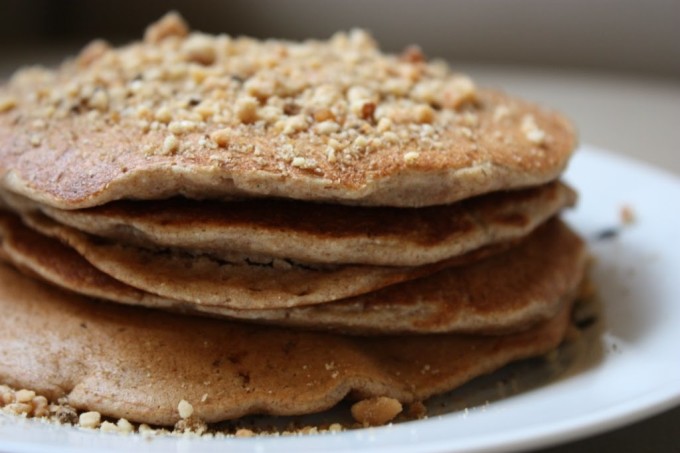
I love all things peanut butter, so despite first making these peanut butter and wheat berry pancakes several years ago, they remain a breakfast favorite!
 Peanut Butter Wheat Berry Pancakes Recipe | Fake Food Free

There are several things you should know about me when it comes to pancakes. I like a very simple recipe. I know you can add eggs, and oil, and milk and create a nice fluffy platform for rich maple syrup, but what I look for is something closer to a just-add-water mix that doesn’t come from a box.
 
And speaking of syrup, while I do love the stuff, I often enjoy my pancakes dry. I sweeten the batter a bit, top them with butter, and then maybe some dry, yet sweet toppings. You’ll understand what I mean in a few minutes.
 
I also like a hearty whole grain pancake. I sometimes add oatmeal to my batter, but given my recent fondness for wheat berries, I thought I would give them their chance to shine once again. And shine they did.
 
This recipe combines whole grains with salty-sweet peanut butter. The wheat berries lend their chewy goodness and the sparkling water creates a somewhat lighter texture to this filling breakfast. I spread a little butter on the finished product and then made a mixture of ground peanuts and mascavo sugar. Sprinkling this on top gave them all the sweet flavor I needed.
 
Peanut Butter Wheat Berry Pancakes Recipe | Fake Food Free
 
Peanut Butter Wheat Berry Pancakes
Makes: 5 small pancakes
Write a review
Print
Ingredients
  1. ¾ cup whole wheat flour
  2. 1 teaspoon baking powder
  3. ¼ teaspoon fine ground sea salt
  4. 3 tablespoons mascavo sugar
  5. ¼ cup cooked wheat berries
  6. ¾ cup sparkling water
  7. 2 tablespoons peanut butter (any variety)
  8. 2 tablespoons chopped salted peanuts
Instructions
  1. In a medium bowl, stir together the flour, baking powder, salt and 2 tablespoons of the sugar. Stir in the wheat berries. Next, whisk in the water until everything is combined. Add the peanut butter, and stir or whisk until it is evenly distributed into the batter.
  2. Preheat the griddle. Measure ¼ cup of the mixture for each pancake and pour onto a hot griddle. Cook about 2 minutes, or until bubbles begin to form on the surface of each pancake. Flip and cook another minute or two, until the pancake is browned on both sides and cooked through the center.
  3. In a small bowl, stir together the chopped peanuts with the remaining 1 tablespoon of sugar. Sprinkle over the pancakes before serving.
Fake Food Free https://www.fakefoodfree.com/
 

Thanks for reading! All images and content are the property of Fake Food Free unless otherwise stated. Please do not republish full recipes and images without written permission. What is okay? Feel free to Pin images, share links to my posts or share the photo in a round up post with the title of this recipe and a link back to the post. Confused about copyright and food blogs? Here is some helpful information on Recipe Attribution. If you want to use a photo or full recipe, just ask. I’m sure we can work something out.  

Sesame Flax Seed Crackers

September 10, 2009

When I first set out on this journey to reduce and eliminate packaged, processed foods from my diet I knew there would initially be things I missed. One item that I wasn’t expecting to miss so much, however, is crackers.

It is amazing how many things they pair nicely with which you don’t realize until you are trying not to eat them. I love spreads and fancy little appetizer crackers and while I’ve been trying to buy whole wheat versions, I know they still have lots of additives and preservatives that aren’t good for me.

A few months ago Healthy Ashley shared a flaxseed cracker recipe and it has been on my list to make ever since. I finally got around to trying them yesterday and I am happy to announce that they turned out wonderfully! Packaged crackers are getting kicked to the curb along with the once addiction-inducing diet soda.

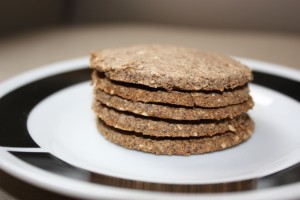
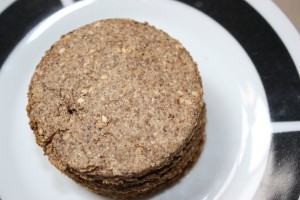
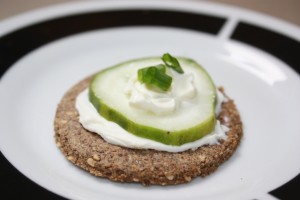
I changed the recipe in a few ways. First I used whole wheat flour instead of the refined flour called for in the original recipe. I only had ground flaxseed so I doubled up on that instead of adding both the ground and whole. I also had some sesame seeds so I thought they would make a nice addition. Then, instead of squares I cut them out in a circle shape using a drinking glass.
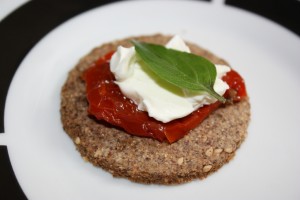
The crackers are crisp with a slightly nutty flavor from the seeds. They are perfect for topping with cheeses and veggies for a tasty snack or appetizer.

Sesame Flax Seed Crackers
Adapted from HealthCastle.com & Flax Council of Canada

½ cup ground flax seed
1 ½ cups whole wheat flour
½ tsp baking powder
½ tsp salt
2 tbsp sesame seeds
4 tsp butter, softened
½ cup skim milk

In a bowl, combine the flax seed, flour, baking powder, salt and sesame seeds. Add in the butter and stir or mix until the mixture is crumbly. Pour in the milk and form into a round ball of dough. Wrap in plastic wrap and refrigerate for 10 minutes.

Preheat the oven to 325 degrees F. Remove dough from the fridge and divide into four pieces working with one at a time. Roll the dough out onto a floured surface or between two sheets of plastic wrap. Roll until very thin about 1/8 to 1/16 of an inch. Cut into squares or circles and transfer to an ungreased baking sheet. Bake for 20 minutes, or until browned and crisp. Makes about 24 2-inch circle crackers.

************

Happy 7th Birthday to our baby girl, Macy Mae! A couple more months and she’ll be sitting on my lap at the computer once again.

Feasting on Pine

September 3, 2009

For a tropical country Brazil has some impressive evergreen trees, at least in the mountainous regions of the country. In fact, the claim-to-fame of the state we are living in is the majestic Araucaria tree. There are about 19 different types of Araucaria tree and each looks just a little different.

While some varieties can be found in other parts of South America, the type the state of Paraná is known for is the Araucaria angustifolia. It is also sometimes called the pinheiro-do-paraná (the Paraná pine). There are a few where we are living, but many more in Curitiba, about a 6 hour drive away, towards the coast. They can also be found in a few states north and south of here such as in Santa Catarina where the island of Florianopolis is located.
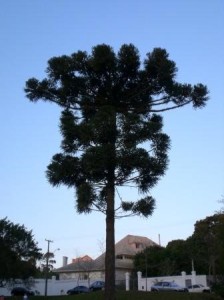
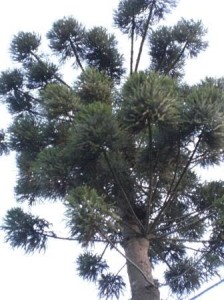
The trees have different shapes, but I love the ones that are more flat along the top. The branches extend out to make them almost look like a candelabra.


So what does all this talk about trees have to do with food?

Well, the pine nuts from the Araucaria tree can be eaten and happen to be quite popular around the area.
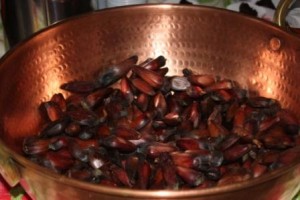

Typically available from May through July (winter), the pine nuts, or pinhão, are most often associated with Festa Junina events. This June festival celebrates rural life and is often equated to a hillbilly party. The hillbillies, so-to-speak, are referred to as Caipiras, a term which lends to the name for the popular Brazilian cocktail, caipirinha. Foods such as canjica, peanuts and popcorn are served at these parties as well as pinhão.

In addition, you can also find the nut in the supermarkets during this time of year. If you happen to be on a road trip like we were in late April you will also pass plenty of roadside stands selling cooked pinhão by the bag. The pine nut (still in it’s shell) is prepared most often using a pressure cooker and is seasoned with salt. It is also made into a soup, but I haven’t had the opportunity to try it.

When we were at the Curitiba Zoo last fall we were able to read a translated description of the pine nut including details about its nutritional value – rich in vitamin B, calcium, phosphorus and protein.
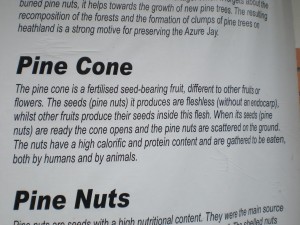
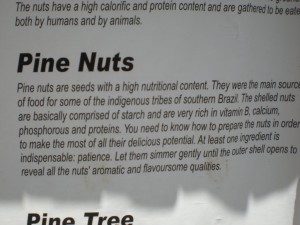
The pinhão are quite difficult to get into. Our friends here suggest biting off the end, spitting it out and then pushing the nut out with your fingers. We tried this, but I always ended up having to peel it.
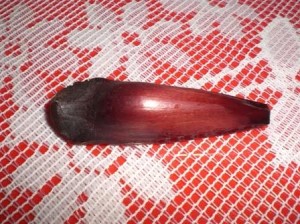
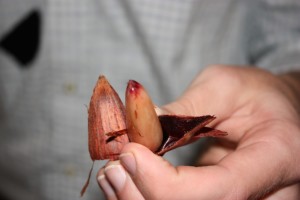
The texture and flavor are like a cross between a nut and firm bean which is enhanced by the added salt. It is a great snack, but given the difficulty of getting one open only a handful tend to be consumed at a sitting.

This has most certainly been one of those local foods we won’t be experiencing anywhere else anytime soon. Even parts of Brazil aren’t fortunate enough to enjoy this winter treat. The pinhão and the Araucaria tree are big foodie benefits of living in Paraná.
Want to create beautiful food and product photos that you can't wait to share?!
Discover your style, control the light, and shoot using the tool you know how to use (yes, your phone included). Learn about free resources, Live Q&As with Lori, and online courses you can take from anywhere in the world!
We respect your privacy. Unsubscribe at any time.