Browsing Category

Grains Nuts and Seeds

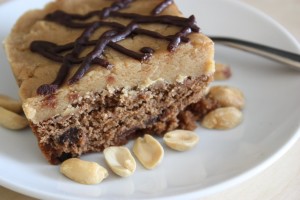
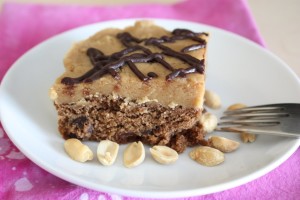
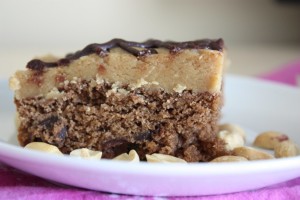
Revising Recipes: Peanut Butter Cookie Dough Brownies

May 10, 2010

Every now and then I come across a recipe that is great for wooing the crowd. You know, when you have a potluck or guests. These recipes have to meet three criteria in my book – simple to make because these events come at busy times, use of familiar flavors because you are trying to please the a majority, and they make everyone ask for the recipe afterward.


This is one of those recipes and I found out about it while watching Ultimate Recipe Showdown. I really like watching this show and not just because Guy is the host. I like it because it showcases amateur cooks like many of us in the food blogging world.


The recipe? Peanut Butter Cookie Dough Brownies


Did you see the episode? Have you tried them? If not, believe me, you will want to. That is, if you are a pb-chocolate lover. I simply never seem to tire of the combination.


I’ve made them twice now and altered the recipe a little each time. The most recent time I made more alterations and the brownie didn’t turn out as rich and dark as I would have liked it. I substituted melted dark chocolate for the unsweetened chocolate because I didn’t have any and cut the sugar. Very good, but not great.


I did use white sugar and brown sugar as the recipe calls for, but my goal is to eventually recreate something similar using my new faves – mascavo sugar and whole grain flour. These are the adjustments I’ve made to the recipe so far.

  •  Melted ¼ cup of the ¾ cup of chocolate chips and combined it with the butter. (I used 60% Ghirardelli chocolate.)
  • Used ½ cup white sugar instead of 1 cup in the brownies
  • Used white whole wheat flour
  • Use natural, no-sugar added peanut butter
Maybe by the end of the summer I’ll have a new version completely. However, until then I had to share it with you because whether you make substitutions or not, this is one good dessert!
 

You can find the recipe on the Food Network site – Peanut Butter Cookie Dough Brownies


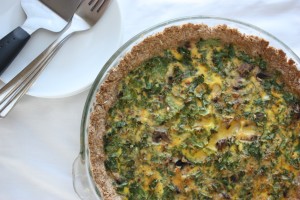
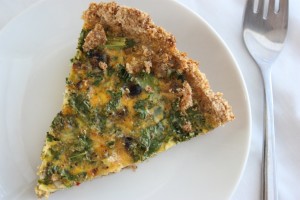
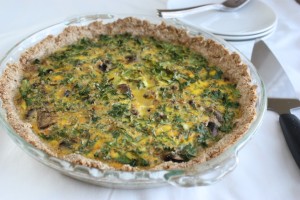
Kale and Mushroom Quiche

April 28, 2010
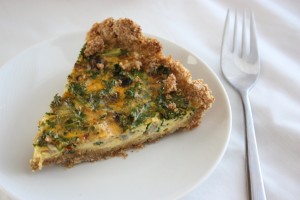
Quiche is such a springtime dish. Funny how I make it this week and the temperature dropped to 35 F last night. Good thing the quiche I made is a little on the hearty side with a whole wheat crust and kale. See, I loved that kale and mushroom combo I made a while back so much that I thought – why not try it in a quiche; take a break from the traditional spinach.

It was so good that I’m bummed my husband took the last piece in his lunch today. Although, I had plenty, I think a piece every day since I made it on Sunday.
I used my favorite quiche crust that I started making last year. It is a pat-in-the-pan butter crust in which I use stone ground whole wheat flour. It is not a light and flaky pastry crust. It is crumbly and the nutty flavor of the whole grain goes well with any quiche combination. I doubt I’ll ever put my quiche in anything different.
I put raw kale in the egg mixture and the cooking time on the quiche was plenty to make it nice and tender. I also sprinkled in some red pepper and hot sauce for a mild kick.
Kale and Mushroom Quiche
1 ½ cups whole wheat flour
½ tsp salt
½ cup unsalted butter, softened
1 to 3 tbsp milk
½ cup fresh button mushrooms, chopped
1 cup kale, finely chopped
2 tbsp fresh parmesan, grated or shredded
1 cup milk
4 farm fresh eggs
1 tbsp white whole wheat flour
½ tsp salt
½ tsp smoked paprika
½ tsp garlic powder
¼ tsp ground black pepper
¼ tsp crushed red pepper
1 tbsp hot sauce
Preheat the oven to 350 degrees F. In a bowl mix together whole wheat flour and salt, cut in the butter and mix with a fork or pastry blender until butter is incorporated and dough is crumbly. Slowly add milk, one tablespoon at a time until the mixture forms a dry, yet cohesive dough. Press the dough evenly into bottom and sides of a deep, 9 inch pie pan.
On top of the crust sprinkle the mushrooms, kale and cheese. In a separate bowl mix together the eggs, milk, flour, salt, spices and hot sauce. Whisk until light and fluffy, or you can also put the mixture in a blender and pulse. Pour the eggs over the crust and arrange your fillings as needed.

Bake for about 40 to 50 minutes. The egg will rise a bit and the top should be slightly browned and the center set. Allow to cool for five minutes, slice and serve. Makes six to eight servings.

If you like this, you might also like my Zucchini Quiche with Whole Wheat Crust

Granola Pancakes

April 22, 2010

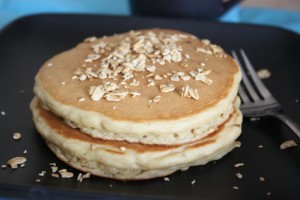
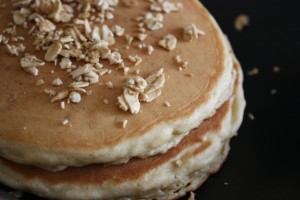
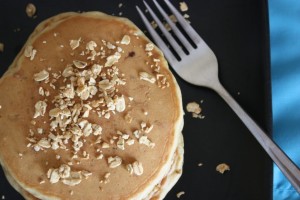
Several weeks ago I was watching an episode of Diners, Drive-ins and Dives; one of my favorite shows, if you haven’t gathered as much from my blog thus far. In that particular episode the restaurant being featured served granola pancakes. I quickly jotted down the idea like I always do when I discover something on television that I want to try and recreate.
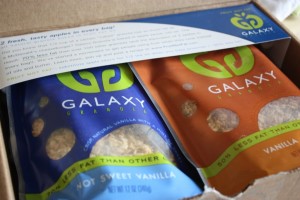
A few days later Galaxy Granola offered to send me some of their granola to try. Now, I’m all about making my own granola. I’m all about making all my own foods in general. However, I try to find a balance with my blog because I know I can’t sit in front of my computer and tell you that you need to make everything from scratch.
Everyone has different lifestyles and responsibilities. However, I can tell you to make the majority of your own foods and when buying packaged items, choose those with the least amount of ingredients and ingredients you can identify.
What inspired me to try the granola was the company’s goal of providing a product with less fat. I embrace fat, but not the processed kind in packaged foods. Instead of processed oils, Galaxy uses fruit. I could also live with their list of ingredients such as evaporated cane juice, wildflower honey and spelt and barley flakes.


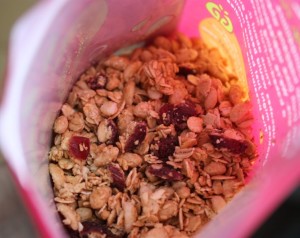
Once the granola got here I knew I wanted to try making the pancakes with it, but we tried it by itself first. My favorite is the Vanilla Almond which is what I used in my recipe. This is a fine granola, however. No large chunks so it is more ideal to sprinkle over yogurt than eat by hand. Of course, I’m still in favor of making your own, but if you need to grab a bag when you are in a time crunch, or maybe to take on a trip this granola would be a better choice than many out on the market today with their endless list of additives.

These whole grain pancakes where just what I had envisioned before making them. They are filling, but not too heavy. The granola adds texture and sweetness. I’m sold on adding granola to pancakes to spice up breakfast and will definitely do it again.

Granola Pancakes

1 large egg, beaten
1 cup white whole wheat flour
1 cup milk
1 tablespoon minimally refined sugar (I used mascavo)
2 tbsp virgin coconut oil, melted
3 tsp baking powder
¼ tsp salt
½ cup granola

In a medium-sized mixing bowl combine all ingredients. You may need to add a little more milk, depending on the type of granola you use as it may make the batter thicker.

Use a ¼ cup measure to drop pancakes onto a preheated griddle two to three at a time. Grease the griddle beforehand if it is not non-stick. Once the pancakes begin to bubble, flip to the other side. The pancakes will be cooked after about a minute and a half to two minutes on each side. Makes 6 pancakes.

Want to try some Galaxy Granola?

The company will give away a bag to one of my readers. Tell me in the comments if you make your own granola or buy it (or both) and why. I will pick a winner at random next Monday, April 26, 2010. (The company ships to US addresses only.) You can check out the Fruit Not Fat blog as well where the company posts recipes and workouts.

Disclaimer: Yes, I received this granola for free, and no, I wasn’t required to post about it and received no compensation for doing so.

Quick Side Dishes and Chimichurri Beer Burgers

April 13, 2010

I’ve been on a mission to find quick side dishes lately. I haven’t tired of cooking, but with longer days and more time spent outside in the evenings I haven’t wanted to spend a lot of time cooking at night.
On a related note, I think I also lose my spark of excitement for evening cooking because I know after the sun goes down the pictures won’t be blog worthy. Why bother, right? This little fact that my blog and photo quality determine what time of day I’m motivated to cook may be indication of an issue that needs attention, but we’ll save that for another day.
So back to the quick sides.
Lately, I’ve found myself tossing broccoli in to steam, sautéing mushrooms and onions to toss in with couscous. You know; nothing exciting, but still relatively tasty and healthy.
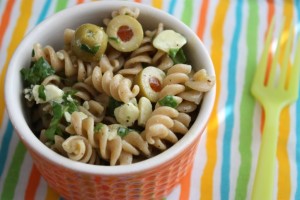
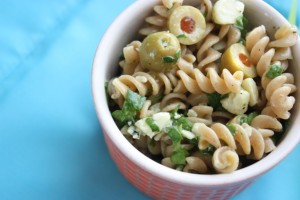
Last night when we needed something to go with our grilled chicken I decided to make some pasta salad; something I haven’t made in a really long time. I had a few more exciting ingredients to use in the dish, so this one I thought I would share.
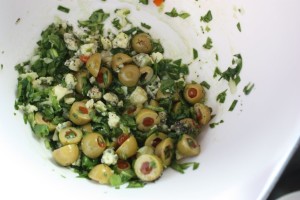
I don’t make pasta salads much anymore mainly because I lack ideas for non-bottled dressings. However, with using the cheese and olives in this, it only needed a drizzle of olive oil and a shake of black ground pepper to be complete.
Gorgonzola, Olive & Spinach Pasta Salad

½ cup fresh spinach, finely chopped, firmly packed
15 pimento stuffed green olives, halved
1 – 2 oz Gorgonzola cheese, crumbled
2 tbsp olive oil
3 cups dry, whole wheat pasta, cooked and rinsed to cool
Black pepper to taste

In a medium-sized bowl combine the spinach, olives, cheese and olive oil. Stir to break up the cheese so it is evenly distributed.


Add the drained pasta to bowl and toss to coat. Sprinkle with black pepper. You can add salt too if you wish, but I found the olives and cheese added enough salty flavor for my tastes. Serves 4.

*******************

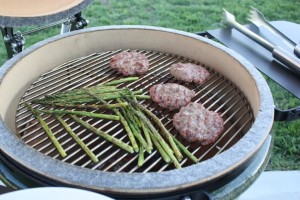
I also said yesterday that I would tell you a little more about the burgers we grilled on Sunday. If you are at all familiar with Argentinean cuisine, then you know about chimichurri. It is a sauce made of herbs, oil and vinegar that is served with meat or it is sometimes used as a marinade.
Before we left Brazil, my husband took a work trip to Argentina and his colleagues gave him some chimichurri. It is in the dry form and you simply add the oil to make the sauce. I’m sure similar products can be found at Latin markets around the States, or you could make a version of your own like this one from Simply Recipes.
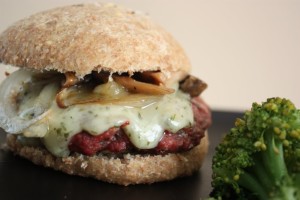
Seeing it in the cabinet the other night I decided to season the burgers with it. The result was fantastic! They were full of flavor and had a slight spiciness that went wonderfully with the grass-fed beef I used.
I finished off the burger-making process by using the Soft Whole Wheat Sandwich Bread from Healthy Bread in Five Minutes a Day to make buns. I was worried they would be too heavy and sweet for the burgers, but they ended up pairing nicely.
Chimichurri Beer Burgers

1 lb grass-fed beef
¼ cup beer (I used a light ale)
¼ cup panko bread crumbs
1 tsp chimichurri seasoning mix
½ tsp sea salt
¼ tsp black pepper
Combine all ingredients in a bowl and mix well to incorporate the spices. Form into 4 equal patties. Grill or pan fry based on your preferences. It took about 8 minutes on our new grill to cook them through.
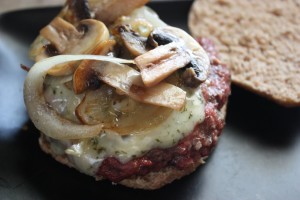
I topped mine with some Chive and Onion Jack Cheese, and sautéed onions and mushrooms!


I’m submitting the pasta salad to the April Side Dish Showdown at Cinnamon Spice & Everything Nice.

Myths and Truths: My First Half Marathon

March 29, 2010

For a while now I’ve been trying to determine where this goal came from, this goal to run a half marathon. A goal which, I might add, I successfully accomplished yesterday morning.
I’ve never especially liked running. There are times when I hated it with a passion. I just prefer other forms of activity. However, I was to the point where I wanted to stop confusing not liking it with not being able to do it. As a result I’m starting to enjoy it more.
Let’s be clear. I run, I’m not a runner. And there are several reasons why I likely won’t ever consider myself a runner. When I think of a runner, I think of someone who is in love with running, and needs it in their lives. Someone who is willing to push themselves to the point of injury and past it to run. Now, I don’t mean to generalize, certainly not all runners are like this, but I know many who are.
Personally, if I hurt, I’m not going to run. I don’t just mean sore, aches and pains hurt, I mean injury hurt. I view my body and all its wonderful capabilities as a gift. Hurting it to the point where it is injured and can’t function is not respecting this gift. Wellness means understanding your limits as well as exceeding them when appropriate. For me, not respecting this gift by pushing too hard is as bad as not respecting it by not using it and letting it waste away without any activity at all. I have issues with both.
The second reason I say I’m not a runner is that I am slow. And I mean slow. I fall into the jogger/walker category. In fact, there were race walkers flying right by me yesterday. When people tell me to slow my pace down I laugh because going any slower for me is walking and it is physically impossible for me to go any faster. I’ve tried hard, too.
My goal was to finish the race in a motion that somewhat resembled running for 13.1 miles and I did. I never stopped running and I came in at a time of 2:57:26. About a 13 minute mile. See, I told you. The fastest I’ve run is a 5K at a 10:45 mile. Still no speed of lightening.
One thing that helped me keep fighting for my goal was a comment I recently read in a book which said “there is no freedom without discipline.” I’d never really thought much about that before. But if we don’t provide structure for our lives, make ourselves do things, we really can’t accomplish much.
Setting out on my training it wasn’t until I was able to run 10-11 miles that I honestly felt like I was going to complete the half marathon. That was about 2 weeks ago, so I was basically pushing myself to obtain a goal I wasn’t sure was possible for 10 weeks.
Throughout the training I knew I wanted to present a post that highlighted the honesty of running a half marathon. Not something that says “it was tough, but so worth it.”
I don’t have finish line blinders on, I have reality set in my mind. The reality of how hard it was to accomplish my goal. I also thought a lot about the things people told me along the way or views I developed and whether or not they were true. So if you are thinking of running or shooting towards a goal you aren’t sure you can accomplish, this is for you.
12 weeks is enough time for training. Debatable.
I think everyone is different when it comes to this. My original plan was to run a half sometime during 2010 and I was shooting for fall. When I discovered this local event it was 14 weeks out. I began training at 13 weeks and used Hal Higdon’s Novice Half Marathon program which is a 12 week program. I added an extra week myself and got up to 11 miles before the race.
Initially I thought this program was too ambitious and at certain points it was. The day I was supposed to run 9 miles, I had to stop at 4.5. I did not reach the goal for many weekday runs because of shin problems in the middle of my training. Also, if I had stopped my training at the 10 mile mark, I’m not sure I could have finished. Making to 11 miles pre-race had a postive impact on me mentally.
Looking back though, I’m glad I pushed the training and got the race in early in the year. At certain times 12 weeks seemed fast, but it is also enough time to get discouraged. If I had pushed the race to later I may not have stayed motivated to meet my goal.
Cross-training is important. Truth.
I suppose there are people out there who love to run and run and run. I don’t. I ran 3 days per week and if I had been forced to run more I would not have enjoyed my training at all. I didn’t enjoy it that much to begin with. In addition, my shin problems stopped as soon as I incorporated yoga into my routine. As with everything else in life physical fitness is about balance and performing different types of exercise helps establish that.
Running will make you lose weight. Myth.
I lost only 6 lbs during my training, but I knew that losing weight by running was a myth before I started because you typically eat more. I could have cut back drastically on my caloric intake and lost weight, but I wasn’t willing to do it. If I didn’t eat, I didn’t have the energy to run. It was a difficult balance for me and stressed me out in the beginning. Finally I decided I would eat healthy foods as I needed them and let my body decide what it wanted to do.
It hurts. Truth.
Fortunately, I had no injuries, not even a blister during my training. I suffered from shin splints halfway through, and a bit of chaffing that was taken care of by BodyGlide. Everything I encountered was manageable.
That being said I have been exhausted for the past 12 weeks. I came home after runs of 5 miles and longer and basically lay around the rest of the day. I was sleepy all the time and incredibly sore after my long runs. During the runs themselves my knees, ankles and hips ached like crazy. It was just part of it for me and I’m glad that part is over.

The adrenaline and atmosphere will push you through the last few miles. Myth.

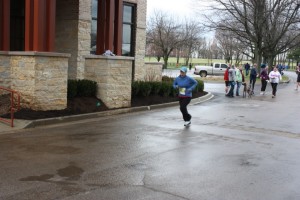
I’ve heard and read this several times, and I’m sorry, but I don’t agree. It is highly dependent upon the race you do. This was not a high energy race, it was a rainy day and I was running past other people leaving as I rounded the ½ mile mark to the finish. The last two miles were complete agony. I got maybe two cheers when I rounded the bend for the finish and a couple claps once I crossed the line. Perhaps if you choose a high energy race with lots of people, music and celebration on a sunny day this statement could be true. Yes I made it, but it would have taken a lot less effort on my part if there had been more support.
Crossing the finish is the best part of the race. Debatable.
I’m going to be honest, because of this particular race, crossing the finish was one of the most disappointing experiences of my training. I was hoping for cheers, music and lots of people around. The place had cleared out. It was me and a handful of people there to hand me a medal and take my picture (a special thank you to them). There were granola bars, water and bananas left to eat, and all the vendors had packed up early. To be honest, it made me sad and even sadder for all the people behind me who still had to finish. Because of this, I think it is important to be prepared that the finish may not be what you have envisioned in your mind.
Note, this doesn’t include seeing my husband there to take pictures of me and hug me afterward. Now that was the best part of the race.


After all this, am I glad I did it? Of course! I accomplished something that I honestly didn’t think I would ever be able to. I also fully believe that pushing myself this hard was beneficial to my well being. I think it is important to find things that push you as hard physically, but it doesn’t have to be running.

What are my goals now?
My running started back in January 2009 with a goal of being able to pick up and run a 5K at any point. I accomplished that and then set one to run a half. Now, I’ve accomplished that.
I’ve discovered that I do enjoy running out in the country and seeing the landscape, I just enjoy running shorter distances. To be honest, I’m tired of running long distances and having to be so structured with my workouts.
So the plan is to now be comfortable with running a 10K at any point in time. I’ll likely run 2-3 miles two days per week and 4-5 miles on the weekend. I want to increase my speed and get closer to a 10 minute mile. I also want to start concentrating on other activities again such as more yoga, spinning and strength training.
Will I run another half?
I haven’t decided that yet. Three weeks ago I would have said no. Everyone told me that when I made it to the finish I would want to do more, but I’m not there yet. I can see signing up for a half that is guaranteed to be fun and energetic at some point during the future, but now I’ll stick with 5Ks and 10Ks. I just find them more enjoyable and don’t view them as work like I do a half.

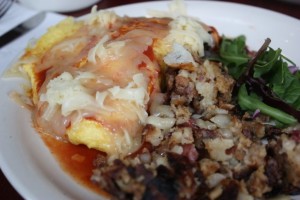
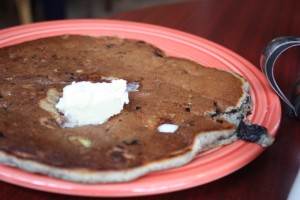
Now for all those who have been holding out for the food. We had an amazing post-race brunch at Alfalfa Restaurant in downtown Lexington, KY. I’ve posted about this place before and we certainly weren’t disappointed on this visit. I enjoyed a Spanish Omelet with white cheddar and ranchero sauce with their special Alfafries. My husband had the Breakfast Burritos. We split the Buttermilk Buckwheat Blueberry Pancake. This thing is amazing. The first bite tastes like a blueberry cake donut!


Special congrats to my husband! Although he’s run relays of the same or greater difficulty, this was his first official half marathon finish as well. He finished in 1:53 and is preparing for the Flying Pig Marathon in May.

Good to the Grain: Honey Amaranth Waffles

March 26, 2010
After you’ve been food blogging for a while, I think you start to realize what your thing is; the topic you like to cover in your posts most often, the one ingredient you like use in your cooking, or the cooking method you prefer. Sure, it may change over time, but there is a point where you realize what you truly enjoy learning about, talking (or typing) about or making.
My thing…is grains.
I’ve always enjoyed baking, but the more I learn about whole grain flours the more interested I become. They all have such unique histories, flavors and nutrient compositions.
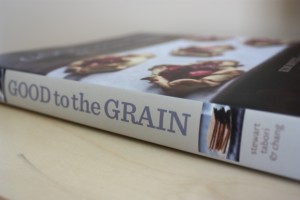
Given this fact about my interests, it’s likely no surprise that when I came across the cookbook Good to the Grain: Baking with Whole-Grain Flours by Kim Boyce, I knew I had to get my hands on a copy!
I was out walking pug a few days ago and I noticed the UPS guy had left a package by the garage. I was pretty sure I knew what it was, and I literally opened the package right there in the yard. I’m sure if any of our neighbors were watching, they had to be wondering what gift had been bestowed upon me.
As I balanced a retractable leash in one hand and the envelope in the other, I flipped through the pages of the cookbook. The smile began to spread (and I might have even done a mini happy dance) as I saw amaranth, buckwheat, barley, Kamut, spelt and teff; each with its distinct section, utilized in some of the most delicious looking baked goods I’ve had the pleasure of viewing.


The author, Kim Boyce, was a pastry chef at the well known Spago and Campanile restaurants before she left to raise her kids, and then embark on creating whole grain baked goods for her family to enjoy. The book is filled to brim with 75 recipes of cookies, cakes, waffles, pancakes, breads and tarts made with 12 different whole grain flours.

The author shares information on the baking equipment and ingredients she considers essential. You will find yourself sharing her journey of balancing flour combinations and perfecting flavors, while you learn a great deal about whole grains and how to use them.
I will mention that since the author’s goal is to create the right structure for the grain products she does use all-purpose flour with the whole grain flours, as well as refined sugars. But as you will see in the recipe below, these things can be altered a bit if you choose to do so. In fact, she encourages you to try different combinations just as she did to develop the recipes.
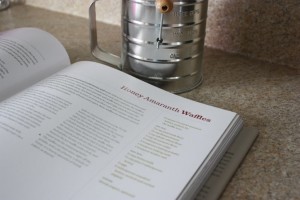
While the Muscovado Sugar Cake and the Cornmeal Blueberry Cookies are on my list to make, for this review I made the Honey Amaranth Waffles. Taking the author’s suggestion to heart, I was modifying right out of the gate. Mainly because I was hoping amaranth flour could be found in the bulk bin of our Whole Foods, but no such luck. I ended up using spelt flour instead. In addition, I don’t use much all-purpose flour at all anymore, so I substituted white whole wheat for this, and then used the whole wheat the recipe calls for. I also used mascavo sugar in the dry mix.


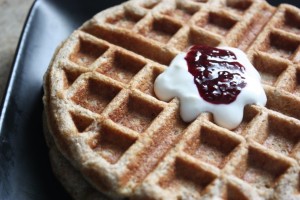
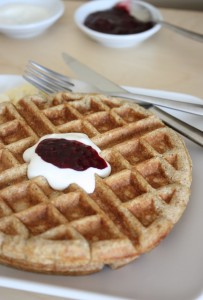
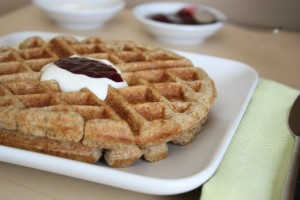
The result? Seriously the best waffles I have yet to make. They were as light and fluffy as any standard white waffle with that deep rich flavor from the whole grains and a mild sweetness from the honey. I needed no toppings at all for these, but tried adding the Greek yogurt suggested in the recipe and a bit of blackberry jam I had made.

If you have any interest in baking with whole grains, this is one cookbook that needs to make it on your shelf. I have a feeling I will be baking from it on a very regular basis.
Honey Amaranth Waffles
From Good to the Grain by Kim Boyce, reprinted with permission

2 ounces (1/2 stick) unsalted butter, melted, for the waffle iron
Dry mix:
¼ cup amaranth flour
¼ cup flaxseed meal
1 cup whole-wheat flour
1 cup all-purpose flour
2 tbsp sugar
2 tsp baking powder
1 tsp baking soda
1 tsp kosher salt

Wet mix:
2 cups buttermilk
¼ cup plus 2 tbsp honey
2 eggs
2 tbsp unsalted butter, melted and cooled slightly

Finish:
Greek yogurt, optional

Turn the waffle iron to its highest setting. Even if you don’t usually heat it this high, these waffles come out best when cooked at high heat. Sift the dry ingredients into a large bowl, pouring back into the bowl any bits of grain or other ingredients that may remain in the sifter.

In a medium bowl, whisk together the wet ingredients until thoroughly combined. Using a spatula add the wet ingredients to the dry ingredients and gently combine. The batter will begin to bubble and swell as the baking soda begins to react with the buttermilk.

Brush the waffle iron generously with butter; this is the key to a crisp crust. Use a ladle or measuring cup to scoop ½ cup batter onto the spaces of the iron. Promptly close, and listen for the iron to sigh as the batter begins to cook. The smell wafting from the iron starts out like a freshly kneaded loaf of bread, then becomes toasty. Remove the waffle when the indicator light shows that it is done, or when a quick peek shows that it’s turned a dark golden-brown, 4 to 6 minutes. Remove the hot waffle with a fork, and repeat with the remaining batter.

The waffles are best eaten right off the griddle, with a bit of butter, a drizzle of honey, or a hearty spoonful of Greek yogurt, as desired.

P.S. The book says it makes 9 waffles, but I got 8.

Disclosure: The review copy of this cookbook was sent to me free of charge. I was not under any obligation to write about it on my website and I did not receive any compensation for doing so.

Apple Cheddar Brown Biscuits

March 18, 2010

You know those moments when you taste something incredible? Not just good food, but something that could quite possibly be the best version of a dish or an individual ingredient you’ve ever put in your mouth.
I had that experience this week and with something that was unexpected – sausage.

I wouldn’t say we eat a lot of sausage. Although, German sausage is in my top 5 of all time favorite meals, and I have to say a piece with waffles or an omelet can really complete a breakfast. However, it has been a long while since I’ve had any.
I’ve been steering clear of ordering meat out at restaurants and buying meat from the supermarket since the beginning of the year. It’s just a personal choice I’ve made. I want the meat I consume to come from grass-fed, pastured and humane (as possible) sources. The last time I tried to order sausage from the farm that has become our regular resource, they were all out. A restaurant had completely wiped them out of all their pork sausage. Bummer.
But a few weeks ago, I placed an order for eggs and Teresa let me know that there would be sausage available in a week, so I signed up and waited patiently. This week, I finally got around to trying it.
I took one nibble from the skillet after I browned it up and I knew. This is what sausage is supposed to taste like! Not greasy, not dry and overcooked, not so salty and seasoned that you can barely taste anything else. This was perfection.
The lack of fat, I’m sure, has to do with it being pastured meat. The seasoning, perhaps it was their processor, but somebody is doing something right. The meat was tender and that familiar sausage flavor was there, but mild and there was just a tiny bit of heat that lingered.
Seriously, I can’t believe I’m going on about sausage like this, but this is some good stuff.
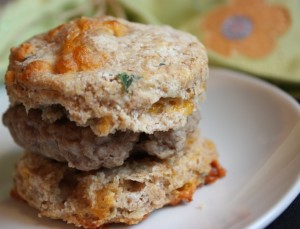
Since I really don’t think it is a good idea to sit down to a bowl of sausage I needed something with which to eat this tasty meat. I love the way apple and cheddar cheese go together, so I thought why not put them in a biscuit.
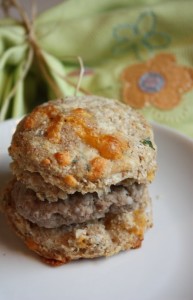
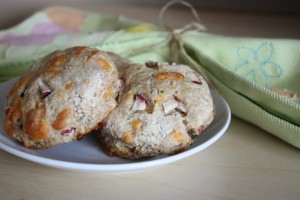
However, you know me; it couldn’t be just a plain white biscuit, so I decided to combine white whole wheat flour and whole wheat flour for some lesser refined brown biscuits. The sausage pairs up with them nicely and I love the tiny bits of sweet apple I get among the salty flavors.
Next up? Bacon. I’m on the waiting list, though, so the anticipation will be building until May!

Apple Cheddar Brown Biscuits


1 cup white whole wheat flour
¾ cup whole wheat flour
1 tbsp baking powder
½ tsp salt
1 tsp dried parsley
¼ tsp garlic powder
4 tbsp butter
¾ cup milk
1/3 cup shredded cheddar cheese
¼ cup apple, finely diced
Preheat the oven to 400 degrees F. Combine the flours, baking powder, salt, parsley and garlic powder in a mixing bowl. Cut the butter into cubes and add to the bowl. Mix using a pastry blender until the butter is transformed into pea-sized pieces. Make a well in the center of the dry mix and add the milk. Stir to combine.
Add in the cheddar and apples and gently mix in. It is easier to use your hand for this. Place the dough on a floured surfaced and roll it out to about a 1 to 1 ½ inch thickness. Using a glass or biscuit cutter, cut into biscuits and place on an ungreased cookie sheet.
Bake for about 12 minutes or until golden brown. Allow to cool to touch, slice open and place a sausage patty inside. Makes about 12, 2-inch biscuits. (Mine made 11, but I think they were slightly bigger than 2 inches.)

Nutty Cauliflower Quinoa

March 12, 2010

I have a few races under my belt since first making this nutty cauliflower quinoa, but it still the type of meal I turn to when I  need to refuel for running!

Nutty Cauliflower Quinoa | Fake Food Free
 
With all the running we’ve been doing, me training for my first half marathon and my husband training for his first full, I’ve really been trying to up the vegetable intake in our diet. After reading 50/50 by Dean Karnazes (an incredibly inspiring and informative book even if you are not a runner, by the way), my husband’s request was an increase in dark, leafy greens and cruciferous vegetables.
 
It’s not that we don’t eat these foods, but with our travel the end of last year and our recent move I’ve had a hard time getting back into the groove with my cooking. Things are getting better though. I’ve been relying some on cauliflower for part of our cruciferous intake.
 
Nutty Cauliflower Quinoa | Fake Food Free
 
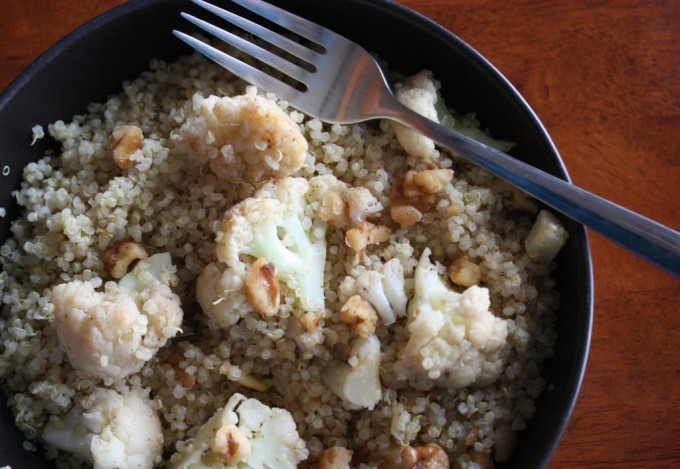
In the research world, cruciferous veggies get most of their attention for the potential to reduce cancer risk. Cauliflower, specifically, is also an excellent source of vitamins C, K and folate. Cauliflower also happens to be one of my favorite veggies. In addition to liking the flavor, I like that I can prepare it in a variety of ways. We eat it mashed, steamed, raw, and in a bit of a stir-fry or sauté which happens to be how I prepared it for my lunch yesterday.
 
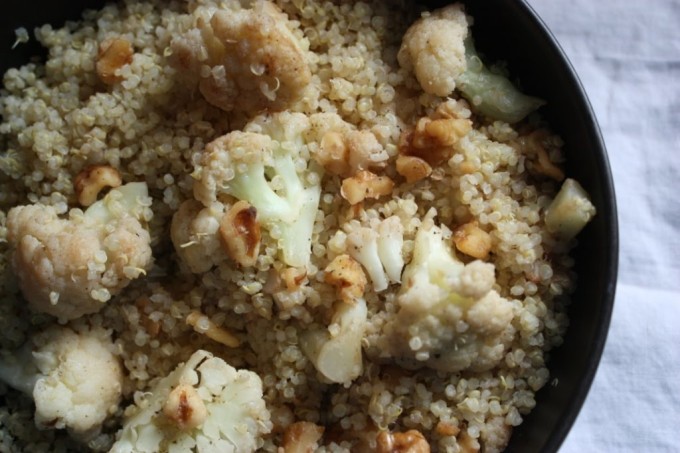
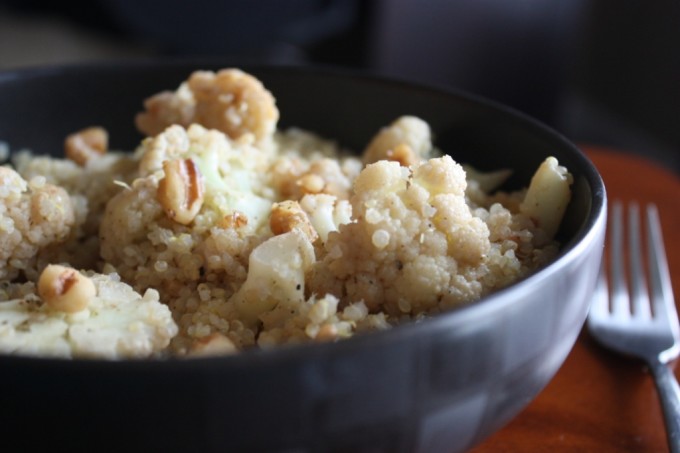
I had some quinoa left over from a meal earlier this week and I decided to make that the base of my lunch. I chopped the cauliflower in small florets, cooked it in a skillet, and then added some chopped walnuts and spices. To finish it off I combined it with the quinoa for a bowl of whole grain and veggie goodness. The nutty flavor of the walnuts and cauliflower and the seed-like crunch of quinoa paired well with the bold spices of the poultry seasoning I tossed in.
 
Nutty Cauliflower Quinoa | Fake Food Free
Nutty Cauliflower Quinoa
Makes: 3 main course servings
Write a review
Print
Quinoa
  1. 1 cup quinoa, soaked, rinsed and drained
  2. 1 ½ cups water
  3. 1/8 teaspoon fine ground sea salt
  4. 1/8 teaspoon ground black pepper
Cauliflower
  1. 1 tablespoon olive oil
  2. 1 medium head of cauliflower, cut into small florets
  3. ¼ cup water
  4. ¾ cup raw walnuts, chopped
  5. ½ teaspoon fine ground salt
  6. ½ teaspoon ground black pepper
  7. ½ teaspoon garlic powder
  8. ¼ teaspoon poultry seasoning
Instructions
  1. Stir together the water and quinoa in a medium saucepan. Bring to a boil over medium-high heat, reduce heat, cover with a secure lid, and allow to simmer for 15 minutes. Remove from heat and fluff with a fork. Stir in the 1/8 teaspoon of salt and pepper.
  2. Heat the oil in a large skillet over medium-high heat. Add the cauliflower and cook until it begins to brown, about 5 to 7 minutes. Add the water, reduce the heat just a bit, cover with a lid and allow to cook until the cauliflower is slightly tender, about 5 minutes.
  3. Remove the lid and ensure all the water has evaporated. Add the walnuts (you can also choose to toast them before adding), and cook 2 to 3 more minutes. Add the remaining salt, black pepper, garlic powder and poultry seasoning. Stir to coat the veggie and nuts.
  4. In a large bowl toss together the quinoa, cauliflower and nuts, and serve.
Fake Food Free https://www.fakefoodfree.com/
Thanks for reading! All images and content are the property of Fake Food Free unless otherwise stated. Please do not republish full recipes and images without written permission. What is okay? Feel free to Pin images, share links to my posts or share the photo in a round up post with the title of this recipe and a link back to the post. Confused about copyright and food blogs? Here is some helpful information on Recipe Attribution. If you want to use a photo or full recipe, just ask. I’m sure we can work something out.  
 
This post contains affiliate links. 

*************************************


More info on cauliflower and cruciferous veggies:
WHFoods: Cauliflower
Oregon State University, Linus Pauling Institute: Cruciferous Vegetables


7-Grain Blackberry Pecan Muffins

March 8, 2010


7-Grain Blackberry Pecan Muffins Recipe
 
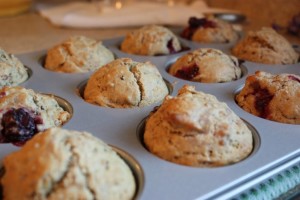
I’ve been in a breakfast rut lately. Between oatmeal, muesli and some fruit I haven’t broken my pattern in a few weeks. However with a newly completed kitchen, all the kitchen boxes unpacked and a freezer still full of last summer’s berries I decided to climb out of my rut and get baking.
 
I was at Whole Foods last week and picked up my favorite 7-grain cereal from the bulk bin. I just love the bulk bins. You can get so many grains at a great price. Since I have yet to make it down the aisle without bumping someone with my basket or receiving an accidental elbow I don’t worry too much about lack of turnover. The grains seem to fly off the shelf there.
 
I cooked up a big batch 7-grain cereal for us to eat throughout this week and I thought it would make a good addition to the muffin batter. Then I decided on a blackberry and pecan combo. I used butter this time, but next time, when I have fresh berries, I want to try these muffins with coconut oil. I was worried the coconut oil would solidify in the batter when I added the frozen berries since this has happened to me before.
 
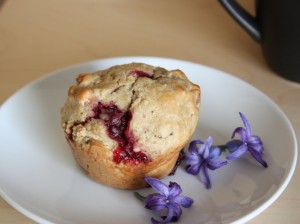
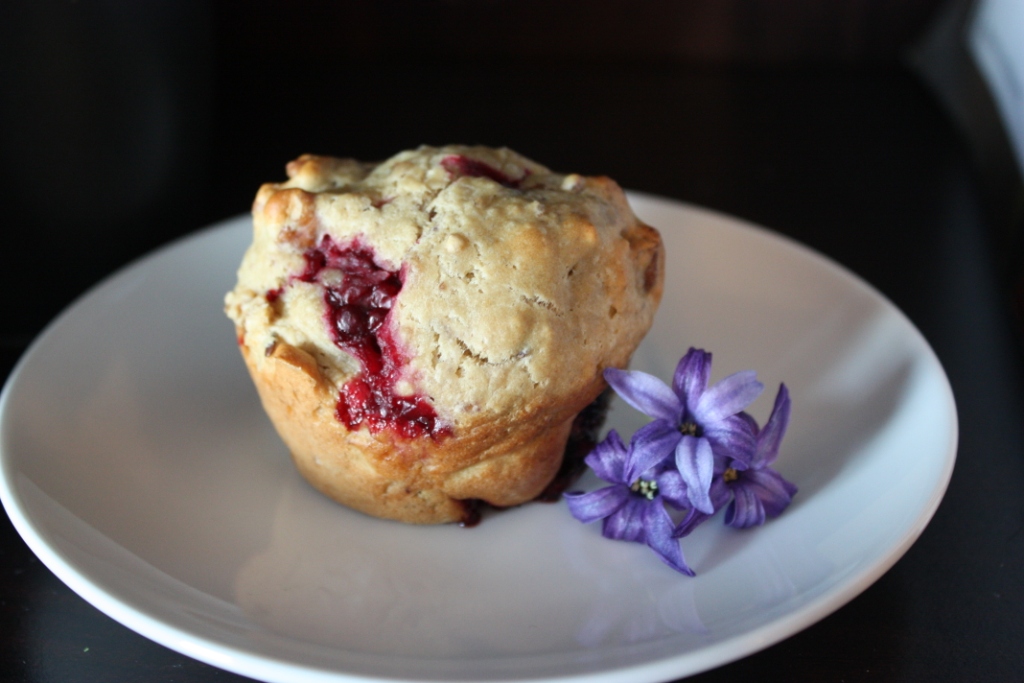
The muffins baked up beautifully. They have a hearty, yet soft texture on the inside and are overflowing with tart berries. The pecans add a toasty crunch with each bite. This combo would work for a lot of different grain cereals, even steel cut oats, and with a lot of different berry/nut combos. I like this one because the muffin itself is sweet, but the blackberries add a strong pucker effect because they are a tart variety.
As of this week, the breakfast pattern has been broken, at least for a little while.
7-Grain Blackberry Pecan Muffins

1 cup milk
½ cup grain cereal, cooked
¼ cup butter, melted
1 egg
½ cup minimally refined sugar (I used mascavo)
2 tsp baking powder
½ tsp salt
2 cups white whole wheat flour
1 ½ cup frozen blackberries
1/3 cup pecans, chopped
 
Preheat the oven to 400 degrees F and lightly grease the bottoms of a 12 serving muffin pan. In a bowl, whisk together the milk and cooked cereal. Stir in the butter, egg and sugar. Add the baking powder and salt and then gradually stir in the flour. Stir just until combined, the batter will be very thick. Gently stir in berries and nuts.
Divide batter into 12 muffin cups. Bake for 18 to 20 minutes. Cool in muffin pan for about 5 minutes and remove to a cooking rack or enjoy warm.


********************************************************
Our fridge is finally in its appropriate spot and the kitchen is complete! I still can’t get over all the space I have. I love that I have to actually take a few steps to walk to the fridge from the stove! I’m looking forward to a lot more baking now that I have all this counter space for kneading, mixing and tossing around ingredients.
 

Dollars to Donuts – Pantry Veggie Burgers

February 22, 2010

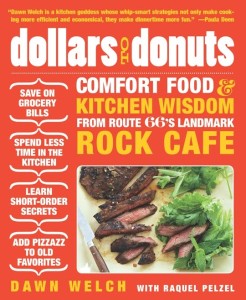
Last November, a few weeks after I returned from the Foodbuzz event , I was contacted regarding some of the free products we received which eventually led to an invitation to review a cookbook. As soon as I read the description sent to me about the Dollars to Donuts cookbook by Dawn Welch I couldn’t wait to get my hands on it.
The background that leads to this book is as interesting as the recipes it offers. Dawn owns the Rock Cafe on Route 66 in Stroud, Oklahoma. She wrote this cookbook as a way to share her recipes, from her own kitchen and the diner, and her tips for stretching your dollar and making homemade foods in the most time-efficient way possible. Simple, real food – my kind of cooking.
The book offers a few surprises. While there are plenty of recipes for typical diner foods such as meatloaf and chicken-fried steak, you’ll also be getting a few flavors of the world with udon soup, peanut sauces and huevos rancheros. Dawn has an international food background from her previous work on cruise ships and she brings that to the kitchen and to this cookbook.
In addition to the recipes, the book contains all kinds of tips about shopping smart, canning and preserving, and making foods ahead of time. There are also icons for each recipe to identify those that are super quick, kid-friendly and freeze well. This is one of those books that is not only a cookbook, but a valuable kitchen resource manual.
I also like how it emphasizes that home cooking, even diner food, can be comforting AND nutritious. These meals are full of real, natural ingredients and use lots of spices for flavor.
I decided to try out the Pantry Veggie Burgers as my introduction to Dollars to Donuts. As I got into the process, it ended up being a bit lengthier than I expected, but I feel that this was just part of a learning curve. Some of the ingredients needed to be cooled before combining so I helped them along using my fridge and freezer. Overall though, these burgers weren’t so time consuming that I would not make them again. In fact, they will likely become a regular.


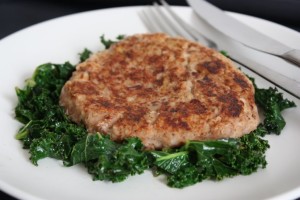
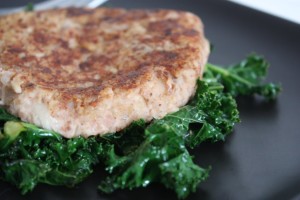
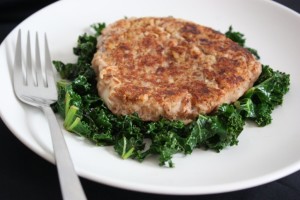
They are delicious! I’ve made veggie, bean burgers before, but none quite like this. I’ve decided it’s the walnuts that make the difference. Each bite gives you a nutty flavor and crunch that goes so well with the vegetable flavors and the texture of the beans.

I did cook my own pinto beans and I didn’t include that in the cooking time. I made a couple substitutions as well. I used white button mushrooms instead of cremini because they were the only available in the market on shopping day. I also used olive oil instead of canola.
The original recipe also calls for toasted buns and your typical burger works for serving. I decided to go bun-less and sautéed some kale (yes, I’m hooked) in the same pan that I used to cook the veggies for the burger. The dark greens were a great match! I also like the suggestion in the cookbook to make this into meatballs or crumble it in lasagna. I will definitely be trying that.

Pantry Veggie Burgers
From Dollars to Donuts and reprinted with permission from YC Media
1 can (14 oz.) pinto beans, or 1 ½ cups cooked pinto beans
½ cup bulgur wheat
1 tsp salt
1 tbsp + 2 tsp canola oil
8 oz. cremini mushrooms, stemmed and thinly sliced
½ yellow onion, finely chopped
1 lg garlic clove, minced
½ cup walnut pieces
½ tsp freshly ground black pepper
1/8 tsp smoked paprika (optional, but I did use it)
5 tbsp mayonnaise
2 tsp canola oil
6 hamburger buns, toasted
Lettuce leaves
1 lg or 2 sm ripe tomatoes, cored and thinly sliced
6 tbps barbeque sauce or ketchup
Dry the beans. Spread the drained pinto beans on a paper towel-lined plate and set aside.
Cook the bulgur. Bring 1 cup of water to a boil in a small saucepan over high heat. Stir in the bulgur and ¼ tsp of the salt, cover, and turn off the heat. Set aside until the bulgur is tender, about 20 minutes. (If some water remains in the bottom of the saucepan, drain the bulgur in a fine-mesh sieve, then set aside to cool to room temperature.)
Cook the veggies. Heat 1 tablespoon of the oil in a large skillet over medium-high heat. Add the mushrooms, onion, and ¼ teaspoon of the salt, and cook, stirring often, until the vegetables begin to brown, about 9 minutes. Stir in the garlic and cook until fragrant, about 30 seconds. Transfer the mixture to a plate and let it cool to room temperature.
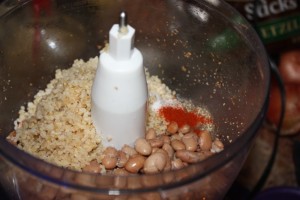
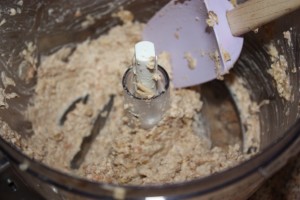
Make the burger mixture. Pulse the walnuts in a food processor until chopped, about five 1-second pulses. Add the beans, bulgur, the mushroom-onion mixture, the remaining ½ teaspoon of salt, the pepper, and the paprika (if using) to the food processor. Pulse about 15 times, or until the mixture holds together when squeezed, but isn’t pureed, scraping down the sides of the bowl as necessary. Add 2 tablespoons of the mayonnaise and pulse a couple of times to combine. * I think I went a little far with my pulsing, but the burgers still held together great.


Shape the burgers. Line a large baking sheet with parchment paper (parchment makes it easier to remove the burgers from the baking sheet). Shape the mixture into 6 equal patties and place them on the prepared baking sheet. Cover with plastic wrap and refrigerate for at least 30 minutes or up to 12 hours (the burgers can also be frozen for up to 6 months).

Brown the burgers and serve. Heat 1 teaspoon of the oil in a large skillet over medium-high heat. Place 3 burgers in the pan and cook until browned on both sides, 5 to 6 minutes total, using a thin, wide, metal spatula to carefully flip the burgers. Transfer to a large plate and tent with foil. Repeat with the remaining oil to cook the last 3 burgers. Place a burger on each bun bottom and top with lettuce and tomato slices. Spread some mayonnaise and barbecue sauce or ketchup on the bun top, cover the burger, and serve.

If you want to get to know Dawn and the Rock Cafe a little bit better, check out this video from one of my fave shows – Diners, Drive-ins and Dives.

Want to create beautiful food and product photos that you can't wait to share?!
Discover your style, control the light, and shoot using the tool you know how to use (yes, your phone included). Learn about free resources, Live Q&As with Lori, and online courses you can take from anywhere in the world!
We respect your privacy. Unsubscribe at any time.