Browsing Category

Grains Nuts and Seeds

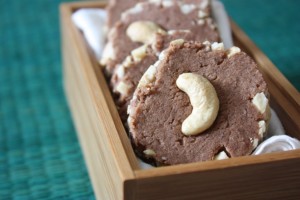
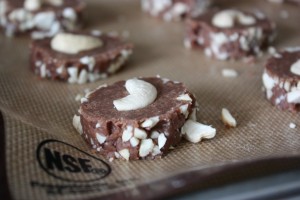
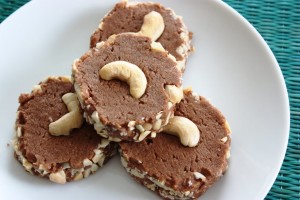
Chocolate Cashew Shortbread

August 17, 2010

It’s starting.

That point in the year where I see a cookie recipe and I think – oh, now that would be nice on my holiday cookie tray. I know it seems a bit early, but it starts for me about this time every year.

I had cookies on my mind this week because I still have some of the fabulous raw cashews that Oh Nuts sent to me a few weeks ago. While I haven’t tired of eating them as a snack or in stir-fry, I’ve felt the need to get a little more creative.

As a result I turned to my favorite shortbread recipe. I doubled the batch to make a few more for freezing, added cocoa because I’ve been hungry for chocolate, and then incorporated the cashews.

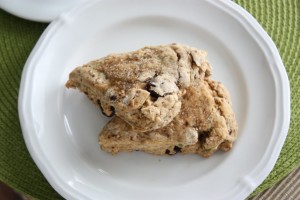
What I like most about these cookies is that they turn out pretty darn cute with very little effort. Few ingredients, easy to bake, and a rich, buttery chocolate flavor with a nutty crunch. Hello, holiday baking list!

Chocolate Cashew Shortbread

1 cup unsalted butter, softened
½ demerara sugar
2 cup white whole wheat flour
2 tbsp cocoa powder
1 tsp vanilla
½ cup raw cashews, finely chopped
24 to 30 raw cashew halves (optional)

In a mixer, combine the butter and sugar. Let it mix on medium and then high for about 3 minutes. The demerara takes a while to get incorporated. Mix in the flour, cocoa powder and vanilla.

On a piece of plastic wrap, spread out the chopped cashews. Remove the cookie dough from the mixing bowl and form it into a log with your hands. The length is up to you and depends on how big you want your cookies. Mine ended up being about 18 inches long, give or take a bit.

Place the cookie dough log on the plastic wrap and gently roll in the cashews until it is fully coated in nuts. Wrap the plastic wrap around the cookie dough and refrigerate for at least 30 minutes.

Preheat the oven to 350 degrees F. Remove the cookie dough from the fridge and use a serrated knife to cut the cookies about a ½ inch in thickness. Place on an ungreased cookie sheet, or on a baking mat on a cookie sheet. Press a cashew half into the top of each cookie if using.

Bake for 12 minutes or just until cookies are firm. The edges and cashews will brown only slightly, if at all. Allow to rest for 3 or 4 minutes and carefully move to a cooling rack. Makes about 24 to 30 cookies.

Disclaimer: I’m sure you are just dying to read one, so you can check out the original when I used Oh Nuts in a recipe a few weeks ago. Oh, alright, I won’t make you surf the web. Oh Nuts were sent to me free of charge for review, no obligation, no compensation.

Bacon and Brussels Sprouts Pasta with Parmesan

August 13, 2010

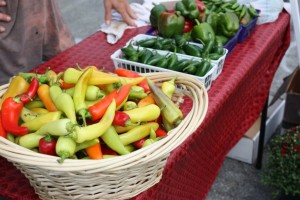
Our local Farmer’s Market is small. We have about 20 members and an average of 5 to 8 sell on Saturdays and often only 2 or 3 on Sundays. Despite the size, it is amazing the amount of produce you can get your hands on by stopping by.

I’ve been helping out with media for the market this year and I enjoy heading out early when I can and chatting with the farmers and vendors. I have learned a lot about growing practices in Kentucky through my conversations. I usually try to help them get set up as we talk, which for me secretly means I get to go through their available produce first.

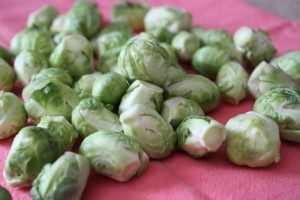
This led me to discover the small bag of Brussels sprouts one of the farmers had available on Tuesday. It was just a cup or two, and I immediately bought them as soon as I discovered the bag. I have only had Brussels sprouts on a couple occasions and have never cooked with them, but inspired by all the recipes on the web, I’ve had my eye out for some.

First of all, when you buy them from the farm, they don’t look like the ones in the supermarket. I wish I had taken a before picture, but let’s just say there was a ton of peeling off outer leaves and trimming stems involved. I ended up being very happy that my bounty included only a couple handfuls.

Once cleaned, however, they looked beautiful and I couldn’t wait to get cooking!

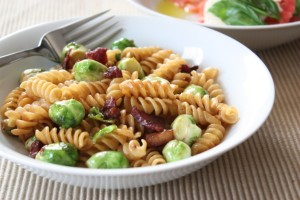
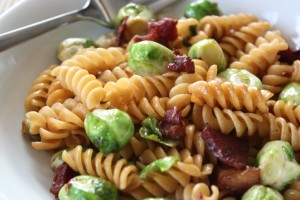
A few months ago I picked up a discounted pack of pastured heritage breed bacon pieces from St. Asaph farm. These are the little bits they trim off the pretty bacon. They are perfect for beans, or in this case, a pasta dish with Brussels sprouts.

I checked out a few recipes on the web and finally decided to modify the Braised Brussels Sprouts in Bacon and Shallots from White on Rice Couple. What I really needed from this recipe was the cooking method which worked out wonderfully.

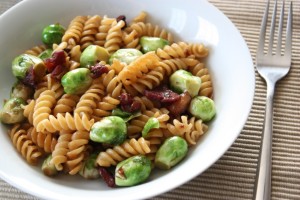
I tossed the final dish with some whole wheat pasta and stirred in some freshly grated parmesan. The bacon was slightly crispy and the sprouts nice and tender. This is a dish I will be making more of as the Brussels sprouts become more available this fall!

Bacon and Brussels Sprouts Pasta with Parmesan
Modified from Braised Brussels Sprouts from White on Rice Couple

10 ounces dry whole wheat pasta
½ to ¾ cup bacon, chopped into small pieces
¼ cup onion, diced
2 cloves garlic, minced
1 ½ cups Brussels sprouts, halved if large
½ cup chicken stock
¼ cup grated parmesan

Cook the pasta according to package directions, drain, reserving ¼ cup pasta water, and set aside. In a deep skillet add the bacon and cook over medium-high heat. Cook for 5 to 7 minutes, you really want the fat to immerge in the pan.

Once bacon is browned, quickly stir in the onion, garlic and Brussels sprouts. Stir well and lower heat as necessary to avoid burning the garlic. Pour in the chicken stock and simmer on medium heat, stirring often, until the Brussels sprouts are tender about 5 more minutes.

Add the pasta to the skillet along with the reserved pasta water. Stir to incorporate all ingredients. Turn off the heat and stir in the parmesan cheese. Serves 3, for us anyway.

Vegetable Fried Rice

August 6, 2010

Is anyone else experiencing a cooking low right now? I’m feeling uninspired and I blame it on the current season. Just weeks ago I was still giddy over garden goodness and content with fresh salads, light vinaigrettes combined with the occasional grilling.

The grilling is still interesting, and for that matter I could bake and bake, but I am stumped for main courses to cook. Nothing sounds good at all.

While part of me is saying – it’s still summer, enjoy fresh and light meals, another tiny voice which grows by the day is saying – fall is right around the corner. I think about pumpkin, casseroles, stews and dumplings, and then I realize it is still much too hot for all that heavy food. As a result, I got nothing.

How will I combat this problem? Well, I’ve decided that I will devote much of the month of August to making other people’s recipes. I’ve been pulling out the cookbooks and revisiting all the great food blogger recipes I have bookmarked.

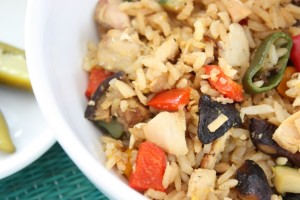
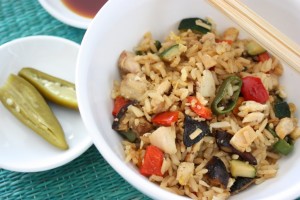
Otherwise I’m going to try to combine the two seasons – light and summery with filling and comforting. That is how I decided on Vegetable Fried Rice.

My mom made the best fried rice when I was growing up. I’ve made it myself before, but after enjoying it last week I have no idea why I don’t make it more often.

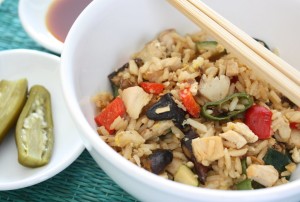
I used a variety of vegetables from our garden and tossed in some shiitake mushrooms. (Those came from Indiana.) The eggs are from friend nearby who has her own chickens and runs a small sustainable homestead at Wonder of Life Farm.

The rice is white. Why? Well, because I love white rice. I eat plenty of whole grains on a regular basis so I have no issues with including white rice from time to time. Brown rice has its place, and feel free to substitute it here, but when traveling all around Southeast Asia I rarely saw it eaten. White rice is more traditional to me so that is what I stick with.

This dish didn’t pull me out of my cooking blahs completely, but I think it was a good start. Now I’m off to check out some more cookbooks, two of which I hope to review for you next week.

Vegetable Fried Rice

1 tbsp olive oil
2 cloves garlic, minced
1 small candy onion, diced
½ cup shiitake mushrooms, chopped
1 small zucchini, diced
1 red bell pepper, chopped
½ orange bell pepper, chopped
2 Anaheim peppers, sliced
3 cups cold, day old rice
2 eggs
3 tbsp tamari

In a large, deep skillet heat the oil and add the garlic and onion. Cook for 1 to 2 minutes. Add the mushrooms and zucchini and cook about 2 minutes more. Finally add the peppers and continue to cook until all vegetables are tender.

Add the rice and stir to incorporate, heating the it through. Push all of the ingredients to one side of the pan and add the two eggs to the empty side of the skillet.

Break the yolks with your spatula and allow the eggs to cook for 30 to 60 seconds. Once they are almost cooked through, stir them into the rest of the rice, distributing the egg evenly.

Stir in the tamari and you are ready to serve. Add salt and pepper to taste if you desire. I find the tamari is enough for me. Serves about 4.

Cherry Lemon Pistachio Scones

July 21, 2010

I’ve written of my love of scones before, although it has been a long time since I’ve made them. This is purposeful since a batch barely lasts a day in our kitchen. Yes, put me and a scone in the same room and the self control goes out the window.

Due to a series of events that involved inspiration and obtaining of ingredients, I decided I had sacrificed long enough. It was time for another batch of scones.

Earlier this week I was inspired by this amazing Lemon and Pistachio Cakes recipe at Baker Wanabe. This is a new blog by Anna from Chef Wanabe, one of my favorite food blogs. I still want to try that cake as is, but for this recipe it got me thinking about the lemon pistachio combo.

Next, I received a package of assorted nuts and dried fruit from Oh Nuts. I was thrilled to receive this because I was able to get raw nuts – cashews, pistachios and almonds. I find that I no longer need salt on nuts. If you take it away, you get to enjoy the true, unique flavor of each variety. I also got a bag of dried tart cherries, the benefits of which I wrote about just last week.

I broke into the bags right away. The nuts were very fresh and while the cherries do have added sugar and oil (it is difficult to find varieties that don’t), I just couldn’t stop snacking. Then I reminded myself that I needed to use these for some cooking.

Hmmm…lemon, pistachio…how about cherries too? Check!

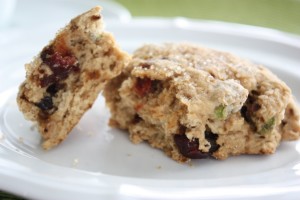
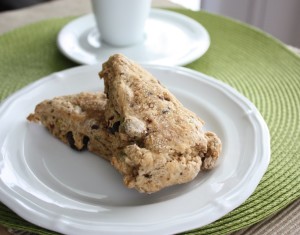
So far I haven’t made scones with white whole wheat flour so I tried it with this time around. Excellent! I also skipped a glaze and simply pressed some demerara sugar into the top of each before baking.

My only change is that in the recipe written below I reduced the salt to ¼ teaspoon. I used sea salt and the original ½ teaspoon I added made them just a little too salty and overpowered the sweet. Otherwise these scones have it all – sweet, salty, tart, chewy and crunchy!

Cherry Lemon Pistachio Scones

1 ¼ cups white whole wheat flour
2 ¼ tsp baking powder
2 tbsp mascavo sugar
¼ tsp sea salt
1 tbsp lemon zest
¼ cup cold unsalted butter
Juice from ½ a lemon
2/3 cup dried tart cherries
¼ cup raw pistachios
½ cup milk
Demerara sugar

Preheat the oven to 400 degrees F. In a medium bowl, mix together the flour, baking powder, mascavo sugar, salt and lemon zest. Cut the butter into pieces and blend with two knives or a pastry blender until the butter is cut into pea-size pieces.

Stir in the lemon juice, cherries and pistachios. Gradually add the milk and mix the dough to form a ball. Place the dough ball on a floured surface and flatten or roll out until it is ¼ to ½ inch in thickness.

Cut it into 8 pieces and place the pieces on a greased baking sheet. Sprinkle each scone with Demerara sugar and gently press it in to stick. Bake for 13 to 15 minutes or until the edges are browned and scones are baked through. Makes 8 scones.

Happy 70th Birthday to my Dad today! One of my most loyal readers!
 
Disclosure: Oh Nuts nuts and dried cherries were sent to me free of charge. I was not under any obligation to write about or cook with them, and I did not receive any compensation for doing.

Spiced Local Lamb over Israeli Couscous

July 16, 2010

At a party about a week or so ago we were having a discussion with friends about cooking. It was mentioned how fortunate my husband is to be the recipient of all my cooking creations. This particular friend didn’t overly enjoy cooking and was frustrated with the same dishes. Even more so, she was frustrated when she put in the time and things didn’t turn out well.

It was at this point that I took the opportunity to say that while I enjoy cooking my creations aren’t always especially delicious either. I have about a 60/40 success rate. Sixty percent of the time I end up with something that tastes and looks good and 40 percent of the time something is lacking. It might be the flavor, the appearance, or both.

Sometimes I mention my failures here, but to be honest I have limited time to edit photos and write up posts. So why would I concentrate on all the bad things I make? No, I put up all the great things! It isn’t about being dishonest; I just think most people would like to see things they can recreate that will taste good.

So just know it isn’t all roses in Lori’s kitchen. Sometimes I have difficulty keeping the ugly weeds from popping up.

Let’s use Israeli couscous as an example. I am completely new to it. I read the directions carefully including the part that said – cook the couscous in a skillet over low heat, but do not let it get brown. Ooops!

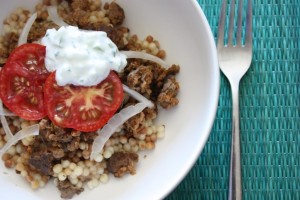
This is a dish I was able to save in the end with lots of flavorful toppings, but if you look closely, pieces of the couscous are definitely brown! Some almost burnt. Better luck to me next time, but you can recreate this with no problem at all and hopefully you won’t burn the couscous like me.

I’ve never cooked with lamb before (look at that, two new ingredients in one post!), but for the first time I am now in an area with a local producer, Windhover Farm. We picked up a pound of ground lamb at the Farmer’s Market a few weeks ago and I hope to buy more in the future because it was delicious.

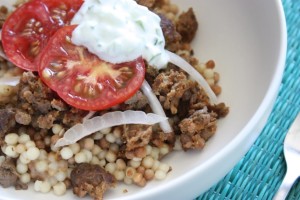
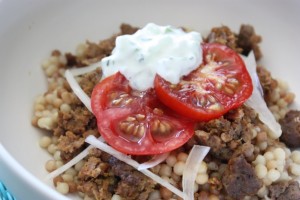
I first started out with lamb patties, but soon realized that crumbled lamb works better in this dish. You can use either. I seasoned the lamb, topped it with all kinds of fresh stuff and came up with one tasty dinner in a bowl!

Spiced Local Lamb over Israeli Couscous

3 cups Israeli Couscous, cooked
1 lb ground lamb
½ tsp ground allspice
½ tsp ground coriander
2 cloves garlic, minced
1 tbsp onion, grated
½ tsp salt
¼ tsp black pepper
2 tbsp fresh parsley, chopped

¼ large onion, thinly sliced
8 slices of tomato

Sauce:
½ cup plain Greek yogurt
¼ cup cucumber, finely chopped and squeezed dry
1 tbsp fresh lemon juice
Salt and pepper to taste

Combine the ingredients for the sauce in a small bowl. Cover and place in the refrigerator.

In a skillet, brown the lamb. When it has been cooked about ¾ of the way through add the allspice, coriander, garlic, onion, salt and pepper. Continue cooking until done and stir in the parsley.

(If making lamb patties add the spices to the raw, ground lamb and mix well. You might also want to add a couple tablespoons of bread crumbs. Shape into four patties and cook in a skillet about 4 minutes on each side or until cooked through.)

Divide the cooked couscous into four bowls and top with one-fourth of the ground lamb. Add onion and tomato slices followed by 2 tbsp of the yogurt sauce. Enjoy! Serves 4.

Cucumber Dill Wheat Berry Salad

July 1, 2010

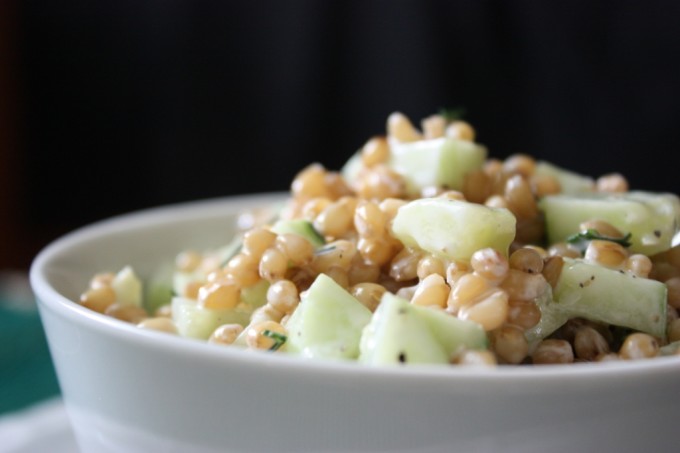
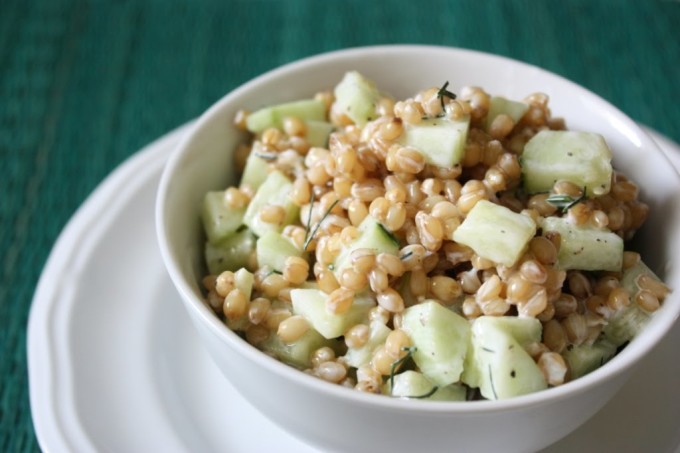
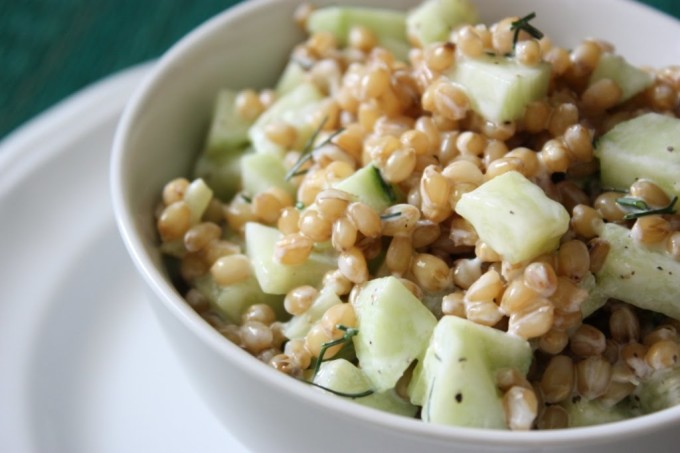
Cucumber Dill Wheat Berry Salad | Fake Food Free | A hearty cold grain salad with a tangy yogurt dressing and refreshing cucumber.

Ever since my food service class in undergrad I have been crazy about herb gardens. The class involved operating both the department cafeteria and a seated dining room two times a week. I had to take the course over the summer the year before I graduated so the fresh foods we used were at their peak.

On the first day of class Chef walked us outside and showed us the herb garden right behind our building on campus. I had walked by it on my way to classes for nearly 2 years and had never seen it. It was a modest row of basics – basil, thyme, parsley, oregano, dill, cilantro and a few others. The whole garden was only about 6 feet long and 3 feet wide, but the plants were overflowing out onto the side walk and most came to at least knee height.

It was my first introduction to using fresh herbs in cooking. I’m sure that was evident to my instructors when I kept pronouncing thyme as it looks with the “th” and not “time.” Our TA quietly told me the correct pronunciation to help me avoid embarrassment.

Since then I’ve been interested in herb gardens and while I still may mispronounce a name now and then, and I am thrilled to have my own again this year. The only problem is the plants produce A LOT and my cooking can’t keep up with them. I’m always looking for things to use them in, but I have to admit they tend to go a few days at a time without me picking a single leaf.

So last week, armed with some wheat berries, I began thinking about what herbs would go well with the grain. That led me to think about the fresh cucumbers I picked up at the farmer’s market which ended up in thoughts of Greek yogurt.

Finally, all those food thoughts resulted in this:

Cucumber Dill Wheat Berry Salad | Fake Food Free | A hearty cold grain salad with a tangy yogurt dressing and refreshing cucumber.

The Cucumber Dill Wheat Berry Salad ended up a hit. I was able to combine two of my favorite herbs for a refreshing cold grain salad. I used leftover, previously cooked wheat berries so if yours are still warm, wash them well under cold water to cool them off. Also, peel your cucumber before chopping if it is of the waxy skin variety.

I’ve already made this salad once more for lunch and now I have my eye out for a potluck to take it to (it can easily be doubled or tripled).

Cucumber Dill Wheat Berry Salad | Fake Food Free | A hearty cold grain salad with a tangy yogurt dressing and refreshing cucumber.

Cucumber Dill Wheat Berry Salad

Makes: 2 servings

Ingredients


1 cup cooked wheat berries
½ medium cucumber, chopped
1 T fresh lemon juice
½ T fresh dill, chopped
½ T fresh chives, chopped
1 ½ T plain Greek yogurt
Salt and pepper to taste

Prep

Place the wheat berries and chopped cucumber in a medium-sized bowl and set aside.

In a small bowl, whisk together the lemon juice, dill, chives and yogurt. Pour the dressing over the wheat berries and toss or stir to coat. Sprinkle with a generous amount of sea salt which adds great flavor and a little black pepper. Eat right away, or refrigerate for up to a day. 


This recipe was submitted to Souper Sundays at Kahakai Kitchen.
 
Thanks for reading! All images and content are the property of Fake Food Free unless otherwise stated. Please do not republish full recipes and images without written permission. What is okay? Feel free to Pin images, share links to my posts or share the photo in a round up post with the title of this recipe and a link back to the post. Confused about copyright and food blogs? Here is some helpful information on Recipe Attribution. If you want to use a photo or full recipe, just ask. I’m sure we can work something out. 

Patty Pan Squash Stuffed with Basil Orzo

June 7, 2010

Stuffed Patty Pan Squash with Basil Orzo Recipe

Just when I was becoming confident in my knowledge of squash varieties I came across a new one at Lexington Farmer’s Market a couple weeks ago.

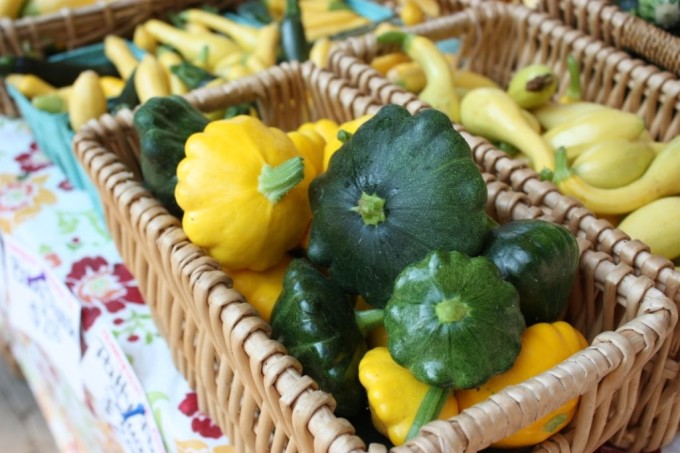
My Dad has grown varieties of yellow squash and zucchini in his garden my whole life, but I’ve never come across Patty Pan Squash. It is also sometimes called Scalloped Squash for obvious reasons. Have you seen it or cooked with it before? 

Patty Pan Squash

Patty Pan or Scalloped Summer Squash

Just look at that interesting shape. It is as if the little squash decided that it really didn’t want to grow long and decided to grow wide instead. You know, just to be different.

Well, in my opinion, different is good, and while Patty Pan has a similar flavor and texture to its longer cousins it adds a lot more fun to cooking.

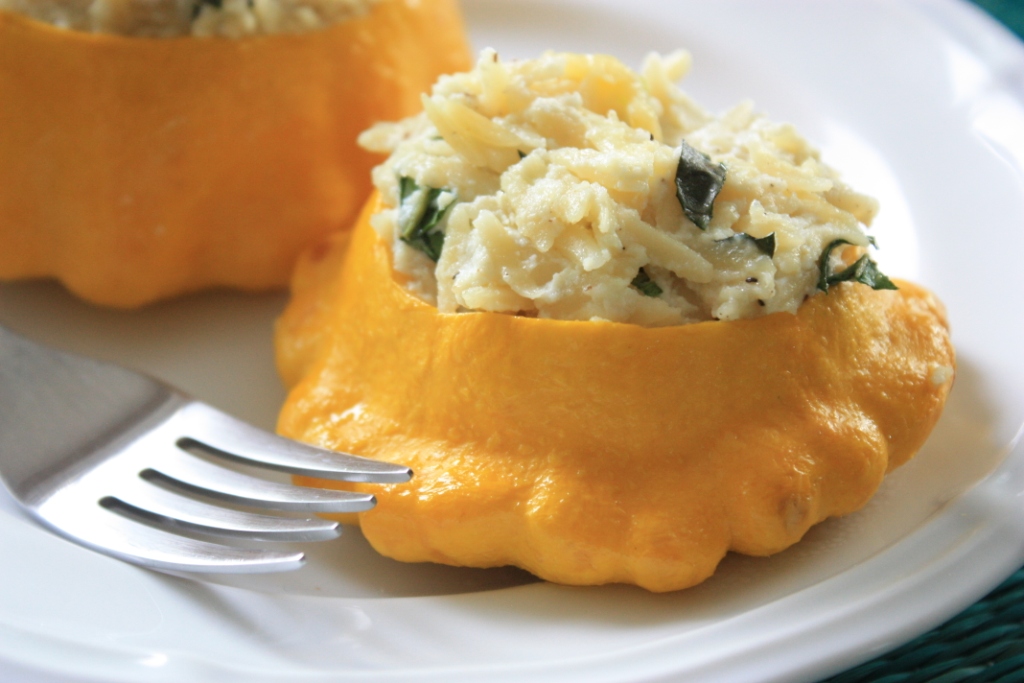
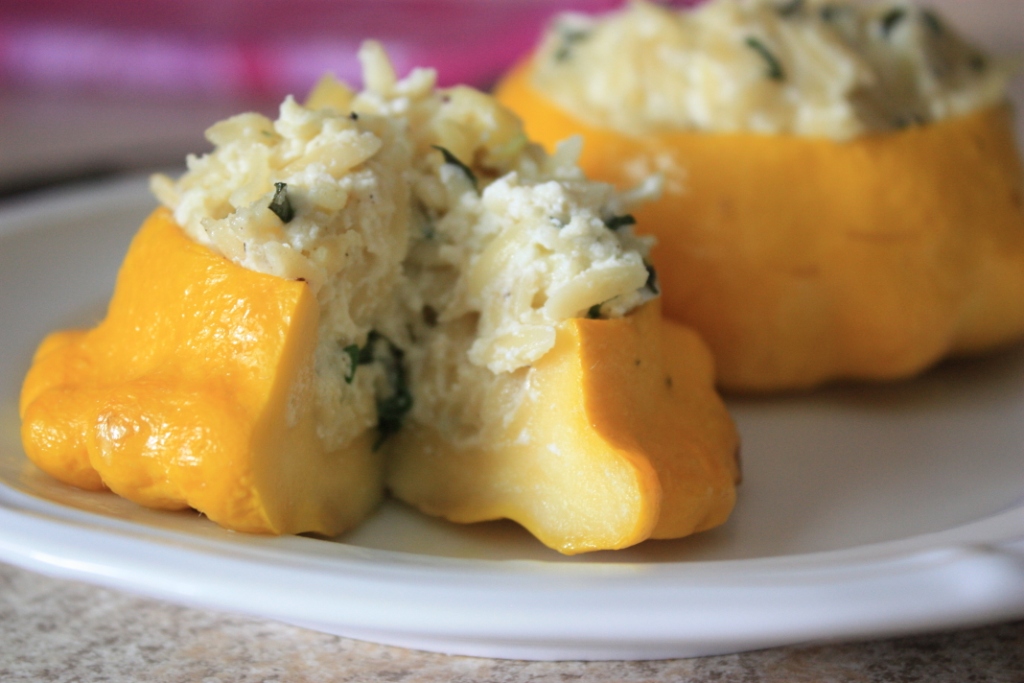
Patty Pan Squash Stuffed with Basil Orzo


I spent several days trying to figure out what I was going to stuff into these little bowl-like vegetables. I kept going back and forth between rice, bulgur and orzo, finally settling on orzo. With all the fresh basil in our herb garden at the moment, I thought an Italian twist was the way to go.


Patty Pan Squash Stuffed with Basil Orzo


At first I was much more interested in the shape than the actual squash, but that quickly changed as I began creating this dish. Patty Pan are easy to roast up. If you trim the stem and flip them over you can simply remove the top, clean out the seeds and stuff them with all sorts of ingredients. These squash can also be sliced and steamed or sautéed with a little olive oil or butter.

Patty Pan Squash preparation

The yellow Patty Pan that I used had a sweet, fresh flavor. They seemed even sweeter to me than standard yellow straight or crooked-neck summer squash. The basil and cheese combination with its slight saltiness paired perfectly with the tender, sweet flesh of the squash.

Patty Pan Squash Stuffed with Basil Orzo

Makes: 2 servings

What you’ll need:

2 medium Patty Pan squash
Olive oil
1 cup orzo, cooked and cooled
2 tablespoon whole milk ricotta cheese
2 tablespoon Romano cheese, grated
6 fresh basil leaves, chopped
¼ teaspoon sea salt
1/8 teaspoon black pepper

How to make it:

Preheat the oven to 400 degrees F. Trim the stem off the squash to create a flat surface. Coat them in olive oil and place them stem side down in a baking dish. The bake time will vary greatly depending on the size of the Patty Pan. I had two, one smaller than the other. The smaller cooked in 30 minutes and the larger took 40 minutes. Insert a fork in the flesh to ensure that it is tender and remove from the oven. Set aside until cool enough to handle.

In a bowl mix together the orzo, cheeses, basil, salt and pepper. Set aside.

Patty Pan Squash recipe prep

Using a small paring knife carefully cut the top off of each squash. Gently scrape out some of the seeds using a spoon to create a bowl to hold your filling. Scoop half of the filling into each squash. Return to the oven and bake 5 to 7 minutes longer until everything is heated through. Makes 2 side dish servings.


Thanks for reading! All images and content are the property of Lori Rice and Fake Food Free unless otherwise stated. Please do not republish full recipes and images without written permission. What is okay? Feel free to Pin images, share links to my posts or share the photo with the title of this recipe and a link back to the post. Confused about copyright and food blogs? Here is some helpful information on Recipe Attribution. If you want to use a photo or full recipe, just ask. I’m sure we can work something out.

Whole Grain Rhubarb Waffles with Strawberry Butter

June 1, 2010
Whole Grain Rhubarb Waffles with Strawberry Butter | Fake Food Free
 

I’m always inspired when I read about other food bloggers taking on challenging ingredients. It is usually something like a root veggie or an over abundance of cabbage in a CSA box. While there is apprehension at first, the final result is always beautiful even if you don’t prefer the star ingredient.

Rhubarb has been my challenging vegetable as of late. It was a staple in our garden growing up, but when I had the opportunity to grow it myself, I declined. But since my parents had an over abundance, I was offered some of this year’s harvest. Seeing it as a culinary challenge, I accepted.

I feel a bit sorry for rhubarb with its poisonous leaves. It really isn’t a nutritional superstar either; just a stalk that is often in the shadows of fruits like strawberries, in order to be enjoyed.

Whole Grain Rhubarb Waffles with Strawberry Butter | Fake Food Free

I like the flavor of rhubarb, just not the texture. This is especially true after growing up at dinner table with brothers who made disgusting jokes about said texture while eating the pie. Thus, be careful of the way you perceive and communicate perceptions of foods to children. I’m proof that those comments hang around and can control food preferences later in life!

But now, I was up for the challenge of tackling my rhubarb apprehension. With plenty on hand I had to come up with something that would present the flavor, but not the texture.

My first thought? Waffles!

Ever since I got my waffle maker last Christmas I’m always thinking about new waffle recipes. For this one, the rhubarb blended in nicely to the whole grain waffle and while it wasn’t quite as strong as I would have liked it was still good. I topped it off with some strawberry butter and breakfast was complete.

Whole Grain Rhubarb Waffles with Strawberry Butter | Fake Food Free

Whole Grain Rhubarb Waffles with Strawberry Butter

Makes: About 6 waffles

Ingredients


1 cup rhubarb, chopped
4 tablespoon water
¼ cup demerara sugar

1 cup white whole wheat flour
¾ cup whole wheat flour
1 tablespoon baking powder
½ teaspoon salt
¼ cup unsalted butter melted, plus 2 tbsp more for waffle iron
2 large eggs, lightly beaten

Prep

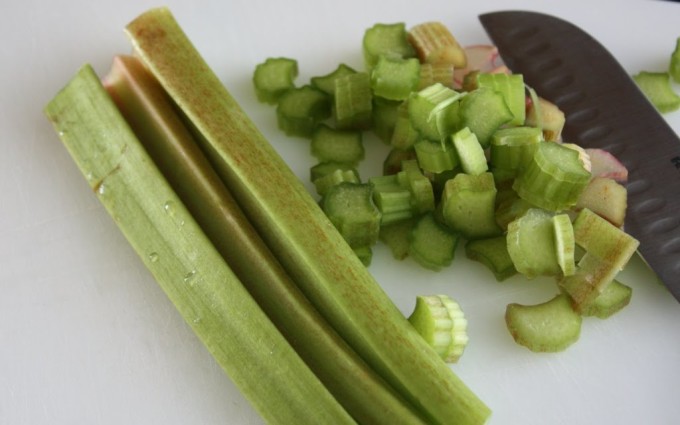
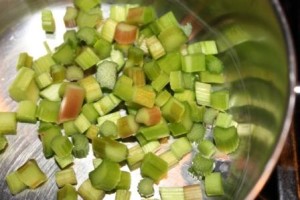
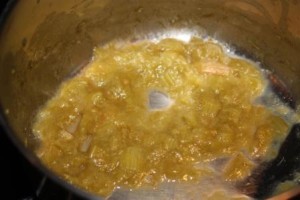
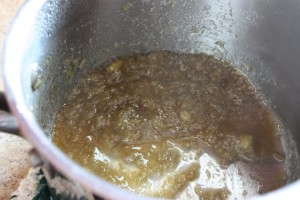
In a sauce pan, combine the rhubarb, water and sugar. Cook on medium-high heat, stirring often until the rhubarb cooks down to a jam-like consistency, about five to seven minutes. Remove from the heat and set aside.

rhubarbrhubarb-cookedrhubarbpan

In a large bowl, sift together the flours, baking powder and salt. Stir in the cooled melted butter, eggs and rhubarb. Stir to combine all the ingredients.

Heat your waffle iron and lightly brush each side with melted butter. Pour a heaping 1/3 cup of batter onto the iron, close and cook for about four minutes. Remove and repeat with the butter for the next waffle. Top waffles with strawberry butter (below) before serving. 

Strawberry Butter

I really enjoy fruit butters in place of syrup on waffles. We used to make them all the time when I worked in a bakery. There are a variety of ways to create them, but the easiest is with jam and butter. I used some strawberry freezer jam that my mom made with this year’s fresh strawberries.

Ingredients

¼ cup butter, unsalted, slightly softened
2 teaspoon strawberry jam, the thinner the consistency the better

Prep

Place ingredients in a small food processor. Process until everything is blended and the butter is soft and spreadable.

For more info, the University of Illinois Extension Service has a helpful page about rhubarb.


Thanks for reading! All images and content are the property of Fake Food Free unless otherwise stated. Please do not republish full recipes and images without written permission. What is okay? Feel free to Pin images, share links to my posts or share the photo in a round up post with the title of this recipe and a link back to the post. Confused about copyright and food blogs? Here is some helpful information on Recipe Attribution. If you want to use a photo or full recipe, just ask. I’m sure we can work something out.  

Chicken Shiitake Manicotti in Garlic Cream Sauce

May 17, 2010

When I was younger I used to hunt for morel mushrooms with my older brothers in the woods behind our house. I guess that is when I learned other mushrooms existed besides the white button variety so plentiful in US supermarkets and salads. Other than that, however, my mushroom knowledge was limited.

Fast forward 20 years and I still know very little about mushrooms, but I’m learning. Two things I’ve learned is that they offer multiple health benefits and they are highly respected ingredients in the culinary world with deep, complex flavors.

After reading food blogs and articles about mushrooms I was beginning to think they were another one of those gourmet ingredients most plentiful on the food-rich coasts of the US or abroad. Then I learned of The Hoosier Mushroom Company. Yep, an Indiana company. Not only am I living close to Indiana, but I am originally from there. That’s where we did all that morel hunting as kids.

The Hoosier Mushroom Company is a small, family run operation in Nashville, Indiana that began as a mushroom farm growing six varieties – Oyster, Shiitake, Maitake, Lion’s Mane, Nameko, and Reishi. Despite the fact that morel hunting is a pretty big deal in Indiana, there were very few resources in the state for mushroom hunting. This company has evolved into that much needed resource.

It is now both a retail shop in Brown County, Indiana and an online store. Mycologists on staff are available to help hunters identify mushrooms, and books, hunting and cultivation supplies are all available. The store offers gourmet foods like dried mushrooms and truffle oils, and even mushroom-inspired gifts.

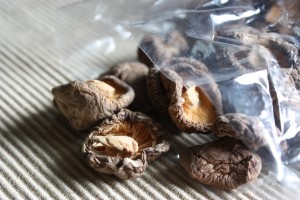
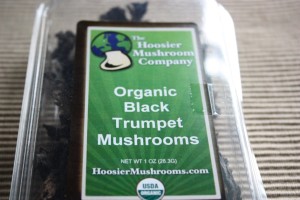
I, of course, was interested in the gourmet food, and the kind owners, Megan and Stephen, sent me two packs of mushrooms to try — Organic Dried Shiitakes and Organic Black Trumpet Mushrooms.

I started with the Shiitakes and researched a bit why I could benefit from these little nutritional powerhouses. First of all, edible mushrooms are considered functional foods which are sometimes given the name nutraceuticals. According to the American Cancer Society animal studies which are now expanding to human studies show that Shiitakes have three main health benefits. They are considered antitumor, cholesterol-lowering and virus-inhibiting.

Shiitakes contain lentinan which is a beta-glucan. Beta-glucans stimulate the immune system and activate the attack of cancer cells. This has been associated with slowing tumor growth. Another component of shiitakes, eritadenine, has been found to lower blood cholesterol levels because it blocks the way cholesterol is absorbed into the blood stream.

The great site, WH Foods, reports that Shiitakes contain antioxidants. These mushrooms have one of the highest concentrations of L-ergothioneine, a powerful antioxidant. The best part? This antioxidant doesn’t appear to be destroyed when the mushrooms are cooked.

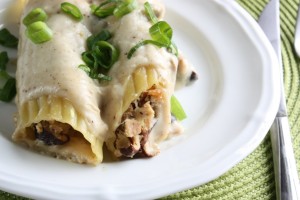
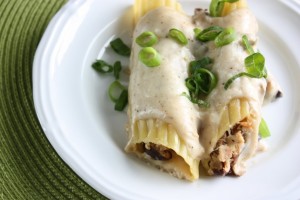
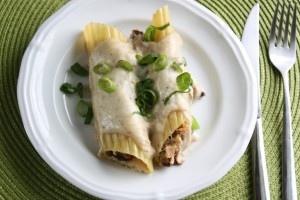
All set to get cooking and enjoy these health benefits, I decided to combine the shiitakes with some leftover local, pastured chicken we grilled last week. It resulted in a manicotti filled with delicious mushrooms, tender chicken and creamy ricotta cheese. The sauce is made with sweet roasted garlic. If you want to use less dairy feel free to substitute a stock for the milk in the sauce. I added a lot of black pepper to this dish which ended up giving it a nice, mildly spicy background flavor that goes well with the mushrooms.

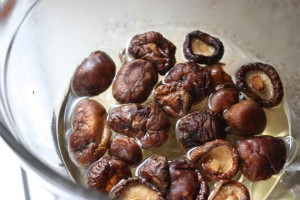
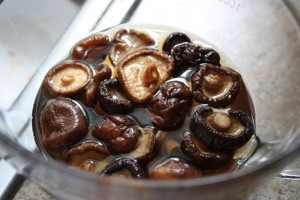
You don’t have to slave over the stove long to make this dish. It comes together pretty quickly, but you do need to start a little ahead of time to roast your garlic and reconstitute your mushrooms.

Chicken Shiitake Manicotti in Garlic Cream Sauce

Preparation:
Olive oil
1 head garlic
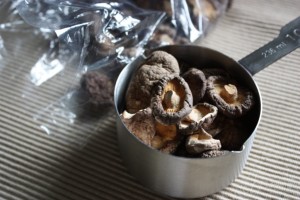
1 cup dried shiitake mushrooms
Boiling water

Manicotti:
6 manicotti, cooked to al dente
1 cup cooked chicken, shredded
1 large green onion, sliced, greens reserved
1 clove garlic, minced
2 tbsp water
2 tbsp parmesan cheese, grated
1/3 cup ricotta cheese
¼ tsp each salt and black pepper

Sauce:
2 tbsp unsalted butter
2 tbsp white whole wheat flour
1 cup milk
2 tbsp parmesan, grated
¼ tsp each salt and pepper

Preheat the oven to 400 degrees F. Slice off the top third of your garlic head, place it cut side up on a piece of foil and drizzle with olive oil. Wrap in the foil and bake for about 45 minutes or until soft. Set it aside to cool.

Place the mushrooms in a bowl and cover with hot water. Allow to sit for about 20 to 25 minutes. Drain and reserve the water for stock. Gently dry the mushrooms and then roughly dice. Reserve about a 1/ 4 cup for the sauce.

Heat about 1 tbsp of olive oil in a skillet and add the onion and garlic, cook for 1 minute then add the mushrooms, chicken and water. Cook for about 5 more minutes until everything is heated through. Stir in the parmesan, ricotta, salt and pepper. Set aside and allow to cool so that you can handle the filling.

In a sauce pan create a roux by melting the butter over medium heat, and then whisk in the flour to form a paste. Remove the pan from the heat and slowly whisk in the milk. Whisk constantly to smooth out any clumps. Return to the heat, still whisking, and allow the sauce to thicken to your desired consistency. It should coat the back of a spoon when it is ready.

Remove the pan from the heat and squeeze in the roasted garlic cloves (careful not to let any of the skins to fall in), parmesan, salt and pepper and whisk until smooth. Stir in the reserved mushrooms.

Spread 2 tbsp of the sauce in the bottom of a casserole dish. Divide the filling into six equal parts and fill each manicotti shell by hand or with a spoon. Place each shell in the baking dish, and then pour the remaining sauce over the top.

Bake for about 15 minutes until the sauce is bubbling. Remove from the oven, allow to cool for 3 to 5 minutes. Then serve and garnish with the reserved onion greens, or scallions. Serves 2 to 3 people.

**************

Hungry for mushrooms, now? Well you are in luck. The Hoosier Mushroom Company has offered to give away a pack of organic dried Black Trumpet Mushrooms to one of my readers! Entries (via comment) are due by 11:59 pm EST on Sunday, May 23rd. I’ll announce the winner next Monday along with some more information on Black Trumpets and how I used them.

To enter follow the steps below. For each entry to count be sure to leave a separate comment saying you followed, tweeted, etc. You have the opportunity for 4 entries/comments. You will also need a US address to win.

  1. Leave a comment telling me if you’ve used dried mushrooms before and how you would use the Black Trumpets.
  2. Follow me (@lori1329) and The Hoosier Mushroom Company (@hoosiermushroom) on Twitter and tell me you do or did so.
  3. Tweet the giveaway and @ both of us. Tell me you did so in a comment.
  4. Like (become a fan of) The Hoosier Mushroom Company on Facebook and tell me you do or did so in a comment.

Resources for health benefits of Shiitakes:
American Cancer Society: Shiitake Mushroom 
WHFoods: Shiitake Mushroom 
Chang, R. Functional properties of edible mushrooms. Nutr Rev. 1996 Nov;54(11 Pt 2):S91-3

Disclaimer: I received the mushrooms mentioned in this post free of charge from The Hoosier Mushroom Company. I was not required to review them and received no compensation for doing so.

Butternut, Flax and Walnut Bread

May 12, 2010

It is rare that you come across a food that is fresh and local, yet out of season. Sounds kind of strange doesn’t it? Fall and winter squash is such an amazing thing. Stick those babies in a cool environment and they seem to last forever.
That is exactly how this bread came about. At Easter my parents gave me two butternut squash, the last two of the 2009 season. They had kept them in the garage all winter and spring.

I wasn’t sure what I would find when I cut them open. I inserted the knife and carefully split open the squash a little nervous that I might be met with smelly, rotting innards. I breathed a sigh of relief when I saw only bright orange flesh staring back at me, ready to be roasted.

I will admit I was pretty thrilled. One, because of how amazing these veggies are that they can be stored for so long and still taste great. Two, because this cool, rainy spring we are having is really messing with my cravings! I should be in a blissful state of enjoying fresh salads and grilled fish, but I find myself wanting warm comfort food and baked goods scented with cinnamon and spice.

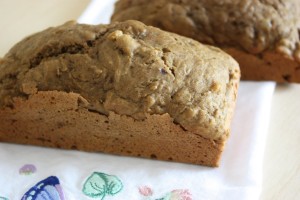
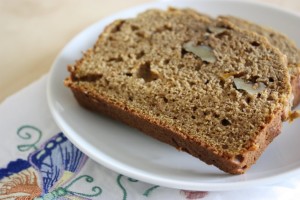
The latter led to this recipe. Regardless of the season I can’t seem to pass up a tender, yet hearty quick bread for breakfast. This one is a twist on banana bread. It is sweetened with mascavo sugar and maple syrup and has some walnuts and flax meal thrown in for extra crunch and nutrition. The result? A slightly sweet bread, soft and moist from the squash — the perfect partner for coffee or tea eaten plain or with a small swipe of cinnamon butter.

Butternut, Flax and Walnut Bread

1/3 cup minimally refined cane sugar
3 tbsp maple syrup
½ cup butter, melted
2 eggs
1 cup roasted butternut squash, mashed or pureed
2 tsp ground flax meal
¾ cup milk
2 ½ cup white whole wheat flour
1 tsp baking soda
1 tsp salt
2 tsp cinnamon
½ cup walnuts, chopped

Preheat the oven to 350 degrees F. Grease two loaf pans, or you can use one standard loaf pan and two mini-loaf pans like I did.

In a mixing bowl whisk together the sugar, syrup and butter. Add the eggs and whisk until combined. Stir in the squash, milk and flax. Sift together the flour, baking soda, salt and cinnamon. Gradually mix these dry ingredients into the wet batter just until everything is combined. Stir in the nuts.

Divide the batter between loaf pans. Bake the small loaf pans 20 to 25 minutes and the standard loaves 30 to 32 minutes, or until a toothpick inserted in the center comes out clean. Cool for 10 minutes, de-pan and allow to cool completely on a wire rack.

Want to create beautiful food and product photos that you can't wait to share?!
Discover your style, control the light, and shoot using the tool you know how to use (yes, your phone included). Learn about free resources, Live Q&As with Lori, and online courses you can take from anywhere in the world!
We respect your privacy. Unsubscribe at any time.