Browsing Category

Desserts Sweets

Sweet Potato Chocolate Chip Cookies

October 29, 2010

With my next sweet potato recipe, I didn’t deviate much from my sweet tooth. I often make pumpkin chocolate chip cookies around this time of year so it only seemed natural that I should try the combination with sweet potato instead.

Honestly, it is difficult to tell the difference between the sweet potato version and a pumpkin version. They both offer a rich flavor that tastes so good with the chocolate, especially if you use dark chocolate chips.

I used my Coconut Oil Chocolate Chip Cookie recipe for this one and adjusted it to fit what I had on hand. I make my own oat flour by tossing old fashioned oats in the food processor. I’ve learned I love my cookies with oat flour. It adds texture, but doesn’t create as much chewiness as adding the un-ground oats.

Sweet Potato Chocolate Chip Cookies

1 cup demerara sugar
½ cup unsalted butter, softened
1 egg
1 tsp vanilla
½ cup sweet potato, pureed
½ cup oat flour
¾ cup white whole wheat flour
½ tsp baking soda
½ tsp salt
2/3 cup dark chocolate chips
Heat the oven to 375 degrees F. In a mixing bowl, cream together the sugar and butter until fluffy, about 3 to 4 minutes. Add the egg and vanilla and mix until combined. Mix in the sweet potato.
In a separate bowl, sift together the flours, baking soda and salt. Gradually add the dry ingredients to the mixing bowl. Scrap the sides and mix until everything is combined. Stir in the chocolate chips.
Place cookies by the teaspoon or tablespoon full onto an ungreased cookie sheet. Bake 8 to 10 minutes, or until the cookies are slightly browned. Remove from the oven, allow to rest 1 minute and then transfer to a cooling rack. Makes about 2 dozen cookies.

Spiced Sweet Potato Cupcakes with Cream Cheese Frosting

October 22, 2010

Sadly, all the late heat and dry conditions we had this year left no winter squash to be found in our garden. While my dreams of homegrown pumpkins, butternut squash and spaghetti squash were left shattered, not all was lost in the area of orange autumn veggies.

When my parents came to visit to celebrate my birthday and attend the World Equestrian Games, they brought with them a huge bucket of sweet potatoes! My Dad’s green thumb prevailed despite the conditions and some beautiful taters resulted.

I’m noticing a lot of bloggers keeping with a theme this time of year – pumpkin, apples, acorn squash – so I thought I’d go a different route and create my own little ode to the sweet potato. My next few posts will highlight these root veggies with their versatile ability to be eaten savory or sweet.

First up, cupcakes!

I have a favorite banana cake recipe that I’ve tweaked throughout the years. It is quick, easy to substitute whole grain flours and minimally refined sugars, and has been a no-fail go-to when we need dessert or to use up bananas.

I decided to change the recipe even further this time by adding sweet potato, ground ginger and cinnamon. I was worried I might end up with more of a muffin than a cupcake, but these goodies are cake all the way.

They seemed to be calling for cream cheese frosting, so I answered with a nice dollop on top. I didn’t list the recipe for the frosting because it is nothing too extraordinary. I used my recipe from the Joy of Cooking, but any cream cheese frosting will do.

Spiced Sweet Potato Cupcakes

1 cup demerara sugar
½ cup unsalted butter, softened
½ cup pureed sweet potato
2 eggs
1 tsp vanilla
1 cup white whole wheat flour
1 tsp baking soda
½ tsp salt
¼ tsp ground ginger
½ tsp ground cinnamon

Preheat the oven to 375 degrees F and prep a cupcake/muffin tin with 12 paper liners.

In a mixing bowl, using the paddle attachment beat the butter and sugar until mixed and fluffy, about 3 minutes. Add in the sweet potato and continue to mix until combined. Add the eggs and the vanilla. Mix until all ingredients are combined.

In a separate bowl combine the flour, baking soda, salt, ginger and cinnamon. Gradually add the dry ingredients to the mixing bowl. Mix just until combined.

Divide the batter among the 12 muffin cups. Bake for 15 to 17 minutes, until the cupcakes are browned and a toothpick inserted into the center comes out clean. Be careful not to over bake.

Remove the cupcakes from the pan and place on a cooling rack. Allow the cupcakes to cool completely before topping with your favorite frosting.

P.S. Thanks so much for all the well wishes. I’m starting to feel much better. I was away for a training this week for work and came back craving time in my kitchen. Being ready to bake again is a sure sign that I’m on the road to recovery!

International Holiday Cookie Recipe Exchange

October 15, 2010

How cookies became the focus of my holiday treats I’m not quite sure. We were never really the cookie family growing up. We had plenty of delicious, traditional sweets, but they were mostly in the form of cakes and pies. My grandma may have made a few varieties of cookies, and my mom would make divinity and fudge, but that about summed it up in my family.

During grade school my friend’s mother used to go all out. She’d start weeks ahead of time. She’d freeze dough, cookies and candies in anticipation of the holiday season. My mom’s best friend would always send over a plate overflowing with holiday cookies she’d spent hours baking and neighbors would drop by with their cookie-tray offerings.

Perhaps this is how I became so infatuated with the holiday cookie and the holiday cookie gift tray. All I know is that when it comes to Christmas and food, cookies are the first thing that comes to mind for me.

A few weeks ago, Adrienne from Gastroanthropology and I thought we should get our food blogging friends involved in a cookie recipe exchange, the International Holiday Cookie Recipe Exchange to be exact.

As part of this recipe exchange you’ll be doing two things. Sending a recipe to another blogger, and making and posting about the recipe another blogger has sent to you.

We’d love to get as many people involved as possible and the exchange is simple. Leave a comment here or on Adrienne’s blog, Gastroanthropology, by November 5th to let us know you are interested in participating. Be sure to leave a valid email address when you sign in to comment.

Each participant will create an original or an adapted, attributed-to holiday cookie recipe and send it to the blogger we’ve randomly selected for you via email by November 15th.

Once you receive a recipe we ask that you post on the recipe by December 15th. Adrienne and I will do a roundup of all the recipes so you know where all the cookies were baked and how all the cookies turned out.

We are aware that a few of you have dietary restrictions or allergies. When you receive a recipe you may alter it to fit your dietary needs, but please post the original as well. If you have any trouble altering a recipe feel free to contact me at lori AT fakefoodfree dot com or Adrienne at gastroanthropology AT yahoo dot com for advice or suggestions.

The only guideline is that the recipe should be something you’d find on a holiday cookie plate, so anything from rugelach to alfajores to fudge squares to gingerbread men!

Important Dates:

Let us know you want to participate by November 5th.

Send your recipe to the blogger randomly selected for you by November 15th.

Post about the recipe you received from a fellow blogger by December 15th.

What do you say? Let’s start collecting and creating those recipes and get some baking going on around the world, all in honor of the beloved holiday cookie plate!

Baked Explorations: Ginger Rum Molasses Cookies

October 11, 2010

I remake these delicious Ginger Rum Molasses Cookies every year! Soft and chewy, they are by far my favorite spiced cookie. Perfect for the holiday season or any time you have a craving! 

When I received my copy of Baked Explorations by Matt Lewis and Renato Poliafito, I turned directly to the Cookies and Bars section.

  Baked Explorations: Ginger Rum Molasses Cookies | Fake Food Free


I’m not sure why because the book is filled with every other treat imaginable – pies, tarts, bundt cakes, layer cakes, cupcakes, waffles, donuts and scones. The subtitle of the book is, Classic American Desserts Reinvented, and these experienced authors and bakers have left no stone unturned.

Lewis and Poliafito are authors of another, very popular, cookbook, Baked, and own a Brooklyn-based bakery of the same name. It was love at first word as I read the introduction when Lewis explains how he no longer plans vacations like a normal person. He writes:

“In addition to choosing the mountain, the condo, and the best month to ski, I might also insist that we spend a day off-slope in search of a much-written-up, much-blogged-about creamy bourbon milkshake.”

The Cookbook, Baked Explorations | Fake Food Free

One, he mentioned food and travel. Two, he mentioned bourbon.

I’ll sum up my review of this cookbook pretty quickly – if you love to bake or want to love it, you need this cookbook. The recipes will spark some memories of old time favorites, but you might also be introduced to delicious cakes and pies you were previously unfamiliar with.

Each recipe begins with an interesting story. The instructions are straightforward and well explained. The only thing I might fault is that the ingredient list is difficult to read due to small print and italics, but it emits a bit of style that goes so well with the book that I’m willing to overlook it in my recommendation.

The Red Velvet Whoopie Pies, Salt-n-Pepper Sandwich Cookies, Carrot Coconut Scones and the Caramel Apple Cake are all on my to-bake list. For this review, however, given my current schedule I chose something a little ambitious, but no less delicious.

The name given to these cookies in the book is Joe Froggers and a wonderful little story accompanies this name. However, according to the Baked Note (little tips throughout the book) the original Joe Frogger was made with all vegetable shortening. The authors switched this to half butter, half shortening and warned that an all butter cookie just wouldn’t be a Joe Frogger.

 
Baked Explorations: Ginger Rum Molasses Cookies

So unfortunately, I guess I can’t call mine Joe Froggers because I don’t use vegetable shortening in my baking. I can, however, give it the second name given in the book – Ginger Rum Molasses Cookies.

If you are looking for your next gingerbread man, I’ve found him for you.

This cookie bakes up into a chewy, soft, spicy cookie. As you have probably already guessed, yes, it is going on the holiday baking list! I love this cookie!

I used my standard white whole wheat flour, dememara and mascavo sugar, but I am printing the original recipe here for you to do as you wish. The dough needs to be refrigerated so plan ahead when making these.

This cookbook is one for your baking bookshelf. If you can’t get it in time for your holiday baking, I’d highly suggest putting the book itself on your gift wish list!

Ginger Rum Molasses Cookies

Reprinted with permission from the publisher.

Makes: 36 to 48 cookies (depending on the size of your cookie cutter)

Ingredients

4 cups all-purpose flour
1 ½ teaspoons salt
1 ½ teaspoons ground ginger
½ teaspoon freshly grated nutmeg
½ teaspoon ground cloves
1 teaspoon baking soda
4 tablespoons (1/2 stick) unsalted butter
¼ cup vegetable shortening
¾ cup firmly packed dark brown sugar
¼ cup granulated sugar
1 ¼ cups molasses
3 tablespoons dark rum
Coarse sugar for décor

Prep

Whisk the flour, salt, ginger, nutmeg, cloves, and baking soda together. Set aside.

In the bowl of a standing mixer fitted with the paddle attachment, beat the butter and shortening together until there are no visible lumps. Add both sugars and beat just until incorporated. Scrape down the bowl, add the molasses, and beat until the mixture is uniform in color.

Prepare 1/3 cup very hot water. Add the flour mixture to the butter mixture, alternating with the hot water; in three parts, beginning and ending with the flour mixture. Scrape down the bowl, add the rum, and mix for 15 seconds. Cover the bowl and chill for at least 3 hours or overnight.

Preheat the oven to 375 degrees F. Line two baking sheets with parchment paper. Dust a work surface with a sprinkling of flour. Roll the dough into a ¼ – inch thick round. Cut out the cookies with a 2- to 3-inch round cookie cutter, and transfer them to the prepared baking sheets. Sprinkle a tiny bit of sanding sugar onto each cookie.

Bake the cookies for 8 to 12 minutes, until they are set. The author notes – 8 minutes for a chewy cookie, 12 minutes for a crispier cookie. Place the baking sheet on a wire rack to cool for 5 minutes. Use a spatula to transfer the cookies to the rack to cool completely. Store in an airtight container for up to 3 days.


Baked Explorations: Ginger Rum Molasses Cookies

Disclaimer: This book was sent to me for review purposes. I was not required to write about it nor did I receive any compensation for doing so.

Thanks for reading! All images and content are the property of Fake Food Free unless otherwise stated. Please do not republish full recipes and images without written permission. What is okay? Feel free to Pin images, share links to my posts or share the photo in a round up post with the title of this recipe and a link back to the post. Confused about copyright and food blogs? Here is some helpful information on Recipe Attribution. If you want to use a photo or full recipe, just ask. I’m sure we can work something out.

Spiced Whole Grain Apple Pie

September 15, 2010
I feel like pie is a dessert that I will always be experimenting with. It’s been several years since I made this hearty spiced whole grain apple pie, but it’s a seasonal favorite! 
 Spiced Whole Grain Apple Pie Recipe | Fake Food Free
 
I will admit that apple pie isn’t my absolute favorite. Any other time of year, I’d prefer lemon or chocolate, but right now I’m all about apple. It isn’t a great year for apples around here. There was some hail damage at the local orchard early in the season and then all this heat. Fortunately I was still able to stop by and pick up a few recently.
 
While apples are the highlight of my season at the moment, the highlight of this post is pie crust. I struggle with finding a good pie crust and with timing it correctly. I like butter crusts, but most need to be refrigerated, often overnight, before you can roll them out.
 
Spiced Whole Grain Apple Pie Recipe | Fake Food Free
 
I finally got ahead of the game and made a crust with some of my favorite ingredients. I refrigerated the dough for about 3 or 4 hours and it worked out nicely. It baked up with what I would consider acceptable flakiness and held together well during cutting and serving. The butter and grains blended well, and gave a nice earthly flavor to match the apples and mascavo sugar.
 
This one may not win any awards for the perfect pie crust, but considering it is whole grain with some flaxseed thrown in, I think it’s pretty darn good.

Spiced Whole Grain Apple Pie Recipe | Fake Food Free

Spiced Whole Grain Apple Pie

Ingredients: 

Crust (makes 2 – 9 inch)
2 cups white whole wheat flour
½ cup brown rice flour
2 tbsp flaxseed meal
1 cup butter, cold, cut into cubes
1 tsp salt
½ cup water

Pie Filling
4-5 apples, peeled, cored and sliced
½ – ¾ cup mascavo sugar
2 tbsp white whole wheat flour
½ tsp ground allspice
1 tsp ground cinnamon
2 tsp spiced rum
2 tbsp butter

Prep:

In a large bowl, sift together the flours and flaxseed. Add the butter and blend with two knives or a pastry blender until the butter is incorporated and in pea-sized pieces. Stir in the salt. Add the water a little at a time and stir to combine the dough. Divide in two pieces and wrap in plastic wrap. Refrigerate 3 to 4 hours, up to overnight.

Preheat the oven to 400 degrees F. In a bowl, combine the apples, sugar (depending on how sweet you want your pie), flour, allspice, cinnamon and rum. Stir to combine and set aside.

Roll each piece of dough on a floured surface to create a 9 inch circle. Transfer one piece to your pie plate, pressing it gently to fit. Pour in the apple mixture and top with pieces of the butter. Place the top crust over the pie filling and pinch the ends around the edge of the pie, removing any excess crust.

Cut slits in the top crust. Decorate with dough cutouts, if desired. Brush the top of the crust with milk or melted butter. Bake for 35 to 45 minutes, or until the crust is browned and filling is bubbly. Allow to rest for 10 minutes. Serve warm or at room temperature.

Thanks for reading! All images and content are the property of Fake Food Free unless otherwise stated. Please do not republish full recipes and images without written permission. What is okay? Feel free to Pin images, share links to my posts or share the photo in a round up post with the title of this recipe and a link back to the post. Confused about copyright and food blogs? Here is some helpful information on Recipe Attribution. If you want to use a photo or full recipe, just ask. I’m sure we can work something out.  


Good Meat: Cookbook Review and Pig Candy!

September 8, 2010

One word that seems to be synonymous with meat is slab. When I think of a steak, I think of a slab of meat. Similarly, when I received the cookbook – Good Meat: The Complete Guide to Sourcing and Cooking Sustainable Meat – I had the exact same thought.

This is one slab of a cookbook! A thick, hardback of 400 pages that is filled with valuable information, delicious recipes and stunning photography from cover to cover.

Anyone else excited by this book simply by reading the title? I was, and the title pretty much says it all.

Inside you will find everything you wanted to know about grass-fed beef and pastured meat and eggs – what it is, definitions of common terms used when discussing it, how to cook it, and the tools you’ll need to do so. It is described not only as a cookbook, but as a guide and that is spot on. This book is as much a necessary reference for meat in general as it is a collection of recipes.

We don’t eat an overabundance of meat, in fact, I would say our diet is at least 70% vegetarian, but we do eat meat and enjoy it. With the exception of the occasional order while traveling, when we do include meat in our meals it is from local farms utilizing sustainable practices and those which treat the animals as humanely as possible. Fortunately we have a lot of options that fit these criteria here in Kentucky.

Despite my frequency of preparing meat, I always struggle with recipe ideas. It’s just never been my strong point. Well, that could all change after browsing this book. The author, Deborah Krasner, a James Beard Award winning cookbook writer, covers beef, lamb, pork, rabbit, poultry and eggs, and even provides a recipe section for side dishes.

A taste of the recipes include:

Beef and Lamb Meat Loaf
Baked Cured Ham Steak with Honey, Onion Confit, and Bourbon
Roast Chicken with Apples Sausage, and Cider
Sicilian Rabbit Agrodolce
And yes, if you are the adventurous type, there are recipes for sweetbreads, tongue and gizzards.

What I love about this book:

  • The book opens with multiple, homemade spice rubs that are used in many of the recipes to follow.  
  • The recipes are clearly written with straight forward instructions, one recipe per page. 
  • The recipes incorporate a variety of cultural cuisines including French, Indian, North African, Chinese and Cuban. 
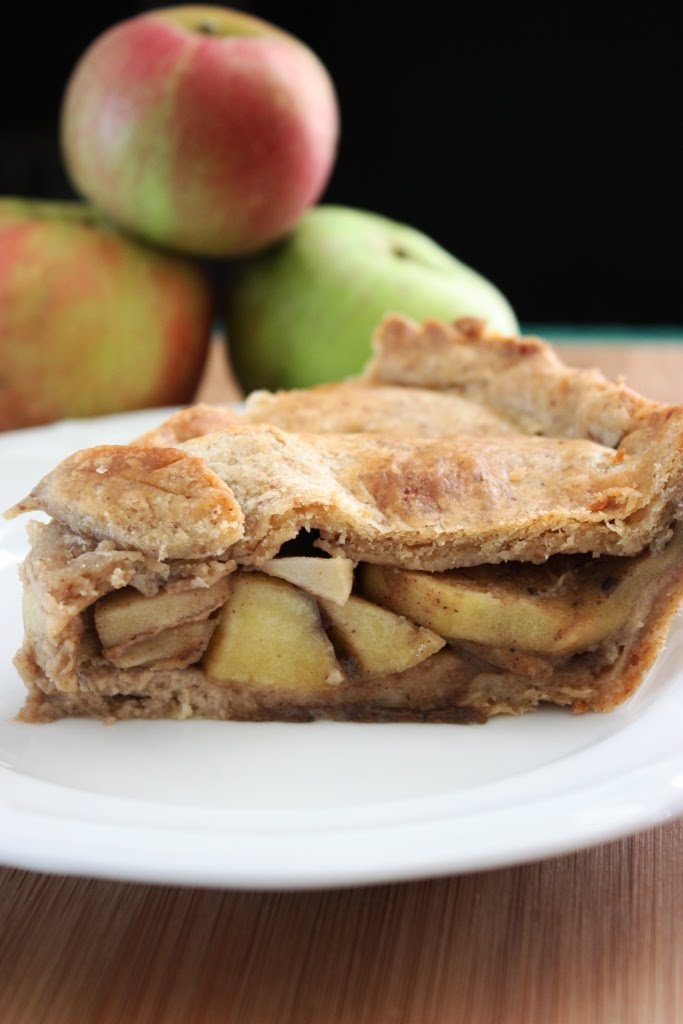
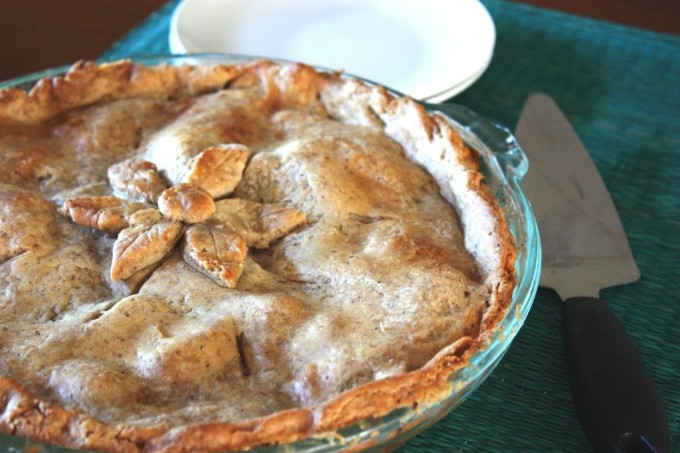
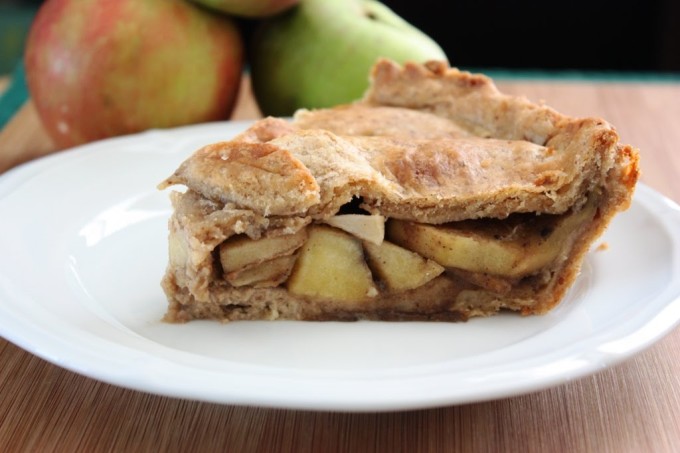
  • There isn’t a photo with each recipe, but the photography included is outstanding from farm scenery to completed dishes. There are also pictorial descriptions of meat cuts for each meat type.  
  • The author touches on ethical topics for those of us who care deeply about animals, but still feel that some are meant to be a source of food. One example is her short section on the topic of naming animals.

What I’m not so crazy about:

I really like to make sure I look at cookbooks with a critical eye and mention the good with the bad. I have to be honest, though; there is nothing I don’t like about this cookbook.

If I had to stretch it, maybe I would go with the fact that it is really difficult for me to see a cute calf on one page and a slab of beef on another, but that doesn’t make the photography or the book any less spectacular. The book is also very large and difficult to keep open with the recipe in view while cooking, but I find that with multiple cookbooks in my collection.

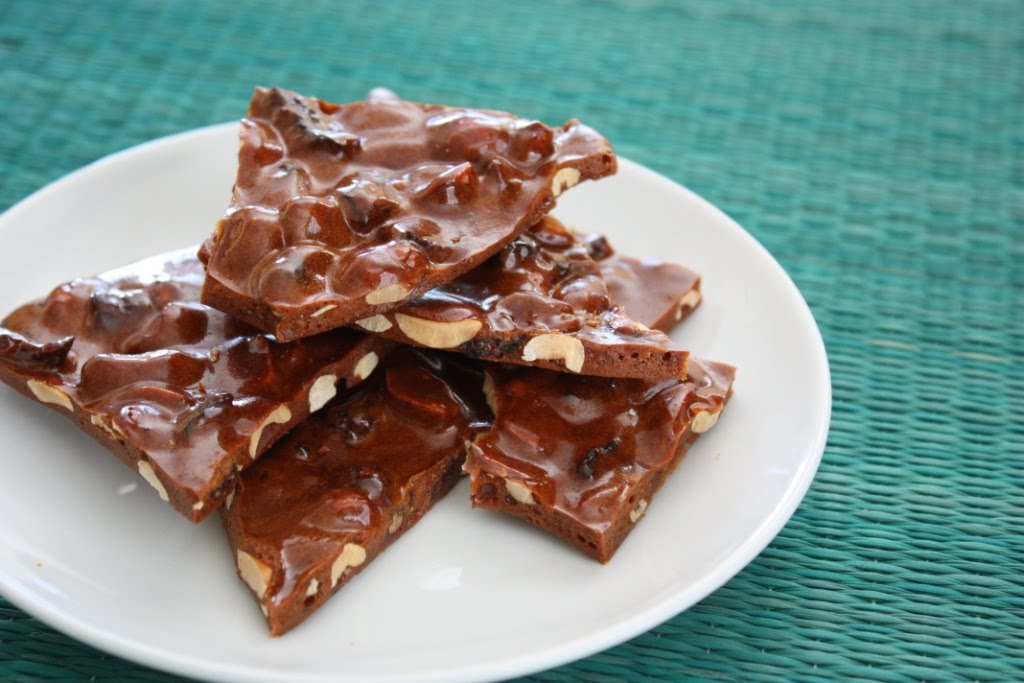
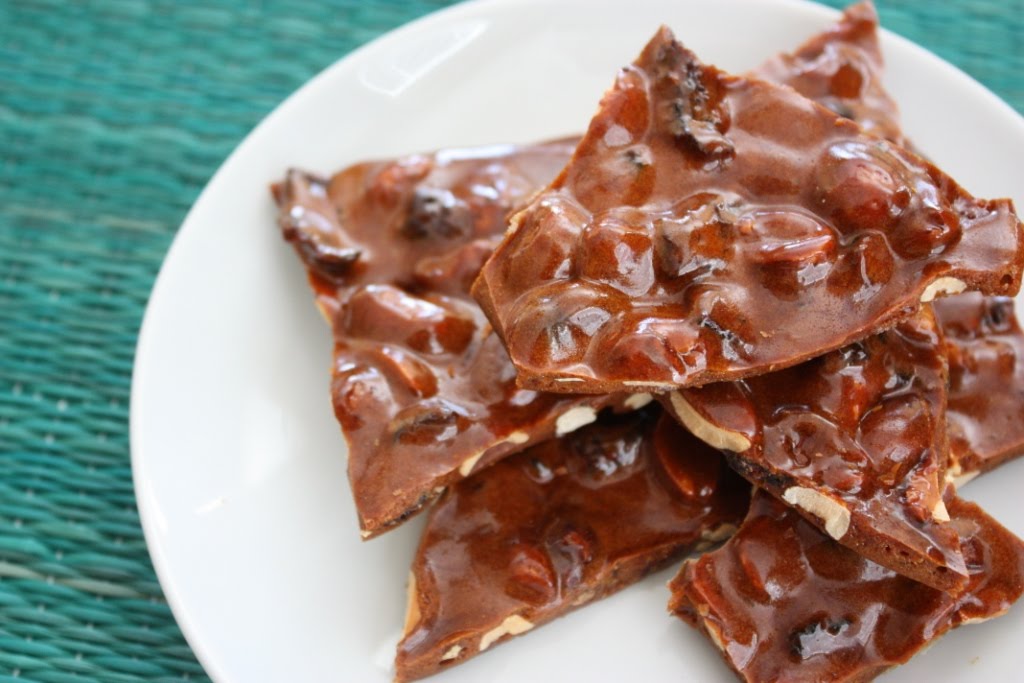
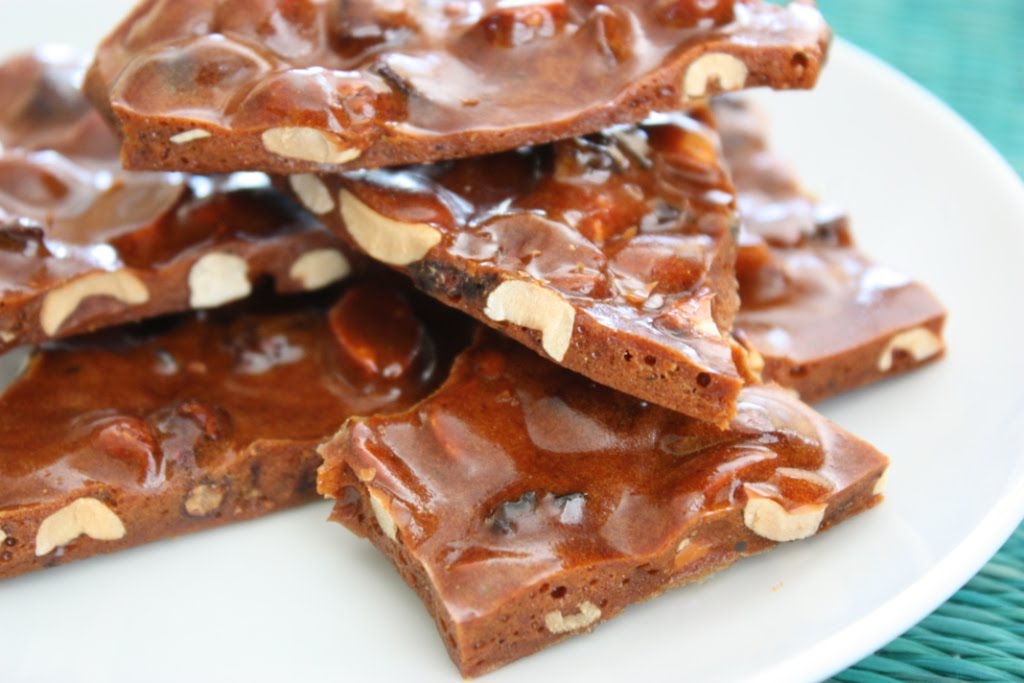
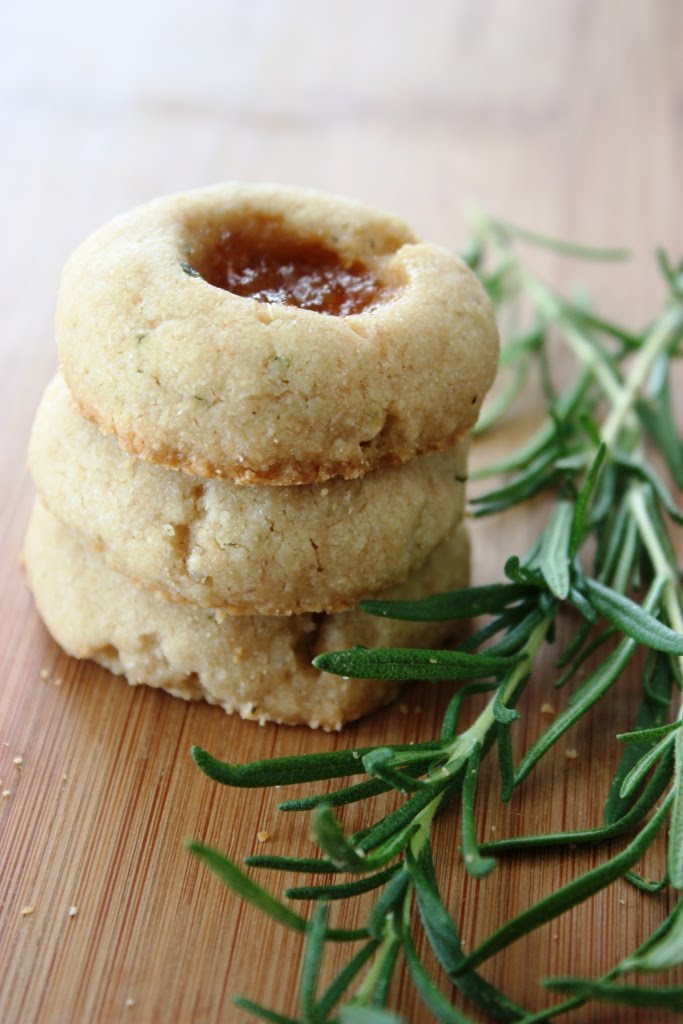
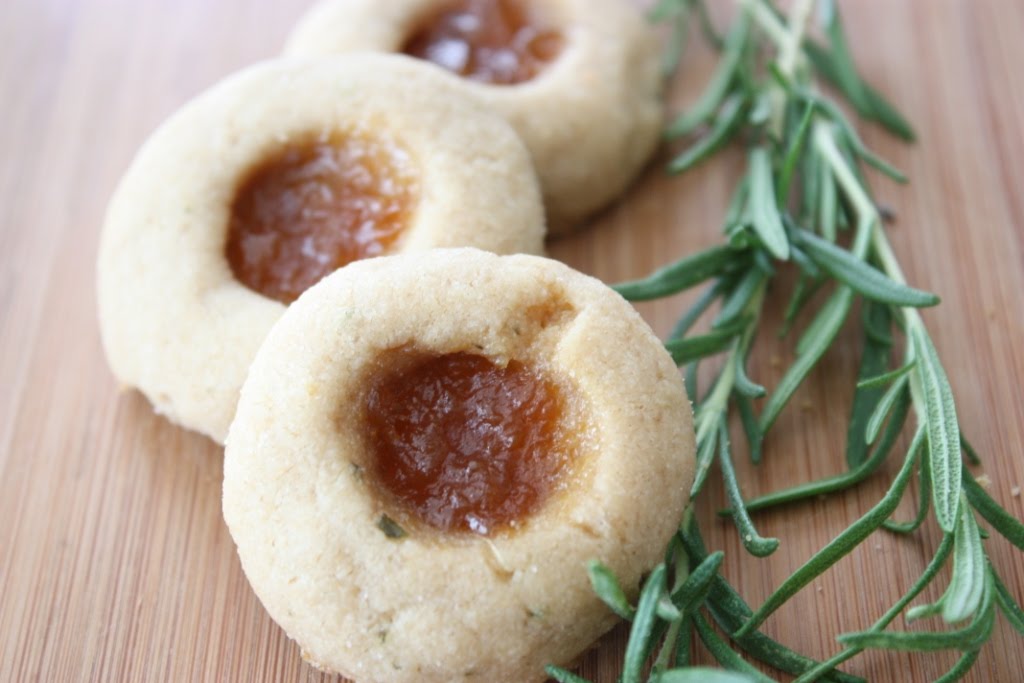
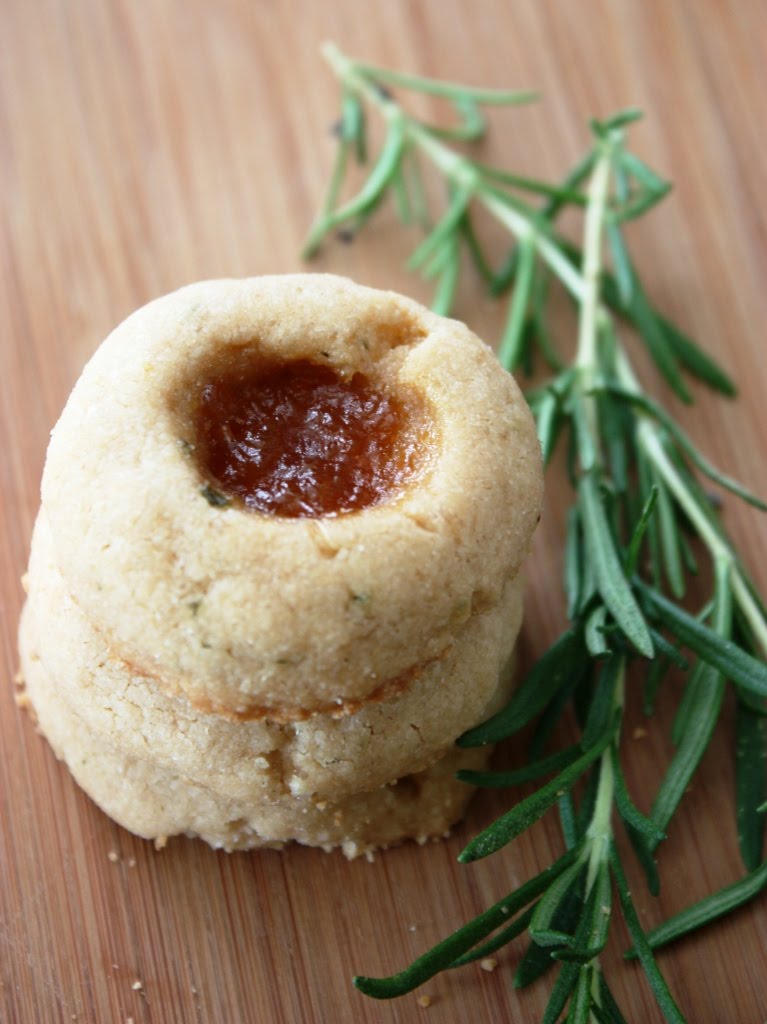
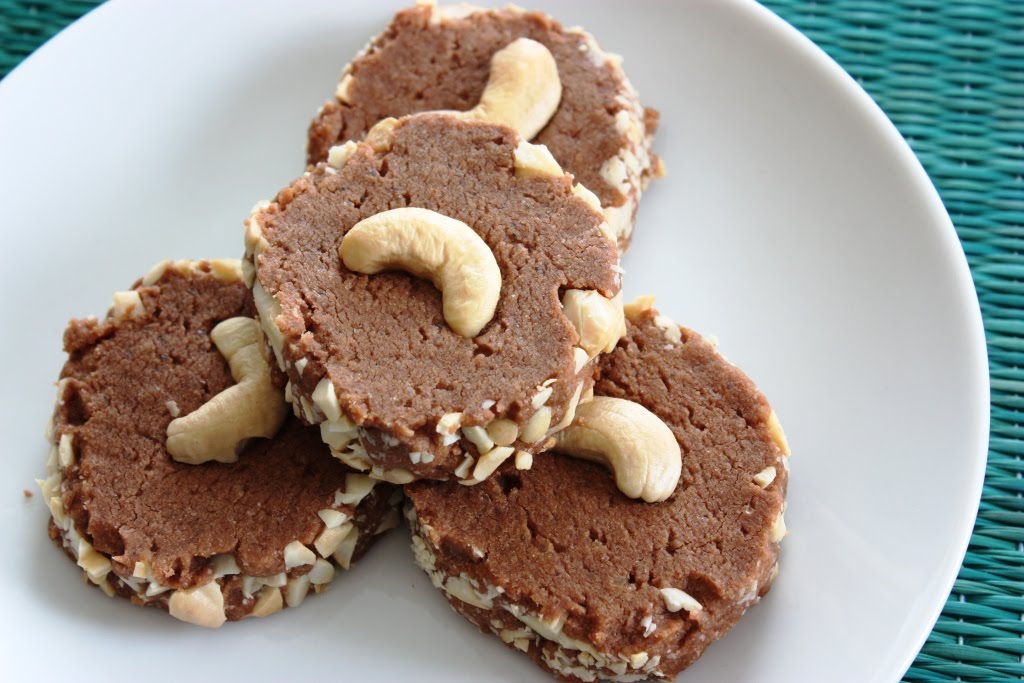
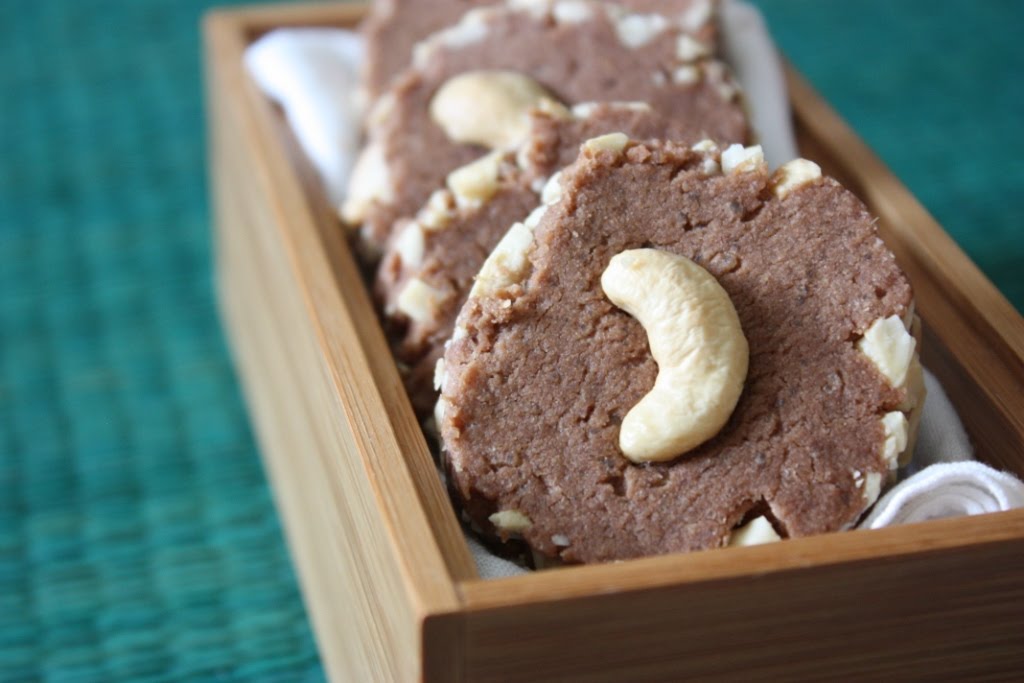
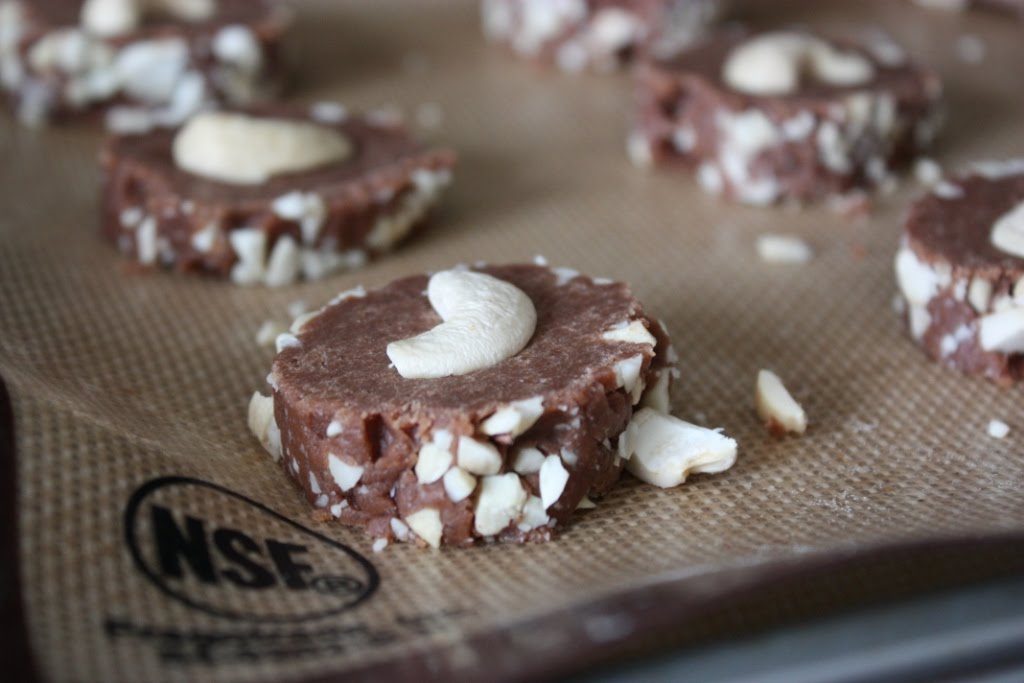
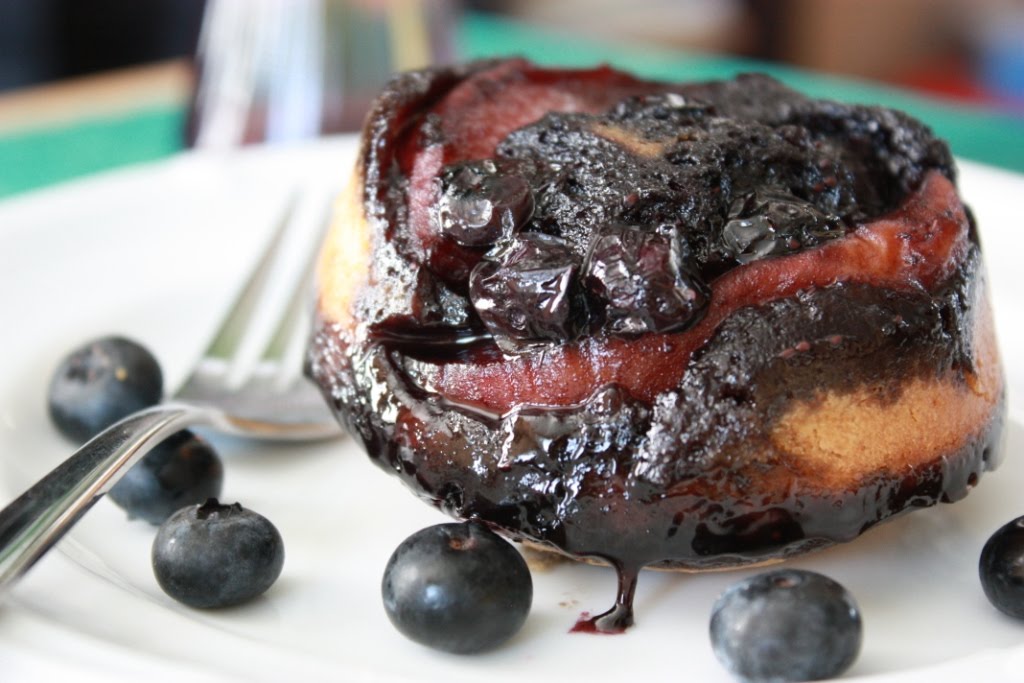
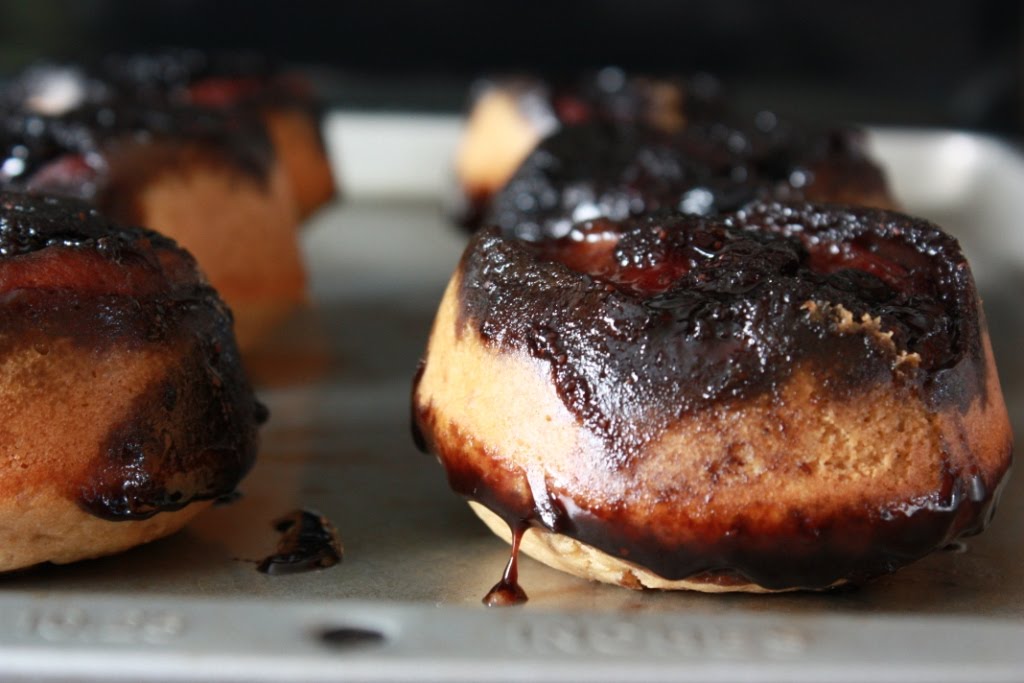
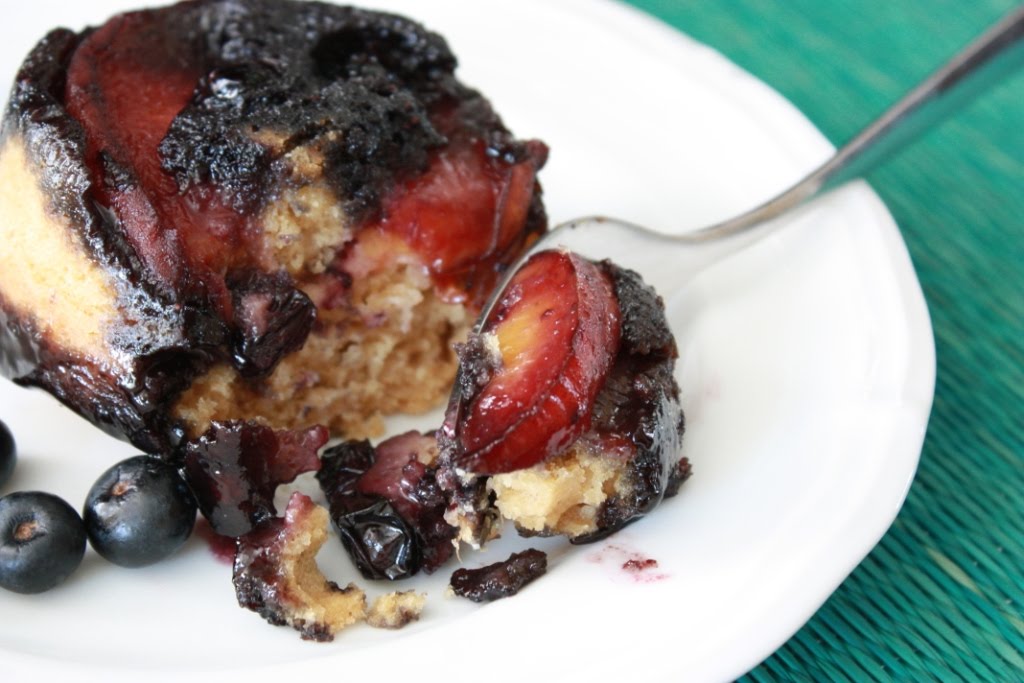
Did I mention that there are dessert recipes in this meat cookbook? I got to test out the Pig Candy recipe and I absolutely love that name. Pig Candy is a peanut brittle-type candy that has the spiciness of crushed red pepper and the saltiness of pastured bacon.

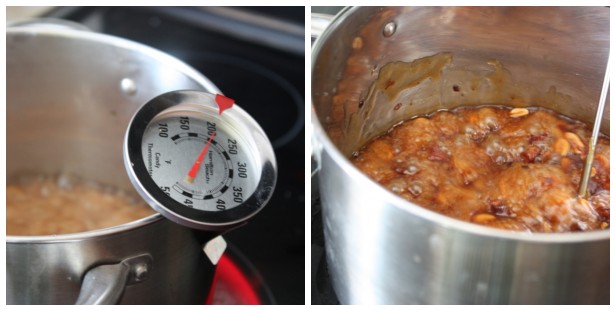
I really wanted to make this recipe with brown rice syrup because I’ve heard that it is a good substitute for corn syrup. However, I couldn’t find it at the markets I went to so I stuck with corn syrup that did not also have HFCS in it. I’m not sure how much of an improvement that is, but I used what I had to work with. In addition, I used Demerara sugar instead of white sugar.

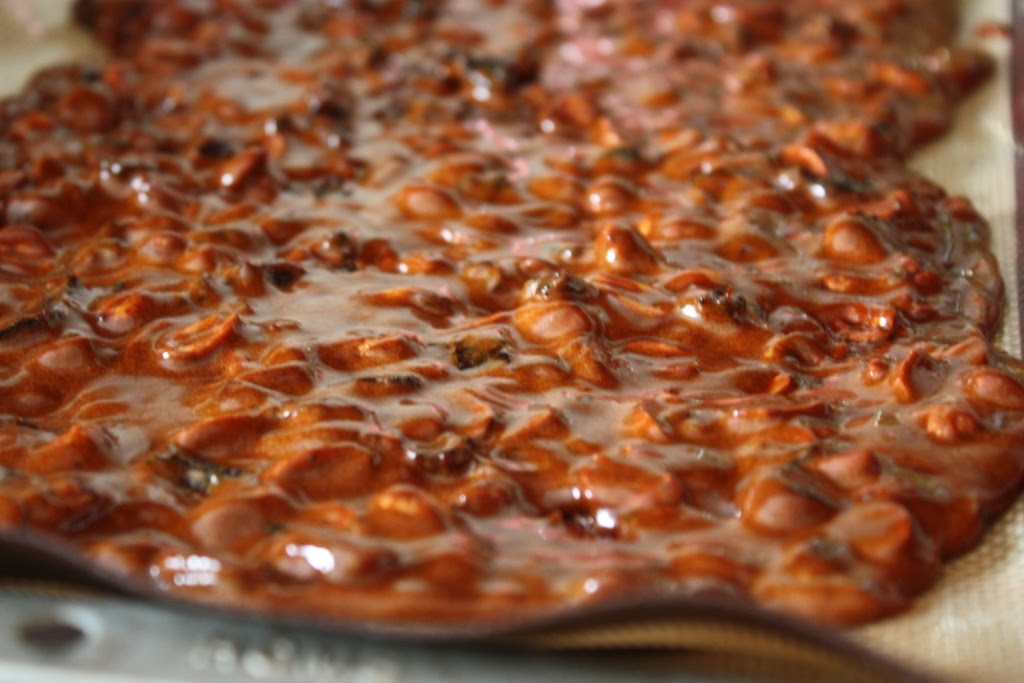
The result? Well, I think I burnt it a bit, and the Demerara did make it much darker. I am a true amateur candy maker and I need a lot more practice so I am going to chalk it up to that. However, despite the fact that I slightly burnt it and it isn’t perfect, we still can’t keep our hands out of it around here.

This recipe is brilliant, in my opinion. Add another one to your holiday baking list!

Pig Candy
Reprinted with permission from Abram Books

Peanut brittle made with crisp pastured bacon and a little red pepper—what could be bad about that? Try this with a glass of Bourbon or cocktails, or serve it at a Super Bowl party—either way, it’s memorable.

MAKES ABOUT 1 POUND BRITTLE

2 tablespoons unsalted butter, softened, plus more for greasing the baking sheet and spatula
1 cup sugar
1⁄2 cup light corn syrup
1⁄2 teaspoon sea salt or smoked salt flakes
1⁄4 cup water
1 cup roasted unsalted peanuts
1⁄4 teaspoon crushed red pepper flakes, or more to taste
1⁄2 cup crumbled crisp-cooked pastured pork bacon (about 6 slices)
1 teaspoon baking soda

Butter a silicone baking liner or cookie sheet, as well as an offset spatula or icing knife, and set aside.

Using a 1-quart saucepan, heat the sugar, corn syrup, salt, and water over medium heat and cook until the sugar dissolves, stirring with a silicone spatula. Stir in the nuts, red pepper, and bacon pieces.

Cook the mixture until it registers 300 to 310 degrees on a candy thermometer—it will form a long thread when you pull the spatula out. Depending on the pan and the efficiency of the burner, this can take up to 20 minutes.

Remove the pan from the heat and carefully but thoroughly stir in the 2 tablespoons butter and the baking soda (take care—the mixture will foam). Immediately pour the mixture onto the prepared pan and, using the offset spatula or an icing knife, spread it into an even layer as thinly as possible. When the brittle is cool enough to handle (but still warm and pliant), use your hands (gloves can help) to stretch and pull it even thinner.

When the brittle is cool, break it into pieces and serve, or store in an airtight tin.

Disclaimer: This cookbook was sent to me free of charge. I was under no obligation to review it and received no compensation for doing so.

Lemon Rosemary Thumbprints with Peach Jam

September 4, 2010

I’m happy to say that Fake Food Free has transitioned to the Substack Newsletter called Every Corner of the World.

I hope to see you there.

 Lemon Rosemary Thumbprints with Peach Jam | Fake Food Free  

One of my favorite cookies that show up at our holiday cookie exchange is a creative combination of lemon and rosemary in a shortbread. A former coworker of mine brings these cookies and I usually get to go home with all the extras. We both love them, but others seem to be resistant to the savory herb flavor in something that is supposed to be strictly sweet.

It is surprising how delicious the rosemary tastes in the cookies. It isn’t an overwhelming flavor, but more of a crisp, refreshing background to the sweet lemon shortbread. I’ve been meaning to make these cookies for a while, but just haven’t gotten around to it.

All that time thinking about them has given me the opportunity to get creative. First, let’s talk about the jam.

I’ve wanted to try some jam with alternative sweeteners all summer, but I’ve been afraid of ruining all that wonderful fresh fruit if it didn’t turn out well. When I came across Stone Fruit Preserves from The Cilantropist, I finally decided to give it a try. The recipe already had honey in it so I added demerara sugar instead of white sugar.

I also cooked it according to other jam recipes I’ve used, boiling it hard for about 15 minutes. I canned the majority of it and left about a ¼ cup as refrigerator jam which I used in the cookies.

For the cookies, I decided to try out some brown rice flour which I have never baked with before. I really like the texture it gave to the cookies. They have almost a cornmeal-like feel in the mouth. I wouldn’t go overboard with it though. A little adds nice texture, but too much makes them gritty.

The rosemary adds that same refreshing flavor as the cookies I enjoy from our holiday party. Despite the fact that there is rosemary, lemon and peach going on here it all blends nicely for one delicious thumbprint cookie. Feel free to substitute any type of jam. I think a lemon curd would be tasty with them, too.

Lemon Rosemary Thumbprints with Peach Jam | Fake Food Free

Lemon Rosemary Thumbprints with Peach Jam

Jam modified from Stone Fruit Preserves at The Cilantropist
Cookies modified from Jam Thumbprint Cookies by Ina Garten

Makes: About 18 cookies

Jam Ingredients

Peach Jam/Filling

2 lb. peaches, peeled, pitted and chopped
1 cup demerara sugar
¼ cup local honey
Juice of ½ a lemon

Jam Prep

Combine all ingredients in a heavy soup pot. Bring to a boil and cook, stirring often, for 15 minutes. You can check to make sure the jam has set up by spooning some on a plate and putting it in the freezer for a couple minutes. If it is thick and spreadable when you get it out, it is ready. Process as you would any jam if you choose to can it, otherwise, place it in a sealable container and store in the refrigerator for up to a week. Makes about 4 cups.

Cookie Ingredients

3/4 cup unsalted butter, softened
½ cup demerara sugar
½ teaspoon vanilla
1 cup brown rice flour
¾ cup white whole wheat flour
½ teaspoon fine ground sea salt
1 teaspoon lemon juice
1 teaspoon lemon zest
½ tablepsoon fresh rosemary, chopped

Cookie Prep

In a mixer, cream together the butter and sugar on medium to medium-high for about 2 minutes. Add the vanilla. Slowly mix in the flours, salt, lemon juice and lemon zest. Finally, mix in the rosemary. Form the dough into a ball, wrap in plastic wrap and refrigerate for at least 30 minutes.

Preheat the oven to 350 degrees F. Roll the dough into about 1 inch balls, maybe just a little larger. Place on an ungreased cookie sheet. Flatten the cookies slightly and make a small indentation in the center with your thumb. Fill the spot with about 1/8 to ¼ tsp of jam. Be carefully not to fill the space too full or it will bake out of the cookie.

Bake for about 12 minutes or until the cookies are firm and slightly browned. Let cool on the baking pan for about 2 minutes and carefully transfer to a cooling rack to allow the jam to set before serving. 

Lemon Rosemary Thumbprints with Peach Jam | Fake Food Free
 
 
Thanks for reading! All images and content are the property of Fake Food Free unless otherwise stated. Please do not republish full recipes and images without written permission. What is okay? Feel free to Pin images, share links to my posts or share the photo in a round up post with the title of this recipe and a link back to the post. Confused about copyright and food blogs? Here is some helpful information on Recipe Attribution. If you want to use a photo or full recipe, just ask. I’m sure we can work something out.  

Chocolate Cashew Shortbread

August 17, 2010

It’s starting.

That point in the year where I see a cookie recipe and I think – oh, now that would be nice on my holiday cookie tray. I know it seems a bit early, but it starts for me about this time every year.

I had cookies on my mind this week because I still have some of the fabulous raw cashews that Oh Nuts sent to me a few weeks ago. While I haven’t tired of eating them as a snack or in stir-fry, I’ve felt the need to get a little more creative.

As a result I turned to my favorite shortbread recipe. I doubled the batch to make a few more for freezing, added cocoa because I’ve been hungry for chocolate, and then incorporated the cashews.

What I like most about these cookies is that they turn out pretty darn cute with very little effort. Few ingredients, easy to bake, and a rich, buttery chocolate flavor with a nutty crunch. Hello, holiday baking list!

Chocolate Cashew Shortbread

1 cup unsalted butter, softened
½ demerara sugar
2 cup white whole wheat flour
2 tbsp cocoa powder
1 tsp vanilla
½ cup raw cashews, finely chopped
24 to 30 raw cashew halves (optional)

In a mixer, combine the butter and sugar. Let it mix on medium and then high for about 3 minutes. The demerara takes a while to get incorporated. Mix in the flour, cocoa powder and vanilla.

On a piece of plastic wrap, spread out the chopped cashews. Remove the cookie dough from the mixing bowl and form it into a log with your hands. The length is up to you and depends on how big you want your cookies. Mine ended up being about 18 inches long, give or take a bit.

Place the cookie dough log on the plastic wrap and gently roll in the cashews until it is fully coated in nuts. Wrap the plastic wrap around the cookie dough and refrigerate for at least 30 minutes.

Preheat the oven to 350 degrees F. Remove the cookie dough from the fridge and use a serrated knife to cut the cookies about a ½ inch in thickness. Place on an ungreased cookie sheet, or on a baking mat on a cookie sheet. Press a cashew half into the top of each cookie if using.

Bake for 12 minutes or just until cookies are firm. The edges and cashews will brown only slightly, if at all. Allow to rest for 3 or 4 minutes and carefully move to a cooling rack. Makes about 24 to 30 cookies.

Disclaimer: I’m sure you are just dying to read one, so you can check out the original when I used Oh Nuts in a recipe a few weeks ago. Oh, alright, I won’t make you surf the web. Oh Nuts were sent to me free of charge for review, no obligation, no compensation.

United Cakes of America – Cookbook Review and Cupcakes!

August 10, 2010

Sometimes practice makes perfect and other times practice makes presentable. The latter is how I feel about my cake baking and decorating skills.

If I haven’t mentioned it before, my mom has had a cake business for most of my life. So I was surrounded by beautifully decorated, great tasting birthday and wedding cakes for as long as I can remember.

Somehow the skill didn’t rub off on me. I’m not sure if it is lack of patience or creativity, but my cakes never turn out the way I want them to. However, it doesn’t keep me from trying, nor does it keep me from loving cakes and cake recipes.

I was excited to receive a copy of United Cakes of America by Warren Brown to review. I really enjoyed his show and story on the Food Network and the theme of this cookbook couldn’t be a better fit for me. It highlights the traditional cake, dessert or pastry from each state around the U.S. There are also a few extra recipes thrown in that utilize specific ingredients from select areas.
United Cakes of America: Recipes Celebrating Every State

It is full of recipes, some of which you may know such as Boston Cream Pie and Carrot Cake from Kansas, and some which may be new such as Chocolate Sauerkraut Cake from Michigan and the Tomato Soup Cake from New Jersey. Personally, I can’t wait to try the Kentucky Jam Cake and the Avocado Cupcakes which feature a California ingredient.

I read a less than stellar review a couple months ago which I can’t locate at the moment, so I wasn’t quite sure what to expect. The major complaint of this post was the freedom the author took with selecting recipes and putting on his own twists.

I really had no problem with Key Lime Pie, Whoopie Pies and Pumpkin Pancakes being in a cake cookbook. I say the more recipes the better. Overall, I’m glad to have this book in my collection. I think I will be referring to every time I need to make a special dessert or get creative with a birthday cake.

A few things I enjoy about this book:

  • The author highlights muscovado sugar and raw sugar for baking in the introductory chapters, two of my favorite baking ingredients.
  • The variety of recipes means I’ll be using it for a lot more than just cakes.
  • I found the steps for each recipe straightforward and easy to follow.
  • I really like all the tips throughout the book, from frosting tips with photos to variations for buttercream.
  • The little history lessons spread throughout the text are especially interesting if you are into culinary history as I am. 

Things I’m not so crazy about:

  •  With the recipe I made below, I had some major differences in yield. The recipe states that I should have gotten 24 cupcakes, but I got 12 and they barely rose to the top of the cup. I did have to leave out one ingredient, but it doesn’t seem like that would equal 12 cupcakes!
  • The recipe text has a bit of creativity. Each ingredient listed is shaded with a different color, incorporating a red, white and blue theme. I found this a bit difficult to read when I was glancing across the counter top at the book.  

The recipe I got to try was the Connecticut Nutmeg Spice Cupcakes with Old-Fashioned Milk Buttercream. The one ingredient I had to leave out was the potato starch. The author says that it lightens the texture of cake and adds a slight flavor, but I was unable to find it at supermarkets here. I didn’t look everywhere, but I did check two with no luck.

The cake itself has a wonderful flavor. The nutmeg and rum (I used a spiced rum) blended so well together. I’ll likely make it again, maybe around the holidays.

As for the frosting, I was so excited to try a new variety. This one whipped up light and frothy and has a thin consistency. It actually reminds me of the fillings my mom used to make when recreating Hostess cakes. It doesn’t store very well, but if you are looking for a light buttercream, this may be a good choice. Next time I will likely use it for a filling rather than a frosting.

My next challenge will be substituting my favorite minimally refined sugars and whole grain flours to see how it turns out!

Connecticut Nutmeg Spice Cupcakes

Reprinted with permission
Yield: One 9-inch layer cake or 24 cupcakes (I got 12)

Dry Ingredients:

8 ounces (1 cup) superfine granulated sugar
5 ounces (1 cup) all-purpose flour
1 tablespoon potato starch
1/8 teaspoon kosher salt
½ teaspoon nutmeg, freshly grated
Pinch of allspice
Pinch of salt
1/8 teaspoon baking soda

Wet Ingredients:

3 ounces (6 tablespoons) butter, melted
¼ cup half-and-half
1 tablespoon rum
½ teaspoon vanilla extract
2 whole eggs
1 egg yolk

Preheat the oven to 325 degrees F and place the rack in the middle position. Lightly coat a cupcake tray with nonstick oil-and-starch spray and line 10 of the cups with paper liners.

Measure and combine all the dry ingredients in a deep bowl. Whisk lightly for about 15 seconds to blend.

Combine all the wet ingredients in a container with a tight-fitting lid and shake well for 15 seconds.

Lightly whisk the wet ingredients into the dry ingredients. This should take about 15 seconds.

Scoop or pour 2 ounces of the batter into the paper-lined cups. (Using a food scooper or ladle works best.)

Bake for 20 to 25 minutes, or until the tops of the cupcakes are golden brown and a wooden skewer inserted in the center of one comes out clean or with just a few crumbs.

Cool the cupcakes for 5 minutes before removing them from the tray. When they are room temperature, frost or decorate with Old-Fashioned Milk Buttercream.

Old-Fashioned Milk Buttercream

 Reprinted with permission

Yield: Enough for one 9-inch layer cake or 24-cupcakes

1 cup milk
2 ounces (1/4 cup) all-purpose flour
8 ounces (2 sticks) unsalted butter
8 ounces (1 cup) superfine granulated sugar
Pinch of salt
2 teaspoons vanilla extract

Quickly whisk together 4 tablespoons of the milk with the flour. This slurry will be somewhat thick, so whisk thoroughly to make it smooth. Press out any lumps with a flexible spatula, if necessary.

Whisk in the rest of the milk and transfer the mixture to a 2-quart heavy-bottom saucepan. Bring to a simmer for about 30 seconds over medium heat, whisking the whole time.

Remove the pan from the stove and place plastic wrap directly against the milk’s surface. (This is the best method to prevent a skin from forming.) Cool to room temperature.

Combine the butter, sugar, salt and vanilla in the bowl of a standing mixer fitted with the paddle attachment and mix at medium to high speed for 5 minutes.

Pour the cooled milk-and-flour mixture into the bowl and beat for another 5 minutes, or longer, as needed to achieve a spreadable consistency.

Update on the yield:  I checked out the recipe again and it looks like the yield mistake was in the press release. The press release says the recipe makes 24 cupcakes which is the recipe I followed and reprinted. However, when checking out the recipe in the book, it says it yields 10 cupcakes. That is much closer to what I got.
Disclaimer: This cookbook was sent to me free of charge. I was under no obligation to review it and received no compensation for doing so.

Blueberry Peach Upside-down Cakes

August 5, 2010

Last fall, before we even moved back to the U.S., I was already excited about blueberry picking. I hadn’t been in almost 3 years and I was determined that I would load the kitchen with an abundance of blueberries picked at a nearby orchard.

As the summer went on, I began to lose hope that I’d make it to the orchard. It is about 1 ½ hours away and there never seemed to be a convenient weekend. When there was, it was typically on Sunday when the place was closed.

A couple weeks ago, my nephew came to visit for a few days and I had just found out about another orchard that was a little closer to where we are living, Reed Valley Orchard. It appeared that blueberries were long gone, but they had an overabundance of Freestone peaches. With a day free and lots of time to spend together, we set off to check this place out.

After, about an hour, and 4 miles creeping along a one lane road, part gravel, we finally found it. I immediately knew it was worth the trip. In addition to the rustic, little building full of fruit preserves and crafts, it was fruit-tree city. It turns out that Reed Valley has just about everything in its respective season – cherries, blackberries, raspberries, pears, nectarines, peaches, plums, pumpkins and apples.

I was excited enough about the peaches, but when I rounded the corner and saw a girl sorting through blueberries (yes, blueberries!) I was ecstatic! It turns out they had about one row still bearing. My lucky day!

We started with the peaches and the amount on the trees was incredible. You could have just walked around holding out your hand and one was bound to fall into it. We filled up our baskets with no problem. That is, after I spend about 15 minutes taking pictures.

Next were the blueberries. We had quite the bucket to fill up and I think my nephew and I both got a good idea of just how small blueberries are when you are trying to fill a whole bucket. It took a very long time, but I wasn’t leaving without more than I knew what to do with.

I picked up some of these too which I’d never had before – Donut Peaches. I guess they also go by the name Saturn Peaches. The orchard only has a few of these trees so they were picked that morning and available in the store. They had that distinctive peach flavor, but a firmer flesh.

This was the total damage, along with a box of peaches considered seconds for making jam.

The donut peaches we ate fresh, and I showed you the jam I made with seconds this past week. I almost made it through the entire bucket of blueberries before I separated some out for freezing. Most of the other peaches we’ve eaten fresh as well, but I had a strong urge to bake something. I rarely ignore these types of urges and this time cake was calling my name.

I found a pineapple upside-cake recipe in my trusty Betty Crocker Cookbook Bridal Edition. I reduced and changed the type of sugar, reduced the butter and changed the flour.

Then I decided I wanted mini-cakes. You know, because mini anything is just too darn cute to pass up. I used the large, six-muffin pan my mom got for me recently. The kind that is ideal for mini-meatloaves. A little big for a muffin, but not bad for dinner or dessert.

Voila – Blueberry Peach Upside-down Cakes. I’m really happy with how these turned out. Next time I may add a few more blueberries, but the cake was nice and tender, and the dessert as a whole wasn’t overwhelmingly sweet. I think the raw sugars and whole wheat flour really work to balance this. Now, I’m thinking about which fruit is next. Maybe plums…

Blueberry Peach Upside-down Cakes
Cake modified from Pineapple Upside-Down Cake, Betty Crocker Cookbook

1 peach
½ cup blueberries, 30-40
½ cup mascavo sugar
¼ cup unsalted butter
½ cup demerara sugar
¼ cup unsalted butter, softened
1 egg
¾ cup milk
1 ½ tsp baking powder
¼ tsp salt
1 1/3 cup white whole wheat flour
Preheat the oven to 350 degrees F. Slice the peach into 12 slices, you’ll need 2 for each cake. In a saucepan, combine the mascavo sugar and a ¼ cup of the butter. Cook over medium heat until the butter is melted and the sugar dissolved.
Pour the sugar syrup evenly into each of the 6 slots. Sprinkle 5 to 6 blueberries in each and top with two slices of peach in a single layer.
In a mixing bowl, cream together the sugar and the butter until combined, then add the egg. Mix in the milk. Next add the baking powder, salt, and flour. Mix just until combined. Divide the batter evenly and pour over the fruit.
Bake for 20 to 25 minutes or until the cake is firm in the center. You can use the toothpick test. Remove from the oven and place a cookie sheet, top down, over the muffin tin. Flip the muffin tin and the cookie sheet. Allow the muffin tin to rest there for about 5 minutes so the syrup will run down over the cake.

Gently remove the muffin tin from the cakes. Serve warm or at room temperature.

Want to create beautiful food and product photos that you can't wait to share?!
Discover your style, control the light, and shoot using the tool you know how to use (yes, your phone included). Learn about free resources, Live Q&As with Lori, and online courses you can take from anywhere in the world!
We respect your privacy. Unsubscribe at any time.