Browsing Category

Book and Product Reviews

Yellow Squash Dumplings with Spiced Tomato Sauce from Vegetarian for a New Generation

April 28, 2014
Yellow Squash Dumplings with Spiced Tomato Sauce from Vegetarian for a New Generation | Fake Food Free

Growing up with a big garden I probably liked vegetables more than most kids, but I can still remember my brother and I taking our peas like pills. Pop them in your mouth, hold your breath, take a big gulp of iced tea and swallow. It put them safely in your stomach without having to taste them. I’m sure there where dinners where broccoli and green beans had a similar fate.

When I think back, I can’t quite remember when I started to truly enjoy vegetables, but I’d be willing to bet it was well into adulthood. I’m not sure if it was the taste or an increased knowledge of the health benefit that helped me turn a corner, but getting my recommended servings of vegetables is easy-breezy these days.

Now that doesn’t mean I don’t turn my nose up at bland broccoli, or eat all my vegetables first to get it over with from time to time. Everyone has their days. But I really do look forward to kale, tomatoes, arugula, zucchini and just about every other veggie out there.

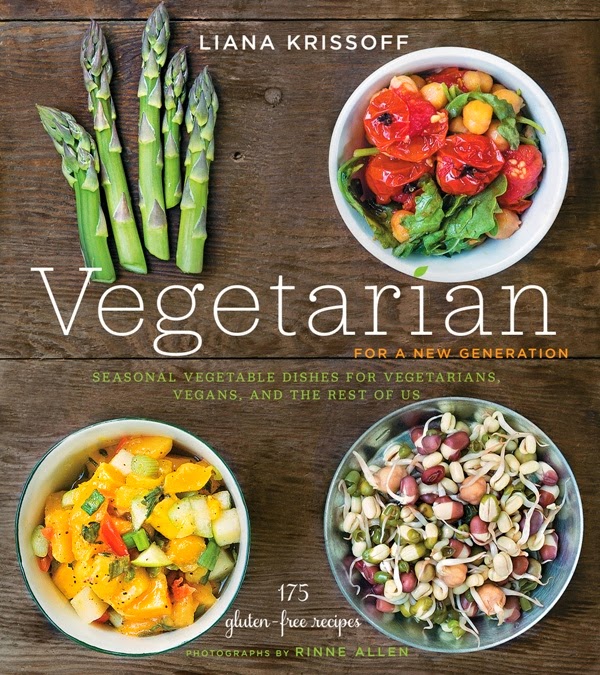
The only thing I welcome as much as a new season of fresh vegetables is a book that gives me new ideas for how to prepare them. So I’m practically giddy over Liana Krissoff’s new cookbook, Vegetarian for a New Generation.

If you’ve been reading this blog for a while, you know that I have her other two cookbooks, Canning for a New Generation and Whole Grains for a New Generation. Both are excellent. I use them all the time to get new ideas for canning and ways to use grains. Liana was kind enough to answer some interview questions for me when Whole Grains came out. She truly inspires me with her creative ideas and delicious recipes.

Vegetarian for a New Generation carries on the tradition of those other two books with 175 recipes that will have you repeatedly saying – That’s such a great idea! The gorgeous food photos will have you day dreaming about how good it must taste.

The recipes in the book are also gluten-free. I don’t eat 100 percent gluten-free, but what makes this great for me is that the focus is on vegetables, not a lot of heavy fillers like breads and grains. The recipes are light and refreshing while being comforting at the same time. Not an easy task with vegetables, but well accomplished in this book.

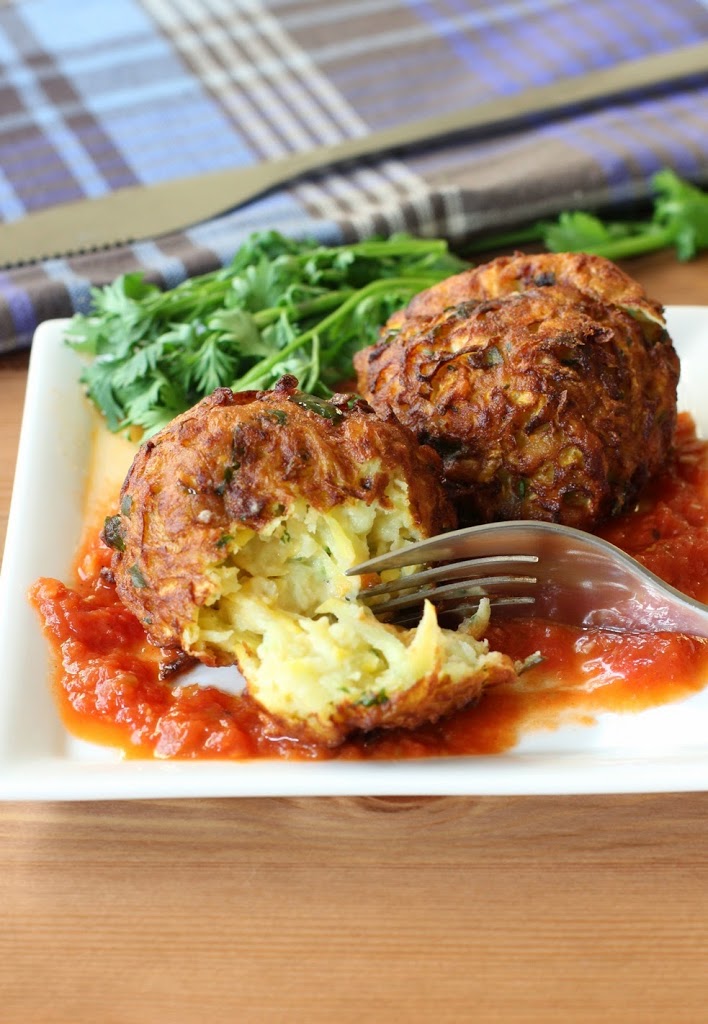
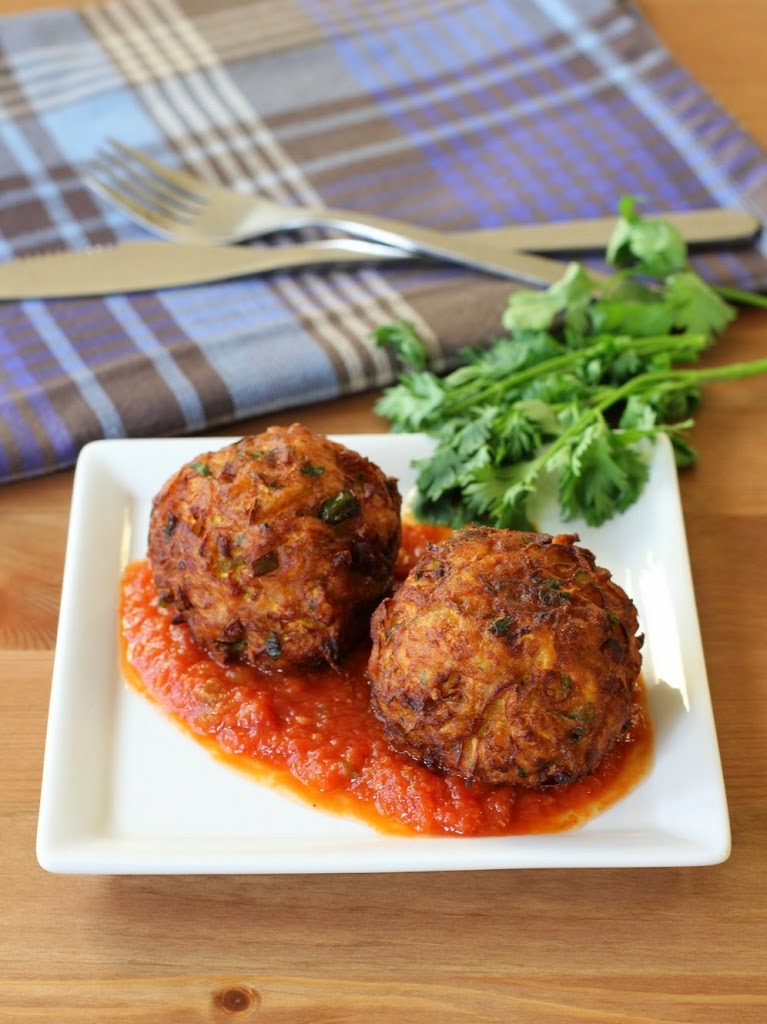
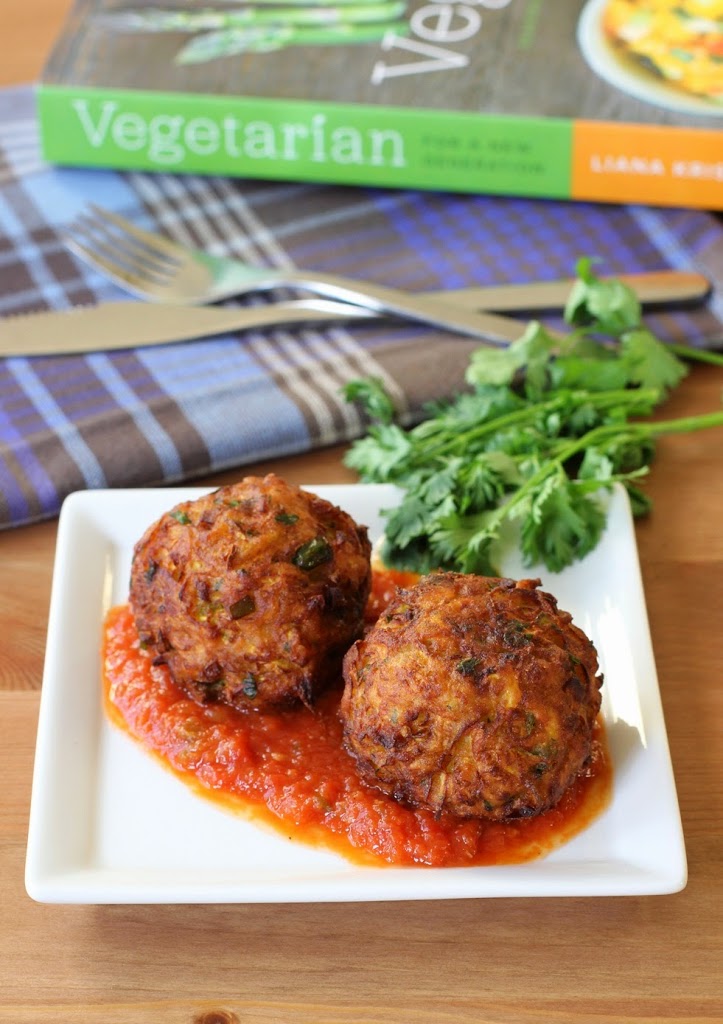
The recipe I had to try was the Yellow Squash Dumplings with Spiced Tomato Sauce. It caught my attention because the herbs and spices used were very different from what I would use with yellow squash. It also used garbanzo bean flour to thicken the batter, something I’ve been been experimenting a lot with lately. I didn’t doubt that it would be delicious and I wasn’t disappointed. The hint of cilantro in the dumplings went so well with the clove and cardamom in the tomato sauce.

Yellow Squash Dumplings with Spiced Tomato Sauce from Vegetarian for a New Generation | Fake Food Free

It was flavors I would never combine on my own which speaks to the value of this book. It will help you step out of your vegetarian cooking comfort zone. It’s almost like tasting vegetables for the first time and learning that you really like them. No swallowing them like pills required.

Yellow Squash Dumplings with Spiced Tomato Sauce

©2014 Liana Krissoff. Reprinted with permission from Abrams Books.

Serves 2 to 4
Vegan

From the book:  
These tender, lightly spiced walnut-size balls are like a cross between pakora (batter-fried vegetable fritters) and vadai (soft grain- or legume-based dumplings). They’re fried and deeply browned, but not crisp-crunchy. The spicing here is fairly mild, and you should feel free to add more chile, some garam masala (page 247), or any other spices you wish. Even if you’re wary of frying (as I am—I really dislike cleaning up after a messy frying experience), you should try these: They don’t spatter or absorb much oil at all, and the croquettes don’t even have to be served right after frying, as they’re served with a sauce and aren’t meant to be especially crisp or crunchy anyway.

I’d suggest doubling the recipe and freezing the extra fried balls and sauce separately—they reheat nicely for a quick meal. The warmed-up sauce can be used in nearly infinite ways: Simmer some chunks of potato and cauliflower in it until tender, then add a few croquettes to warm through and serve over Spiced Brown Rice (page 219).

For the Tomato Sauce

2 tablespoons vegetable oil
1 to 2 fresh hot green or red chiles, seeded and chopped
2 cloves garlic, chopped
3/4-inch (12-mm) piece fresh ginger, peeled and chopped
1/2 teaspoon freshly ground cardamom
1/4 teaspoon ground cloves
2 bay leaves
1 (28-ounce/790-g) can whole peeled tomatoes with their juices
Salt
Pinch of sugar

For the Squash Dumplings

1 pound (455 g) yellow squash (about 3)
1/2 to 1 cup (60 to 120 g) chickpea flour (besan), or more if needed
1 fresh hot green or red chile, seeded and minced
1 tablespoon chopped fresh cilantro
1/2 teaspoon grated fresh ginger
Salt
Pinch of freshly grated nutmeg
Vegetable oil, for deep-frying

Make the Tomato Sauce
In a medium saucepan, heat the oil over medium-high heat until it shimmers. Add the chiles, garlic, and ginger and cook, stirring, until softened but not browned, about 2 minutes. Add the cardamom, cloves, and bay leaves and stir for 10 seconds, then pour in the tomatoes and their juices. Add a generous pinch of salt and the sugar. Bring to a boil, then lower the heat and simmer, stirring to break up the tomatoes a bit, until the flavors are developed and the liquid is reduced a bit, about 20 minutes.

Remove and discard the bay leaves. Puree the sauce using an immersion blender. Taste and add more salt, if needed. Cover to keep warm and set aside. (The sauce can be made, cooled, and stored in an airtight container in the refrigerator for several days. It also freezes very well.)

Make the Squash Dumplings
Coarsely grate the squash into a large bowl. If the squash is quite damp, squeeze handfuls of the shreds over the sink to extract as much liquid as possible. Sift 1/2 cup (60 g) of the chickpea flour through a sieve into the squash. Add the chile, cilantro, ginger, 1/2 teaspoon salt, and nutmeg and stir very well. If it’s too soft or wet to shape into a very loose, soft ball, add more chickpea flour, a little at a time, until it comes together.

In a large, heavy saucepan, heat 2 inches (5 cm) of oil until it registers about 375°F (190°C) on a candy thermometer. Line a plate with paper towels.

Using your hands, shape some of the squash mixture into a walnut-size ball—it will be soft and will just barely hold its shape, but don’t worry, as it’ll firm up in the oil. Set it in a slotted spoon and quickly lower it into the oil; repeat to make 2 or 3 more balls. Don’t overcrowd the oil. Fry, turning occasionally, until deeply browned and cooked through, about 6 minutes. If the balls start to brown too quickly, lower the heat. Remove to the paper towels to drain. Repeat until you have used all of the squash mixture.

Reheat the sauce, if necessary. Serve the dumplings hot or warm, or even at room temperature, with the sauce ladled over or under them.

Variation
Instead of the spiced tomato sauce, serve the croquettes with a simple raita: Rinse off the grater and run a large seeded cucumber (peeled or not) through it. Squeeze out all the excess moisture and put it in a medium bowl. Finely grate 1 clove garlic into the cucumber, add salt, pepper, and chopped fresh cilantro to taste, and stir in about 1 cup (240 ml) plain Greek yogurt.

Yellow Squash Dumplings with Spiced Tomato Sauce from Vegetarian for a New Generation | Fake Food Free

Disclosure: This book was sent to me for review purposes. I was not required to write about it and received no compensation for doing so. Recipe was reprinted with permission from the publisher.

Poached Egg on Spicy Lentils Recipe from The Healthy Slow Cooker

April 22, 2014
Poached Egg on Spicy Lentils Recipe from The Healthy Slow Cooker | Fake Food Free

I don’t use many small kitchen appliances that do the same type of work as my stove and oven. I’ve never been a huge fan of toaster ovens taking up my valuable counter space, and while I wouldn’t want to be without my microwave, it’s used for quick reheating, not so much for cooking.

But things change when we start talking about the slow cooker. Yes, I can cook beans, soups and stews on the stovetop, but I’d rather not be in the kitchen for hours. I’m amazed at how much I still use it, even now that I’m back working at home again (with extra time to cook dinner that was once spent commuting).

I have to admit that about the only thing that comes out of it these days are beans. Delicious beans, but even I can get tired of them every now and then.

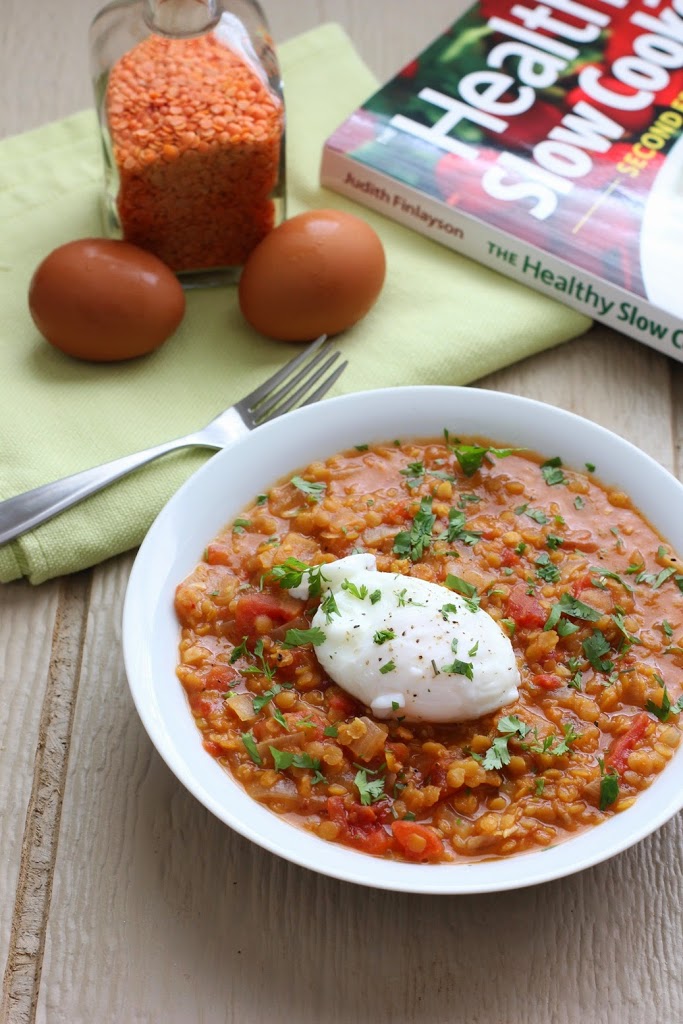
A few weeks ago I received The Healthy Slow Cooker, Second Edition by Judith Finlayson. It was perfect timing because I was so ready to get out of my slow cooked bean rut.

This book is a revised version of one published in 2006. The front cover states that the book has “135 Gluten-Free Recipes for Health and Wellness,” so I had plenty to explore from cover to cover.

A highlight for me is that many of the recipes in this book can cook for 5 to 6 hours on low. This is something I look for in slow cooker recipes because if it cooks in an hour or two the idea of slow cooking while you are away for the day kind of goes out the window. That being said, the recipe instructions include a low and high setting. So if you will be around and want to speed things up, you can decrease the cooking time by setting it to high and the recipe tells you how.

Poached Egg on Spicy Lentils Recipe from The Healthy Slow Cooker | Fake Food Free

The recipes are also light on the pre and post cooking. To me, there is no reason to use a slow cooker if you are going to spend an hour cooking the food before you…cook the food. The recipe I chose to make is a good example of this.

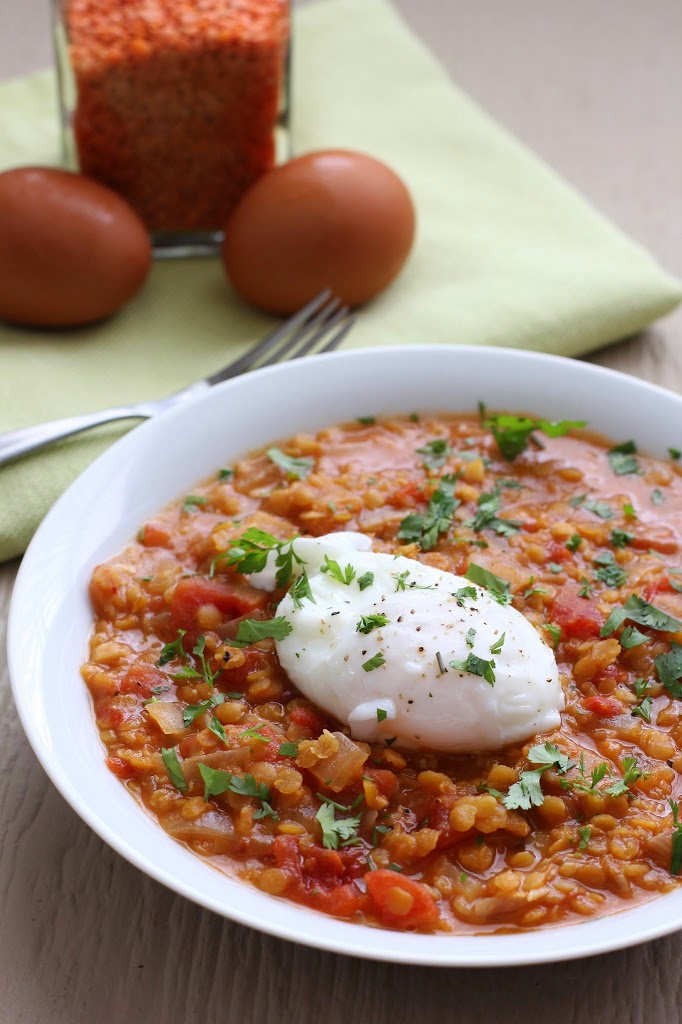
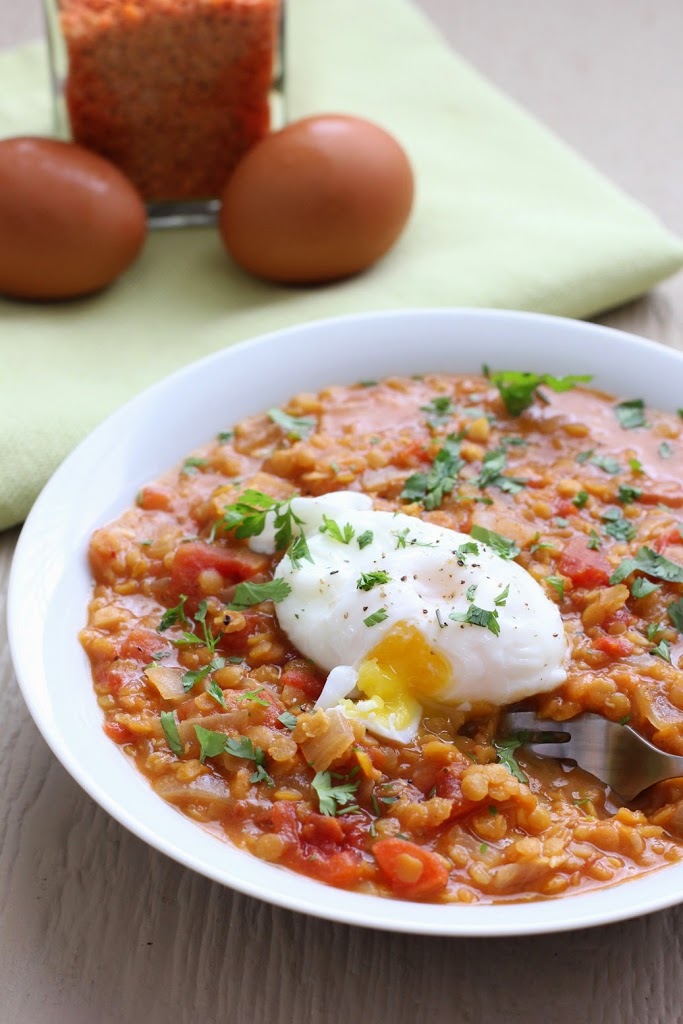
I didn’t stray too far from beans, but these Poached Eggs on Spicy Lentils were a huge hit around here. The recipe says that it is a great cold weather dish, but I could eat this any time of year.

The lentils are full of flavor and you can make them as mild or spicy as you wish. With the coconut milk, they cooked into a rich and creamy stew that was perfect with an egg on top. The recipe requires about 5 minutes of stove cooking time before adding everything to the cooker. About 30 minutes before you are ready to serve, you stir in coconut milk and make the poached eggs to go on top. It was super simple.

The book contains everything from breakfast and appetizers to sauces, dinners and desserts. Only 134 recipes left to make and with things like Maple Sweetened Congee and Sweet Potato Coconut Curry with Shrimp on the list, I might just do it.

Poached Egg on Spicy Lentils Recipe from The Healthy Slow Cooker | Fake Food Free

Poached Eggs on Spicy Lentils

Courtesy of The Healthy Slow Cooker, Second Edition by Judith Finlayson © 2014 www.robertrose.ca Reprinted with publisher permission.

This delicious combination is a great cold-weather dish. Add the chiles if you prefer a little spice and accompany with warm gluten-free Indian bread, such as Yogurt Flatbread, and hot white rice. The Egg and Lentil Curry (see Variation in the book) is a great dish for a buffet table or as part of an Indian-themed meal.

Medium (approx. 4 quart) slow cooker

1 tbsp    olive oil    15 mL
2    onions, finely chopped    2
1 tbsp    minced garlic    15 mL
1 tbsp    minced ginger root      15 mL
1 tsp    ground coriander    5 mL
1 tsp    ground cumin    5 mL
1 tsp    cracked black peppercorns    5 mL
1 cup    red lentils, rinsed    250 mL
1    can (28 oz/796 mL) no-salt-added tomatoes with juice, coarsely chopped
2 cups    vegetable stock    500 mL
1 cup    coconut milk    250 mL
Salt
1    long green chile pepper or 2 Thai bird’s-eye chiles, finely chopped, optional
6    eggs    6
1⁄4 cup    finely chopped parsley leaves    60 mL

1. In a large skillet, heat oil over medium heat. Add onions and cook, stirring, until softened, about 3 minutes. Add garlic, ginger, coriander, cumin and peppercorns and cook, stirring, for 1 minute. Add lentils, tomatoes with juice and vegetable stock and bring to a boil. Transfer to slow cooker stoneware.

2. Cover and cook on Low for 6 hours or on High for 4 hours, until lentils are tender and mixture is bubbly. Stir in coconut milk, salt, to taste, and chile pepper, if using. Cover and cook for 20 to 30 minutes until heated through.

3. When ready to serve, ladle into soup bowls and top each serving with a poached egg (see Tip). Garnish with parsley.

Tip
To poach eggs: In a deep skillet, bring about 2 inches (5 cm) lightly salted water to a boil over medium heat. Reduce heat to low. Break eggs into a measuring cup and, holding the cup close to the surface of the water, slip the eggs into the pan. Cook until whites are set and centers are still soft, 3 to 4 minutes. Remove with a slotted spoon.

Makes 6 servings
Can Be Halved

Disclosure: This book was sent to me for review purposes. I was not required to post about it and received no compensation for doing so.

Easy 4 Ingredient Homemade Peanut Butter Cups Recipe

April 18, 2014
 
Easy 4 Ingredient Homemade Peanut Butter Cups Recipe | Fake Food Free
 
 
When a holiday occurs on the same date every year, I’m usually pretty good at being prepared. But Easter? Easter gets me every time.


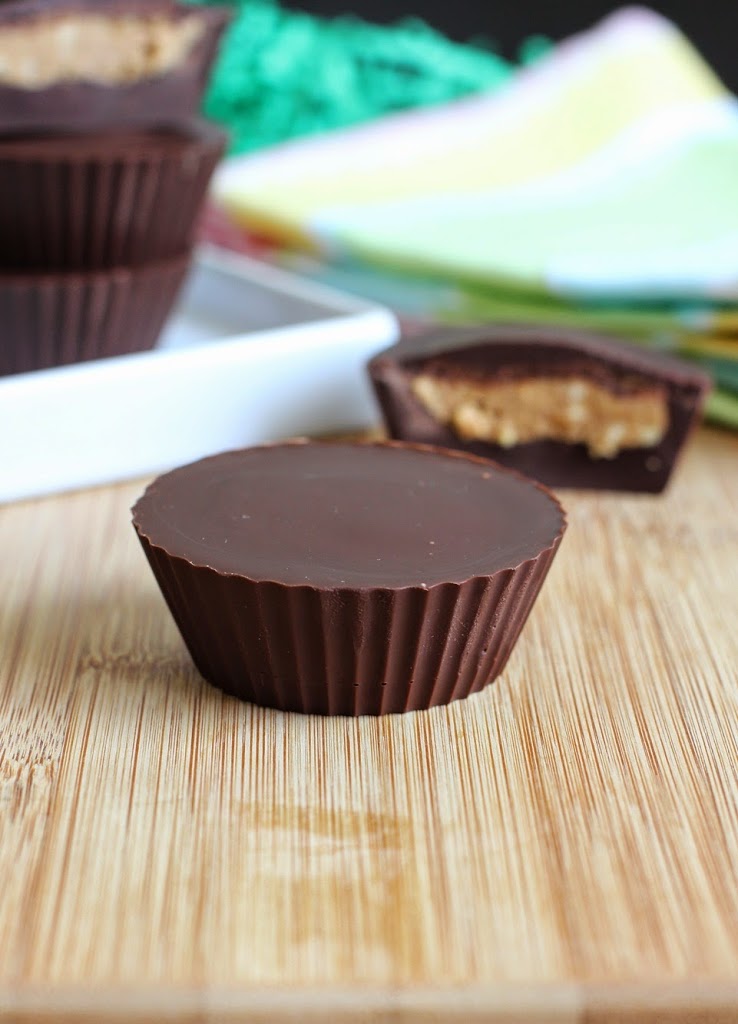
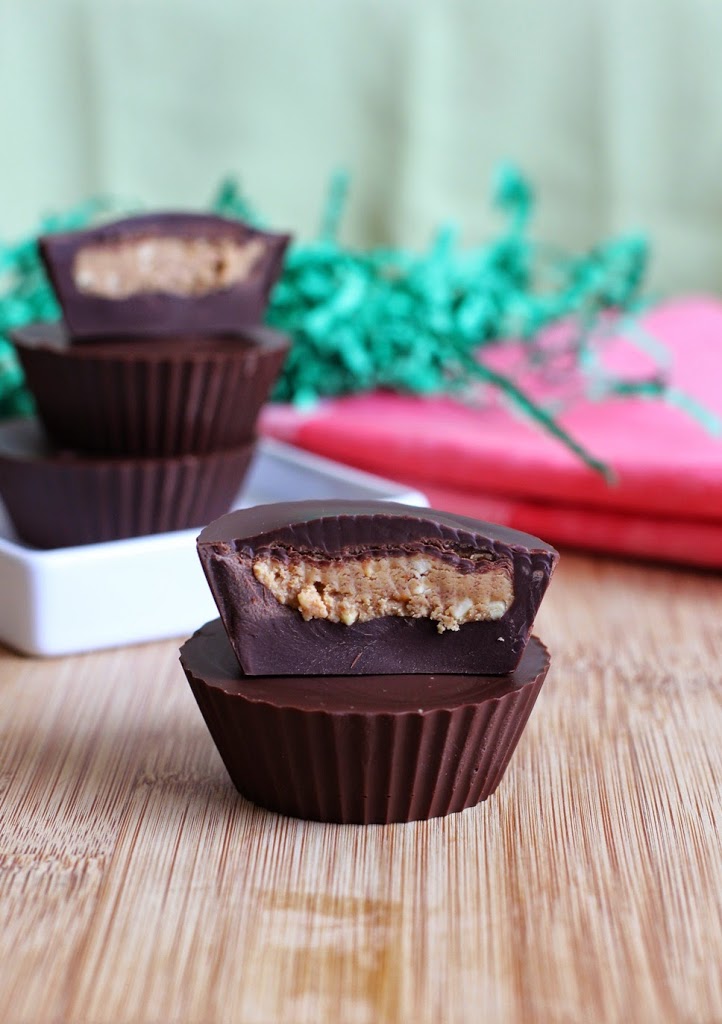
As seems to be the tradition, it snuck up on me once again. I just hate to miss making something for a day that can be celebrated with chocolate, so I got busy and put together some super simple, 4 ingredient peanut butter cups.


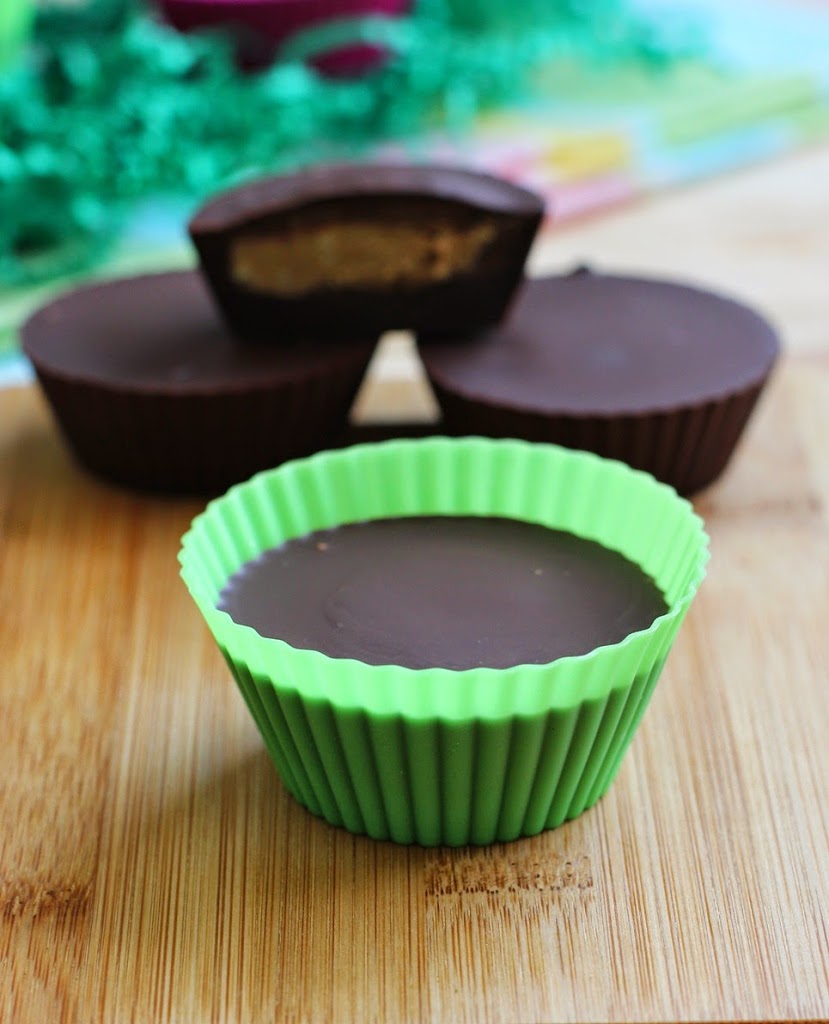
A little while back, I was sent these colorful, BPA-free silicone baking cups from The New York Baking Company. These flexible little guys turned out to be a candy cup making dream. They are oven safe up to 475 degrees F as well as freezer, microwave and dishwasher safe. I used them to form and freeze my peanut butter cups and they peeled off so easy for a perfectly ridged edge. They are such a great thing to have around for both baking and candy making.


Easy 4 Ingredient Homemade Peanut Butter Cups Recipe | Fake Food Free
 
I tried to keep these peanut butter cups as simple, clean and unrefined as possible for a better treat. While they only contain four ingredients, I do want to note that natural peanut butters can vary widely in texture. If your jar is brand new, you may have some extra oil to deal with, but if it’s been in the fridge a few days it will likely be firmer. Textures can vary by brand as well.


Right now I use the natural crunchy Kirkland brand peanut butter from Costco – just peanuts and sea salt. My peanut butter was thick after being refrigerated. If you are using a just opened jar, you might need to add a little more powdered sugar when making the filling. You want it to be like a thick cookie dough that you can form into a small disk.


These cups are large and super rich so one can easily serve two people. But I promise not to judge if you eat the whole thing.


Easy 4 Ingredient Homemade Peanut Butter Cups Recipe | Fake Food Free
 

Easy 4 Ingredient Homemade Peanut Butter Cups

Makes: 8 large peanut butter cups


Ingredients:
1 cup dark chocolate chips (I use Ghirardelli® 60% Cacao Bittersweet Chocolate Chips)
2 tsp virgin coconut oil
½ cup crunchy natural peanut butter
2 tbsp powdered sugar (I use Trader Joe’s Organic)


Prep:
 
Place the chocolate chips in a microwave-safe bowl and add the coconut oil. Microwave on high until melted, about 2 minutes, but be sure to stir it every 30 seconds.


Arrange 8 silicone baking cups on a baking sheet. Transfer 1 tablespoon of melted chocolate to each cup. Place the baking sheet in the freezer for 5 minutes.


In the bowl of mixer fitted with the paddle attachment, add the peanut butter and powdered sugar. Mix on high until combined, about 45 seconds. It should resemble a firm cookie dough that can be shaped by hand.


Form the peanut butter into 8 small flat disks. Place a disk in each cup over the bottom layer of chocolate.


Pour 1 tablespoon of the remaining chocolate over the peanut butter disks. Go back with any remaining chocolate and fill the cups so that the chocolate covers all of the peanut butter.


Gently tap the baking sheet on the countertop to smooth out the surface of the peanut butter cups and release any air bubbles. Freeze for 15 to 20 minutes, or until firm.


Peel away the baking cups and store in an airtight container in the refrigerator until ready to serve.


Disclosure: The silicone baking cups mentioned in this post where provided by Rizzi from The New York Baking Company for review purposes. I was not required to write about them and received no compensation for doing so.
 
 
Thanks for reading! All images and content are the property of Fake Food Free unless otherwise stated. Please do not republish full recipes and images without written permission. What is okay? Feel free to Pin images, share links to my posts or share the photo in a round up post with the title of this recipe and a link back to the post. Confused about copyright and food blogs? Here is some helpful information on Recipe Attribution. If you want to use a photo or full recipe, just ask. I’m sure we can work something out.

Savory Profiteroles with Asparagus and Goat Cheese Recipe

April 16, 2014

Back in early March we vacationed in Antigua. It was our second trip there and I highly recommend it — gorgeous island, friendly people and outstanding food and drink. I did a post on the food highlights from our last trip, but this time I brought back some ideas to recreate in my own kitchen.

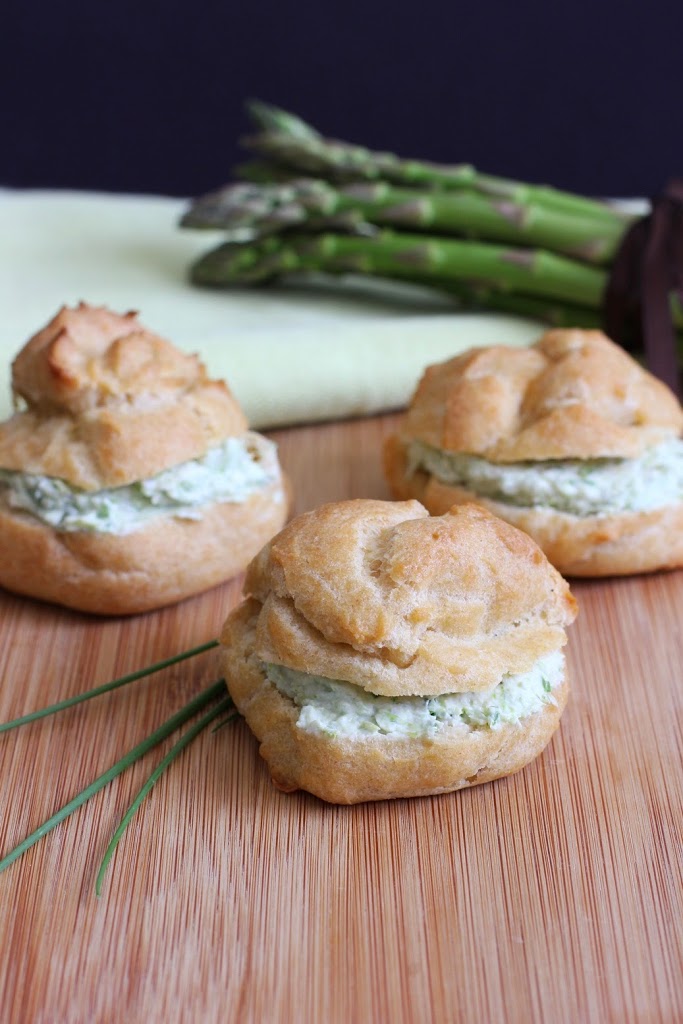
We’re no strangers to digging into the local foods, but often the resorts where we stay come up with some delicious things as well. I spotted these profiteroles on the menu our first night and I was bound and determined to try them before the trip was over.

Not only did I want to try them, I knew as soon as I spotted them (and I’m pretty sure I said it out loud to my husband) – that’s what I’m making with the goat cheese!

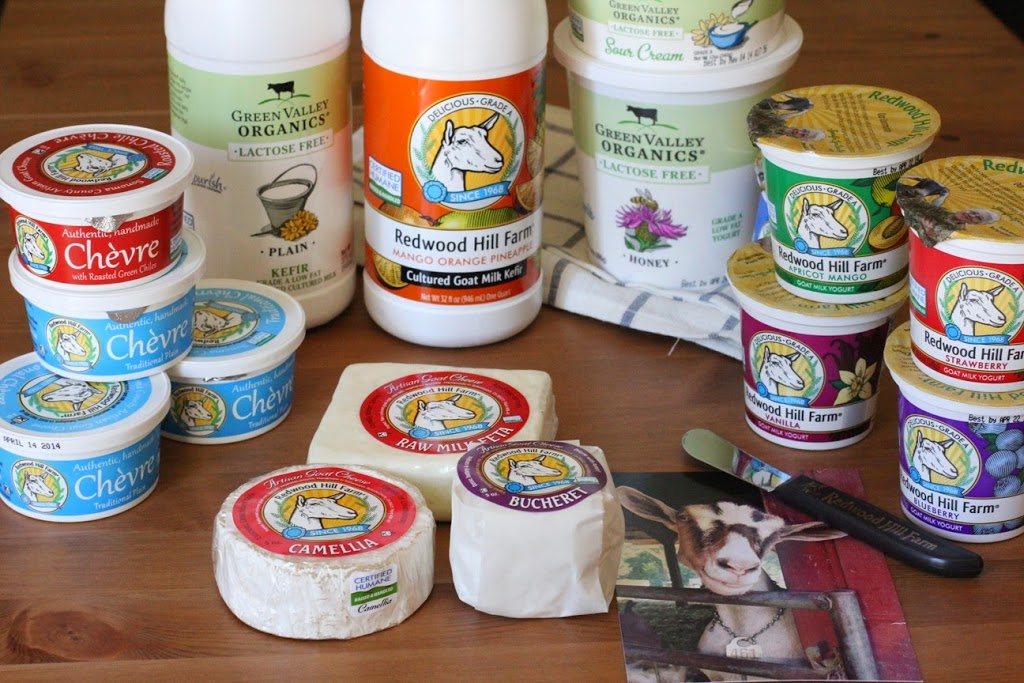
Right before we left for the trip, I received a package overflowing with products from Redwood Hill Farm in Sebastopol, Calif. A Certified Humane goat dairy, Redwood Hill Farm is a small family farm that has been producing goat milk products since 1968.

My generous package contained — Chèvre (including roasted chile chèvre!), Bucheret, Camellia (camembert), raw milk feta, goat milk yogurt in flavors like apricot mango and mango orange pineapple kefir. I also received some lactose-free products from their sister company, Green Valley Organics – yogurt, kefir and sour cream.

The kefirs have made a delicious addition to breakfast and those aged goat cheeses have been a true treat for the cheese plates my husband and I like to snack on over the weekend. But let’s talk about this chèvre.

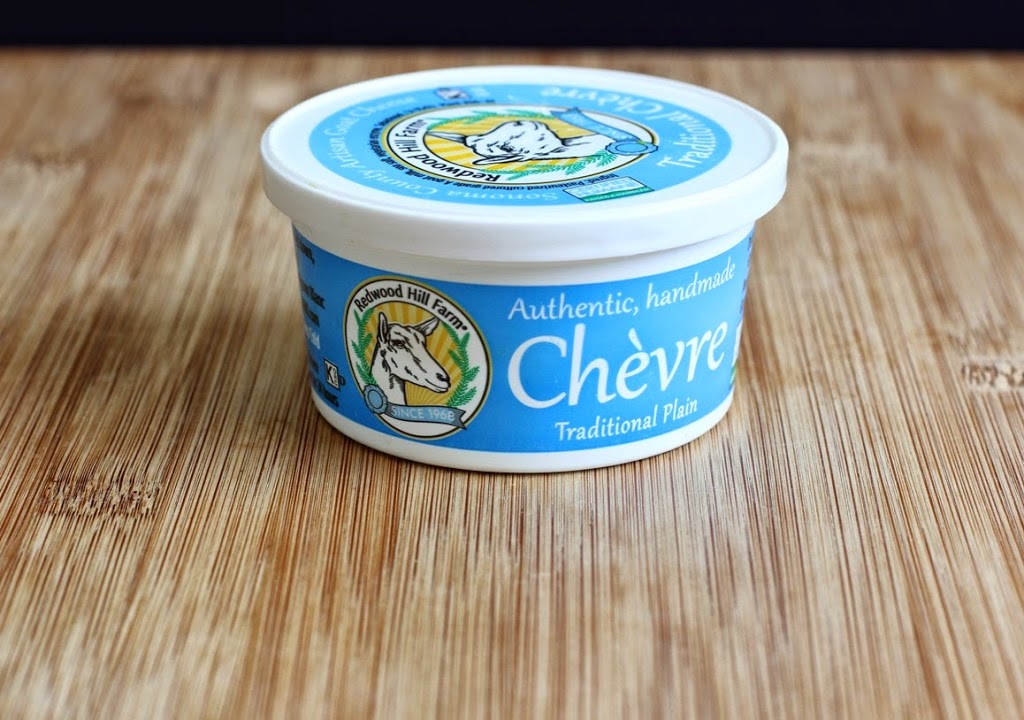
First of all, I have not seen it in re-sealable packaging like this, and I love it! Usually I’m dealing with the log wrapped in messy plastic that is a pain to store in the fridge. This makes it so much easier to keep the fridge stocked.

Unlike the other treats that have been a joy to eat and drink as they are, I wanted to make some with the chèvre. When I saw those profiteroles on our trip, I knew that was it. I had the goat cheese and we were coming into asparagus season. Perfect.

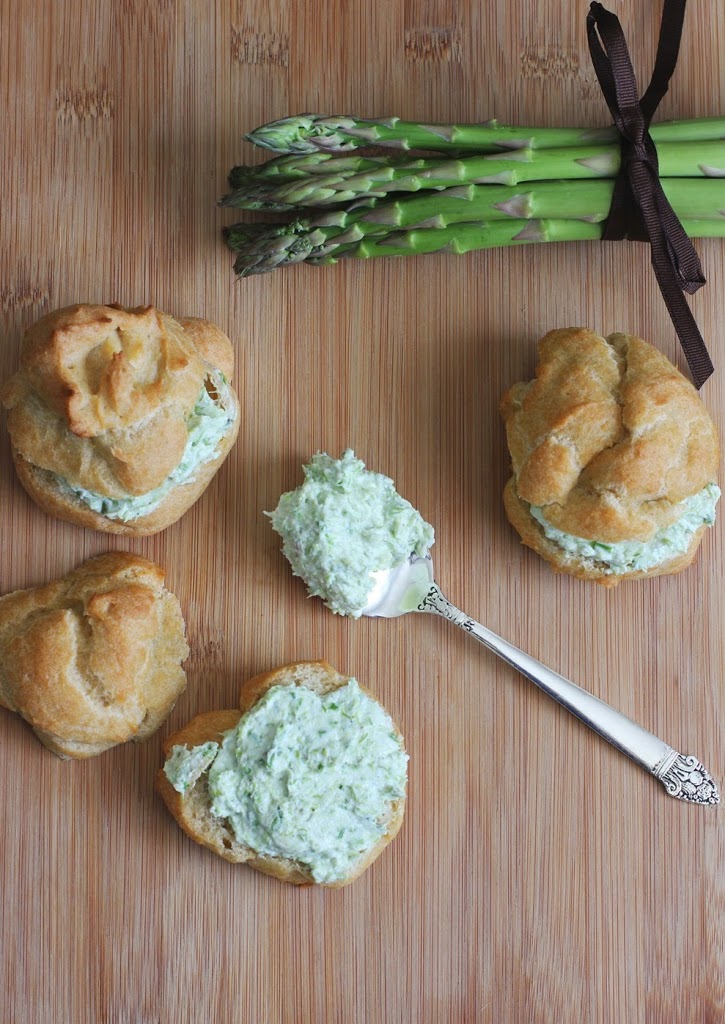
These profiteroles are the answer to the traditional finger sandwich. I would take this light, puffed pastry filled with goat cheese over a roll with ham salad any day. They are also easy to make. I know puffy baked things can be intimidating, but even with my past baking challenges, I can make profiteroles without fail. They are not at all as complicated as they seem. Promise.

Redwood Hill Farm chèvre is ideal for this recipe because it has a creamy, almost whipped texture. It blends well with the steamed asparagus. Speaking of the asparagus, be sure to steam it until it is almost mushy and then chop it before adding it to the food processor. This will ensure the asparagus purees and blends into the goat cheese so you have a smooth filling.

Savory Profiteroles with Asparagus and Goat Cheese

Makes: 12 profiteroles

Ingredients:

Profiteroles
1 cup water
½ cup unsalted butter
¼ tsp salt
1 cup white whole wheat flour
4 eggs

Filling
6 stalks asparagus, steamed and chopped
8 oz. chèvre
2 tbsp chopped fresh chives
¼ tsp salt
1/8 tsp ground black pepper

Prep:

Preheat the oven to 400 degrees F.

Add the water, butter and salt to a medium sauce pan. Bring to a boil over medium-high heat.

As soon as it comes to a rolling boil, stir in the flour and reduce the heat. Continue to stir vigorously until a smooth dough is formed. Remove from the heat.

Stir in the eggs. Stir quickly until they are completely mixed in and the mixture returns to a soft dough.

Use a tablespoon to scoop and drop the dough onto the baking sheet to make 12 large profiteroles. You can also use a pastry bag to pipe the dough onto the baking sheet.

Bake for 22 to 25 minutes, until they are puffed and golden brown. Let cool completely.

To make the filling, combine the asparagus and chèvre in a small food processor. Pulse until combined into a smooth green spread. Transfer to a bowl and stir in the chives, salt and pepper.

Use a serrated knife to cut open each profiterole like a bun. Spread an even amount of the goat cheese filling inside each profiterole and serve.

Disclosure:  The products mentioned in this post were provided by Redwood Hill Farm. I was not required to post about them and received no compensation for doing so.


Thanks for reading! All images and content are the property of Fake Food Free unless otherwise stated. Please do not republish full recipes and images without written permission. What is okay? Feel free to Pin images, share links to my posts or share the photo with the title of this recipe and a link back to the post. Confused about copyright and food blogs? Here is some helpful information on Recipe Attribution. If you want to use a photo or full recipe, just ask. I’m sure we can work something out. 

A visit to St. George Spirits in Alameda, CA

April 9, 2014
As you cautiously weave the car around the blocks of abandoned buildings you will ask the question — are we headed in the right direction? This is a sure sign that you are almost there. 
When you reach the water’s edge and the San Francisco skyline comes into view, three airplane hangars will emerge. Welcome to Booze Alley. Also affectionately known in the local media as Alcohol Alley and Distillery Row. 
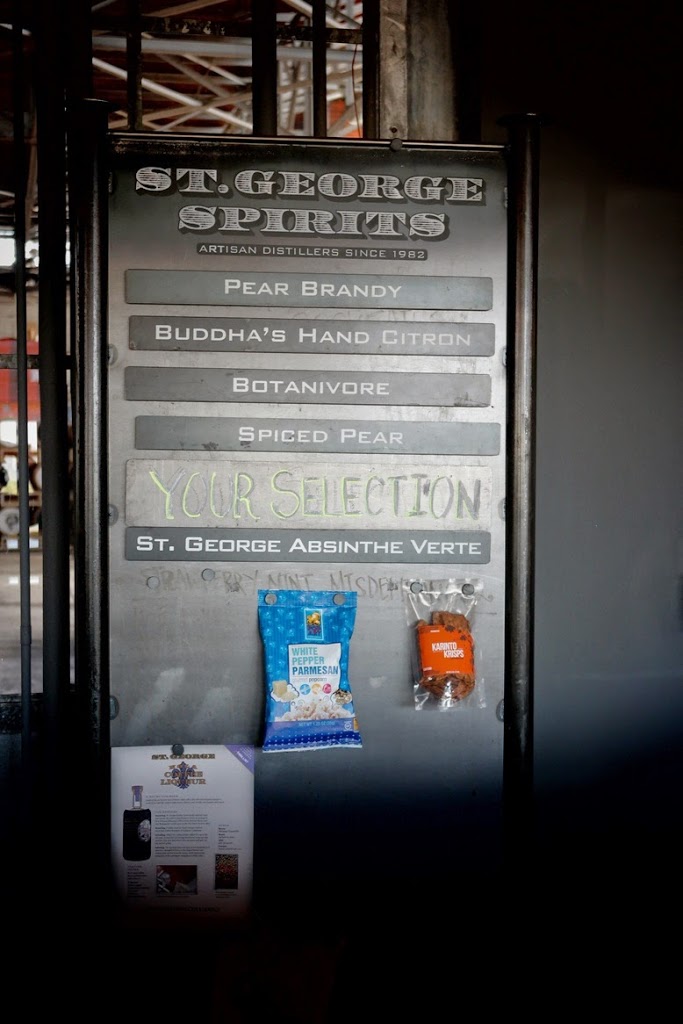
The first of these hangars is Rock Wall Wine Company, the second is Faction Brewing and the third is St. George Spirits – home of Hangar 1 vodka. 
This area beckons for a visit. Not only for the high quality beverages, but for the views and the history. 
We’d checked a visit to Rock Wall and Faction Brewing off our list, so last Saturday we hopped on our bikes and headed out to tour St. George Spirits.  
Small scale alcohol production in airplane hangars is a brilliant idea. Plenty of room for processing and distribution, a wide open space to tour, and tasting rooms that have the appealing vibe of old warehouse meets modern design. 

I love it when food and drink tours load me with new information and the St. George Spirits tour did not disappoint. Put it on your list for a must-do when you visit the East Bay. These are few tips to help and some of my favorite highlights from our afternoon. 

A few tips for a visit:

  • Visitors have three options. A tasting, a basic tour with a tasting and a more in-depth tour and tasting. We chose the second option and it was perfect. More details on that below.

  • You have to purchase a tasting to try the vodka. Unlike Faction Brewing next door (excellent beer, by the way), you can’t just swing in for a shot or cocktail, although we really wish you could!

  • Book your tour online and get there 10 minutes early. There were only a couple spaces left in our tour which we booked about 30 minutes before leaving the house. We were on the printed list when we arrived, but we got there about 3 minutes before the tour started. Because of the line to get in, and people buying the tastings, we were late to join the tour.

  • Take your camera. They have some creative displays for their vodkas, the warehouse has original redwood ceilings from the 1940s and the view of the city from the area is gorgeous.

  • Visit in the fall. Our guide showed us a photo of the warehouse full of California and Colorado pears that are used to make the pear brandy. Apparently you can witness the warehouse full of fruit if you visit after they are shipped in during peak season.

  • We biked the 10 miles from our house. If you live in the city or anywhere that you can get in on the ferry to Alameda Main Street Station, bring your bike. It’s an easy 5 to 10 minute ride from the ferry terminal.

  • Plan to shop. They have a gift shop with some things that are difficult to find elsewhere. Some of the brandies were available in smaller bottles and they had a great 3-pack sampler of their gins. The bourbon was also available in the gift shop.


The tour, interesting facts and product highlights:

  • Our tour lasted about an hour and included a tasting of five St. George Spirits products that were selected for us and then we selected one other option to try. 
  •  Hangar 1 vodka is made from viognier grapes and wheat. There were four varieties available – Straight, Buddha’s Hand, Kaffir Lime and Mandarin Blossom. 
  • St. George Absinthe Verte was the first released after the ban was lifted in the U.S. in 2007. 

  •  Hangar 1 vodka is incredibly smooth. Something that is pleasantly unexpected for a vodka. They get major bonus points for the creative flavors. I mean, who else would think to infuse vodka with Kaffir Lime? While sipping it I had visions of a spicy vodka martini with Thai chilies.

  • Their gins are outstanding. As described by our guide, the Bontanivore (I love that name!) has 19 botanicals that taste like a gin and tonic before even adding tonic. 
  •  The next on my list to try is the Terroir Gin, made from California botanicals foraged on Mount Tamalpais (Mt. Tam). To date, my only experience with Mt. Tam was the most difficult trail race I’ve ever endured, which I’d rather forget. I’m hoping the gin will change my perspective.

  • The Spiced Pear Liqueur tasted exactly like someone had gathered everything from the holiday season, distilled it and poured it in my glass. Despite being made from pear brandy, it tasted as described – like apple pie.

  • Two things I didn’t get to try that I hope to in the future are the NOLA-style coffee liqueur and the single malt whiskey. 
I’ve added St. George Spirits to my arsenal of options that I present when asked — what is there to do in Alameda? One sip and you won’t dare underestimate the potential of a quiet island or abandoned warehouses again. Three cheers for repurposing old buildings, local products and some fine craft spirits!
 

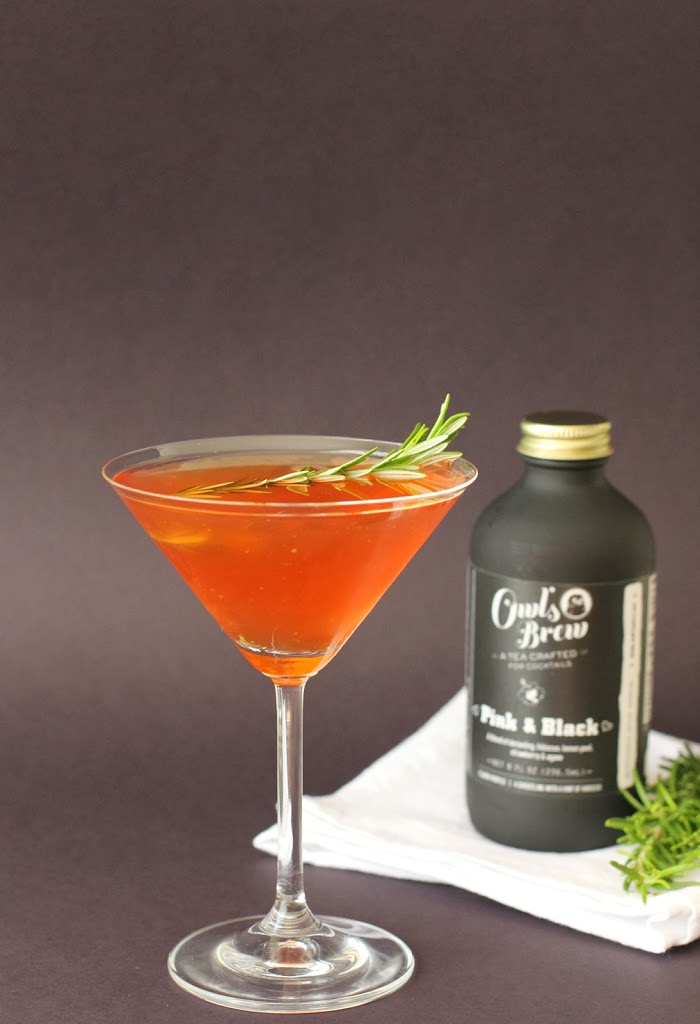
Pink & Black Rosemary Vodka Martini with Owl’s Brew

February 28, 2014

Welcome to the first cocktail week on Fake Food Free. This week I’m recapping some of the excellent cocktail mixers I discovered at the Fancy Food Show in San Francisco in January. This is post three of three. Check out post one and two for more great drink ideas!

I think I’ve mentioned before that I’m attracted to cool packaging, especially bottles. This usually leads me to all kinds of good stuff for the kitchen – olive oils, sea salts, and this time, cocktail mixers!

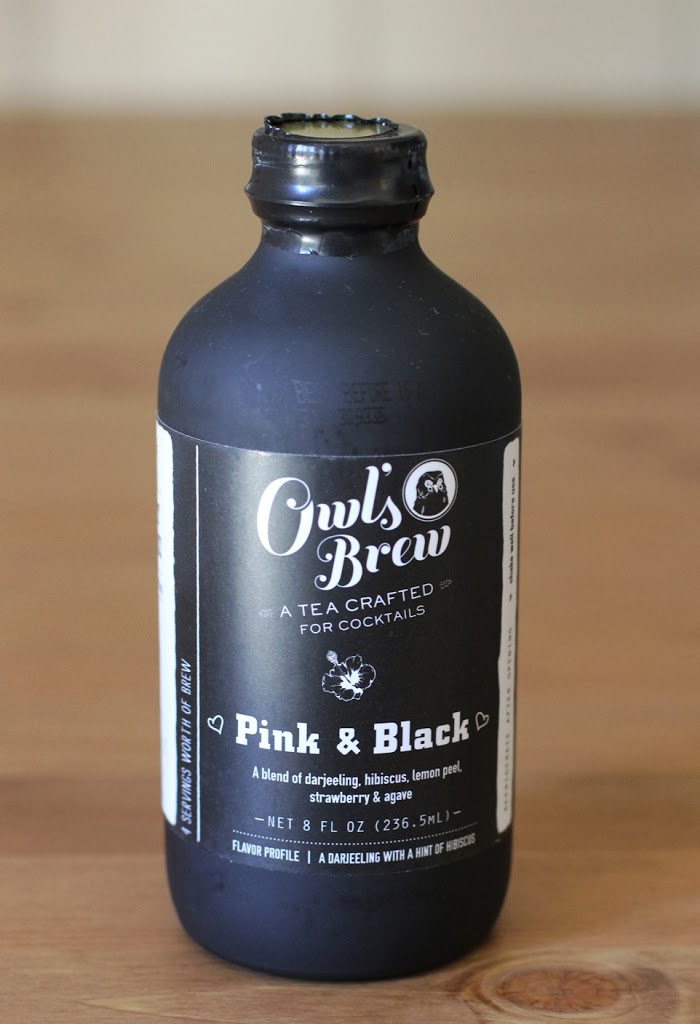
I heard about Owl’s Brew before I attended the food show in January so I was on the lookout. What is different about Owl’s Brew is that it’s all about tea. There are three different blends, two made with black tea and one with English breakfast tea. The teas are brewed with whole spices, fruit peels, fruits and herbs, and slightly sweetened with agave. The idea is to use two parts of Owl’s Brew to one part of your favorite spirits and plenty of suggestions are provided on the bottle.

Cocktails using tea are something new to me and Owl’s Brew served as the perfect introduction. I’ve steered away from mixers in the past, but with less sugar and all the natural ingredients in this, I can see keeping a bottle around for good. You can also get all three flavors in a sampler pack. Gift giving for cocktail and tea lovers is totally taken care of!

So how about those flavors. I mentioned there are three:
Coco-Lada – Black tea with chai spices, pineapple and coconut
Pink & Black – Black tea with strawberries, lemon peel and hibiscus
The Classic – English breakfast tea with lemon peel

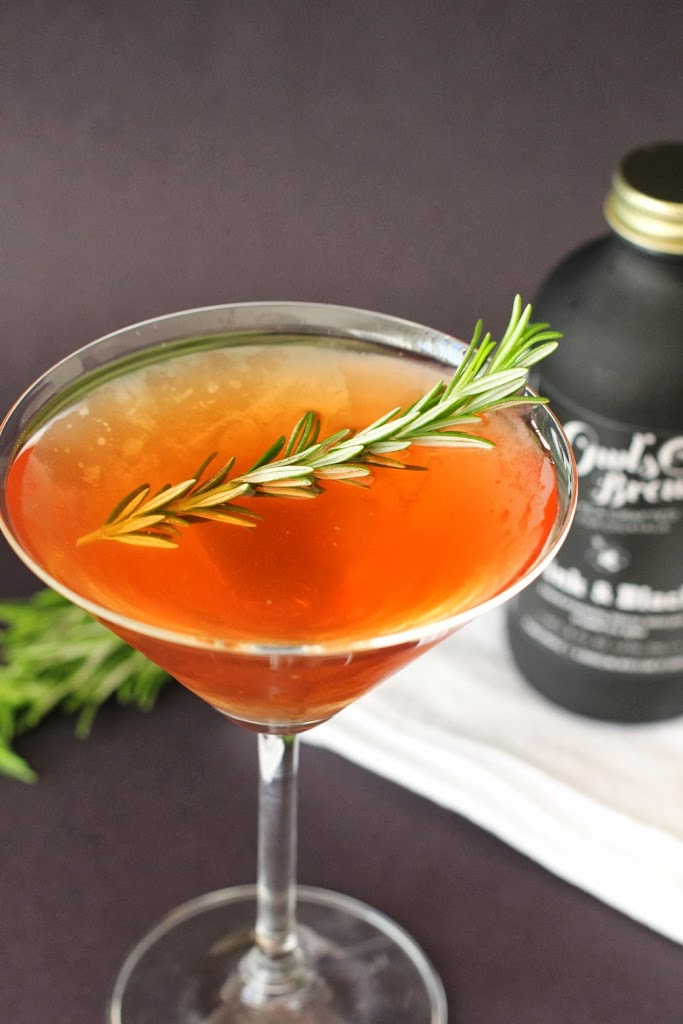
I had a sample of Pink & Black to work with. I tried it with a lager at the show and it was delicious as a beer cocktail. This time around I wanted to concentrate on the strawberry flavor that comes through in the brew. I love rosemary and strawberry so a vodka martini seemed like a good idea.

And a good idea, it was. This drink is nice and simple with both the rosemary and the flavor of the Pink & Black tea mixer coming through. It’s also a beautiful deep pink color. Perfect for spring!


Pink & Black Rosemary Vodka Martini with Owl’s Brew

Makes: 1 drink

2.5 oz. vodka
1.5 oz. Pink & Black Owl’s Brew
2 small sprigs of fresh rosemary
Ice

Place the vodka in a cocktail shaker and add the leaves of one of the sprigs of rosemary. Mull the leaves with the vodka to extract the oils.

Pour in the Owl’s Brew. Add ice. Cover and shake until cold.

Strain the martini into a glass. Garnish with a rosemary sprig and serve.

Disclosure: This product was provided for review purposes. I was not required to post about it and received no compensation for doing so.

Hibiscus Limón Grapefruit Margarita and Wild Ginger Mint Julep with Mixer Elixir

February 26, 2014

Welcome to the first cocktail week on Fake Food Free. This week I’m recapping some of the excellent cocktail mixers I discovered at the Fancy Food Show in San Francisco in January. This is post two of three. Check out post one for more great drink ideas!

The first place I stopped while at the food show was the new products pavilion. I love this area because it is full of passionate small companies who are excited about their products and they hope that you will be, too.  

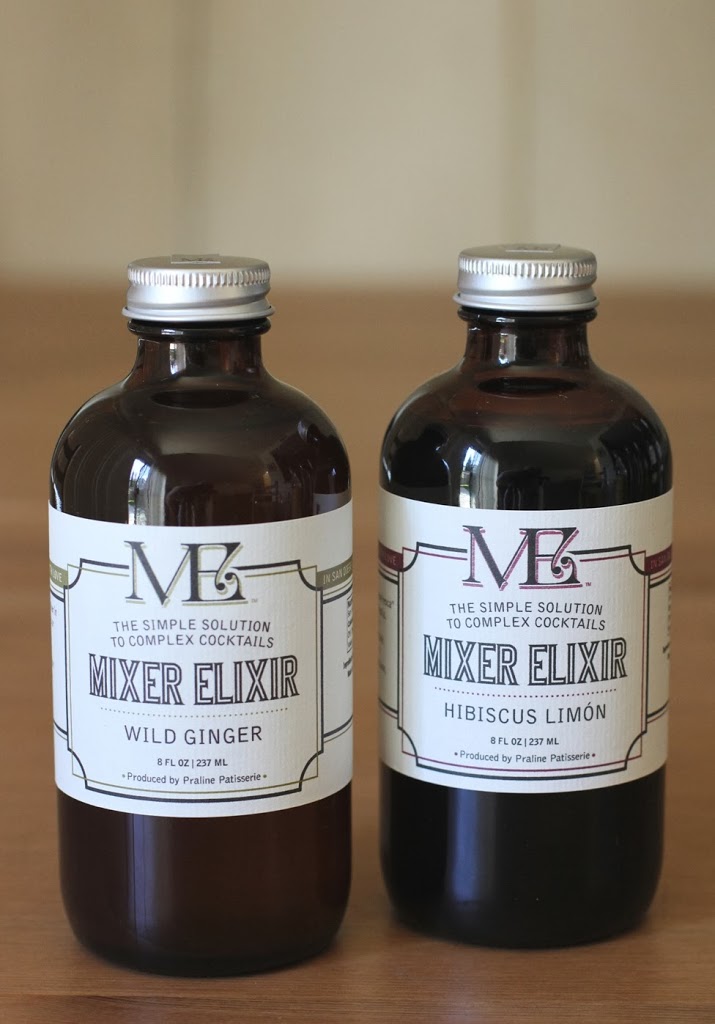
Nicely displayed in a corner booth, Mixer Elixir was a product that immediately caught my attention. I loved the trendy jars and logo design, and I think it’s been pretty well established that I like cocktails.

These drink mixers are from the San Diego-based company Praline Patisserie, created by pastry chef, Cruz Caudillo. They use few ingredients like fresh herbs, fruits and pure cane sugar to create a syrup that can be used to flavor seltzer water, teas, and of course, cocktails.

I had two varieties to try – Hibiscus Limón and Wild Ginger. Each has cocktail suggestions on the bottle.

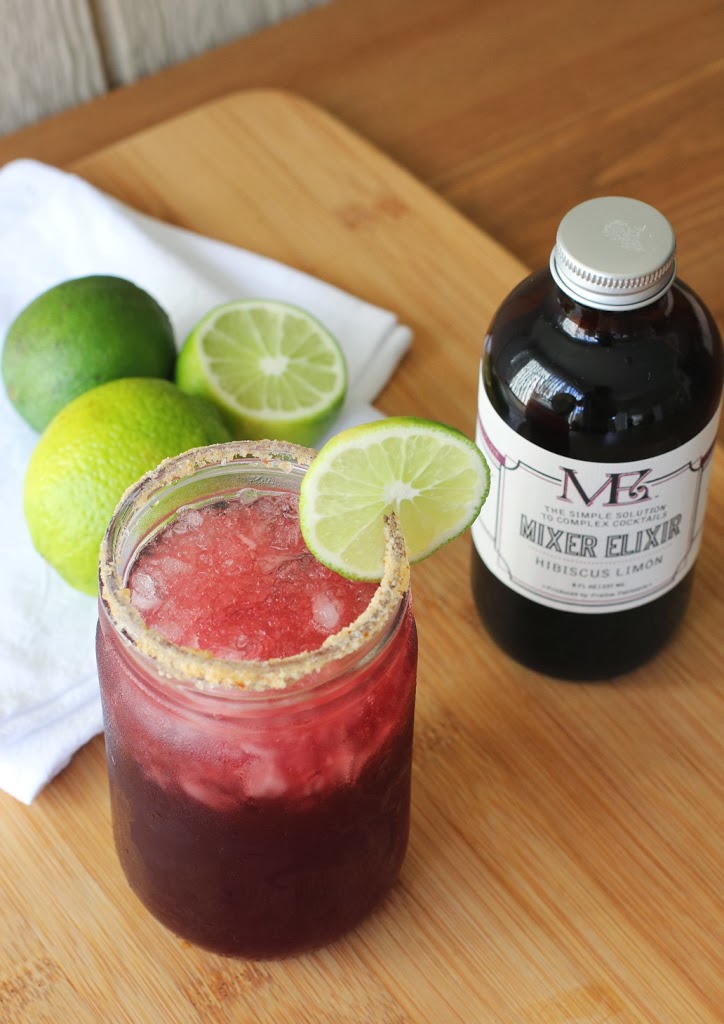
For the Hibiscus Limón, a margarita with orange juice was suggested. But because I can’t think of hibiscus without thinking about Jamaica, and I also associate grapefruits with Jamaica, I added my own twist with grapefruit juice. Yes, I know we’re talking tequila and not rum (which I also associate with Jamaica), but trust me, a margarita is a winner with this one. The Hibiscus Limón is rich, sweet and tangy. It would make a unique soda mixed with seltzer or club soda as well.

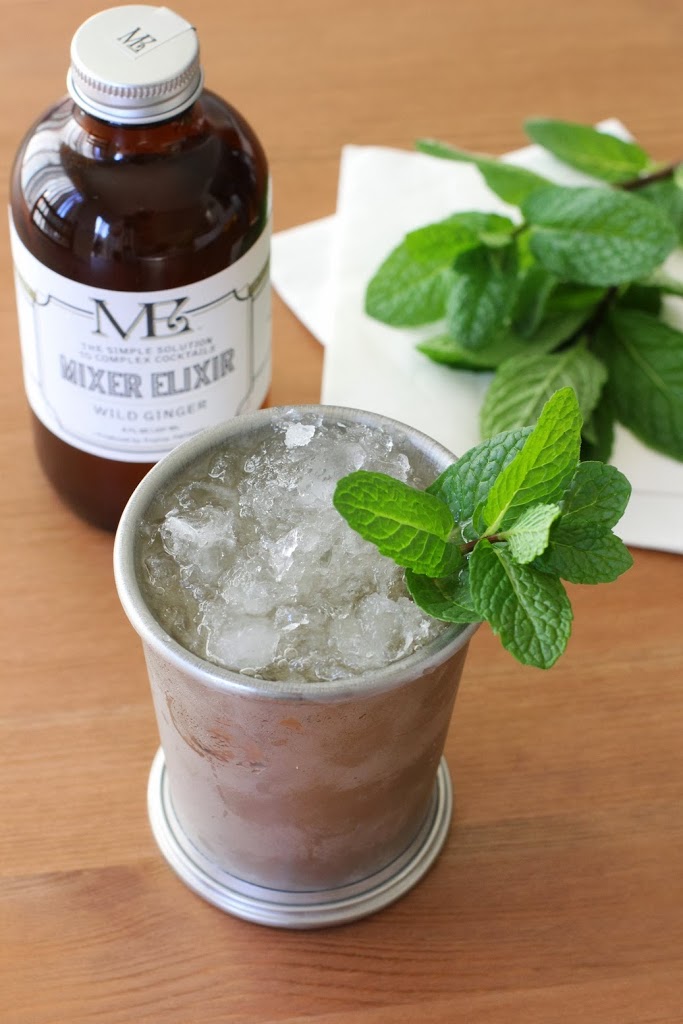
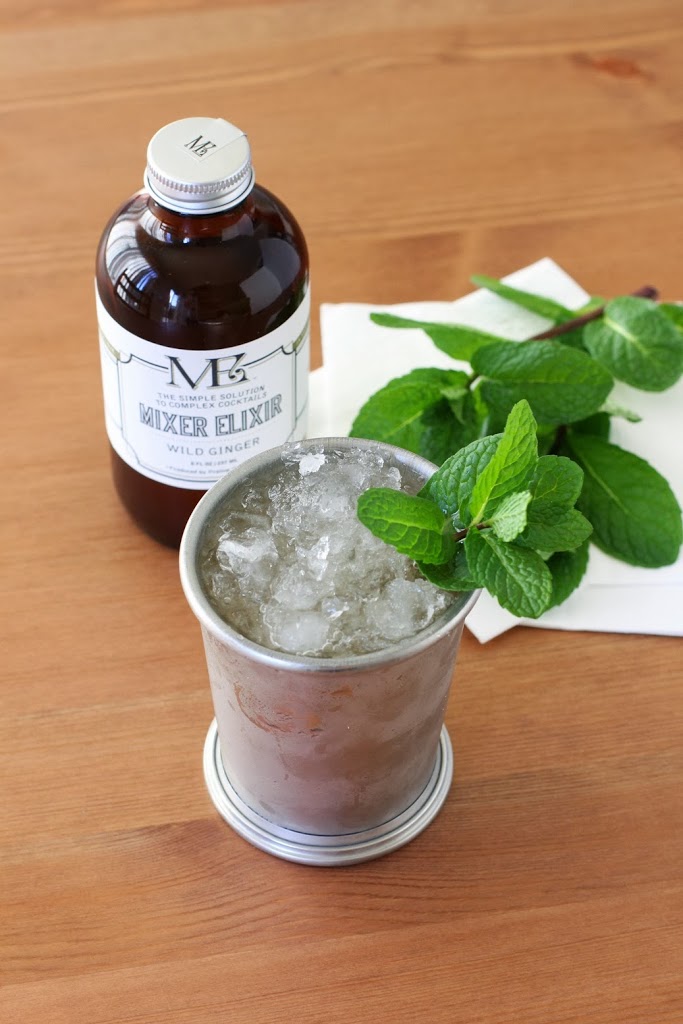
The Wild Ginger has a wonderful spicy flavor and bourbon was the first thing that came to my mind. So I spiced up one of my favorite drinks, the Mint Julep. I may make all my Mint Juleps like this from now on. The kick from the ginger isn’t lost in sweetness like it can often be with sodas. I might even venture to use this Elixir as a flavoring in desserts.

In addition to keeping one around for myself, Mixer Elixir is going on my gift-ideas list. I like that both non-alcoholic and cocktail options are offered on each bottle making them perfect for just about everyone.


Hibiscus Limón Grapefruit Margarita

Makes: 1 drink

3 oz. red grapefruit juice
2 oz. gold tequila
2 oz. Mixer Elixir Hibiscus Limón
.5 oz. lime juice
Ice
Salt for rim of glass (I used this grapefruit sea salt)
Lime slices for garnish

Place the grapefruit juice, tequila, Mixer Elixir and lime juice in a cocktail shaker. Add ice, cover and shake until cold.

Fill a salt-rimmed glass with ice. Strain the margarita into the glass. Garnish with a lime slice and serve.

Wild Ginger Mint Julep

Makes: 1 drink

2 oz. Kentucky bourbon
2 oz. Mixer Elixir Wild Ginger
2 sprigs fresh mint
Crushed Ice

Place the bourbon in a cocktail shaker with one sprig of the mint. Mull the mint with the bourbon to extract the oils. Add the Mixer Elixir and stir.

Pack a mint julep glass full with crushed ice. Strain the cocktail into the glass, over the ice. Garnish with the second mint sprig and serve.

Disclosure: This product was provided to me for review purposes. I was not required to write about it and received no compensation for doing so.

Cocktail Week: Lemongrass Mint Vanilla Cooler and Ginger Lemon Bourbon and Brandy with Ayala’s Herbal Water®

February 24, 2014

Welcome to the first cocktail week on Fake Food Free. This week I’m recapping some of the excellent cocktail mixers I discovered at the Fancy Food Show in San Francisco in January. This is post one of three.

I gave up my beloved diet soda about five years ago (I used to drink 3 cans a day!). It was a big step in cutting artificial sweeteners out of my diet and one of the best decisions I’ve made.

While I can’t even think about drinking a diet soda these days, there is something I still crave often. The carbonation. We make our own club soda all the time, but I’m always on the lookout for flavored carbonated waters without any sweeteners. Especially when we need something for a road trip or when we make cocktails at home.

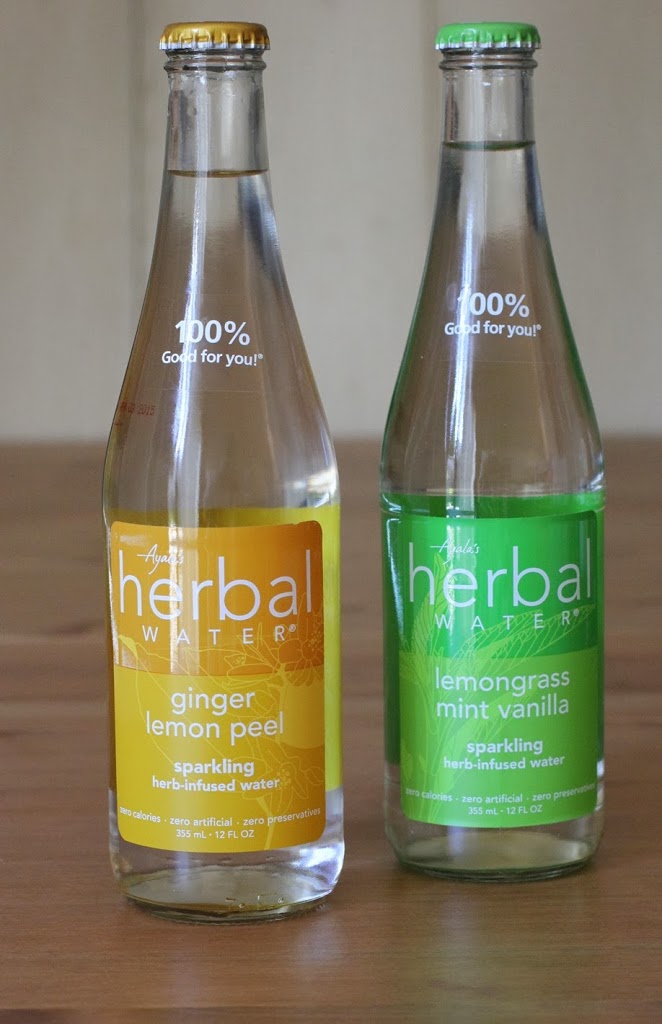
Let me introduce you to my new favorite find — Ayala’s Herbal Water®. I was thrilled to discover this product at the Fancy Food Show last month. Ayala’s Herbal Water® is water infused with organic herbal extracts. It has no sugar, no sweeteners and no preservatives. It also comes in both still and sparkling varieties.

The flavor combinations are anything but boring, but I thought me simply showing you water in a post might be. So I decided a couple cocktails were in order. The sparkling varieties are perfect for cocktails.
                       
I had four sparkling flavors to try — Lemongrass Mint Vanilla, Cinnamon Orange Peel, Ginger Lemon Peel and Lavender Mint. There were none that I disliked, but my favorite surprised me. It was the Lemongrass Mint Vanilla and typically I’m not a huge mint fan. I really enjoyed how the vanilla flavor came through with this one and the mint was balanced by both that and the lemongrass.

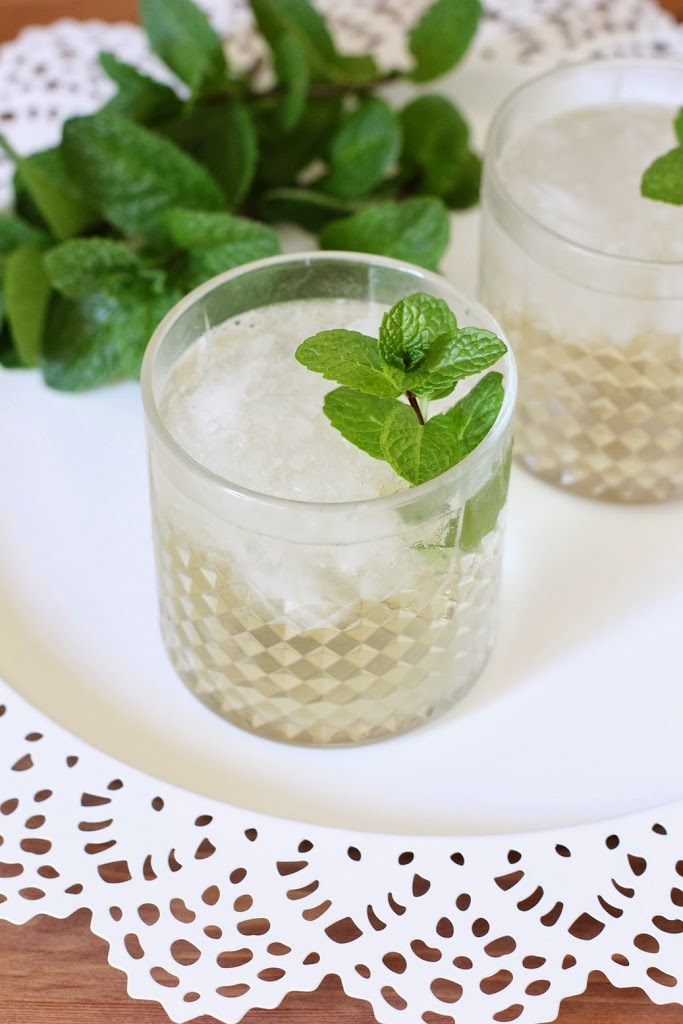
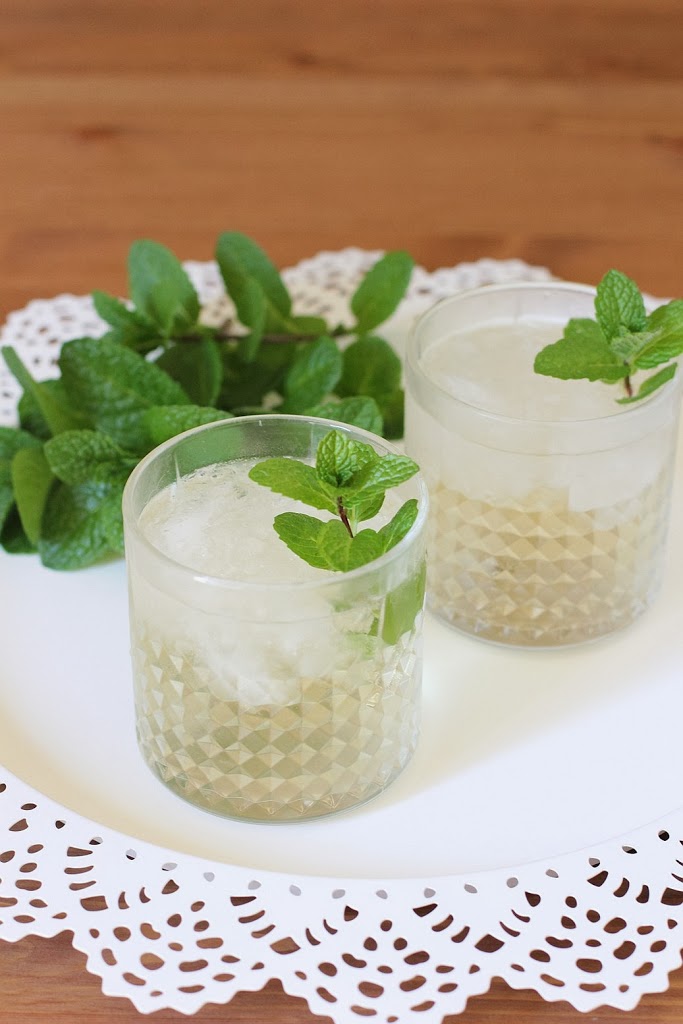
None of the flavors need much to be turned into a great cocktail, especially since the refreshing flavor of the water should come through. I decided to use the Lemongrass Mint Vanilla and the Ginger Lemon Peel. A great choice. (P.S. The Lavender Mint is great with gin and the Cinnamon Orange Peel goes well with dark rum.)

Both of these drinks are perfect for spring, which is already arriving here in California. Proof is in all the gorgeous mint that I picked out of our herb garden. I hope spring makes it your way soon!

Lemongrass Mint Vanilla Cooler

Makes: 1 drink

1 oz. vodka
1 oz. dark rum
3 oz. Lemon Grass Mint Vanilla Ayala’s Herbal Water®
Ice
Mint sprig

Add the vodka and rum to a lowball glass and stir. Add the water. Add ice to fill the glass.
Garnish with a mint sprig and serve.

Ginger Lemon Bourbon and Brandy

Makes: 1 drink

1 oz. Kentucky bourbon
.5 oz. brandy
½ tsp honey
3 oz. Ginger Lemon Peel Ayala’s Herbal Water®
Ice
Lemon slice for garnish

Add the bourbon, brandy and honey to a small cocktail shaker. Stir well to dissolve the honey.
Pour into a lowball glass. Add the water. Add ice to fill the glass.
Garnish with a lemon slice and serve.

Disclosure: This product was sent to me for review purposes. I was not required to post about it and received no compensation for doing so.

Pumpkin Seed and Lime Chicken from Dog-Gone Good Cuisine

February 18, 2014

Since the day we brought Dixie to her forever home three years ago, this sassy, sweetheart of a pug has had a favorite food.

Chicken on the bone.

If we dine on a vegetarian meal, she sleeps in the corner by the fireplace. Ribs or burgers? You can hear her snoring in her kennel. Even boneless chicken breasts don’t interest her.
But sit down with a plate of bone-in chicken and things drastically change.

She raises her nose to sniff the air. She nudges under your arm to get closer to the plate, and the sounds of soft, subtle whining and exasperated sighs can be heard throughout the house.

I’ve never seen anything quite like it. I have no idea what experience in her past made her develop a fondness for such a specific food, but that dog knows when you are having chicken on the bone.

And she wants some.

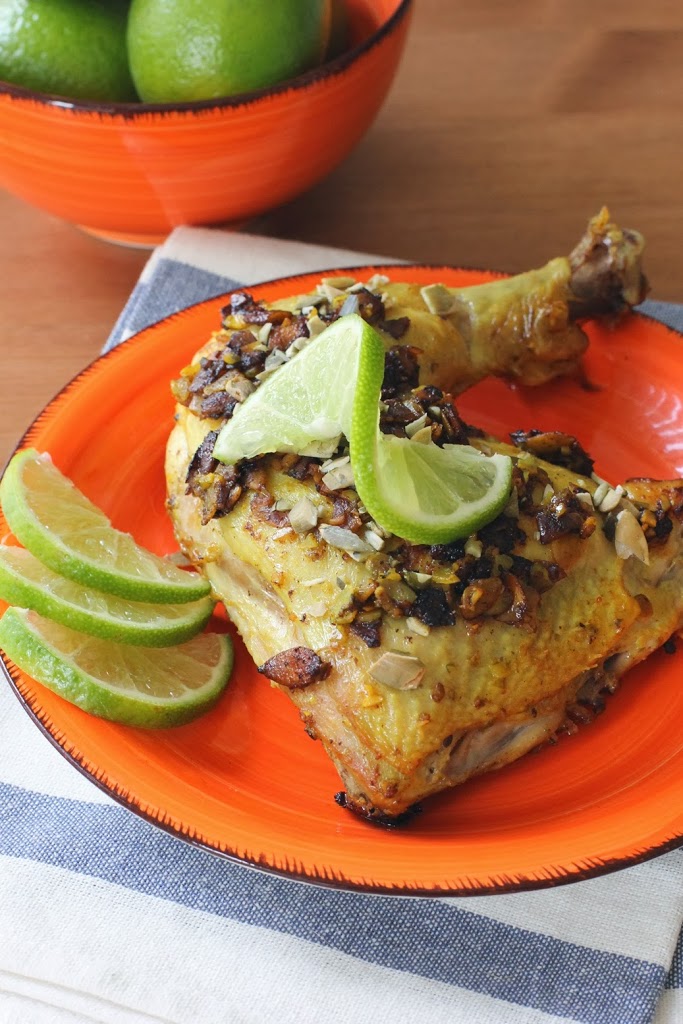
So when I received a copy of the cookbook, Dog-Gone Good Cuisine by Gayle Pruitt, I stopped my browsing when I found Pumpkin Seed and Lime Chicken. I knew I had to make it.

This might go down in history as the cutest cookbook, not to mention the most versatile. If you didn’t gather it from title, the book features recipes that are fit for both human and canine consumption. It includes a wonderful intro about ingredients that are safe for dogs and nutrients that benefit both you and your best friend. You’ll be thoroughly entertained by the tasteful pet photos and beautiful food photography by Joe Grisham. The recipes are simple and straightforward with ideas to please the entire family.

Also, don’t expect it to be all chicken and rice. The creativity here will inspire you. Plain Chia and Flaxseed Pancakes, Tomato-Carrot Soup and Mediterranean Meatballs on a Stick are a few more recipes I can’t wait to share with my furry family.

I also have to mention that my heart melted a little when I read the dedications, which included a mention of the author’s dog, Mister Casper. My childhood dog was named Casper. I knew him for the first 10 years of my life. What an amazing being.
As expected, the chicken was a hit (taken off the bone, of course.) This book is an excellent resource for cooking for your dog, and it would make a wonderful gift for all the dog lovers in your life.

Pumpkin Seed and Lime Chicken

From Dog-Gone Good Cuisine by Gayle Pruitt with photographs by Joe Grisham. Copyright © 2014 by the author and reprinted by permission of St. Martin’s Griffin.

Ingredients

4 chicken quarters, bone in, skin on
2 tablespoons olive oil
2 ounces raw pumpkin seeds
Juice and zest of 2 limes
1 teaspoon ground turmeric
½ teaspoon Celtic sea salt

Add all the ingredients except for the chicken to a food processor and pulse until the pumpkin seeds are in small chunks. Put the chicken in a bowl and pour the pumpkin seed mixture over the chicken, making sure to completely cover it. Refrigerate for at least 1 hour.

Place the chicken, skin side down, in a hot skillet or grill pan. Place a cover over the top of the chicken, touching the chicken with the lid, and pressing down on the top of the chicken. Cook for about 10 minutes, then turn the chicken over; the skin should now be a golden brown. Reduce the heat to medium-low, re­ place the lid over the chicken, and cook for another 30 minutes.

Serves 4 adult humans and 6 to 8 small to medium dogs.

Disclosure: This book was sent to me for review purposes. I was not required to post about it and received no compensation for during so. However, I was paid in full by two very happy pugs in the form of pug kisses.

Whole Grain Chocolate Cookie and McConnell’s Fine Ice Cream Sandwiches

February 14, 2014
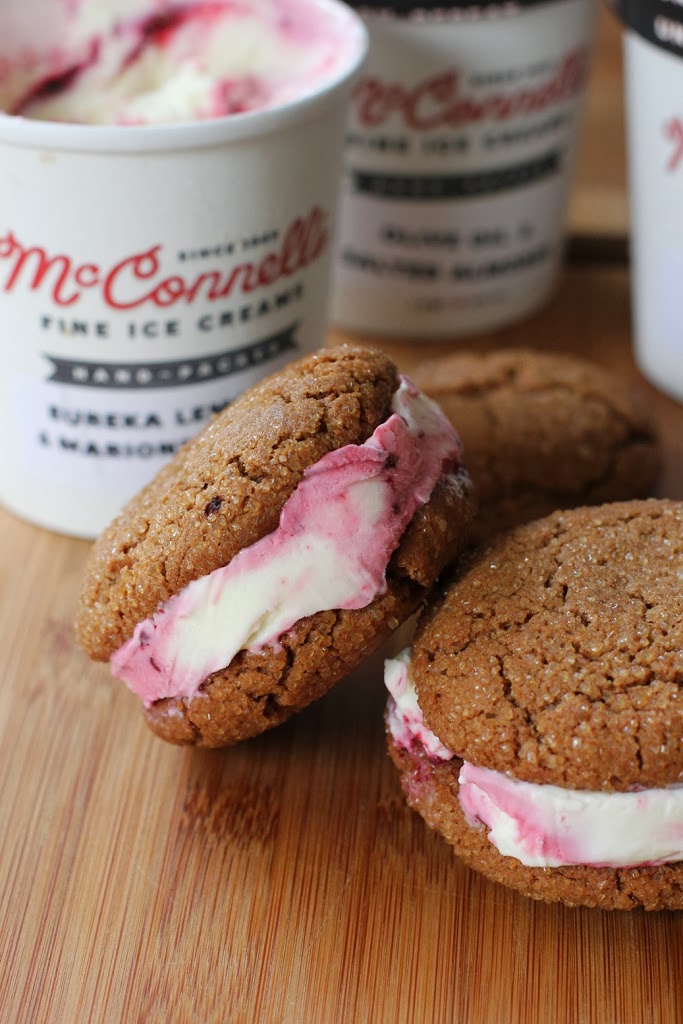
This hearty, whole grain chocolate cookie is best served with a delicious ice cream. One of my new favorites is McConnell’s Fine Ice Cream based in Santa Barbara, Calif. 
 
Whole Grain Chocolate Cookie Recipe | Fake Food Free

My first New Year’s Eve in California was spent in Santa Barbara. It was just last year and we were on the fourth day of our five day cross-country move. Knowing that we didn’t want to spend that particular night in a roadside hotel, we drove a few extra miles to the beach.

It was a short trip with two pugs along so we didn’t see much of the city, but since that little taste, I’ve wanted to return. I thought I had plenty of reasons for wanting to go back, but a few days ago I found one more.

This ice cream…

I was introduced to it through the Winter Fancy Food Show that I attended last month. You can order it online, but I fully support using it as an excuse to visit California.

Despite my endeavors to make most of the foods we eat, occasionally you come across something that you simply cannot master as well. You can’t make it any more delicious or natural. This ice cream is that for me.

McConnell’s has been making their ice cream since 1949, but I have yet to come across a company that uses such great ingredients or creates a product that tastes as good as this. I know. It’s ice cream. But the texture and flavor of McConnell’s is truly outstanding.

The ice cream is made from raw milk and cream from California grass-fed cows that is pasteurized and homogenized in-house. It’s then combined with cage-free organic eggs, some pure cane sugar and all kinds of natural, local ingredients like organic fruits and nuts.

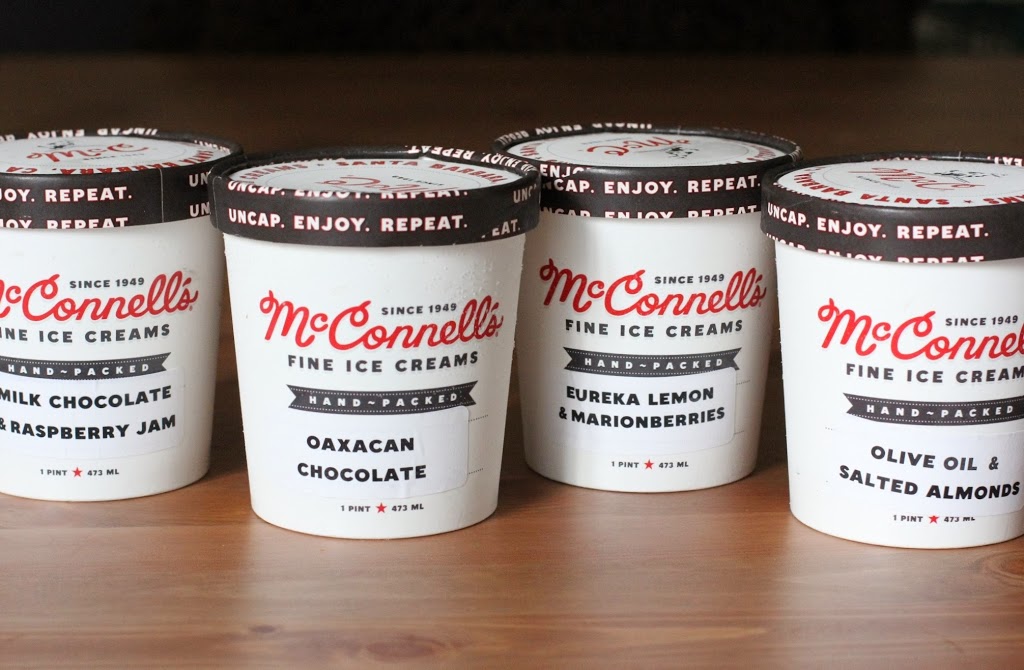
I got four varieties to try:

Olive Oil & Salted Almonds – Mild and creamy. Vanilla lovers will enjoy its simplicity.
Milk Chocolate & Raspberry Jam – Smooth chocolate meets fresh raspberry swirl.
Eureka Lemon & Marionberries – It’s like California and the Pacific Northwest came to a party in my mouth.
Oaxacan Chocolate – A flavor so rich and complex (with hints of cinnamon) that you’ll keep taking bites just to analyze it some more.

While I was completely intrigued by the Oaxacan Chocolate, I decided that the Eureka Lemon & Marionberries was my favorite. It was tough to choice!

This ice cream needs nothing more than a spoon, but I thought I would use it in a Valentine’s Day dessert. I tested out a cookie recipe with whole grains, raw cane sugar and California butter to complement all the natural ingredients in the ice cream. The goal was a mildly flavored cookie that’s sweetness or flavor wouldn’t overpower the ice cream. These were perfect.

Whole Grain Chocolate Cookie Recipe | Fake Food Free

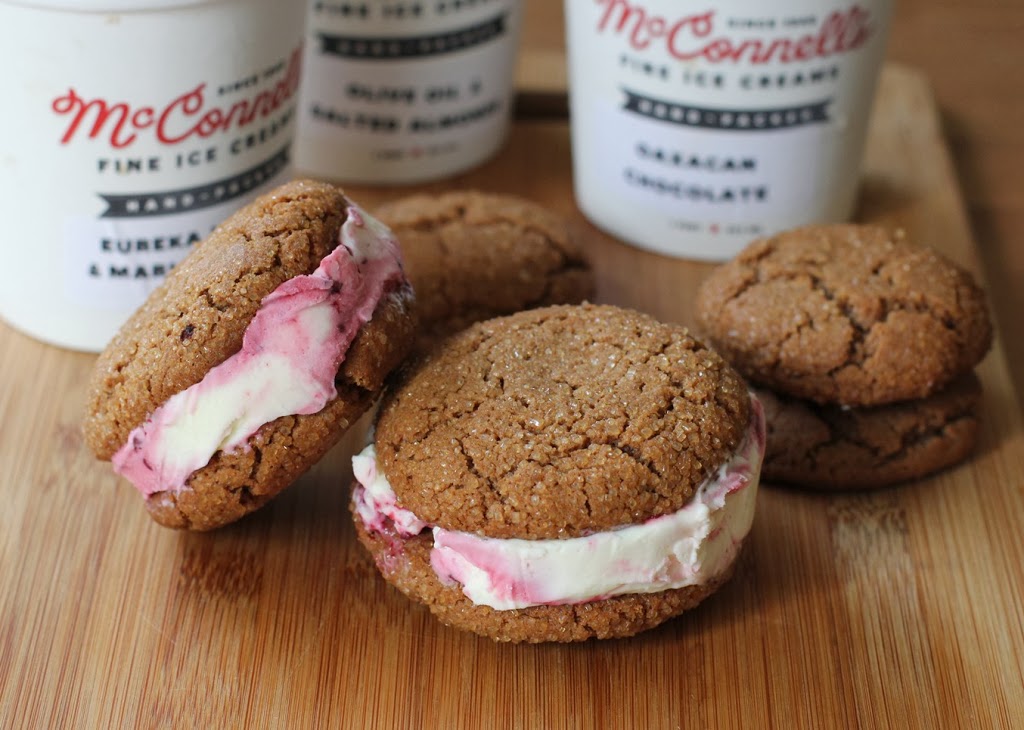
Whole Grain Chocolate Cookie and McConnell’s Fine Ice Cream Sandwiches

Makes: 6 ice cream sandwiches

½ cup unsalted butter, softened
¾ cup raw sugar
1 large egg
2 tbsp unsweetened cocoa powder
1 tsp cream of tartar
½ tsp baking soda
¼ tsp salt
1 ¼ cup white whole wheat flour
½ cup raw sugar for rolling the cookies
1 pint Eureka Lemon & Marionberries McConnell’s Fine Ice Cream (or your favorite flavor)

Preheat the oven to 375 F.

In a mixer fitted with the paddle attachment, beat the butter and sugar on medium speed for about 30 seconds. Scrape the sides of the bowl as needed, and increase the speed to medium-high. Beat for about 2 minutes or until well combined.

Reduce the speed to medium and mix in the egg. Mix in the cocoa powder. Scrape the sides of the bowl as needed.

Mix in the cream of tartar, baking soda and salt. Slowly add the flour, a little at a time. Mix just until all ingredients are combined.

Scoop out the dough and roll into generous golf ball size portions. Roll in the raw sugar and place on an ungreased baking sheet. Place only 6 to 9 cookies on each baking sheet. Press the cookies slightly flatten them.

Bake for 12 minutes or until the edges are lightly browned and centers of the cookies are somewhat firm. Cool for 1 minutes and transfer to a cooling rack to cool completely.

Once cooled, allow the ice cream to soften at room temperature for about 5 minutes. Place six of the cookies bottom-side up on a flat surface.

Top with a generous ¼ cup of ice cream. Place the remaining six cookies on top, bottom-side down, to create the sandwich. Gently press the cookies so that ice cream spreads to the edges. Depending on how generous you are with the ice cream. You may have some leftover. I suggest eating it.

Wrap the sandwiches in plastic wrap and refrigerate for at least 3 hours before serving.

Whole Grain Chocolate Cookie Recipe | Fake Food Free


If you are looking for more ways to use McConnell’s Ice Cream, check out Salty Sweet Life’s Pear, Gorgonzola and Thyme Galette!


Disclosure:  I received this product for review purposes. I was not required to blog about it and I received no compensation for doing so. All thoughts and content here are my own. It’s really good ice cream!

Want to create beautiful food and product photos that you can't wait to share?!
Discover your style, control the light, and shoot using the tool you know how to use (yes, your phone included). Learn about free resources, Live Q&As with Lori, and online courses you can take from anywhere in the world!
We respect your privacy. Unsubscribe at any time.