Browsing Category

Appetizers and Snacks

Spicy Spiked Bacon Guacamole

September 16, 2013
Spicy Spiked Bacon Guacamole | Fake Food Free  

I was well into adulthood before I realized that guacamole wasn’t a neon green paste served in a little plastic cup alongside Mexican fast food in the U.S. Fortunately, when friends were in disbelief of my dislike of guac, they took the opportunity to explain the potential of the real, non-processed version. From that point forward, bite by bite, I started trying more and making my own.

Now, I like it chunky, loaded with avocado, onion, jalapeno and cilantro, and I make it every chance I get. With California avocados, that chance comes around much more often than it used to. So this isn’t just a celebration of guacamole, it’s a celebration of living in a placing that is brimming with amazing avocados.

And since we are celebrating, we should make a toast to the drink that goes best with guacamole – tequila! I lived in Kentucky for 10 years, so when it comes to bourbon, I’m pretty educated. We also travel to the Caribbean so I’ve learned a fair share about rum, too.

But tequila? Tequila I have a lot to learn about.

That’s why I was thrilled when Casa Noble sent me some samples to help celebrate this food holiday. I received Casa Noble’s Reposado Tequila which is aged 364 days in French White Oak Barrels. It has won both Gold and Silver in the San Francisco World Spirit competition as well as other numerous awards. (They also make several other award-winning varieties. You can check out those, and their tequila-making process on the Casa Noble website.) 

Spicy Spiked Bacon Guacamole | Fake Food Free

And did I mention how cool their bottles are? Yes, I get sucked in by creative packaging. Especially if it looks good sitting on top of our bar.

After taking a sip, I knew I had lived a sheltered life in terms of tequila. I couldn’t believe how smooth it was; none of that harsh burn that you get from so many tequilas.

There are great tequila cocktail ideas on the company’s website, but to celebrate this day I decided to use the tequila in my guacamole. If you’ve not done this before, it is time to start spiking those avocados. And I know that traditional guac is made with lemon juice, but we are working with tequila here so I dressed it up with lot of lime and salt!

Spicy Spiked Bacon Guacamole

Serves: 4

Ingredients

3 ounces pastured bacon ends, chopped and cooked crispy
1 small tomato, diced
¼ cup chopped cilantro
2 green onions, sliced
1 clove garlic, minced
2 tbsp chopped pickled jalapeno
3 avocados
Zest of 1 lime
Juice of ½ lime
2 tsp Casa Noble tequila
½ tsp sea salt

Prep

Stir together the bacon, tomato, onion, cilantro, garlic and jalapeno in a medium bowl. 

Add the avocado, lime zest, lime juice and tequila. Mash and stir the ingredients together until the avocados reach your desired consistency. (You can also use a mortar and pestle or a food processor.)

Stir in the sea salt and serve.

 
Spicy Spiked Bacon Guacamole | Fake Food Free

Disclosure: Casa Noble tequila was sent to me for celebrating National Guacamole Day. I was not required to post about it and I received no compensation for doing so. Thoughts are my own and it is really great tequila!

Slow Cooker Mushroom and White Bean Soup with Red Wine Recipe

September 4, 2013

Red wine adds rich flavor to this hearty mushroom and white bean soup. It’s easy to throw together in the slow cooker making it perfect for a busy day when you need a warm and filling meal.

Slow Cooker Mushroom and White Bean Soup with Red Wine | Fake Food Free

About one year ago, I made my first road trip across the country – Lexington, Kansas City, Cheyenne, Salt Lake City, Reno, and finally Oakland. I dropped off my husband to start his new job and I went back to Kentucky to wrap things up before making the move final.

So while I haven’t been in California a full year, he has. This month marks when things really began to change. I’ve probably mentioned before that we love change. This past year of change has been rewarding, challenging, and exciting.

And of all the things I could have made to mark this anniversary, I picked soup?

Well, we just got back from a very low key, and enjoyable trip to Las Vegas over Labor Day weekend. We could really use a break from heavy food. It is also now September and my favorite season of the year (regardless of where I live) is almost here – fall!

To justify things more, I love that I can now get mushrooms at the Farmers Market! I like all kinds of mushrooms, but I always default to the white button. I find that I can do so much with them – stuff them, put them in soups, add them to tacos. Don’t let anyone fool you into thinking they don’t have benefits either. As I put in my book, even white buttons have plenty of immune boosting power.


Slow Cooker Mushroom and White Bean Soup with Red Wine | Fake Food Free


I bought a bag that fortunately decided to hang on until I got back from traveling. I had to make the decision to use them now or never. When I spotted the half bottle of red wine on the counter the meal began to come together.

So grab the slow cooker! It may not be crisp and cool yet, but fall is coming! Feel free to start off the celebrations with this rich and hearty soup.

 
Slow Cooker Mushroom and White Bean Soup with Red Wine Recipe
Serves 4
Red wine adds flavor to this hearty mushroom and white bean soup. It's easy to throw together in the slow cooker making it perfect for a busy day when you need a warm and filling meal.
Write a review
Print
Ingredients
  1. 1 pound white button mushrooms, halved or sliced
  2. ½ medium yellow onion, sliced
  3. 3 cloves garlic, minced
  4. 1 quart chicken, beef or vegetable stock
  5. 1 cup red wine
  6. 1 ½ to 2 teaspoons fine sea salt
  7. ½ teaspoon ground black pepper
  8. 1 sprig rosemary
  9. 1 ½ cups (or 15-ounce can) cooked white kidney beans, rinsed and drained
Instructions
  1. Place the mushrooms, onions, garlic stock, wine ,and 1 cup of water in the bowl of the slow cooker. Add ½ teaspoon of salt and ¼ teaspoon of black pepper. Place the rosemary sprig in the bowl and stir.
  2. Cook on high for about 3 ½ hours, until the mushrooms are almost tender. Remove the rosemary and add the beans. Add an additional 1 to 2 teaspoons of salt and ¼ teaspoon of black pepper to taste. Let cook on high for 20 to 30 more minutes, and serve.
Fake Food Free https://www.fakefoodfree.com/
 
Slow Cooker Mushroom and White Bean Soup with Red Wine | Fake Food Free
 
Thanks for reading! All images and content are the property of Fake Food Free unless otherwise stated. Please do not republish full recipes and images without written permission. What is okay? Feel free to Pin images, share links to my posts or share the photo in a round-up post with the title of this recipe and a link back to the post. Confused about copyright and food blogs? Here is some helpful information on Recipe Attribution. If you want to use a photo or full recipe, just ask. I’m sure we can work something out.

Smoky Boiled Peanuts Recipe

August 27, 2013

One thing I wasn’t expecting to find at the markets here were fresh peanuts. I know that there are a few areas on this side of the U.S. where they are grown, but I was definitely closer to the peanut growing states of Virginia and Georgia when we lived in Kentucky.

Yet, I can’t remember ever coming across a fresh peanut. But then again, I wasn’t looking for them either.

When I saw the light blond shells piled up on the tables at the market, I knew right away that they were peanuts. It took me longer to figure out that they were fresh. (Often called, green peanuts.)

Never one to resist the urge to buy a new ingredient, I bagged up a few handfuls still speckled with the dirt and brought them home. Honestly, I had no idea what else to do except boil them.

After researching several recipes, I made my first batch which was a huge fail. According to a few recommendations, I soaked them in water first, drained them and then boiled them. They were much too wet and soggy for my taste.

So when I picked up another bagful last week, I skipped the extra soaking step. I covered the 1 pound of peanuts in about 5 cups of water. I added salt, garlic powder and smoked hot paprika and let them boil.

Full disclosure. I forgot about them.

I had intended to boil them for 2 hours, but I returned to the stove about 2 hours and 45 minutes later to find almost no water left in the pan. Oops.

I pulled the pan off the burner and gave them a stir to distribute some of the seasonings that had collected at the bottom. Then, I tried one. They were delicious! They really reminded me more of the pinhão (pine nut) we used to find in Brazil, like a firm bean with a nutty flavor.

So there you have it. I accidentally discovered exactly how I like my boiled peanuts. Sometimes kitchen mistakes lead to grand results. And it’s even better if those mistakes and results come without setting off the fire alarm.

Smoky Boiled Peanuts

About 1 pound of fresh, green peanuts
5 to 6 cups of water
¼ cup finely ground sea salt
¼ tsp garlic powder
¼ tsp smoked hot paprika

Add the peanuts to a large saucepan and add enough water to cover the nuts. Stir in the sea salt, garlic powder and paprika. Bring the peanuts to a boil over high heat, partially cover the pan with a lid. Reduce the heat to medium to maintain a low boil, just above a simmer.

Let cook for 2 ½ to 3 hours, until almost all of the water has evaporated. There should still be at least a half inch in the bottom of the pan.  Stir to distribute the salt. Let cool before shelling and eating. Store in an airtight container in the refrigerator for up to 2 days. 

Japanese Pickled Ginger Recipe from The Joy of Pickling

August 19, 2013

   Japanese Pickled Ginger Recipe from The Joy of Pickling | Fake Food Free

Two of my favorite condiments are served beside sushi. First, it’s that pleasantly spicy wasabi. Second is the pickled ginger. I could eat that ginger on just about anything. It has crossed my mind that I could probably make it at home, but I have never searched for a good recipe. Fortunately, now I don’t have to because this time around a good recipe found me. 

All summer I have been browsing the pages of one amazing cookbook. It contains recipes for pickled everything! Or at least it seems like just about everything. The Joy of Pickling: 250 Flavor-Packed Recipes for Vegetables and More from Garden or Market by Linda Ziedrich

Pickled-Ginger-Cookbook
 
While you will find a huge variety of cucumber pickles, this cookbook goes well beyond the standard dill. Figs. You can pickle figs?! And peaches? There is even pickled pig’s ear should you choose to go there. There is also page after page of interesting condiments and sauces like Hot Orange Ketchup and Rhubarb Chutney
 
There were so many tempting recipes to try in this book, but I knew I finally had to give Japanese Pickled Ginger a try. The best part about many pickling recipes is that they are so easy to make. Top a few fruits or veggies with a liquid, seal and rest. A few days later you have a crisp, tangy snack or condiment. 
 
That is definitely the case with this ginger. Peeling and slicing takes a little time, but I had this recipe done in less than 30 minutes. Now that I have the ginger down, it may be time to start practicing the sushi. 
 
Japanese Pickled Ginger Recipe from The Joy of Pickling | Fake Food Free
 
This book has been out for a while now and I’m so glad that it finally caught my attention. I can tell it will become a well-used resource book for me every year. If you are spending late summer and early fall wondering what to do with all your garden produce, the chances are good that you can pickle it. This cookbook will show you how. 
 
Japanese Pickled Ginger Recipe from The Joy of Pickling | Fake Food Free
Japanese Pickled Ginger
©Linda Ziedrich 2009. Reprinted with permission from The Harvard Common Press.
 
Makes: About 1 Pint
 
From the book:
Use fresh young ginger for this pickle. Available in Asian markets, young ginger is pale, almost white with very thin skin and pink stem stubs. A mandolin may be useful for slicing the root. Your pickled ginger may turn out faintly pink, but it won’t have the hot pink color you’ll see in commercial versions of this pickle, that color comes from food dye. A traditional accompaniment to sushi, pickled ginger refreshes the palate and cleanses the mouth of fishy tastes
.
Ingredients
1 quart water
½ pound fresh ginger, sliced paper thin
1 teaspoon plus a sprinkle of pickling salt
1 cup rice vinegar
3 tablespoons sugar
1 teaspoon light (usukuchi) Japanese soy sauce
 
Directions
Bring the water to a boil in a saucepan and add the ginger. Bring the water back to a boil and then drain the ginger well in a colander. Let the ginger cool.
 
Put the ginger into a bowl and sprinkle the ginger lightly with salt.
 
In a saucepan, bring to a boil the vinegar, the sugar, the 1 teaspoon salt, and the soy sauce, stirring to dissolve the sugar and salt. Pour the hot liquid over the ginger, mix well.
 
Store the ginger in a tightly covered container in the refrigerator. It will be ready to use in a day or two and will keep for several months, at least. 
 

Disclosure: This cookbook was sent to me for review purposes by The Harvard Common Press. I was not required to post about it and I received no compensation for doing so. 

13 Best Tomato Recipes

August 1, 2013

I did it again.

Every year when the end of May rolls around, I forget. Unlike other bloggers who spend weeks building up to the big day, planning giveaways and making special recipes, it passes me by, and few weeks later I think – oops, I forgot again.

I’m talking about my food blogging anniversary. Fake Food Free has been alive and well for over 5 years. It’s overwhelming to think where this blog has taken me since I began typing my first words in our apartment in Southern Brazil.

Things have evolved through my travel, adventures in food culture and gardening. My photos are a bit better than those dark point-and-shoot images I started with, and I’d like to think my recipe writing has improved as well. I’ve met amazing people, and now I’m at a place where health, food and recipe writing, and taking food photos are my work. As you’ll hear me say often – Life is good.

And it all started with this blog.

While things have changed a bit here, and I don’t get to post as much as I used to, this is certainly not a farewell post. It’s a big Cheers, Prost and Saúde to another 5 and beyond!

What better way to celebrate than with tomatoes! Well, okay, a cocktail might be better, but right now we’re in the heart of summer and all I can think about are beautiful heirlooms, sweet cherries and plump Romas.

After 5 years of blogging, I’ve created and adapted my fair share of recipes using my favorite part of this season.

Here are 13 that you must make before the 2013 tomato season passes us by! (Click on the name and it will take you to the post with the recipe.)

Roasted Garlic, Tomato and Black Bean Soup

Grilled Marinara Pasta

Honey Peach and Tomato Black Rice Salad

Hearty Tomato, Kale and Mushroom Sauce

Roasted Tomato, Black Bean and Arugula Salad

Smoky Tomato Jam

Beer Cheese Tomato Soup

Honey-Pecan Tomato Tarts with Blue Cheese

BLT Spinach Salad with Fresh Garlic Dill Dressing

Heirloom Tomatoes and Cantaloupe

Stuffed Poblano Peppers with Tomato Chile Sauce

Poblano Cilantro Salsa

Sweet and Simple Tomato Pepper Salad

Bacon and Oyster Mushroom Stuffed Squash Blossoms Recipe

June 11, 2013

It’s surprising that with all the squash plants I’ve grown, I’ve never tried cooking with squash blossoms. I always blamed it on bad timing.

Those pretty yellow flowers would appear in early summer and I would think – No way am I picking those. I want a squash out of that. What if the plant doesn’t produce much this year?

Then (as you know if you’ve grown squash) by mid to late summer when I was buried with summer squash up to my eyeballs, I wish I had used some of those blossoms. 

I no longer have my own squash plants, but I did spot some of those pretty blossoms at the Ferry Building Farmer’s Market last weekend. I wasn’t quite sure what I would do with them, but I had oyster mushrooms, bacon, bread and tomato sauce, too, so this is how it went. And when I have my own squash plants again someday, I will definitely be picking those blossoms.

Bacon and Oyster Mushroom Stuffed Squash Blossoms

1.5 ounces oyster mushrooms, chopped
2 slices bacon, chopped
2 tbsp finely chopped onion
1 clove garlic, minced
1/3 cup bread crumbs
3 leaves fresh basil, chopped
Salt and pepper to taste
12 small to medium squash blossoms
¾ cup your favorite marinara sauce
2 tbsp grated Parmesan cheese

Preheat the oven to 350 degrees F.

Preheat a deep skillet over medium-high, add the bacon and mushrooms. Cook for about 3 minutes. Add the onion and garlic. Continue to cook until the bacon is browned and the mushrooms are tender, about 3 to 4 minutes more.

Stir in the bread crumbs and the basil. Add salt and pepper to taste. Remove from the heat.
Fill each squash blossom with about a heaping tablespoon of the stuffing, depending on the size of the blossom. Twist the end of the flower to seal.

Pour the marinara in a baking dish and spread over the bottom of the dish. Arrange the blossoms in a single layer over the sauce. Top with the Parmesan cheese.

Bake for 20 minutes or until the blossoms become tender and the cheese begins to brown. Serves 2 to 3, if the squash blossoms are on the smaller side.


 Thanks for reading! All images and content are the property of Fake Food Free unless otherwise stated. Please do not republish full recipes and images without written permission. What is okay? Feel free to Pin images, share links to my posts or share the photo in a round up post with the title of this recipe and a link back to the post. Confused about copyright and food blogs? Here is some helpful information on Recipe Attribution. If you want to use a photo or full recipe, just ask. I’m sure we can work something out.  


Cookie Monster Ice Cream Sandwiches from I Scream Sandwich by Jennie Schacht

May 22, 2013
Cookie Monster Ice Cream Sandwiches from I Scream Sandwich by Jennie Schacht on fakefoodfree.com

There is a local ice cream shop in my hometown that has the best ice cream sandwiches. Chocolate chip cookies with chocolate chip ice cream. The cookies are thick and they turn chewy once frozen. They also have just enough of a salty flavor to offset the sweetness of the ice cream, making the whole treat incredibly tasty.

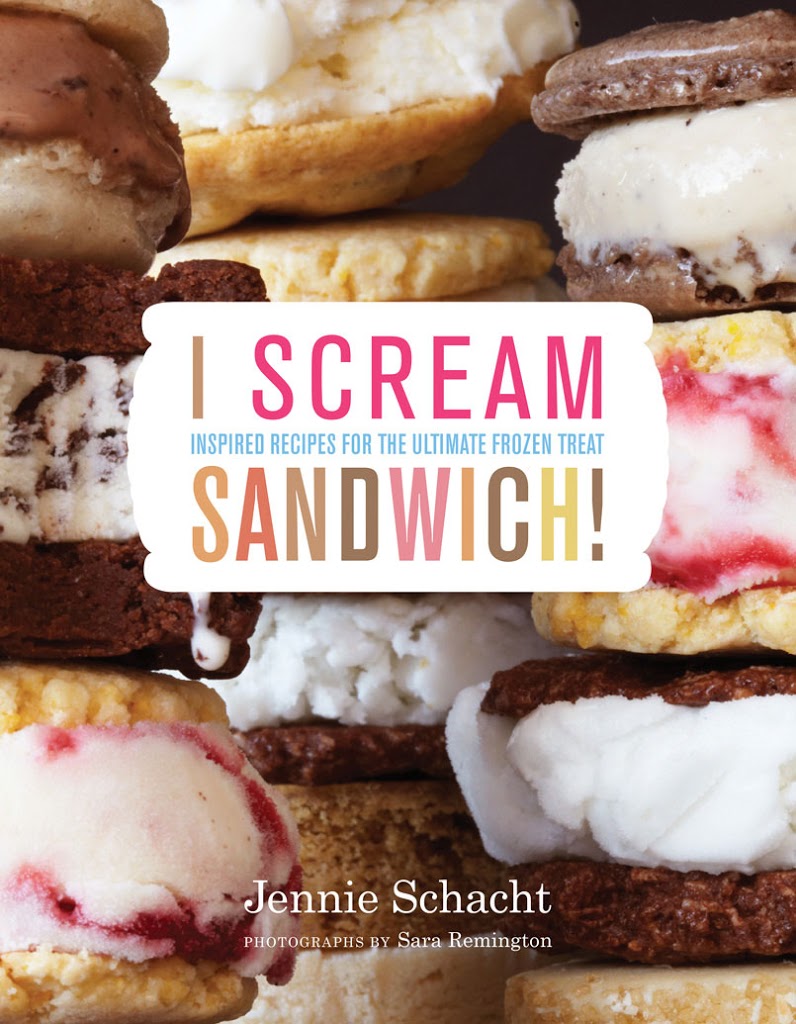
I’ve not made many ice cream sandwiches myself so it’s never occurred to me to try and recreate that version I loved growing up. Then I received a copy of I Scream Sandwich by Jennie Schacht. Those ice cream sandwiches from back home came to mind, but I wanted to try something that sounded different. Maybe the Vietnamese Breakfast with coffee flavored ice cream or the Got Your Goat with goat’s milk ice cream.

This book is full of ice cream sandwiches that will spark your curiosity. You’ll be pulling out the ice cream maker and calling dibs on bringing dessert to all your summer picnics. Creamy ice creams, rich gelatos and fruity sorbets are surrounded by more than just cookies.  Croissants, cakes, bars and buns are just a few of the creative exteriors to the sweet sandwiches in this book.

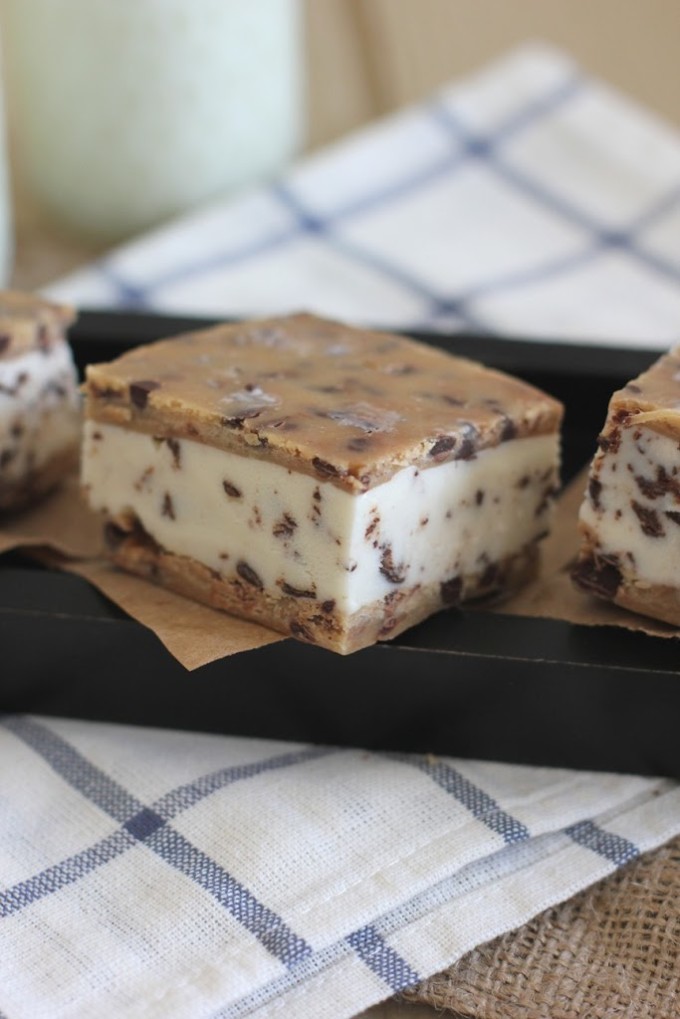
After my husband voiced his craving for something more classic, I decided to make the Cookie Monster. Let’s just say that after reading the recipe I realized that this sandwich was classic only in flavor. I wanted something a little different and, wow, did I get it.

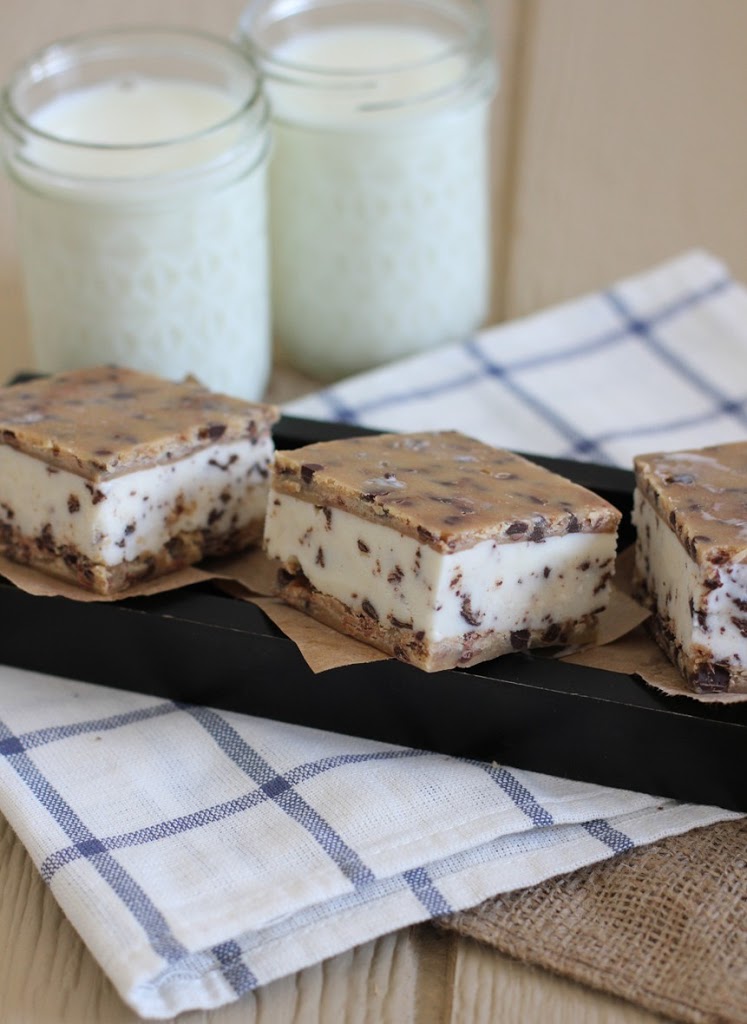
Why? Well, this sandwich isn’t surrounded by a cookie, but by cookie dough! Frozen (yet soft) cookie dough around homemade chocolate chip ice cream. It’s a brilliant idea.

And you know what is even better? Despite the fact that it’s cookie dough and not a baked cookie, it tastes almost exactly like that ice cream sandwich I grew up with!

Just a few tips if you are not a regular ice cream sandwich maker (like I wasn’t). Plan, plan, plan ahead. You will need to plan for freezing time, greased parchment paper and cold bowls. Read through the recipe and read it again. It’s really not that much work when all is said and done, but you’ll want to know what to expect before you get into it. Also, some of the methods for assembly are explained in the first few pages of the book so give them a browse before you start the recipe.

Cookie Monster Ice Cream Sandwiches from I Scream Sandwich by Jennie Schacht on fakefoodfree.com

Finally, don’t expect to have much will power around these things. I thought a batch would last us a while, but these have to be the most vocal desserts I have ever made. I could hear them calling me from the freezer all day long.

Cookie Monster Chocolate Chip Ice Cream on Cookie Dough

Copyright © 2013 Jennie Schacht, reprinted with permission from Abrams Books

Chocolate Chip Ice Cream (GF)

2 cups (480 ml) whole milk
¹⁄3 cup (67 g) granulated sugar
2 tablespoons golden syrup, inverted sugar syrup or light agave nectar
2 tablespoons tapioca starch
¼ teaspoon kosher salt
1 cup (240 ml) heavy cream
½ teaspoon pure vanilla extract
½ cup (100 g) bittersweet (60 to 70 percent) chocolate, chopped or chips
1 tablespoon neutral vegetable oil or coconut oil

Whisk ½ cup (120 ml) of the milk with the sugar, syrup, tapioca, and salt in a medium saucepan until no lumps remain. Stir in the remaining 1½ cups (360 ml) milk and the cream. Heat the mixture over medium-high heat, stirring with a heatproof spatula, until it begins to steam and slightly bubble at the edges. Adjust to a simmer and cook, stirring constantly, until the mixture thickens to the consistency of a cream sauce, about 3 minutes longer; do not fully boil.

Transfer the mixture to a metal bowl set over a larger bowl of ice and water. Stir occasionally until the mixture is cool, taking care not to slosh water into the bowl. Stir in the vanilla, then cover and refrigerate until very cold, at least 2 hours. Transfer the bowl to the freezer for the last half hour before spinning it.

Freeze the mixture in an ice cream maker according to the manufacturer’s directions. While the mixture spins, melt the chocolate and oil in the microwave or in a small saucepan until you can stir it smooth. Let cool to room temperature, keeping it fluid. With the machine running, drizzle in the cooled melted chocolate during the last minute of spinning. (Alternatively, drizzle the chocolate over the ice cream as you transfer it to the container, folding it in with a spatula or ice cream paddle to break it up as you go.) Transfer the ice cream to a chilled container, cover, and freeze until firm but still spreadable, at least 4 hours.

Cookie Dough

½ cup (1 stick / 113 g) unsalted butter
¹⁄3 cup packed (67 g) light brown sugar
¼ cup (50 g) granulated sugar
2 tablespoons milk, whole or 2%
½ teaspoon pure vanilla extract
½ teaspoon kosher salt
1¼ cup (165 g) all-purpose flour
1 cup (200 g) mini chocolate chips
Neutral vegetable oil, for the waxed or parchment paper

Melt the butter with the brown and granulated sugar in a small saucepan, stirring to dissolve the sugar. Transfer to a bowl and stir in the milk, vanilla, and salt until well blended. Stir in the flour until completely smooth. Let cool completely, then stir in the chips. (If the chips begin to melt, stop stirring—the swirls will be pretty.)

Line an 8-inch (20-cm) freezer-safe baking pan with two pieces of lightly oiled waxed paper or parchment paper so the papers extend well beyond the edges of the pan on all four sides as a sling for easy removal. Scatter half of the dough into the pan and use your fingers to pack it into an even layer. Top with lightly oiled waxed or parchment paper, oiled side down.

Place another lightly oiled waxed or parchment paper in the pan, leaving 2 inches (5 cm) of paper extending at each end. Scatter and press the remaining dough into an even layer. Top with lightly oiled waxed paper or parchment, oiled side down. Freeze the dough layers until firm, at least 1 hour.

SANDWICH!

Use the flaps to lift out the top cookie dough layer. Peel the paper from one side and loosely replace it. Flip the layer over and do the same to the other side. Repeat with the second cookie dough layer. Place both layers back in the freezer.

Form sandwiches using Method #4* on page 19, starting with step 3, using the bottom two pieces of parchment extended on all sides to line the pan in place of the plastic wrap. Freeze hard before cutting the sandwiches into 4 strips in each direction to form 16 bars. To make 64 bite-size treats, cut each bar into quarters.

*Place one slab of cookie dough top-side down in the pan and spread softened ice cream over it in an even layer. Top with the second slab, top-side up, pressing firmly to evenly distribute the ice cream. Wrap tightly in plastic wrap and freeze until very firm, at least 6 hours or overnight, for easiest cutting.

Cookie Monster Ice Cream Sandwiches from I Scream Sandwich by Jennie Schacht on fakefoodfree.com

I should probably mention that I happily have many cookbooks to review this summer. Don’t worry, I haven’t stopped creating my own recipes. They will be interspersed regularly. But I have a passion for cookbooks and enjoy the opportunity to support the art by sharing ideas for new books for your library. I hope you enjoy them as much as I do.

Disclosure: I received a copy of this book for review purposes. I was not required to post about it and received no compensation for doing so. Thoughts here are my own.


Thanks for reading! All images and content are the property of Fake Food Free unless otherwise stated. Please do not republish full recipes and images without written permission. What is okay? Feel free to Pin images, share links to my posts or share the photo in a round up post with the title of this recipe and a link back to the post. Confused about copyright and food blogs? Here is some helpful information on Recipe Attribution. If you want to use a photo or full recipe, just ask. I’m sure we can work something out.  

Green Tea-Sesame Butter from Flavored Butters by Lucy Vaserfirer

April 22, 2013
 Green Tea-Sesame Butter over chilled soba noodles | FakeFoodFree.com

Cream, salt and a special marble go into a sealed cup. Then shake until arm cramps, and then keep shaking. Finally, after what feels like hours to your arm, you end up with creamy butter. I can still remember the grade school experiment, as well as how good that butter tasted.

Then along came the junior high years, an obsession with the scale, and many false accusations directed at real food. This was followed by a growing interest in nutrition and fitness. Next, the work toward my degrees in nutrition.

And through all of this, there was no butter.

I wouldn’t touch the stuff. I even convinced myself that I liked dry biscuits and pancakes. I can still remember family cookouts and preparing those foil packets filled with potatoes for the grill. Knowing I was partially in charge, my grandmother would make sure I heard her say, “I want mine with butter. REAL butter.”

Now, the thought brings a smile to my face. Oh, if she could only see how much I’ve changed.

As you know, I am now a believer in real food — grassfed and pastured meats, garden grown vegetables, and yes, sweet butter. No trans-fat filled imposters make it into my kitchen and biscuits and pancakes have never tasted so good.

Naturally, when I was given the opportunity to review a cookbook all about butter, I jumped at the chance. Flavored Butters by Lucy Vaserfirer celebrates the simplicity of butter while showing how exciting we can make it. 

The book is filled with simple (yet taste-bud thrilling) recipes that can turn a pat of butter into the highlight of your breakfast, brunch or dinner. Curry Butter and Coffee Butter were two that immediately caught my attention.

Then I saw the Green Tea-Sesame Butter! Despite my love of Matcha, I had yet to see it in butter. I promise you, a dollop of this gorgeous green, shaken cream will completely transform a meal.


Green Tea-Sesame Butter
In one of the beautiful photos by Lucy, the book shows this butter on top of grilled salmon, which I’m sure is delicious. I decided to take a little creative liberty and used it to top Japanese soba noodles which I plated as bite-sized appetizers. Either way you choose to have it, you’ll love this recipe, and the many more ways this book will introduce you to the amazing potential of butter.

GREEN TEA–SESAME BUTTER
Recipe © 2013 by Lucy Vaserfirer and used by permission of The Harvard Common Press

From the author: This green-hued butter is flavored primarily with matcha tea, which gives it a subtly sweet vegetal note that complements both sweet and savory foods. It pairs nicely with seafood—particularly salmon fillets—and steamed vegetables. But it’s also delicious spread on ginger scones.

Matcha is the powdered green tea traditionally used in the Japanese tea ceremony and can be found at tea shops, many Asian markets, and online.

Ingredients
8 tablespoons (1 stick) unsalted butter, softened
2 teaspoons matcha tea, sifted
2 teaspoons toasted sesame seeds (use black sesame seeds if you want to see the speckles)
2 teaspoons sugar
1⁄4 teaspoon kosher salt, or to taste
1⁄8 teaspoon toasted sesame oil

Instructions
Blend together the butter, tea, sesame seeds, sugar, salt, and sesame oil in a medium-size bowl. Form into a log and refrigerate until firm before slicing and serving, or use another shaping method.
MAKES 8 SERVINGS

Green Tea-Sesame Butter over soba noodles | Fake Food Free

Disclosure:  This book was sent to me for review purposes from The Harvard Common Press. I was not required to write about it and I received no compensation for doing so. Thoughts are my own, and I love butter.


Whole Wheat Banana Snack Cake with Chocolate Guinness Frosting Recipe

April 8, 2013

When presented with an open beer (minus the ¼ cup you used in a recipe), most people would drink it. It’s a logical solution and one I’ve implemented myself numerous times.  But when I made the Guinness Braised Kale with potatoes and poached egg for St. Patrick’s Day, I found myself debating whether to drink half  a beer or make a cake.

I chose cake.
 

This isn’t your super sweet, rich, decadent dessert cake, which is why I decided to add snack cake to the name. It’s filling with the fresh flavor of banana, and the frosting will curb any craving for chocolate. Maybe even a hankering for dark beer. If you don’t mind a splash of booze and hearty whole grains for breakfast or as a snack, then I suggest you forgo finishing off your next pint, too.


Whole Wheat Banana Snack Cake with Chocolate Guinness Frosting

Makes: 9 servings

Ingredients

¾ cup mascavo (muscovado) sugar
¼ cup olive oil*
2 eggs
1 overripe banana, mashed
1 tbsp Guinness beer
1 cup whole wheat flour
½ tsp baking soda
¼ tsp salt
 
Frosting
1 tbsp unsalted butter, softened
1 ½ cups confectioner’s (powdered) sugar
1 tbsp cocoa powder
2 tbsp Guinness beer
 
Prep

Preheat the oven to 350 degrees F and grease an 8×8 inch square pan.

Add the sugar, oil and egg to the bowl of a mixer fitted with the paddle attachment. Mix on medium for about 1 minute. Add in the banana and mix on medium to medium-high 1 minute more. Mix in the 1 tablespoon of Guinness.
 
In a medium bowl, whisk together the flour, baking soda and salt. With the mixer on low, gradually add the dry ingredients. Mix just until combined, scraping the sides of the bowl as needed.
 
Transfer the batter to the prepared pan and bake for 20 to 25 minutes, or until a toothpick inserted in the center comes out clean. Allow the cake to cool.
 
To prepare the frosting, add the butter and powdered sugar to the bowl of the mixer fitted with the whisk or paddle attachment. Beat together the butter and powder sugar on medium and then medium-high until combined, and almost smooth, about 1 minute. Add the cocoa and 1 tablespoon of the Guinness. Mix on medium-high until the frosting is smooth, about 90 seconds. Mix in the additional 1 tablespoon of Guinness, based on your desired consistency for the frosting. The full 2 tablespoons was perfect for me.
 
Frost the cooled cake, cut into 9 pieces and serve. 
 
*Be sure to use regular olive oil with this recipe because it has a more mild flavor. Virgin olive oils may add too much of an olive-like taste. 


Thanks for reading! All images and content are the property of Fake Food Free unless otherwise stated. Please do not republish full recipes and images without written permission. What is okay? Feel free to Pin images, share links to my posts or share the photo in a round up post with the title of this recipe and a link back to the post. Confused about copyright and food blogs? Here is some helpful information on Recipe Attribution. If you want to use a photo or full recipe, just ask. I’m sure we can work something out. 

Ginger Coconut Soup with Wai San and Shrimp Recipe

March 26, 2013

Wai San is a potato-like root vegetable that I discovered at an Oakland Farmers market several years ago. It turned out to be delicious addition to this ginger coconut soup!

I watched the mass of shoppers hover around the table for at least 10 minutes before I mustered up enough courage to elbow my way in and take a look. I was surprised to see a knobby, speckled, skinny root vegetable staring back at me. I had no idea what it was and given all the hustle around me, I doubted I’d get an answer even if I asked.


I walked away, but it didn’t take long for my curiosity to get the better of me. Finally, on my last lap through the Farmers Market there was a lighter crowd swarming the vendor. I stepped up, analyzed the unfamiliar root, and I caught his eye. I asked what it was. He responded twice with the proper name, and I’m sure my face revealed that not only could I not hear over the people, but that I also couldn’t understand him.

His next response was, “Chinese potato. You cook it like potato in a soup.

Sold. I grabbed up a handful and he nodded in acknowledgement that I only needed a few for soup.


After a bit of research, I think I finally found the name for this new-to-me vegetable. I say – I think – because it wasn’t easy to come by. I have found a couple of blogs which identify it as Wai San.

It’s long and thin, and almost looks like it has dots. Check.

When it’s peeled, its starch is sticky and a little glue-like. Check.

It boils up like a potato, yet it has a blander flavor. Check.

If you happen to know it by another name, please let me know in the comments. I’d love to learn more about it.

This being my first attempt at cooking with Wai San I didn’t want to get too adventurous. I stuck to the recommendation for soup, and I wasn’t let down.

Cut into small pieces, it takes less time to cook than potato. It has a similar texture, but it’s less starchy. It’s almost like a cross between a carrot and a potato, but with little flavor. That is, until you mix it with the ginger, coconut milk, and shrimp in this soup. Then it becomes all kinds of delicious.

 
Ginger Coconut Soup with Wai San and Shrimp Recipe
Serves 4
Wai San, a potato-like root veggie, makes a delicious addition to this soup. If you can't find it in your area, any type of potato can be substituted. Adjust the cooking time to cook until the potato you use is tender.
Write a review
Print
Ingredients
  1. 1 tablespoon extra virgin olive oil
  2. 1 small yellow onion, diced
  3. 4 cloves garlic, minced
  4. 2 stalks celery, sliced
  5. ½-inch piece of ginger, peeled and grated
  6. 1 ½ cups peeled and chopped Wai San
  7. 1 (13.5 ounce) can coconut milk
  8. 3 cups seafood stock
  9. ½ pound cooked shrimp, chopped
  10. ½ teaspoon sea salt
  11. ¼ teaspoon ground black pepper
  12. 2-3 green onions, sliced for garnish
Instructions
  1. Heat the olive oil over medium-high in a large soup pot. Add the onion, garlic and celery. Cook, stirring often, for 2 to 3 minutes, or until the vegetables begin to soften. Add the ginger. Add the Wai San and cook 1 more minute.
  2. Pour in the coconut milk and seafood stock. Bring to a low boil and then reduce the heat to a simmer. Allow the soup to simmer about 5 minutes or just until the Wai San is tender.
  3. Add the shrimp, salt, and pepper. Cook just until the shrimp are heated through, about 1 minute. Top each bowl of soup with green onions and serve warm.
Fake Food Free https://www.fakefoodfree.com/


Want to create beautiful food and product photos that you can't wait to share?!
Discover your style, control the light, and shoot using the tool you know how to use (yes, your phone included). Learn about free resources, Live Q&As with Lori, and online courses you can take from anywhere in the world!
We respect your privacy. Unsubscribe at any time.