Browsing Category

Appetizers and Snacks

Gold Potato and Bacon Croquettes with Jackpot Beer Cheese Sauce

September 16, 2014

Gold Potato and Bacon Croquettes with Jackpot Beer Cheese Sauce | Fake Food Free

The challenge? Come up with a potato recipe that can be classified as Potatoes: Vegas-style! We go to Las Vegas every year so I started thinking of all the words I associate with that sparkly, shiny town.

Gamble – Maybe a little too negative and not something you really want to take with a new recipe.
Strip – As in the street, but it still leaves a little too much to the imagination.
Winner – Maybe.
Jackpot – Now you’re talking.

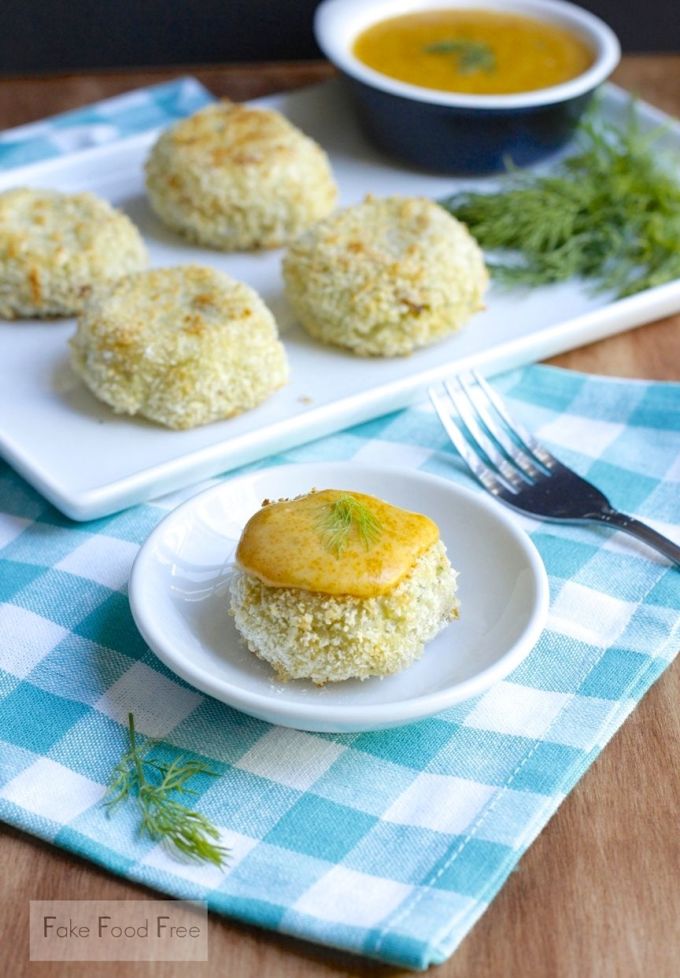
So I started thinking about what I would consider a jackpot of flavors. You can never (and I mean, never) go wrong with potatoes and bacon. And sharp cheddar, of course. Cheddar then makes me think of beer, as in beer cheese. I tossed around ideas of how to put it all together and finally decided on some crispy, crunchy baked croquettes that resembled playing chips with their disk shape. It has to be gold potatoes, by the way, because there are few cities as golden and shiny as Las Vegas.

Continue Reading…

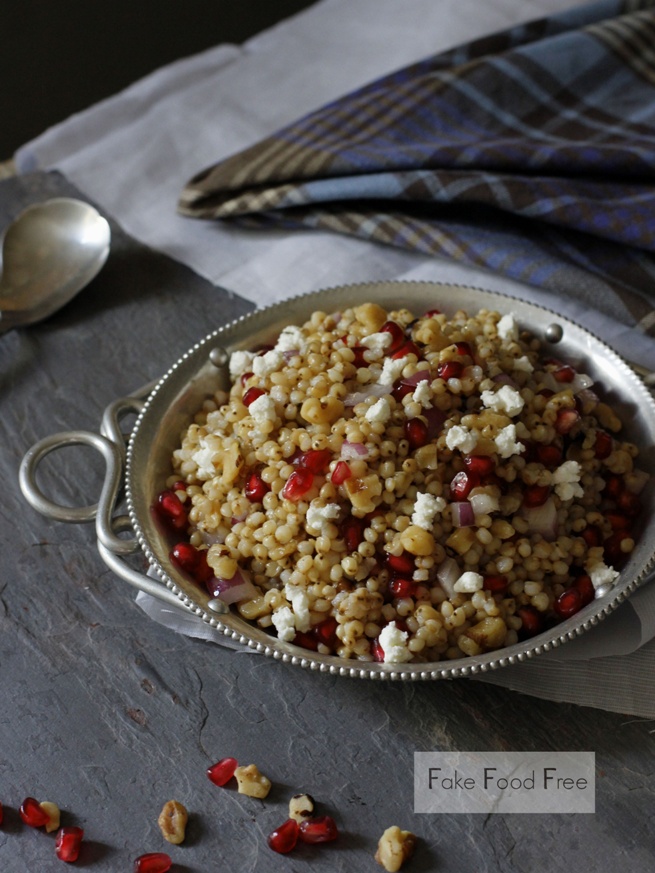
Sorghum Pomegranate Salad with Goat Cheese and Walnuts Recipe

September 8, 2014

Switch up your cold grain salads and add some sorghum! In this recipe, the chewy grain is combined with pomegranate and walnuts, and then topped off with tangy goat cheese.  

Sorghum Pomegranate Salad with Goat Cheese and Walnuts | Fake Food Free

I was cooling down from my run last week, taking a nice leisurely walk back to the house, when I saw it. Tucked between two houses was a tree with long branches that were bending under the weight of beautiful red pomegranates.

I see fruit trees around here all the time – figs, citrus, persimmons – and while I’ve seen a pomegranate tree before, I had never seen one in our neighborhood. It was gorgeous.

And I want some!

When I see trees loaded with fruit that seem to be untouched I am so tempted to knock on the door and ask if the owners are going to use the fruit. But I have never gotten up the courage. Then again, the stakes have never been quite this high. A pomegranate might be just enough to get me out of my comfort zone.

So here is the plan. I’m going to watch the tree for the next few weeks and if none of the fruit disappears, I’m doing it. I’m going to walk up and ring the doorbell.

I think. Maybe.

Continue Reading…

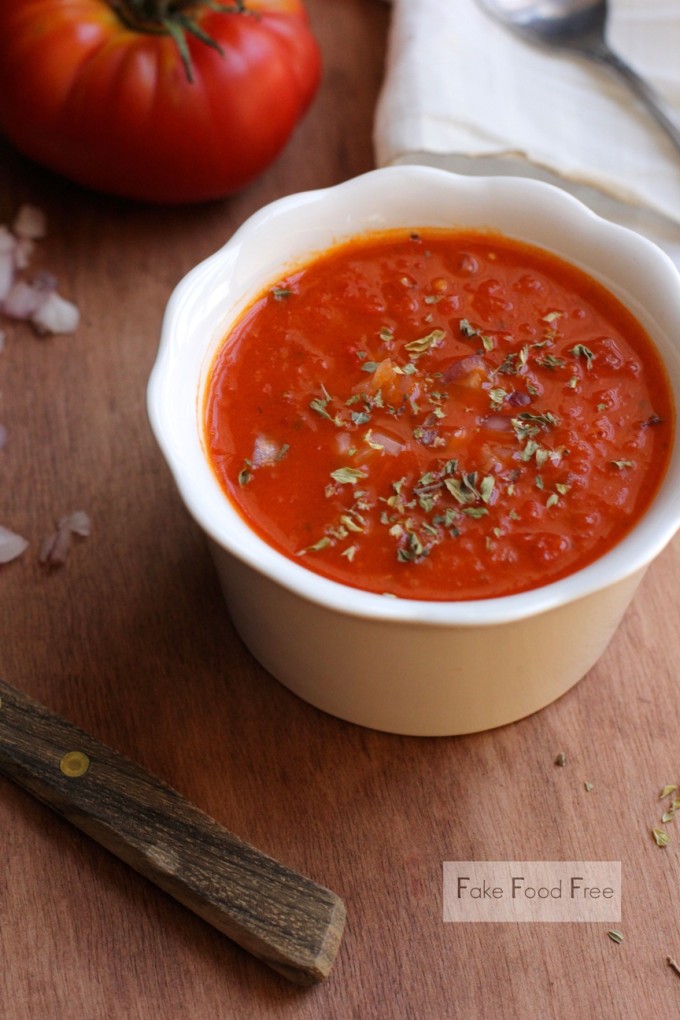
Chipotle Tomato Soup Recipe

August 23, 2014

This chipotle tomato soup comes together in minutes. It is rich and smooth with a hint of spice from chipotle peppers.

Chipotle Tomato Soup | fakefoodfree.com

I love the little cans of chipotles in adobo. I do. But every time I buy one I’m reminded that they may be the reason that phrases like – a little goes a long way – were created. I can never seem to find use for more than one pepper out of the can at a time.

My point being, I have another chipotle recipe to share. So here’s to hoping you like things spicy!

Continue Reading…

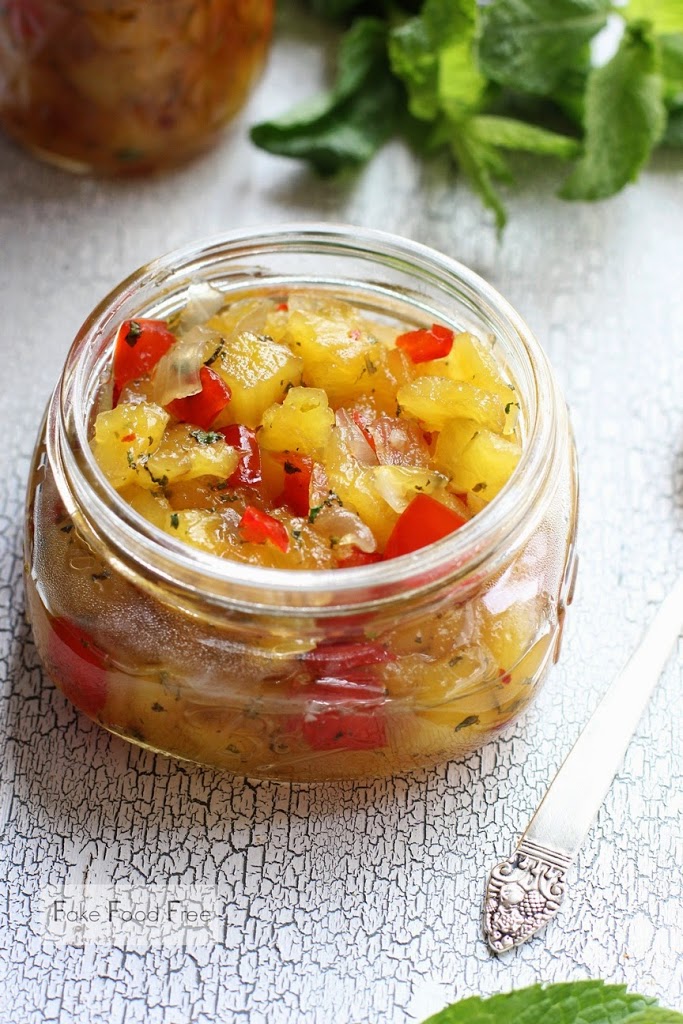
Pineapple Mint Chutney Recipe

July 25, 2014

Friday is cookbook review day throughout the summer here at Fake Food Free. If you have a love of cookbooks be sure to swing back by for plenty of new ideas and recipes.

Pineapple Mint Chutney Recipe | fakefoodfree.com

I don’t like to call it an addiction. That makes it sound as though it’s a bad thing.

Let’s go with attraction.

Yes. I have a strong attraction to canning and preserving cookbooks.

I have my mom’s old ones, I collect new ones and I never turn down the offer to test one out. Regardless of how simple or complex the recipes in the book may be, I always manage to find something I have never canned before.

Continue Reading…

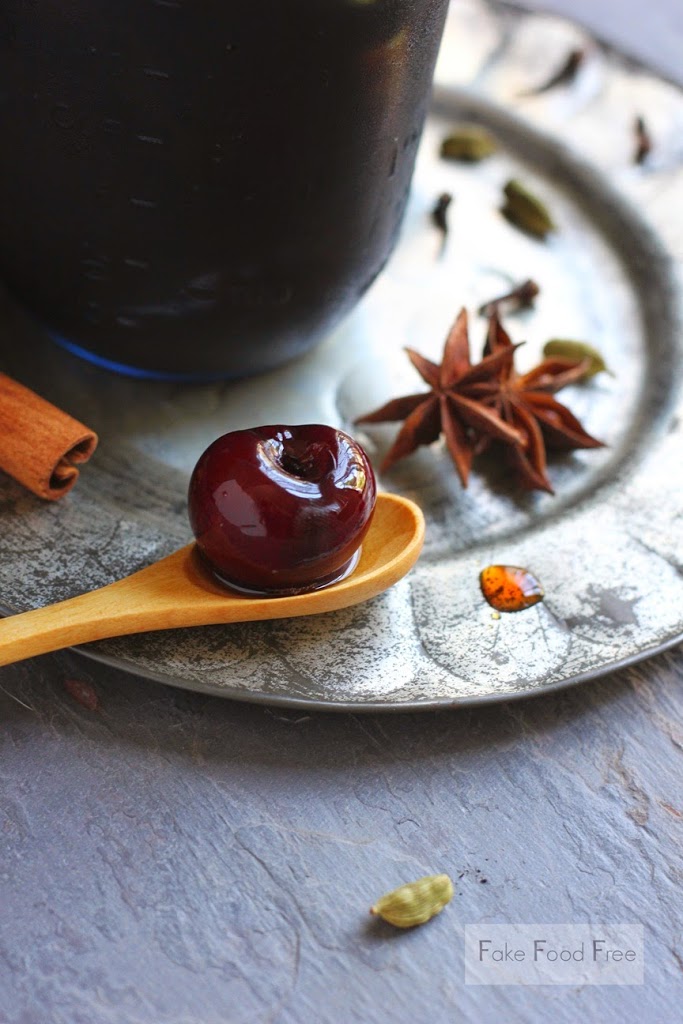
Spiced Balsamic Pickled Cherries Recipe

July 17, 2014
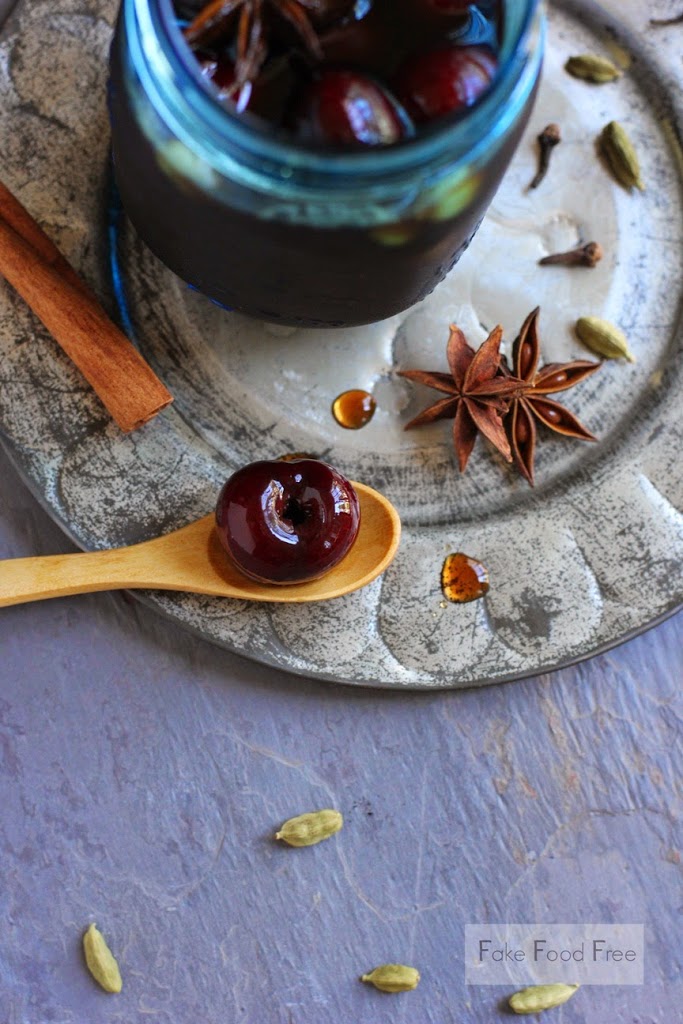
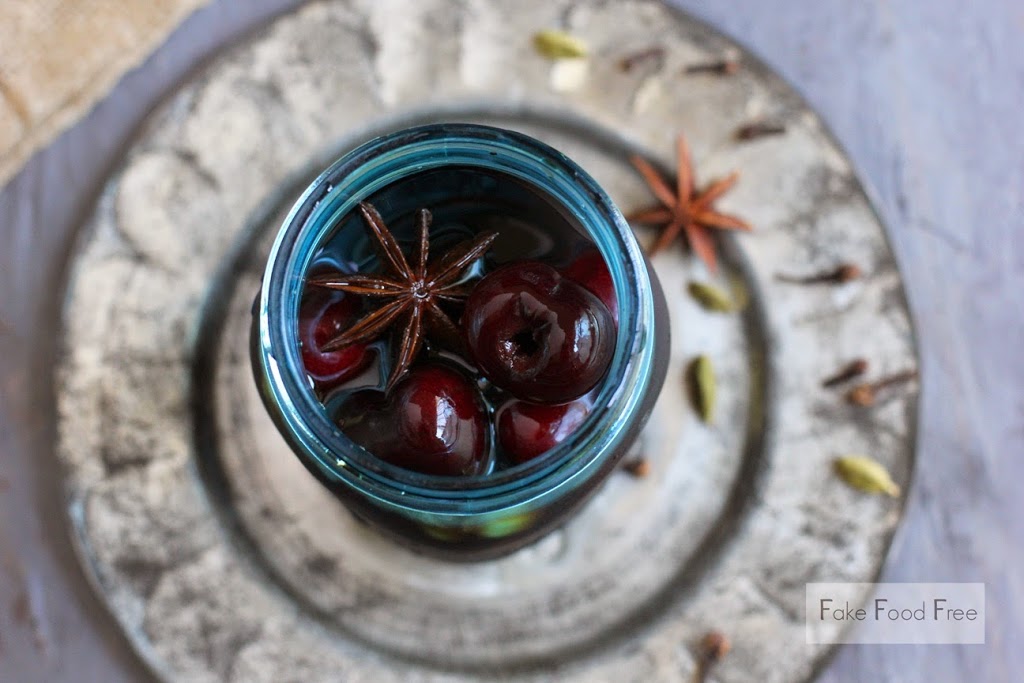
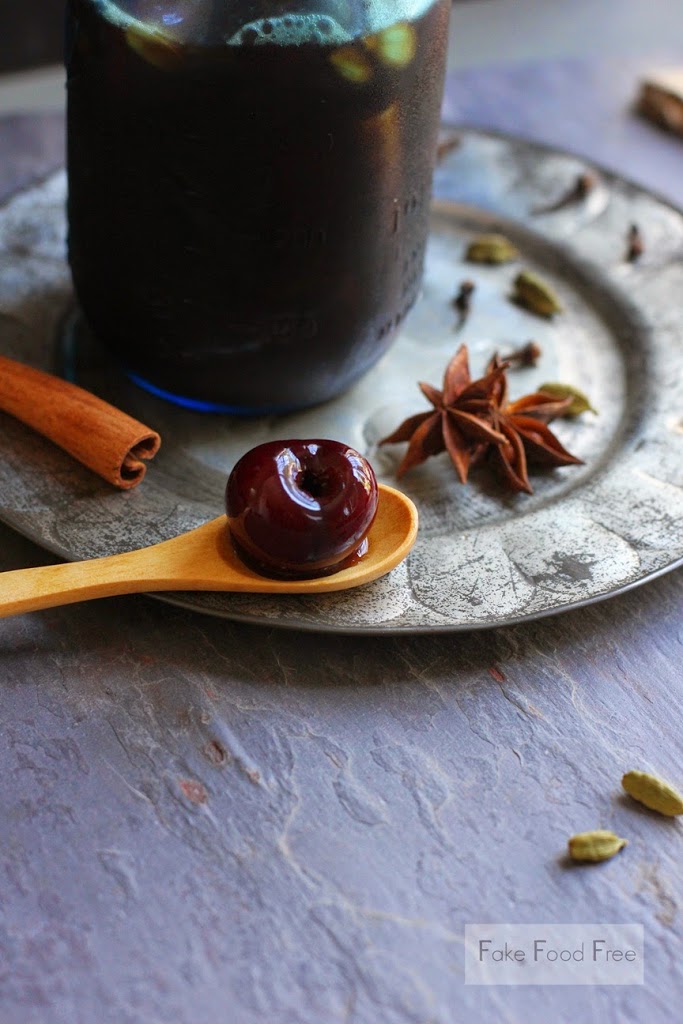
Spiced Balsamic Pickled Cherries Recipe | fakefoodfree.com
 
Last Friday I loaded up on gorgeous Washington State cherries at the Whole Foods one-day sale. By loaded up I mean I bought 10 pounds. I am a sucker for specials on fruit, and cherries freeze well, so I convinced myself to add a few extra bags to my cart.
 
By Tuesday, I realized my cherry pitting hack of using a hard plastic straw wasn’t going to cut it so I broke down and bought a pitter. By Wednesday, they were all pitted and waiting to either be used or frozen.
 
I made a double batch of Kentucky Bourbon-Vanilla Soaked Cherries, but I still had about a pint left in the fridge. A pint that was decreasing at the rate of about one cherry per hour every time I opened the fridge and ate one.
 
I wanted to make something else with these cherries, but I really didn’t want a bunch of baked goods around. Then I spotted a recipe (via Pinterest) this morning for Spiced Quick-Pickled Cherries, which randomly ended up being from Whole Foods as well.


Spiced Balsamic Pickled Cherries Recipe | fakefoodfree.com
 
 
I’d seen recipes for pickled cherries before, but this one convinced me to give them a try. It sparked an idea for my own version. I had some other spices on hand and I really wanted to use star anise because I love the flavor. I also wanted to try using some rich balsamic vinegar instead of white vinegar.
 
This recipe comes together very quickly, but that is only part of it. After you drown the cherries in the spiced, syrupy, vinegar goodness they have to sit in the fridge and you have to wait patiently on the other side of the door.


Spiced Balsamic Pickled Cherries Recipe | fakefoodfree.com
 
It was hard work, but I tasted them every few hours because I wanted to know the minimum they could sit to get the best flavor. As a result, I suggest letting them soak for at least 12 hours before serving, and 24 would be even better. They tasted good after just a few hours, but the spiced flavors get stronger and more delicious as they sit.
 
I’ve been snacking on them straight from the jar, but the original recipe suggests serving pickled cherries with charcuterie and I think that would be an excellent way to use them. Cocktails and ice cream topping come to mind as well.


Spiced Balsamic Pickled Cherries

Inspired by Spiced Quick-Pickled Cherries
 
Makes: 1 pint
 
Ingredients
½ cup water
¼ cup sugar
5 cardamom pods
5 whole cloves
2 whole star anise
1 cinnamon stick
¾ cup balsamic vinegar, or enough to fill the jar
1 pint fresh cherries, pitted
 
Prep
Combine the water and sugar in a medium saucepan over medium-high heat. Bring to a simmer and cook for 2 to 3 minutes, until all the sugar is dissolved the liquid thickens a little.

Add the cardamom, cloves, anise and the cinnamon stick. Stir, remove from the heat and let cool for 2 to 3 minutes.

Pack the cherries into a clean pint jar, leaving at least a 1-inch head space. Pour the syrup and the spices into the jar. You might need to push the whole spices around to help them fit.

Pour the vinegar into the jar to cover the cherries, leaving a 1-inch head space. Seal the jar with a lid and band. Gently shake it a bit to mix and coat all the cherries.

Place the jar in the refrigerator and give it a shake every few hours, or when you think about it. Let chill in the fridge for at least 12 hours before serving.


Thanks for reading! All images and content are the property of Fake Food Free unless otherwise stated. Please do not republish full recipes and images without written permission. What is okay? Feel free to Pin images, share links to my posts or share the photo in a round up post with the title of this recipe and a link back to the post. Confused about copyright and food blogs? Here is some helpful information on Recipe Attribution. If you want to use a photo or full recipe, just ask. I’m sure we can work something out. 

Dainty Ladies from Edwardian Cooking

June 13, 2014
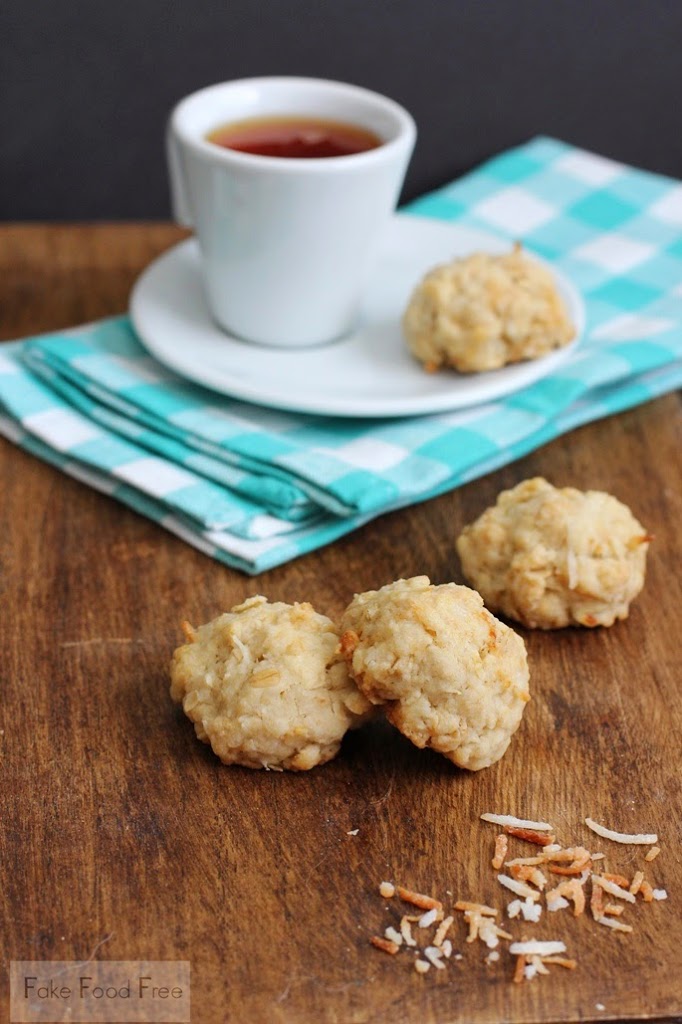
My favorite scenes from Downton Abbey are always in the kitchen or the dining room. These Dainty Ladies from Edwardian Cooking bring those scenes to life, allowing us to serve some foods of that time at our own (less fancy) tea times and dinner parties!
 
Dainty Ladies from Edwardian Cooking | fakefoodfree.com
Have you ever envisioned what it would be like to live during a different time in history?
 
As a kid I can remember being crazy about Little House on the Prairie. I really wanted to be that Laura Ingalls. At that point, food didn’t play a part in my fascination, but the rustic kitchen, farm life and fishing by the creek did. Despite the cold nights and TV drama, it looked like so much fun!
 
Given that little piece of my past and my love of travel you’d think I would have been a shoo-in for Downton Abbey. I was such a late blooming fan. I didn’t see the draw at all for the first two seasons. Then I watched my first episode and it all went down hill.
 
Hooked, binged watched and I’m anxiously awaiting what will happen next like everyone else.
 
I bet you can guess my favorite scenes. Yep, the kitchen. I love catching glimpses of what might have been prepared and served during that time.
 
It’s one reason why I’ve found Edwardian Cooking by Larry Edwards so interesting! Like the show, it’s a bit of fantasy meets history and it’s just plain fun!  
 
 
Even though Downton Abbey is fictional, similar scenarios existed during that time and the book goes into detail about the foods that were likely eaten. It is history lesson slash cookbook and provides 80 recipes inspired by Downton Abbey’s elegant meals so that you can recreate them.
 
I was drawn to the section devoted to High Tea recipes – the crumpets, finger sandwiches and cookies. I decided to make the one recipe that is direct opposite of my personality.
 
Dainty Ladies.
 
I’ve been described with many words, but dainty certainly isn’t one of them. Aside from giving me a giggle, the ingredients were right up my alley and I love the story about how ladies were reminded to remove their gloves to prevent getting butter stains. You can read about that below.
 
These little tea biscuits are just barely sweet. It reminds me of my favorite scones from Ireland. They are nothing like the scones here in the States. Just a touch of sugar and fruit make them sweet, just like a touch of sweetener and coconut takes the edge off the savory, buttery flavor of these little ladies. They have a nutty, shortbread-like taste and texture making them perfect for a tea or coffee break.
 
A note on ingredients. I had sweetened coconut on hand from another recipe so I used that. The recipe doesn’t clarify, but if you want them to be more of a cookie, I’d do the same. It adds just a little more sweetness.
 
Dainty Ladies from Edwardian Cooking | fakefoodfree.com


Dainty Ladies

(makes 32 small cookies)
From the book:
A staple of the drawing rooms and salons that served High Tea, these sweet sensations truly lived up to their feminine name. Served primarily to the female guests, Dainty Ladies are very buttery rich and have a wonderful texture, all of which was created to accentuate the taste of tea. When Dainty Ladies appeared on the table, the guests knew something special was about to happen. This is one of only a few dishes of the Edwardian era to feature coconut and the reason for this is rather simple. Obviously, you couldn’t grow coconut anywhere in Great Britain. It had to be imported at great cost. When (and if ) an abbey had coconut, it was locked up with only the butler of the house having the key. You might have noticed when watching Downton Abbey that quite often during High Tea or a social gathering featuring food, the women would wear white gloves. If Dainty Ladies were one of the featured sweets, the footman presenting the cookie would inform the guest and the guest would remove here right glove and with her thumb and forefinger, retrieve a cookie. The reason for this is the amount of butter used to make Dainty Ladies would soil the gloves.
 
Ingredients needed to make Dainty Ladies:


2 cups flour
1 cup flaked coconut
1 cup rolled oats (oatmeal)
1 tsp. baking soda
2 tsp. cream of tartar
1 cup butter
1 Tbs. corn syrup
2 Tbs. water
1 Tbs. vanilla
 
Steps:
1. Preheat the oven to 325°F. Line the bottom of a baking sheet with parchment paper
or a silicon sheet.
2. In a large bowl, whisk together the flour, coconut, rolled oats, baking soda, and
cream of tartar.
3. In a small pan over medium heat, melt the butter into the corn syrup and water.
Once the butter has melted, stir in the vanilla.
4. Pour the butter mixture into the flour mixture and stir until it is combined.
5. Let the dough sit 5 minutes for the oats to soak up the butter mixture.
6. Remove walnut-size portions of the mixture and roll into a ball.
7. Place the balls onto the prepared baking sheet.
8. Place into the oven and bake 12 minutes.

9. Remove from the oven and place the cookies on a wire rack to cool.

Disclosure: This book was provided for review purposes. I was not required to write about it and received no compensation for doing so. 


Thanks for reading! All images and content are the property of Fake Food Free unless otherwise stated. Please do not republish full recipes and images without written permission. What is okay? Feel free to Pin images, share links to my posts or share the photo in a round up post with the title of this recipe and a link back to the post. Confused about copyright and food blogs? Here is some helpful information on Recipe Attribution. If you want to use a photo or full recipe, just ask. I’m sure we can work something out. 

Swedish Crisp Bread with Cumin from Tina Nordström’s Scandinavian Cooking

May 15, 2014
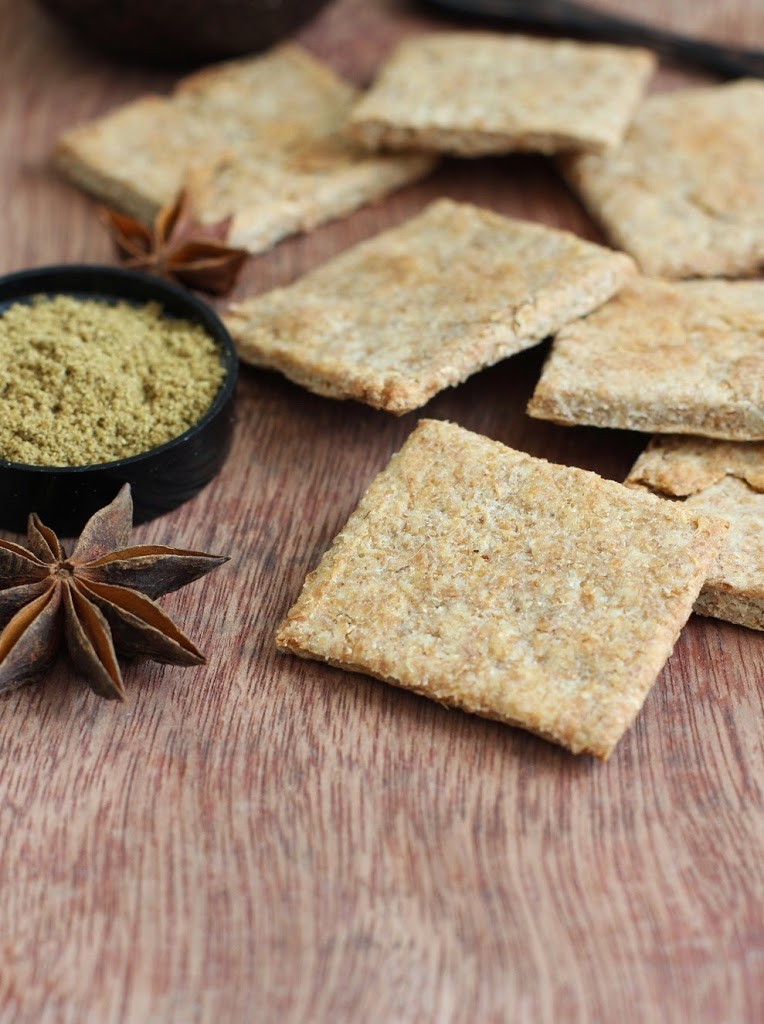
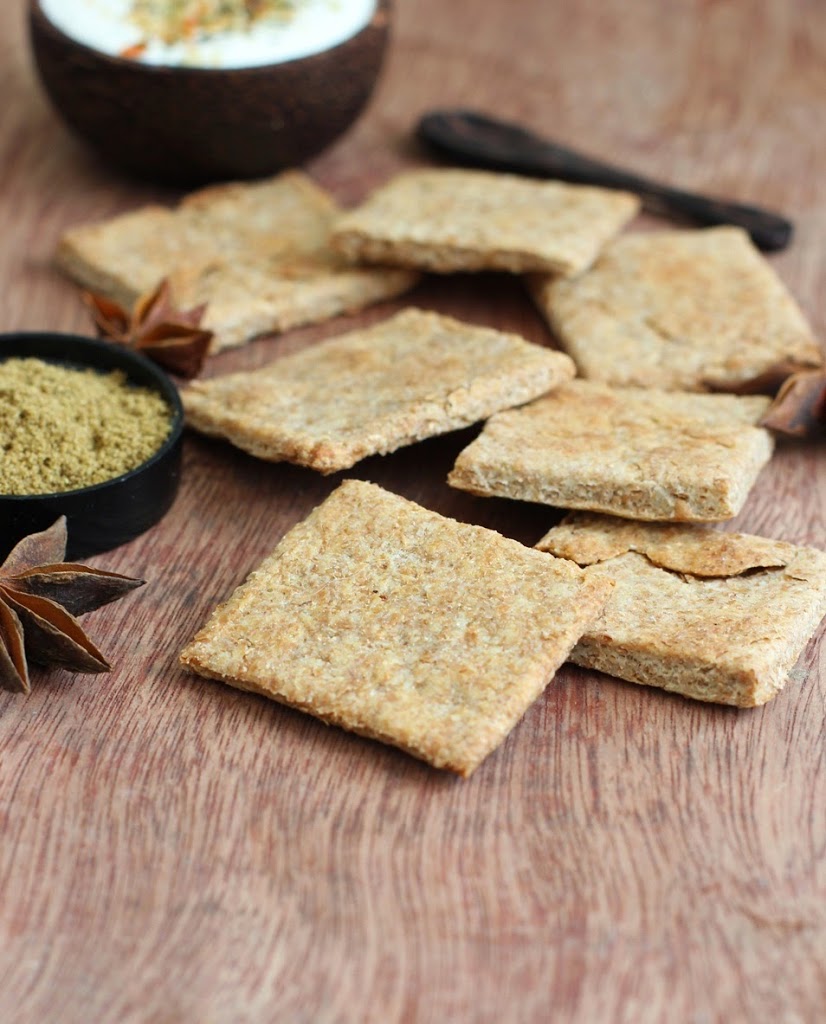
Swedish Crisp Bread with Cumin from Tina Nordström’s Scandinavian Cooking | Fake Food Free

Unless you count frequently visiting the IKEA marketplace and staying well stocked in lingonberry jam, I have little experience with Scandinavian cuisine. Had the opportunity for more experiences arisen, I would have snatched them up as it’s an area of the world that has always intrigued me, and one that has been on our travel list for a while. It’s just that even in this diverse food scene that I now live in, Scandinavian still doesn’t top the list of well-marketed options.

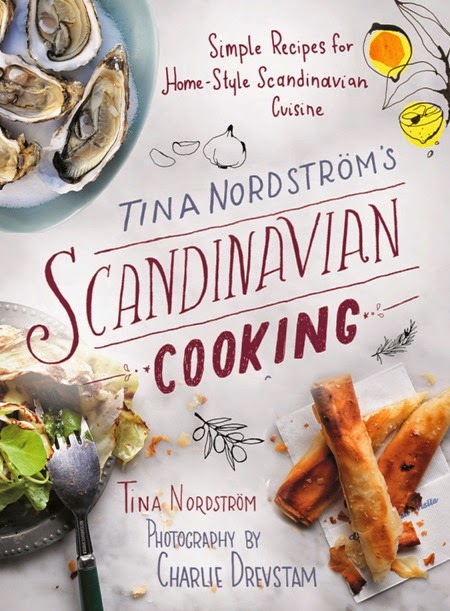
When I saw Tina Nordström’s Scandinavian Cooking I knew I needed a copy for my cookbook shelf. What a unique addition! I can safely say that I have nothing like this book in my collection. It not only fills a cuisine void, it is also a pretty outstanding cookbook.

Tina is a Swedish celebrity chef, host of the PBS show New Scandinavian Cooking and author of several cookbooks. This book, which she describes as the most comprehensive book that she has written, is speckled with family photos, letters and personal essays that give you a peek into her life. It’s comfortable style makes you feel as if you are in the kitchen cooking with her or dining at her family table. It’s an intimate feeling that you don’t get from many cookbooks.

After feeling at home as a result of the intro, next I was drawn in the by the food photos. They are exactly how I love them – moody and intriguing with a classic comfort that makes you feel happier by simply viewing them.

Next the recipes were there to educate me. It wasn’t enough to see the delicious titles. I just had to read the intros and ingredient lists to see what the food was all about. The book is a true lesson in Scandinavian cooking. I learned so much. Especially that the cuisine goes far beyond fish and my beloved lingonberries.

Whenever I explore new foods, I always go straight to the bread. I’d like to think that it’s not because I like carbohydrates so much. I’d rather think that it’s because breads, crackers or buns and rolls of some form or another tend to be at the foundation of so many cuisines (and if it isn’t bread it’s often rice or noodles).

That’s the first reason why the Swedish Crisp Bread with Cumin caught my attention. The second, was all the flavors. Yogurt, cumin and anise in a flatbread-like crisp? Sign me up!

I can’t stop gushing over the great flavors in this recipe. The tang of the yogurt with the spices is unlike any crisp bread or cracker I’ve had before.

Swedish Crisp Bread with Cumin from Tina Nordström’s Scandinavian Cooking | Fake Food Free

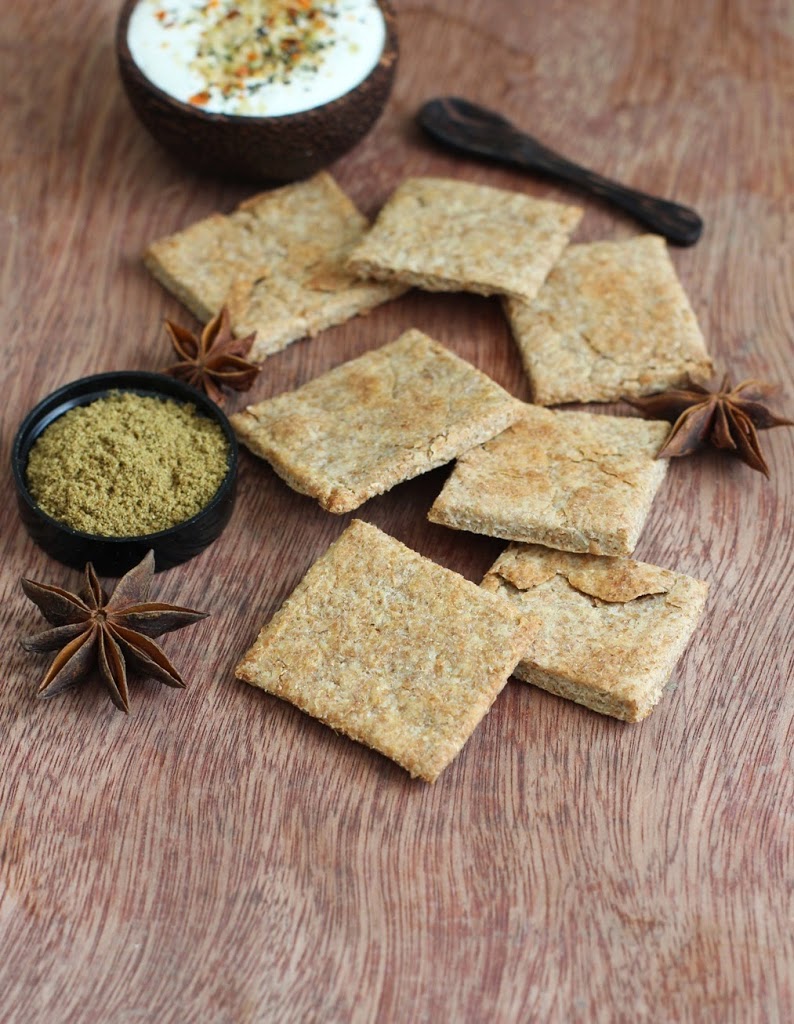
I didn’t get mine rolled out quite as thin as the version pictured in the book, so on the second round of baking I decided to cut them into squares to create crackers. It worked great. Either way they are delicious.  (I paired them with a quick spread of thick sour cream and herbs from the pantry.)

If your shelf has a void when it comes to Scandinavian cuisine, this is the cookbook you want to fill it with.

Swedish Crisp Bread with Cumin

Excerpted with permission from Tina Nordström’s Scandinavian Cooking: Simple Recipes for Home-Style Scandinavian Cooking by Tina Nordström. Photographs by Charlie Drevstam. Copyright, 2014. Skyhorse Publishing, Inc. 

From the book:
I think it’s easier to bake crisp bread in a frying pan. It’s quite traditional and delicious with gravlax and some lemon mayonnaise (see page 92). Or try some green pea guacamole (see page 252). You can even break the crisp bread into a bowl of tomato soup.

30–35 CRISP BREADS
3 cups (700 ml) wheat flour
1 1/4 cups (300 ml) rye flour
1 1/4 cups (300 ml) yogurt
1/2 cup (100 ml) olive oil
2 tsp baking powder
1 tbsp salt
6 tbsp ground cumin
2 tbsp ground anise seeds

DIRECTIONS:
1. Mix all ingredients into a smooth dough.
2. Roll the dough out into flat pieces and bake them for about 4–5 minutes per side in either a cast iron frying pan without any grease or oil, or in the oven at 425ºF (225ºC) on a baking sheet lined with parchment paper.
3. Store the crisp bread in a metal box in a dry location.

Swedish Crisp Bread with Cumin from Tina Nordström’s Scandinavian Cooking | Fake Food Free

Disclosure: This book was sent to me for review purposes. I was not required to write about it and received no compensation for doing so. 

 
Thanks for reading! All images and content are the property of Fake Food Free unless otherwise stated. Please do not republish full recipes and images without written permission. What is okay? Feel free to Pin images, share links to my posts or share the photo in a round up post with the title of this recipe and a link back to the post. Confused about copyright and food blogs? Here is some helpful information on Recipe Attribution. If you want to use a photo or full recipe, just ask. I’m sure we can work something out.

12 Favorite Kentucky Derby Recipes

April 30, 2014
12 Favorite Kentucky Derby Recipes | Fake Food Free

You don’t have to live in Kentucky long to catch the Derby bug. We were there for about ten years, but I was hooked after our very first Derby celebration.

Did I mention that I’ve never actually been to the Kentucky Derby?

Everyone seems shocked when I tell them this. It’s a bit of a long story, but you basically have two choices – the infield with loads of intoxicated folks having a good time where you can’t even get a clear view of the race (or so I’ve been told), or tickets for the Grandstand side which, if you can even get your hands on some, are a bit expensive. Add to that, all the people I know who have gone (on the Grandstand side) and had a less than stellar time to see the big, but very short, race.

Compare that to hanging out at the local race track, Keeneland, in Lexington and watching the race on the big screen or having your own party at home. No traffic, no hot sun, you can still wear a hat if you want and there are plenty of bourbon-based beverages and good food.

What can I say? The latter won out for us every year.

Over those ten Kentucky Derbies, and within the past year, I’ve made a few favorite recipes that are perfect for celebrating the big day. Most with bourbon, some with mint and others with Kentucky classics in mind. There will be more to come in the future, but these should give you plenty of ideas for your own Derby celebration whether you need breakfast, brunch, drinks or dessert.

(Click on the recipe name to go to the recipe.)

Cornmeal Waffles with Bananas Foster Sauce from Jonathan’s Bluegrass Table

Bourbon Sweet Potato Waffles with Maple Cinnamon Butter

Mint Julep Scones

Bourbon Banana Scones with Walnuts

Wild Ginger Mint Julep

Kentucky Bourbon-Vanilla Soaked Cherries

Kentucky Bourbon Dogs

Pimento Cheese Dinner Rolls

Maple Bourbon Budino with Spiced Pecans from Bakeless Sweets

Mint Julep Blondies

Bourbon Chocolate Chip Pecan Cookies with Coconut Oil

Kentucky Bourbon Barrel Ale and Pretzel Caramels

Yellow Squash Dumplings with Spiced Tomato Sauce from Vegetarian for a New Generation

April 28, 2014
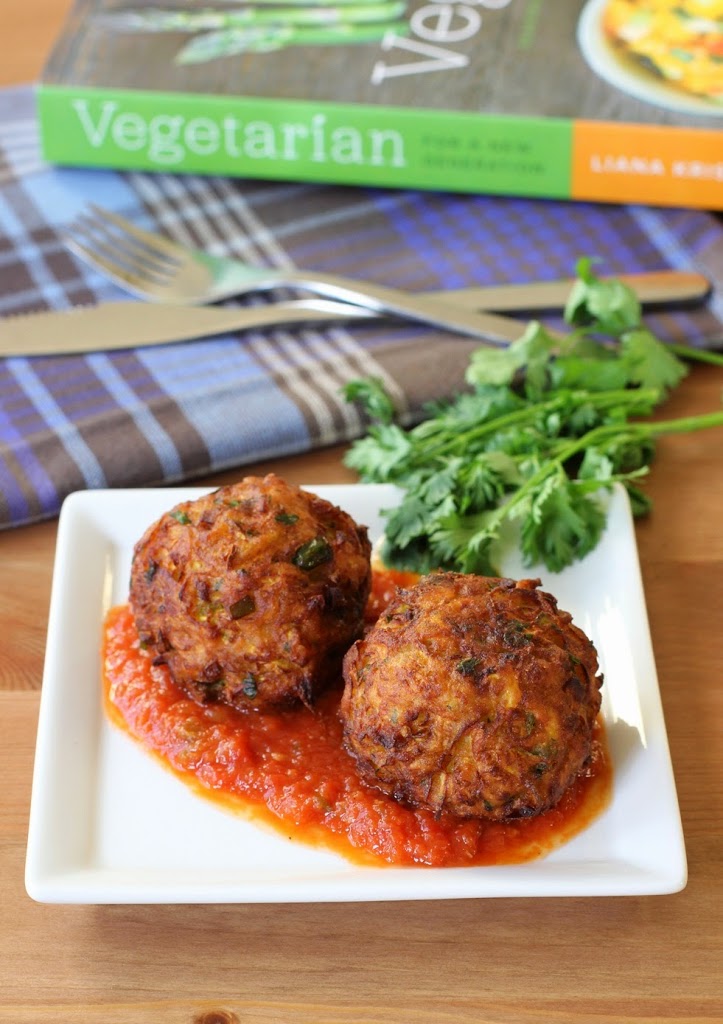
Yellow Squash Dumplings with Spiced Tomato Sauce from Vegetarian for a New Generation | Fake Food Free

Growing up with a big garden I probably liked vegetables more than most kids, but I can still remember my brother and I taking our peas like pills. Pop them in your mouth, hold your breath, take a big gulp of iced tea and swallow. It put them safely in your stomach without having to taste them. I’m sure there where dinners where broccoli and green beans had a similar fate.

When I think back, I can’t quite remember when I started to truly enjoy vegetables, but I’d be willing to bet it was well into adulthood. I’m not sure if it was the taste or an increased knowledge of the health benefit that helped me turn a corner, but getting my recommended servings of vegetables is easy-breezy these days.

Now that doesn’t mean I don’t turn my nose up at bland broccoli, or eat all my vegetables first to get it over with from time to time. Everyone has their days. But I really do look forward to kale, tomatoes, arugula, zucchini and just about every other veggie out there.

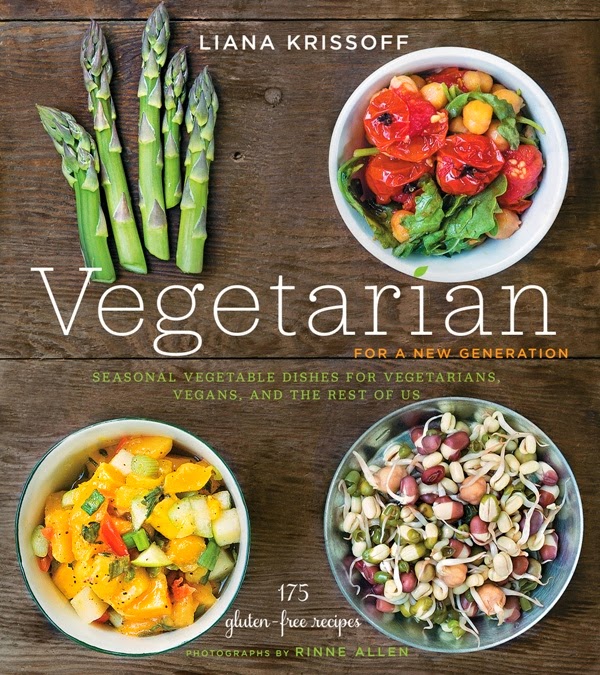
The only thing I welcome as much as a new season of fresh vegetables is a book that gives me new ideas for how to prepare them. So I’m practically giddy over Liana Krissoff’s new cookbook, Vegetarian for a New Generation.

If you’ve been reading this blog for a while, you know that I have her other two cookbooks, Canning for a New Generation and Whole Grains for a New Generation. Both are excellent. I use them all the time to get new ideas for canning and ways to use grains. Liana was kind enough to answer some interview questions for me when Whole Grains came out. She truly inspires me with her creative ideas and delicious recipes.

Vegetarian for a New Generation carries on the tradition of those other two books with 175 recipes that will have you repeatedly saying – That’s such a great idea! The gorgeous food photos will have you day dreaming about how good it must taste.

The recipes in the book are also gluten-free. I don’t eat 100 percent gluten-free, but what makes this great for me is that the focus is on vegetables, not a lot of heavy fillers like breads and grains. The recipes are light and refreshing while being comforting at the same time. Not an easy task with vegetables, but well accomplished in this book.

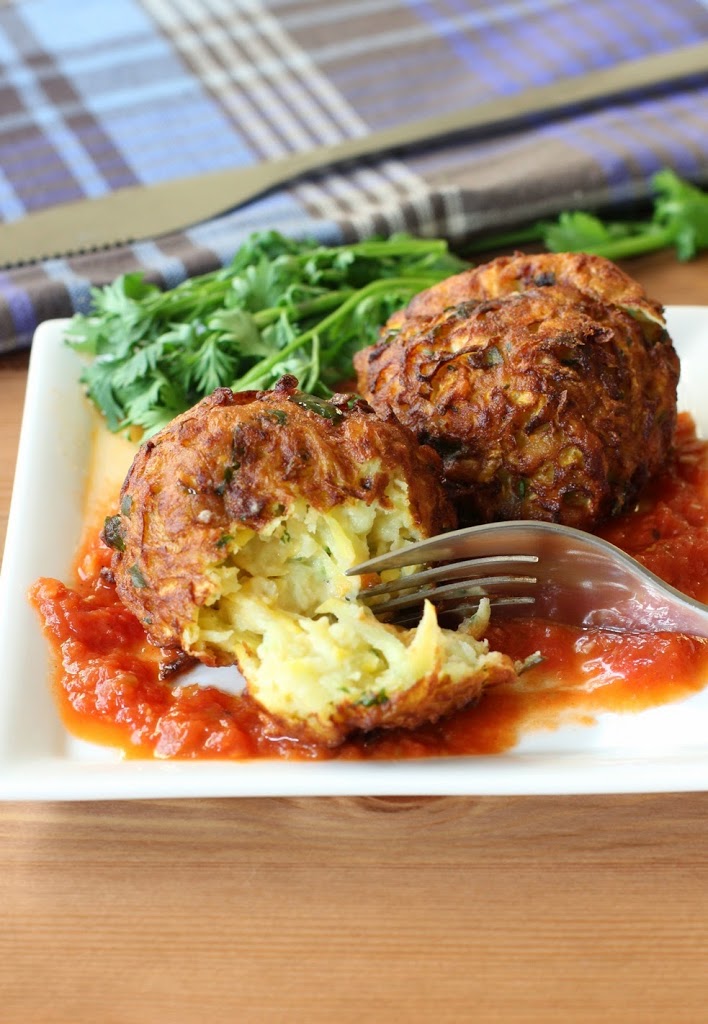
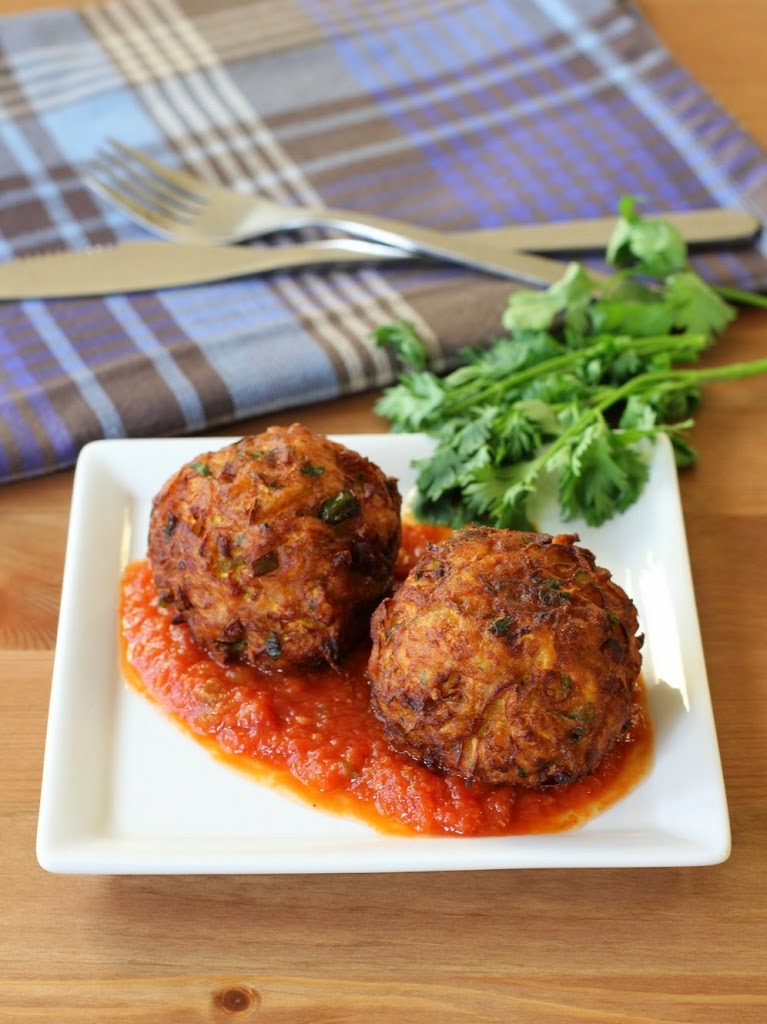
The recipe I had to try was the Yellow Squash Dumplings with Spiced Tomato Sauce. It caught my attention because the herbs and spices used were very different from what I would use with yellow squash. It also used garbanzo bean flour to thicken the batter, something I’ve been been experimenting a lot with lately. I didn’t doubt that it would be delicious and I wasn’t disappointed. The hint of cilantro in the dumplings went so well with the clove and cardamom in the tomato sauce.

Yellow Squash Dumplings with Spiced Tomato Sauce from Vegetarian for a New Generation | Fake Food Free

It was flavors I would never combine on my own which speaks to the value of this book. It will help you step out of your vegetarian cooking comfort zone. It’s almost like tasting vegetables for the first time and learning that you really like them. No swallowing them like pills required.

Yellow Squash Dumplings with Spiced Tomato Sauce

©2014 Liana Krissoff. Reprinted with permission from Abrams Books.

Serves 2 to 4
Vegan

From the book:  
These tender, lightly spiced walnut-size balls are like a cross between pakora (batter-fried vegetable fritters) and vadai (soft grain- or legume-based dumplings). They’re fried and deeply browned, but not crisp-crunchy. The spicing here is fairly mild, and you should feel free to add more chile, some garam masala (page 247), or any other spices you wish. Even if you’re wary of frying (as I am—I really dislike cleaning up after a messy frying experience), you should try these: They don’t spatter or absorb much oil at all, and the croquettes don’t even have to be served right after frying, as they’re served with a sauce and aren’t meant to be especially crisp or crunchy anyway.

I’d suggest doubling the recipe and freezing the extra fried balls and sauce separately—they reheat nicely for a quick meal. The warmed-up sauce can be used in nearly infinite ways: Simmer some chunks of potato and cauliflower in it until tender, then add a few croquettes to warm through and serve over Spiced Brown Rice (page 219).

For the Tomato Sauce

2 tablespoons vegetable oil
1 to 2 fresh hot green or red chiles, seeded and chopped
2 cloves garlic, chopped
3/4-inch (12-mm) piece fresh ginger, peeled and chopped
1/2 teaspoon freshly ground cardamom
1/4 teaspoon ground cloves
2 bay leaves
1 (28-ounce/790-g) can whole peeled tomatoes with their juices
Salt
Pinch of sugar

For the Squash Dumplings

1 pound (455 g) yellow squash (about 3)
1/2 to 1 cup (60 to 120 g) chickpea flour (besan), or more if needed
1 fresh hot green or red chile, seeded and minced
1 tablespoon chopped fresh cilantro
1/2 teaspoon grated fresh ginger
Salt
Pinch of freshly grated nutmeg
Vegetable oil, for deep-frying

Make the Tomato Sauce
In a medium saucepan, heat the oil over medium-high heat until it shimmers. Add the chiles, garlic, and ginger and cook, stirring, until softened but not browned, about 2 minutes. Add the cardamom, cloves, and bay leaves and stir for 10 seconds, then pour in the tomatoes and their juices. Add a generous pinch of salt and the sugar. Bring to a boil, then lower the heat and simmer, stirring to break up the tomatoes a bit, until the flavors are developed and the liquid is reduced a bit, about 20 minutes.

Remove and discard the bay leaves. Puree the sauce using an immersion blender. Taste and add more salt, if needed. Cover to keep warm and set aside. (The sauce can be made, cooled, and stored in an airtight container in the refrigerator for several days. It also freezes very well.)

Make the Squash Dumplings
Coarsely grate the squash into a large bowl. If the squash is quite damp, squeeze handfuls of the shreds over the sink to extract as much liquid as possible. Sift 1/2 cup (60 g) of the chickpea flour through a sieve into the squash. Add the chile, cilantro, ginger, 1/2 teaspoon salt, and nutmeg and stir very well. If it’s too soft or wet to shape into a very loose, soft ball, add more chickpea flour, a little at a time, until it comes together.

In a large, heavy saucepan, heat 2 inches (5 cm) of oil until it registers about 375°F (190°C) on a candy thermometer. Line a plate with paper towels.

Using your hands, shape some of the squash mixture into a walnut-size ball—it will be soft and will just barely hold its shape, but don’t worry, as it’ll firm up in the oil. Set it in a slotted spoon and quickly lower it into the oil; repeat to make 2 or 3 more balls. Don’t overcrowd the oil. Fry, turning occasionally, until deeply browned and cooked through, about 6 minutes. If the balls start to brown too quickly, lower the heat. Remove to the paper towels to drain. Repeat until you have used all of the squash mixture.

Reheat the sauce, if necessary. Serve the dumplings hot or warm, or even at room temperature, with the sauce ladled over or under them.

Variation
Instead of the spiced tomato sauce, serve the croquettes with a simple raita: Rinse off the grater and run a large seeded cucumber (peeled or not) through it. Squeeze out all the excess moisture and put it in a medium bowl. Finely grate 1 clove garlic into the cucumber, add salt, pepper, and chopped fresh cilantro to taste, and stir in about 1 cup (240 ml) plain Greek yogurt.

Yellow Squash Dumplings with Spiced Tomato Sauce from Vegetarian for a New Generation | Fake Food Free

Disclosure: This book was sent to me for review purposes. I was not required to write about it and received no compensation for doing so. Recipe was reprinted with permission from the publisher.

Easy 4 Ingredient Homemade Peanut Butter Cups Recipe

April 18, 2014
 
Easy 4 Ingredient Homemade Peanut Butter Cups Recipe | Fake Food Free
 
 
When a holiday occurs on the same date every year, I’m usually pretty good at being prepared. But Easter? Easter gets me every time.


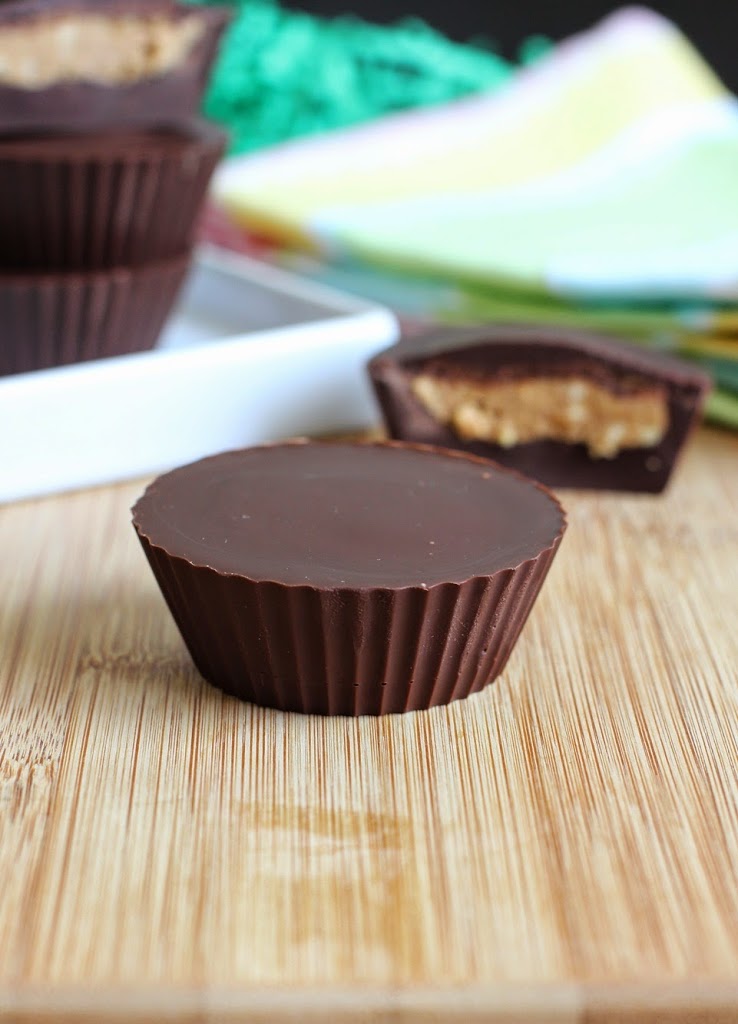
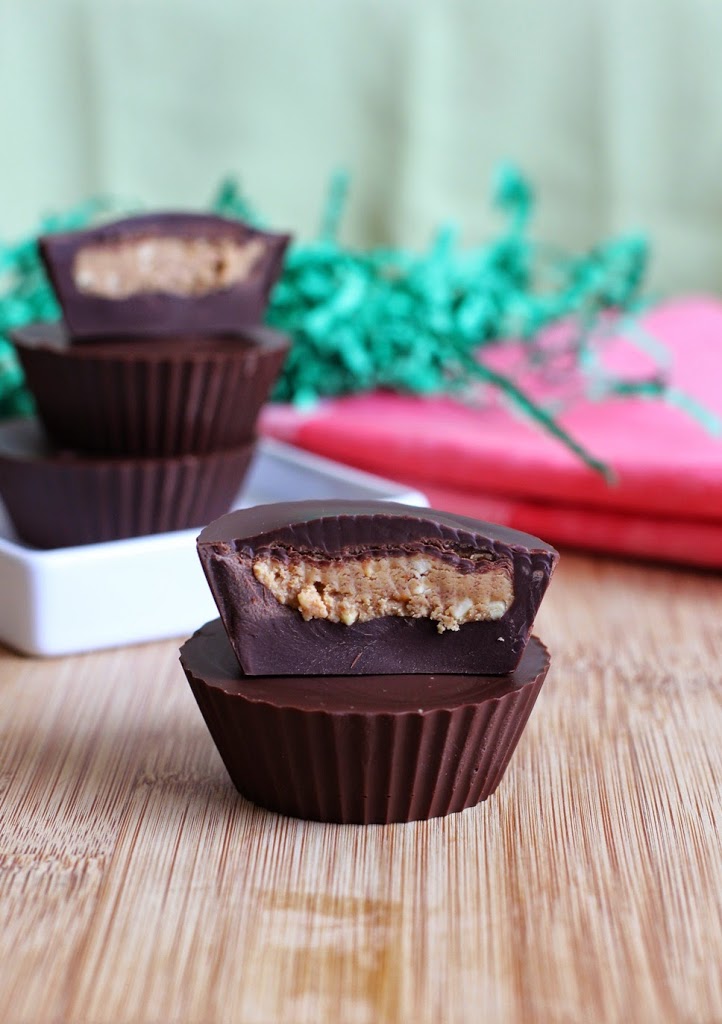
As seems to be the tradition, it snuck up on me once again. I just hate to miss making something for a day that can be celebrated with chocolate, so I got busy and put together some super simple, 4 ingredient peanut butter cups.


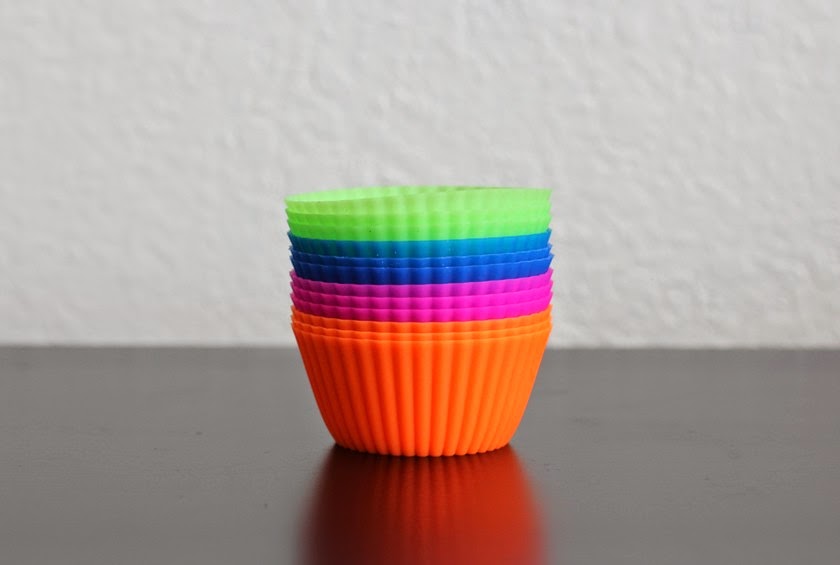
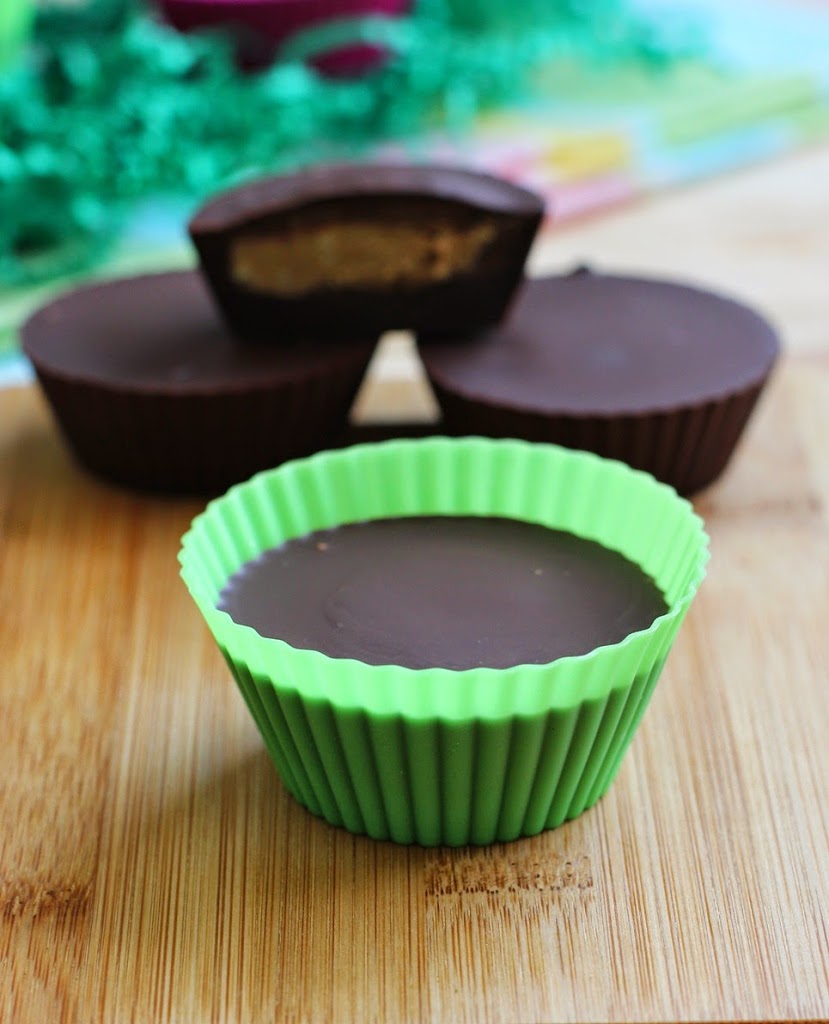
A little while back, I was sent these colorful, BPA-free silicone baking cups from The New York Baking Company. These flexible little guys turned out to be a candy cup making dream. They are oven safe up to 475 degrees F as well as freezer, microwave and dishwasher safe. I used them to form and freeze my peanut butter cups and they peeled off so easy for a perfectly ridged edge. They are such a great thing to have around for both baking and candy making.


Easy 4 Ingredient Homemade Peanut Butter Cups Recipe | Fake Food Free
 
I tried to keep these peanut butter cups as simple, clean and unrefined as possible for a better treat. While they only contain four ingredients, I do want to note that natural peanut butters can vary widely in texture. If your jar is brand new, you may have some extra oil to deal with, but if it’s been in the fridge a few days it will likely be firmer. Textures can vary by brand as well.


Right now I use the natural crunchy Kirkland brand peanut butter from Costco – just peanuts and sea salt. My peanut butter was thick after being refrigerated. If you are using a just opened jar, you might need to add a little more powdered sugar when making the filling. You want it to be like a thick cookie dough that you can form into a small disk.


These cups are large and super rich so one can easily serve two people. But I promise not to judge if you eat the whole thing.


Easy 4 Ingredient Homemade Peanut Butter Cups Recipe | Fake Food Free
 

Easy 4 Ingredient Homemade Peanut Butter Cups

Makes: 8 large peanut butter cups


Ingredients:
1 cup dark chocolate chips (I use Ghirardelli® 60% Cacao Bittersweet Chocolate Chips)
2 tsp virgin coconut oil
½ cup crunchy natural peanut butter
2 tbsp powdered sugar (I use Trader Joe’s Organic)


Prep:
 
Place the chocolate chips in a microwave-safe bowl and add the coconut oil. Microwave on high until melted, about 2 minutes, but be sure to stir it every 30 seconds.


Arrange 8 silicone baking cups on a baking sheet. Transfer 1 tablespoon of melted chocolate to each cup. Place the baking sheet in the freezer for 5 minutes.


In the bowl of mixer fitted with the paddle attachment, add the peanut butter and powdered sugar. Mix on high until combined, about 45 seconds. It should resemble a firm cookie dough that can be shaped by hand.


Form the peanut butter into 8 small flat disks. Place a disk in each cup over the bottom layer of chocolate.


Pour 1 tablespoon of the remaining chocolate over the peanut butter disks. Go back with any remaining chocolate and fill the cups so that the chocolate covers all of the peanut butter.


Gently tap the baking sheet on the countertop to smooth out the surface of the peanut butter cups and release any air bubbles. Freeze for 15 to 20 minutes, or until firm.


Peel away the baking cups and store in an airtight container in the refrigerator until ready to serve.


Disclosure: The silicone baking cups mentioned in this post where provided by Rizzi from The New York Baking Company for review purposes. I was not required to write about them and received no compensation for doing so.
 
 
Thanks for reading! All images and content are the property of Fake Food Free unless otherwise stated. Please do not republish full recipes and images without written permission. What is okay? Feel free to Pin images, share links to my posts or share the photo in a round up post with the title of this recipe and a link back to the post. Confused about copyright and food blogs? Here is some helpful information on Recipe Attribution. If you want to use a photo or full recipe, just ask. I’m sure we can work something out.
Want to create beautiful food and product photos that you can't wait to share?!
Discover your style, control the light, and shoot using the tool you know how to use (yes, your phone included). Learn about free resources, Live Q&As with Lori, and online courses you can take from anywhere in the world!
We respect your privacy. Unsubscribe at any time.