Archives

Health as a By-Product

April 16, 2010

Lately, I find that I am focusing less and less on health. Yet, strangely, I feel healthier than I have in a long time, perhaps healthier than I ever have. Over time we all go through changes in our ways of thinking about food and health, and we are able to look back and see where we were and compare it to where we are now. That’s the place I am at right now. I think I’m experiencing a decent amount of balance.
I used to think a lot about numbers. Calories, grams, micrograms, cups, minutes and hours. I also had big, fancy names on my mind a lot – anthocyanin, flavonoid, erythrocyte, anaerobic, oxidation. I was recently reminded of just how much this was on my mind in the past as I sorted through some old college binders and course notes.
It wasn’t necessarily a bad thing. At one time it motivated me and made me feel knowledgeable. It also enabled me (and still does) to help other people. However, over time it also made me feel like health was a bit of a burden, a little too complex for my current interests.
I don’t think I consciously changed. I think my mind did it out of a necessity; necessity to remain a healthy person, and therefore, began seeking other avenues to maintain and celebrate health.
As a result I think more about being well, contentment, laughter, smiling, energy, enjoying the scenery, accomplishing goals (not associated with numbers), tasting good food, and being energized to wake up each morning and face the day. By doing this I’ve found that health is a by-product, not the main focus.
I eat the foods I eat because they taste good, and I feel better because of them. I run because I want to check out what the basset hound a few streets over is up to and see the cows grazing in the fields. I cook and write because it relieves my stress, I read because it fills me with knowledge.
Because of all this, I believe I am healthy and well.
My focus has changed. I don’t do things necessarily because I deem them healthy, I do them because I enjoy them and I know they are right for me. I feel I’m no longer seeking a means to an end, or a final goal of ultimate health, I’m simply living and enjoying.
I do have to admit that numbers haven’t completely left my life. There is a number on the scale that has my attention and when I sit down to a big salad I may think about the number of cups of veggies I’m eating. I have pace goals associated with my running. When I see a colored vegetable I often think of the nutrient in it and how that influences health. I also do a few things I don’t enjoy from time to time, like eat the broccoli I make for my husband because I know it is good for me.
However, these numbers don’t overpower my lifestyle. They aren’t the driving force anymore and as a result, I have to admit I am a much more relaxed person.

Health shouldn’t stress us out.

Do you focus on health or are you healthy because of your focus?

Quick Side Dishes and Chimichurri Beer Burgers

April 13, 2010
I’ve been on a mission to find quick side dishes lately. I haven’t tired of cooking, but with longer days and more time spent outside in the evenings I haven’t wanted to spend a lot of time cooking at night.
On a related note, I think I also lose my spark of excitement for evening cooking because I know after the sun goes down the pictures won’t be blog worthy. Why bother, right? This little fact that my blog and photo quality determine what time of day I’m motivated to cook may be indication of an issue that needs attention, but we’ll save that for another day.
So back to the quick sides.
Lately, I’ve found myself tossing broccoli in to steam, sautéing mushrooms and onions to toss in with couscous. You know; nothing exciting, but still relatively tasty and healthy.
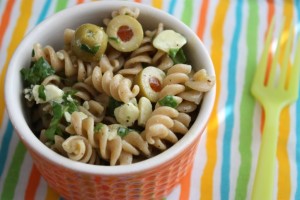
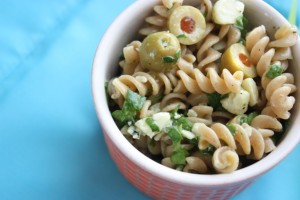
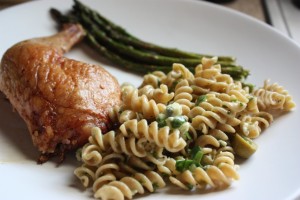
Last night when we needed something to go with our grilled chicken I decided to make some pasta salad; something I haven’t made in a really long time. I had a few more exciting ingredients to use in the dish, so this one I thought I would share.
I don’t make pasta salads much anymore mainly because I lack ideas for non-bottled dressings. However, with using the cheese and olives in this, it only needed a drizzle of olive oil and a shake of black ground pepper to be complete.
Gorgonzola, Olive & Spinach Pasta Salad

½ cup fresh spinach, finely chopped, firmly packed
15 pimento stuffed green olives, halved
1 – 2 oz Gorgonzola cheese, crumbled
2 tbsp olive oil
3 cups dry, whole wheat pasta, cooked and rinsed to cool
Black pepper to taste

In a medium-sized bowl combine the spinach, olives, cheese and olive oil. Stir to break up the cheese so it is evenly distributed.
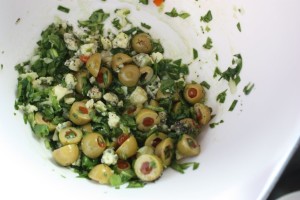

Add the drained pasta to bowl and toss to coat. Sprinkle with black pepper. You can add salt too if you wish, but I found the olives and cheese added enough salty flavor for my tastes. Serves 4.
*******************

I also said yesterday that I would tell you a little more about the burgers we grilled on Sunday. If you are at all familiar with Argentinean cuisine, then you know about chimichurri. It is a sauce made of herbs, oil and vinegar that is served with meat or it is sometimes used as a marinade.
Before we left Brazil, my husband took a work trip to Argentina and his colleagues gave him some chimichurri. It is in the dry form and you simply add the oil to make the sauce. I’m sure similar products can be found at Latin markets around the States, or you could make a version of your own like this one from Simply Recipes.
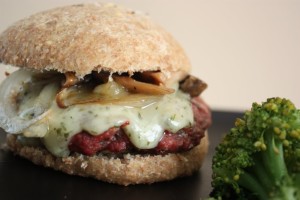
Seeing it in the cabinet the other night I decided to season the burgers with it. The result was fantastic! They were full of flavor and had a slight spiciness that went wonderfully with the grass-fed beef I used.
I finished off the burger-making process by using the Soft Whole Wheat Sandwich Bread from Healthy Bread in Five Minutes a Day to make buns. I was worried they would be too heavy and sweet for the burgers, but they ended up pairing nicely.
Chimichurri Beer Burgers

1 lb grass-fed beef
¼ cup beer (I used a light ale)
¼ cup panko bread crumbs
1 tsp chimichurri seasoning mix
½ tsp sea salt
¼ tsp black pepper
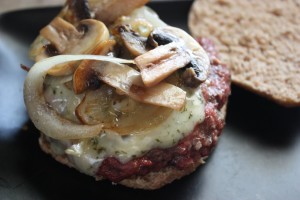
Combine all ingredients in a bowl and mix well to incorporate the spices. Form into 4 equal patties. Grill or pan fry based on your preferences. It took about 8 minutes on our new grill to cook them through.
I topped mine with some Chive and Onion Jack Cheese, and sautéed onions and mushrooms!


I’m submitting the pasta salad to the April Side Dish Showdown at Cinnamon Spice & Everything Nice.

A Boy, His Grill, and a Spatchcocked Chicken

April 12, 2010

Over the past few months I’ve regularly documented all of the things I am thrilled to have returned to since our move back to the States. In fact, I wouldn’t blame you for thinking me annoying because I tend to express my excitement with an over abundance of irritating happiness.

There was the real winter with snow which necessitated the wearing of boots not just for fashion, but for functionality. A full size oven with a temperature setting that goes low enough to prevent burning all my baked goods to a crisp. A washer and dryer that take fewer than 90 minutes for each cycle. My KitchenAid mixer with all its powerful capabilities.

Ahhh, I smile just thinking about it all.

Despite my glowing excitement, I was getting a little bit worried that my husband hadn’t yet experienced such bliss. Sure, he had some of his favorite electronics back, and we now have a nice size garage with a yard to tend to, but something was missing.

Over Easter weekend I learned what it was. This:
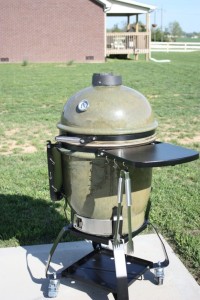
Yes, a grill. As much as we enjoyed the food and culture of the Brazilian barbeque, let’s just say, there is no place like home. We talked about it often during our time abroad — grilling different kinds of meats from chicken to pork tenderloin, burgers, hot dogs and even fruits and vegetables; the array of side dishes, and sitting outside all afternoon with a beer in hand.

He had his heart set on a Big Green Egg for a long time, even before we moved back to the US. However, after some research he learned that there are the same style of grills out there (a ceramic pod grill that cooks by charcoal) without the same price tag.

We couldn’t find any sources around here, but some stores in our hometown occasionally carried them. When he learned that two had come in the day we got to Indiana for our Easter visit, off he went with my Dad to grab one before it was gone.

He’s been anxiously awaiting the opportunity to get cooking so this weekend we decided to break out the new grill and see what this baby can do.

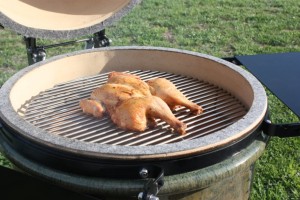
First we tried chicken. Until this weekend I had seen the process of spatchcocking a chicken on the web and on tv, but had no idea that “spatchcocking” was the appropriate term. I gave it a try last night. To be honest, I did get a flat chicken out of the process which was the goal, but I really have no idea if I did it exactly as it should be done. In fact, I already discovered a step I accidentally skipped. Shhhh! I’m not telling.

Therefore, you really shouldn’t listen to me about how to spatchcock a chicken when there are much more knowledgeable people out there to tell you. Check out A Good Appetite or this YouTube video for some help.

I can, however, tell you the rub I used on the bird which turned out nicely. My husband wanted something a little more spicy/Cajun in nature since I typically do Italian-style herb rubs. I coated the chicken with the spices below and then rubbed it generously with olive oil.

First Chicken of the Season Spicy Rub
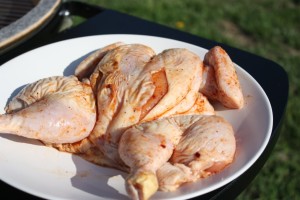
1 tsp chili powder
1 tsp cumin
¼ tsp crushed red pepper
1 tsp garlic powder
1 ½ tsp sea salt
¾ tsp ground black pepper

Combine in a small dish and mix with your fingers to crust of the red pepper with the other spices. Rub over the chicken including under the skin.

After an hour on the grill, the chicken was perfect. Nice and juice with a crispy skin just as was predicted by all the recipes I’d read prior to our attempt. There will be lots of grilled chicken in our near future, especially once Pike Valley has some available again later in the month. They should process 32,000 chickens this year. Not bad for a farm using humane, sustainable practices. The word is really getting out about them.

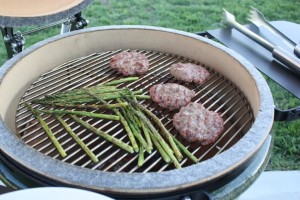
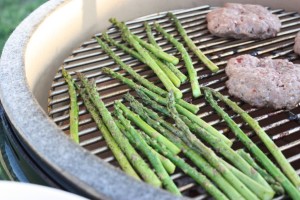
In addition to the chicken we decided to grill up some burgers for later in the week, as well as some asparagus as a side for our chicken. Grilled asparagus is about the easiest thing you can cook on a grill. I drizzled it with olive oil and sprinkled on some of the herb seasoning I told you about a few days ago. About five to eight minutes on the grill and it’s all done.

Tomorrow I’ll tell you more about the burgers and a new pasta salad I tried out.
Have the grill out yet? What’s on the menu?

Links to a Healthy Weekend

April 10, 2010

Did you miss them?
Yes, the links of been absent for about three or four weeks now. Sorry about that. It’s not that I haven’t been reading. In fact, I have a whole list of things bookmarked and I’ve discovered some wonderful new food blogs in recent weeks. It’s just been that by the time the weekend rolls around, the opportunity to sit down and write a post including them fades.

On Twitter the other day I wrote that I’m feeling a bit overwhelmed. Anyone else in that boat? This isn’t necessarily a negative thing, but all my thoughts and actions have drifted outdoors. I’m loving the weather and our new yard, however, between the half marathon, lawn mowing, prepping a garden and making our way through the final boxes still left in the garage there is always something to do. Computer time is work time and if I’m not working, I want to be outside.

But after getting the yard mowed last night and taking a beautiful run near the horse farms this morning, I am enjoying a little down time this afternoon. I thought some great links were in order!
Spring Chicken and Asparagus Soup from Fresh Slowcooking. Asparagus is all over the place this time of year and while it has taken me a while to come around I actually kind of like it now. (It has been my least favorite vegetable in previous years.) I like that this recipe is different than the usual grilled and steamed version that is so common.
Window Farming: A Do-It-Yourself Veggie Venture from NPR. If you feel space is a barrier to growing some of your own produce definitely check this out!
You Are What You Eat is a photo essay by Mark Menjivar. It is composed of several photos of the inside of refrigerators from people with different backgrounds, jobs, and eating styles. Such a simple thing, but so educational and fascinating.
Making a Foreign Staple Work Back Home from the NYTimes is an entertaining article that anyone who has ever traveled to experience culture and food can relate to.
Taste of Beirut is a food blog I just discovered and it has quickly topped my list. Since we haven’t traveled for a few months now, something that feels so odd after years living abroad, I feel my motivation to cook cultural food waning a bit. It’s blogs like these that remind me why I love to cook and travel. I’m also very excited that a family friend who cuts my hair back in my hometown has her Lebanese mother-in-law living with her. They have invited me to come and learn how to make some traditional dishes sometime this summer. I’ll keep you posted!
Photo of Macy enjoying the bed she got for Easter.

Spinach Pesto Spread

April 9, 2010

This week my husband’s family came to visit us and see the new house. Since they arrived on a Wednesday and this is the first full week of horse racing we decided to head out to Keeneland for the afternoon.
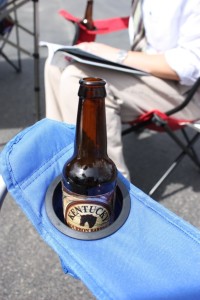
I know many people who would argue that the best part of going to Keeneland is the tailgating, not watching the races. I fall into this category. I enjoy going into the stadium, but I’m perfectly willing to put it off for while in order to sit in the sunshine, drink a little beer or bourbon, and feast on an array of snacks.
If you’ve never been to the track, specifically the ones in Kentucky, it is quite the upscale event. People typically get dressed up in collared shirts, suit coats, dresses and hats. The tailgating tends to follow suit. You are likely to find artisanal breads, cheeses and wine spread out along the tailgates of trucks and SUVs.


This is why I love it. Football tailgates with their barbeque and chips are lots of fun, but going to Keeneland gives you the chance to be a little more creative and fancy with your food choices.
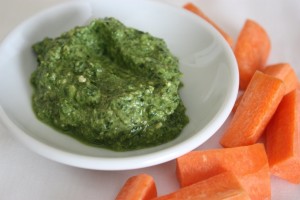
One my favorite tailgate items for these occasions is a crusty bread and different types of spreads. A few weeks ago I came across Andrea’s Sundried Tomato and Spinach Dip from Off Her Cork. I had every intention of making it until I came across the sundried tomatoes at the market for $5 a jar. Yikes.

I’m not saying that there are not perfectly good reasons to buy them or that I won’t in the future. I happen to love sundried tomatoes. However, it was one of those instances where I’d already spent a lot on ingredients and I wasn’t willing to tack on the tomatoes. Has that ever happened to you? Hopefully I’m not alone here.


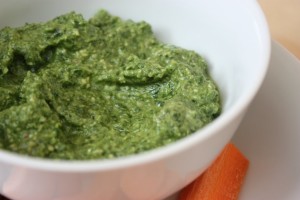
The spinach had been purchased, however, so I decided to replace the basil in my typically pesto recipe with the spinach. It turned out great! I added enough oil to make it a spread. I ended up liking it more as it sat in the fridge a couple days because the walnuts and spinach combined into a creamy paste that was perfect for dipping carrots or pretzels.

Spinach Pesto Spread

5 oz spinach leaves, about 3 big handfuls
2 cloves garlic
¼ cup chopped walnuts
3 tbsp parmesan cheese, grated
Olive oil
Salt and pepper to taste
In a food processor combine the spinach, garlic, walnuts and cheese. Pulse until you create everything is finely chopped and begins to create a paste. Turn on low and slowly drizzle in olive oil. I don’t measure the olive oil, I just add until it reaches the consistency I desire. Add less if you want a thick spread, more if you want a dip or dressing. Remove the lid of the food processor. Sprinkle in about a ¼ tsp of salt and pepper, or more or less to taste. Serve immediately or refrigerate until ready to use.

My favorite picture of the day. Check out his tube socks made of tape.

Salmon-Stuffed Portabella Mushrooms

April 5, 2010
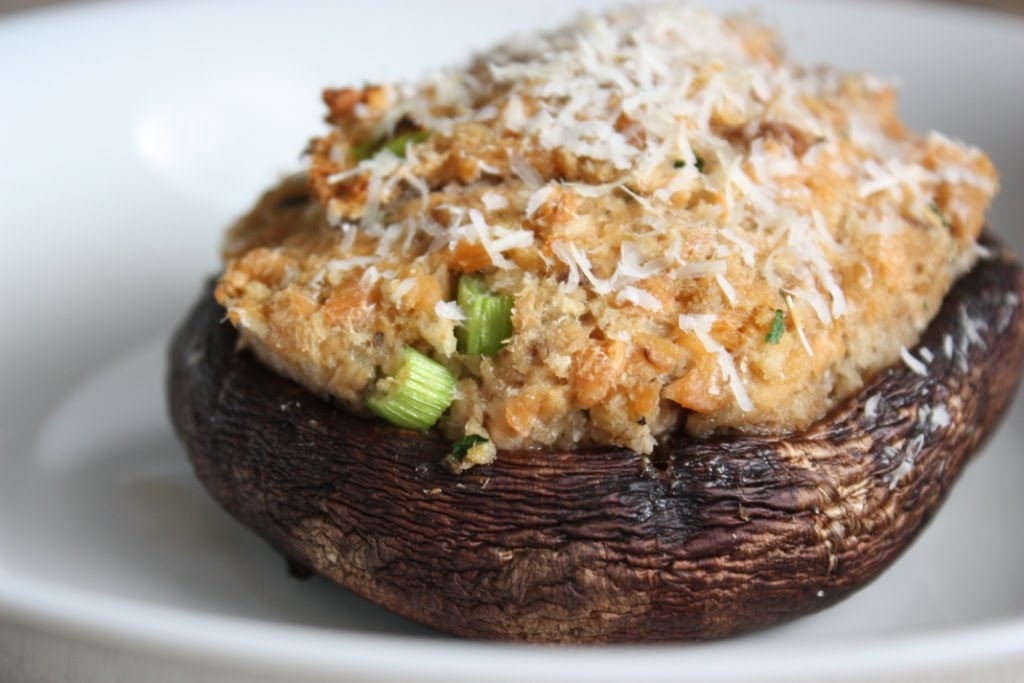
Salmon-Stuffed Portabella Mushrooms Recipe | Fake Food Free

Over the past year or so we have progressively been eating fewer and fewer foods from cans. A positive, healthy move for us, but there are still a few things I grab when I zip down the canned food aisle. One of these is salmon.

Growing up I loved salmon patties which my mom always made from canned salmon. It seems kind of strange now because I don’t really see many kids excited about canned salmon. I think I mostly enjoyed eating the bones as they went from crunchy to magically disappearing altogether in my mouth. As I got older and began studying nutrition it just happened to be a bonus that these little bones are a source of calcium.

It had been a very long time since I’d even thought about salmon patties, but recently I decided to make up a batch. Of course, I was trying to find a way to give them a twist. It seems I rarely cook at all anymore without trying to give things a twist.

I don’t often by portabella mushroom caps, but had branched out and picked up a pack on a trip to the market a few days before. After a little quiet thought in the kitchen I could have sworn I heard them begging to be stuffed with salmon.

So I made up a batch of salmon patty mix, batter, dough – what the heck do you call it prior to being cooked anyway? I formed the nameless concoction into a nice mound inside a mushroom cap coated in olive oil and sprinkled on some parmesan cheese.

After about 25 minutes in the oven, I was greeted with a tender mushroom filled with soft salmon and a slightly browned and crispy edge. A definite winner and a nice change from the same ol’ patty.

This recipe makes enough for four stuffed mushrooms. I only had two portabellas so I just made two salmon patties for lunch later in the week. They are easy to cook, just form them into flat patties, heat some oil in a pan and cook for about three minutes on each side.
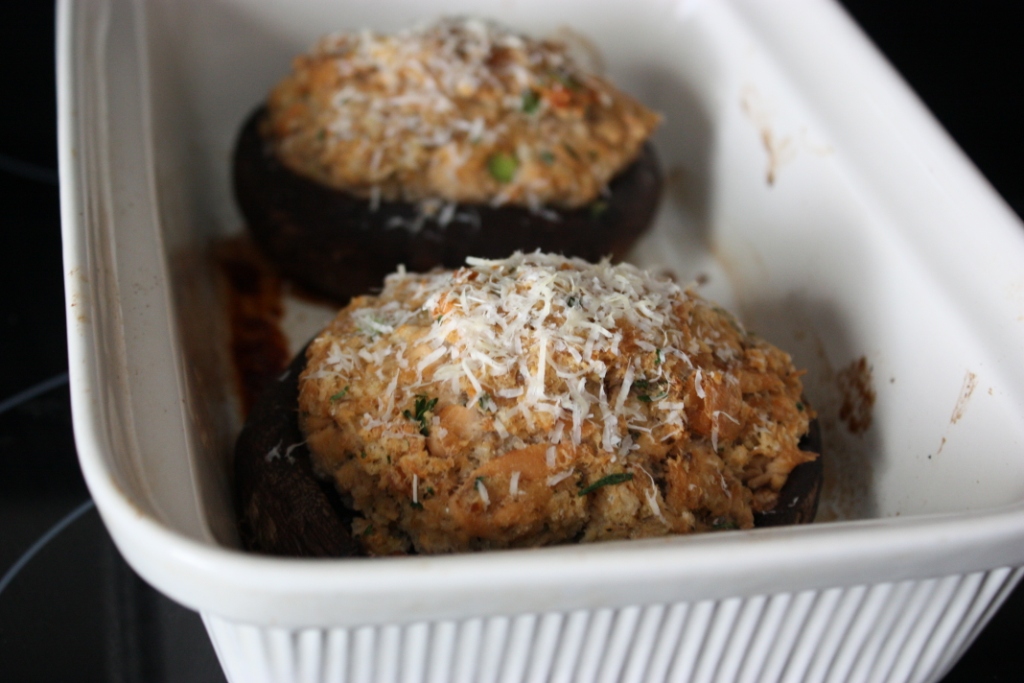
Salmon-Stuffed Portabella Mushrooms Recipe | Fake Food Free

Salmon-Stuffed Portabella Mushrooms

Makes 4 servings

1 can salmon, drained
½ cup panko bread crumbs
1 egg, lightly beaten
½ tsp salt
¼ tsp pepper
¼ tsp garlic powder
1 tsp dried parsley
2 green onions, sliced, greens and some of the white
2 tbsp fresh grated parmesan cheese plus extra for sprinkling
4 portabella mushroom caps
Olive oil

Preheat oven to 400 degrees F. In a bowl combine the salmon, bread crumbs, egg, seasonings, onion and 2 tbsp cheese. Mix well until all ingredients are combined. Place mushroom caps in a baking dish that has been coated with olive oil. Rub more olive oil on the mushrooms, coating them well. Turn the caps top (smooth side) down.

Divide the salmon mixture into four equal parts, form into a ball and mound inside the mushroom cap. Sprinkle with parmesan cheese. Bake for 25 to 35 minutes or until the mushrooms are tender and the cheese has browned a little. Serve warm.
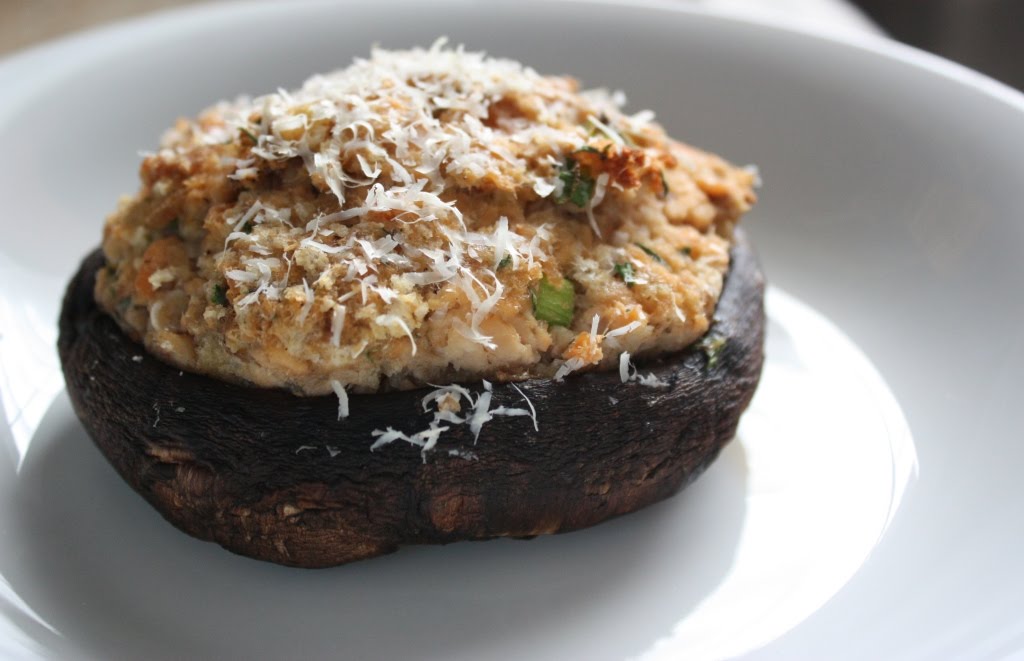
Salmon-Stuffed Portabella Mushrooms Recipe | Fake Food Free
Thanks for reading! All images and content are the property of Fake Food Free unless otherwise stated. Please do not republish recipes and images without written permission. Feel free to Pin images and share links to my posts, but please do not copy and paste recipes or photos and share them on other sites. Confused about copyright and food blogs? Here is some helpful information on Recipe Attribution.

March in Food

April 1, 2010

I’m finding that I look forward to the first day of the month so that I can post my Project 365 food recap. It’s been fun to look back each month, and I really think that it is keeping me on my toes with trying new recipes and getting creative. I mean, everyone doesn’t want to see the same photo every day!

I’m thrilled that it is April and we are experiencing true spring weather around here. We will likely hit 80 the end of the week. It will be interesting to see how my food pictures change as more and more fresh produce becomes available.
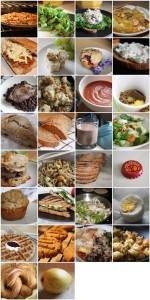
Papa Murphy’s Gourmet Veggie Pizza & the first official meal in our new house!
Lettuce to increase the veggie intake
Tuna salad on whole grain bread
A mediocre soba noodle experiment
Bourbon BBQ sandwiches with mustard coleslaw
Kenny’s Farmhouse Tomato Basil Cheese
7-Grain Blackberry Pecan Muffins
Benedictine salad (cucumber cream cheese salad)
Pastured Pork Chops and Black Beans
Nutty Cauliflower Quinoa
Tomato Basil Soup from A Good Appetite
Braised Lamb over Polenta
Blueberry scone
Whole Wheat Bread from Healthy Bread in Five Minutes a Day
Blackberry, kale smoothie
Shrimp salad with soy dressing
Apple Cheddar Brown Biscuits
Ginger veggies over noodles
Flax bread from Great Harvest
New Belgium beer
Pear Walnut Muffin
Grilled Vegetable Sandwich
Veggie fixin’s for tacos
Success with hard boiled eggs (no green edge!)
Honey Amaranth Waffles
Whole Grain Peanut Butter Cookies
Post-race Spanish Omelet from Alfalfa’s
Curried Lentils with Cauliflower and Sweet Potato
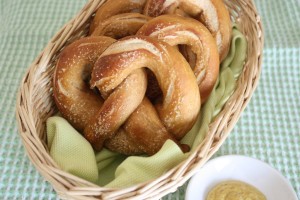
Whole Wheat Soft Pretzels
Champagne Mango

PS. Sorry the mosaic is turning out so small. I’m working on it.

Pretzels: A Word About Easter History

March 30, 2010

When I think about the things I associate with Easter, pretzels is typically not one of them. Hot-cross buns, chocolate, eggs, bunnies, and on a religious note, sacrifice, the cross and new life. No, pretzels really don’t make the list. Well, that was before I read about their history a couple years ago.
My interest in pretzels began when we traveled to Austria and Germany a few years ago. At that point I discovered one of my top five meals of all time – German sausage, kraut, mustard, a pretzel and beer.
It has to be from the source though, so traveling is required. A simple meal, yes, and likely very unexciting for many, but it tops my list. In many cases, I could just go for the pretzel, mustard, and beer, and believe me; in Germany they are large enough to be made a meal!
This is what sparked my interest in pretzels and I soon learned that their history is strongly associated with Easter. Well, actually, they are associated with Lent. As the story goes, pretzels originated in Southern France or Northern Italy when a monk was making unleavened bread for Lent. At this time it was common for arms to be folded across the chest when praying with each hand on the opposite shoulder. Does that vision look familiar?
Such is the traditional shape of the pretzel. Supposedly this monk used the pretzel as a reward for children or other monks (each account is a bit different) who recited their prayers. Therefore the pretzels were first named “pretiola” which is Latin for “little reward.”
Another name associated with the pretzel is “bracellae” which is Latin for “little arms.” As pretzels made their way to Austria and Germany they became known as a “bretzel” or “pretzel.” Historically, aside from the association with Lent, pretzels symbolize good luck, long life and prosperity.
I’ve wanted to make pretzels for a while now, especially since I read about the history, and I decided that this Easter is the year for it. Traditionally, due to the strict Lenten fasting rules of the Catholic Church, breads made during this time were composed of only water, flour and salt.
Most pretzels today use more ingredients. For example, the one I set out to make is a recipe for Homemade Soft Pretzels by Alton Brown. As is typical of my baking, I made a few changes.
I used mascavo sugar in place of the white sugar and white whole wheat flour in place of all-purpose flour. I also didn’t have kosher or pretzel salt so I just used my finely ground sea salt, but used half of what the recipe calls for in kosher salt.
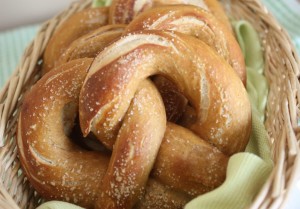
I was so happy that these whole grain pretzels turned out beautifully. They raised well, browned up nicely and remained soft and tender on the inside.
Whole Wheat Soft Pretzels
Adapted from Homemade Soft Pretzels by Alton Brown

1 ½ cups warm water
1 tbsp of mascavo/muscavado sugar
1 tsp sea salt
1 pk active dry yeast (I used rapid rise)
4 cups white whole wheat flour
4 tbsp unsalted butter, melted
10 cups water
2/3 cup baking soda
1 egg yolk, beaten
1 tbsp water
Olive oil
Salt or other seasoning
Combine the sugar, salt and water in the bowl of a mixer and sprinkle the yeast on top. Let it sit for 5 minutes, it will begin to foam. Add the flour and butter and use the dough hook to mix the dough on slow. Gradually increase the speed to medium and let mix until the dough forms and pulls away from the sides of the bowl. This only took about 2 to 3 minutes for me.
Remove the dough and knead into a ball. Place the ball in a clean bowl and coat with olive oil. Cover and set aside in a warm place to let rise for about 55 minutes.
Preheat the oven to 425 degrees F. Bring the water and baking soda to a boil in a large soup pot. Separate the dough into 8 equal pieces and roll out each piece to about 24 inches long. Shape into a U, cross in the middle, and press the two ends into the opposite sides of the bottom of the U. In other words, make a pretzel shape however you see fit. Mix the egg yolk with the water in a small bowl and set aside.
Drop the pretzels in the boiling water one at a time for about 30 seconds. Remove after they float to the top. Place on a cookie sheet (four pretzels per sheet) covered with greased parchment paper or with a silicone mat. Brush the pretzels with the egg yolk mixture and sprinkle with salt or other seasoning. Bake for about 12 minutes or until golden brown. Cool and enjoy.

Eating these lovely treats is a far cry from a sacrifice, which is what I usually associate with the Lenten season. So that is why I think I’ll stick with the name “pretiola.” I will gladly take these as a little reward any time of year.
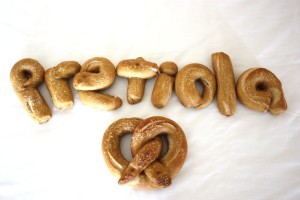
In fact, I like that name so much I decided to spell it out for you. So this pretzel experiment is being submitted to the Eating Your Words Challenge hosted by Tangled Noodle and Savor the Thyme.

Resources for more info about pretzel history:
Catholic Education Resource Center: Lenten Pretzels
CatholicCulture.org: Pretzels for God
The History of the Pretzel

Snyder’s of Hanover: History of Pretzels

Myths and Truths: My First Half Marathon

March 29, 2010
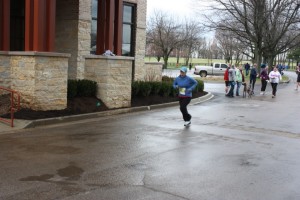
For a while now I’ve been trying to determine where this goal came from, this goal to run a half marathon. A goal which, I might add, I successfully accomplished yesterday morning.
I’ve never especially liked running. There are times when I hated it with a passion. I just prefer other forms of activity. However, I was to the point where I wanted to stop confusing not liking it with not being able to do it. As a result I’m starting to enjoy it more.
Let’s be clear. I run, I’m not a runner. And there are several reasons why I likely won’t ever consider myself a runner. When I think of a runner, I think of someone who is in love with running, and needs it in their lives. Someone who is willing to push themselves to the point of injury and past it to run. Now, I don’t mean to generalize, certainly not all runners are like this, but I know many who are.
Personally, if I hurt, I’m not going to run. I don’t just mean sore, aches and pains hurt, I mean injury hurt. I view my body and all its wonderful capabilities as a gift. Hurting it to the point where it is injured and can’t function is not respecting this gift. Wellness means understanding your limits as well as exceeding them when appropriate. For me, not respecting this gift by pushing too hard is as bad as not respecting it by not using it and letting it waste away without any activity at all. I have issues with both.
The second reason I say I’m not a runner is that I am slow. And I mean slow. I fall into the jogger/walker category. In fact, there were race walkers flying right by me yesterday. When people tell me to slow my pace down I laugh because going any slower for me is walking and it is physically impossible for me to go any faster. I’ve tried hard, too.
My goal was to finish the race in a motion that somewhat resembled running for 13.1 miles and I did. I never stopped running and I came in at a time of 2:57:26. About a 13 minute mile. See, I told you. The fastest I’ve run is a 5K at a 10:45 mile. Still no speed of lightening.
One thing that helped me keep fighting for my goal was a comment I recently read in a book which said “there is no freedom without discipline.” I’d never really thought much about that before. But if we don’t provide structure for our lives, make ourselves do things, we really can’t accomplish much.
Setting out on my training it wasn’t until I was able to run 10-11 miles that I honestly felt like I was going to complete the half marathon. That was about 2 weeks ago, so I was basically pushing myself to obtain a goal I wasn’t sure was possible for 10 weeks.
Throughout the training I knew I wanted to present a post that highlighted the honesty of running a half marathon. Not something that says “it was tough, but so worth it.”
I don’t have finish line blinders on, I have reality set in my mind. The reality of how hard it was to accomplish my goal. I also thought a lot about the things people told me along the way or views I developed and whether or not they were true. So if you are thinking of running or shooting towards a goal you aren’t sure you can accomplish, this is for you.
12 weeks is enough time for training. Debatable.
I think everyone is different when it comes to this. My original plan was to run a half sometime during 2010 and I was shooting for fall. When I discovered this local event it was 14 weeks out. I began training at 13 weeks and used Hal Higdon’s Novice Half Marathon program which is a 12 week program. I added an extra week myself and got up to 11 miles before the race.
Initially I thought this program was too ambitious and at certain points it was. The day I was supposed to run 9 miles, I had to stop at 4.5. I did not reach the goal for many weekday runs because of shin problems in the middle of my training. Also, if I had stopped my training at the 10 mile mark, I’m not sure I could have finished. Making to 11 miles pre-race had a postive impact on me mentally.
Looking back though, I’m glad I pushed the training and got the race in early in the year. At certain times 12 weeks seemed fast, but it is also enough time to get discouraged. If I had pushed the race to later I may not have stayed motivated to meet my goal.
Cross-training is important. Truth.
I suppose there are people out there who love to run and run and run. I don’t. I ran 3 days per week and if I had been forced to run more I would not have enjoyed my training at all. I didn’t enjoy it that much to begin with. In addition, my shin problems stopped as soon as I incorporated yoga into my routine. As with everything else in life physical fitness is about balance and performing different types of exercise helps establish that.
Running will make you lose weight. Myth.
I lost only 6 lbs during my training, but I knew that losing weight by running was a myth before I started because you typically eat more. I could have cut back drastically on my caloric intake and lost weight, but I wasn’t willing to do it. If I didn’t eat, I didn’t have the energy to run. It was a difficult balance for me and stressed me out in the beginning. Finally I decided I would eat healthy foods as I needed them and let my body decide what it wanted to do.
It hurts. Truth.
Fortunately, I had no injuries, not even a blister during my training. I suffered from shin splints halfway through, and a bit of chaffing that was taken care of by BodyGlide. Everything I encountered was manageable.
That being said I have been exhausted for the past 12 weeks. I came home after runs of 5 miles and longer and basically lay around the rest of the day. I was sleepy all the time and incredibly sore after my long runs. During the runs themselves my knees, ankles and hips ached like crazy. It was just part of it for me and I’m glad that part is over.


The adrenaline and atmosphere will push you through the last few miles. Myth.
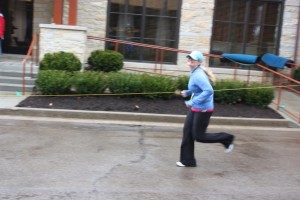
I’ve heard and read this several times, and I’m sorry, but I don’t agree. It is highly dependent upon the race you do. This was not a high energy race, it was a rainy day and I was running past other people leaving as I rounded the ½ mile mark to the finish. The last two miles were complete agony. I got maybe two cheers when I rounded the bend for the finish and a couple claps once I crossed the line. Perhaps if you choose a high energy race with lots of people, music and celebration on a sunny day this statement could be true. Yes I made it, but it would have taken a lot less effort on my part if there had been more support.
Crossing the finish is the best part of the race. Debatable.
I’m going to be honest, because of this particular race, crossing the finish was one of the most disappointing experiences of my training. I was hoping for cheers, music and lots of people around. The place had cleared out. It was me and a handful of people there to hand me a medal and take my picture (a special thank you to them). There were granola bars, water and bananas left to eat, and all the vendors had packed up early. To be honest, it made me sad and even sadder for all the people behind me who still had to finish. Because of this, I think it is important to be prepared that the finish may not be what you have envisioned in your mind.
Note, this doesn’t include seeing my husband there to take pictures of me and hug me afterward. Now that was the best part of the race.


After all this, am I glad I did it? Of course! I accomplished something that I honestly didn’t think I would ever be able to. I also fully believe that pushing myself this hard was beneficial to my well being. I think it is important to find things that push you as hard physically, but it doesn’t have to be running.

What are my goals now?
My running started back in January 2009 with a goal of being able to pick up and run a 5K at any point. I accomplished that and then set one to run a half. Now, I’ve accomplished that.
I’ve discovered that I do enjoy running out in the country and seeing the landscape, I just enjoy running shorter distances. To be honest, I’m tired of running long distances and having to be so structured with my workouts.
So the plan is to now be comfortable with running a 10K at any point in time. I’ll likely run 2-3 miles two days per week and 4-5 miles on the weekend. I want to increase my speed and get closer to a 10 minute mile. I also want to start concentrating on other activities again such as more yoga, spinning and strength training.
Will I run another half?
I haven’t decided that yet. Three weeks ago I would have said no. Everyone told me that when I made it to the finish I would want to do more, but I’m not there yet. I can see signing up for a half that is guaranteed to be fun and energetic at some point during the future, but now I’ll stick with 5Ks and 10Ks. I just find them more enjoyable and don’t view them as work like I do a half.


Now for all those who have been holding out for the food. We had an amazing post-race brunch at Alfalfa Restaurant in downtown Lexington, KY. I’ve posted about this place before and we certainly weren’t disappointed on this visit. I enjoyed a Spanish Omelet with white cheddar and ranchero sauce with their special Alfafries. My husband had the Breakfast Burritos. We split the Buttermilk Buckwheat Blueberry Pancake. This thing is amazing. The first bite tastes like a blueberry cake donut!
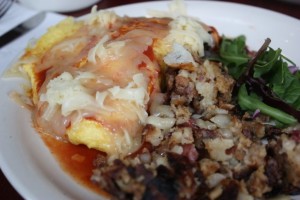
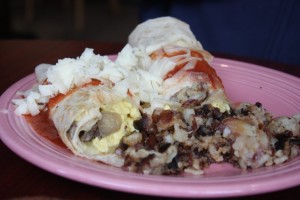
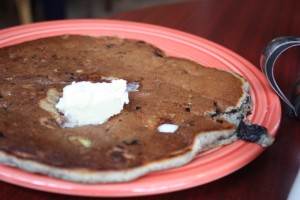
Special congrats to my husband! Although he’s run relays of the same or greater difficulty, this was his first official half marathon finish as well. He finished in 1:53 and is preparing for the Flying Pig Marathon in May.

Good to the Grain: Honey Amaranth Waffles

March 26, 2010
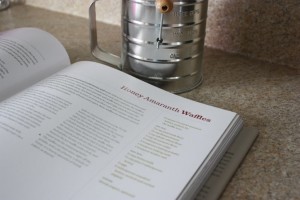
After you’ve been food blogging for a while, I think you start to realize what your thing is; the topic you like to cover in your posts most often, the one ingredient you like use in your cooking, or the cooking method you prefer. Sure, it may change over time, but there is a point where you realize what you truly enjoy learning about, talking (or typing) about or making.
My thing…is grains.
I’ve always enjoyed baking, but the more I learn about whole grain flours the more interested I become. They all have such unique histories, flavors and nutrient compositions.
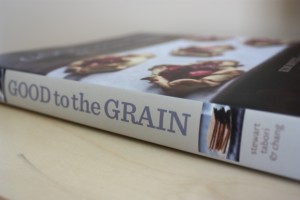
Given this fact about my interests, it’s likely no surprise that when I came across the cookbook Good to the Grain: Baking with Whole-Grain Flours by Kim Boyce, I knew I had to get my hands on a copy!
I was out walking pug a few days ago and I noticed the UPS guy had left a package by the garage. I was pretty sure I knew what it was, and I literally opened the package right there in the yard. I’m sure if any of our neighbors were watching, they had to be wondering what gift had been bestowed upon me.
As I balanced a retractable leash in one hand and the envelope in the other, I flipped through the pages of the cookbook. The smile began to spread (and I might have even done a mini happy dance) as I saw amaranth, buckwheat, barley, Kamut, spelt and teff; each with its distinct section, utilized in some of the most delicious looking baked goods I’ve had the pleasure of viewing.


The author, Kim Boyce, was a pastry chef at the well known Spago and Campanile restaurants before she left to raise her kids, and then embark on creating whole grain baked goods for her family to enjoy. The book is filled to brim with 75 recipes of cookies, cakes, waffles, pancakes, breads and tarts made with 12 different whole grain flours.
The author shares information on the baking equipment and ingredients she considers essential. You will find yourself sharing her journey of balancing flour combinations and perfecting flavors, while you learn a great deal about whole grains and how to use them.
I will mention that since the author’s goal is to create the right structure for the grain products she does use all-purpose flour with the whole grain flours, as well as refined sugars. But as you will see in the recipe below, these things can be altered a bit if you choose to do so. In fact, she encourages you to try different combinations just as she did to develop the recipes.
While the Muscovado Sugar Cake and the Cornmeal Blueberry Cookies are on my list to make, for this review I made the Honey Amaranth Waffles. Taking the author’s suggestion to heart, I was modifying right out of the gate. Mainly because I was hoping amaranth flour could be found in the bulk bin of our Whole Foods, but no such luck. I ended up using spelt flour instead. In addition, I don’t use much all-purpose flour at all anymore, so I substituted white whole wheat for this, and then used the whole wheat the recipe calls for. I also used mascavo sugar in the dry mix.


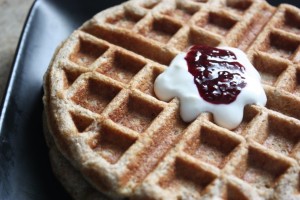
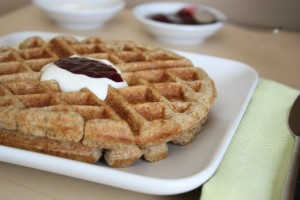
The result? Seriously the best waffles I have yet to make. They were as light and fluffy as any standard white waffle with that deep rich flavor from the whole grains and a mild sweetness from the honey. I needed no toppings at all for these, but tried adding the Greek yogurt suggested in the recipe and a bit of blackberry jam I had made.

If you have any interest in baking with whole grains, this is one cookbook that needs to make it on your shelf. I have a feeling I will be baking from it on a very regular basis.

Honey Amaranth Waffles
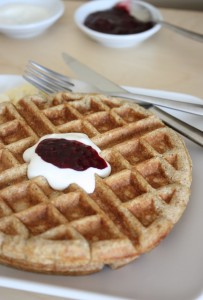
From Good to the Grain by Kim Boyce, reprinted with permission

2 ounces (1/2 stick) unsalted butter, melted, for the waffle iron
Dry mix:
¼ cup amaranth flour
¼ cup flaxseed meal
1 cup whole-wheat flour
1 cup all-purpose flour
2 tbsp sugar
2 tsp baking powder
1 tsp baking soda
1 tsp kosher salt

Wet mix:
2 cups buttermilk
¼ cup plus 2 tbsp honey
2 eggs
2 tbsp unsalted butter, melted and cooled slightly

Finish:
Greek yogurt, optional

Turn the waffle iron to its highest setting. Even if you don’t usually heat it this high, these waffles come out best when cooked at high heat. Sift the dry ingredients into a large bowl, pouring back into the bowl any bits of grain or other ingredients that may remain in the sifter.

In a medium bowl, whisk together the wet ingredients until thoroughly combined. Using a spatula add the wet ingredients to the dry ingredients and gently combine. The batter will begin to bubble and swell as the baking soda begins to react with the buttermilk.

Brush the waffle iron generously with butter; this is the key to a crisp crust. Use a ladle or measuring cup to scoop ½ cup batter onto the spaces of the iron. Promptly close, and listen for the iron to sigh as the batter begins to cook. The smell wafting from the iron starts out like a freshly kneaded loaf of bread, then becomes toasty. Remove the waffle when the indicator light shows that it is done, or when a quick peek shows that it’s turned a dark golden-brown, 4 to 6 minutes. Remove the hot waffle with a fork, and repeat with the remaining batter.

The waffles are best eaten right off the griddle, with a bit of butter, a drizzle of honey, or a hearty spoonful of Greek yogurt, as desired.

P.S. The book says it makes 9 waffles, but I got 8.
Disclosure: The review copy of this cookbook was sent to me free of charge. I was not under any obligation to write about it on my website and I did not receive any compensation for doing so.

Want to create beautiful food and product photos that you can't wait to share?!
Discover your style, control the light, and shoot using the tool you know how to use (yes, your phone included). Learn about free resources, Live Q&As with Lori, and online courses you can take from anywhere in the world!
We respect your privacy. Unsubscribe at any time.