Archives

Shrimp Taco Dorado and a Cookbook Review for Cinco de Mayo

May 4, 2010

This is one of the first cookbooks I reviewed here at Fake Food Free. I still go back to it on occasion for fun taco and drink ideas! This recipe remains a favorite for quick and tasty tacos.
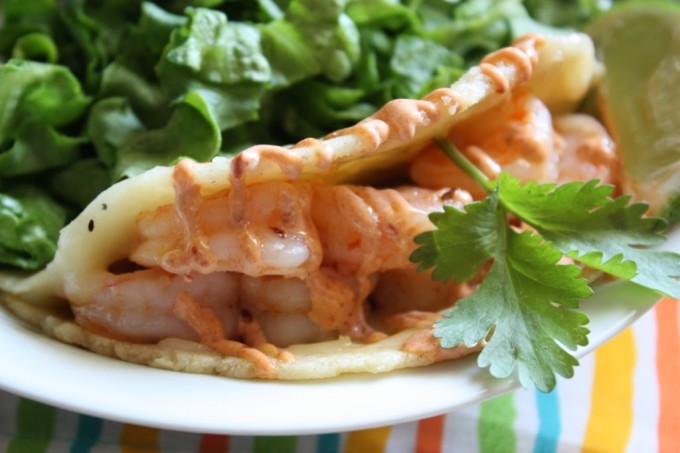
 Shrimp Taco Dorado | Fake Food Free

It’s shameful. A complete disgrace. A food blogger in Kentucky without one post about the Derby or related food traditions. How could I?

Yes, I realize I have let you down. My excuse is that other than watching it on Saturday night there were no celebrations around here for the event. We didn’t even know the favorite horses this year which is uncommon for us. The reason? Well, it was also marathon weekend for my husband which I will recap later this week.

No pies with sugar or juleps with bourbon could be found in the house for several weeks before this event. We’ve vowed to do better next year. Fortunately, Derby should fall the weekend after the Flying Pig marathon events in 2011 so we are all good

I decided that I could not let another special day pass without a celebration in the form of a post and, as you know, tomorrow is Cinco de Mayo. Lucky for me, I received a new cookbook to review for the occasion!

Mexican food has become of interest to me recently. I mean real Mexican, not the version we get here in Kentucky. In fact, I’m not sure I’ve ever had real Mexican since I haven’t been to Mexico or to many places in the southwestern part of the U.S. I just tend to watch it explained on television as my mouth waters.

So I was thrilled to check out the brand new cookbook, Amor y Tacos: Modern Mexican Tacos, Margaritas, and Antojitos by Deborah Schneider. The author is the executive chef and partner in SOL Cocina in Newport Beach, California and was also a nominee for the 2009 James Beard Award. She has written Baja! Cooking on the Edge and Cooking with the Seasons, neither of which I have checked out, but I plan to now.

This cookbook though small in height compared to others on my book shelf makes up for it by being tall on flavor and creative recipes. Its focus on tacos and antojitos (little bites, sometimes referred to as the Mexico version of tapas) makes you want to throw taco-tasting bash!

It is full of recipes using fresh ingredients from margaritas with a homemade sweet and sour mix and fruit juice blends to salsas and guacamoles with everything from pineapple to chipotle. There is one minor hiccup that doesn’t go along with my eating plan, the beef simmered in soda, but I can overlook that to see all the other great options the book has to offer.

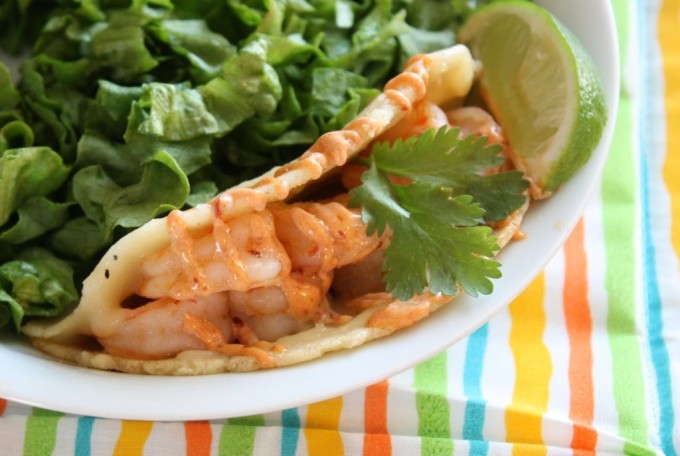
I made the Shrimp Taco Dorado. It combines tender shrimp with smoky chipotles on corn tortillas with jack cheese. Simple, yet incredible flavor! The ingredient list suggests toppings of chipotle salsa, guacamole and mango habanero salsa all homemade from recipes in the book. I chose to go with only the chipotle salsa, a mix of chipotle peppers in adobo, mayonnaise and lime juice blended into a sauce. It alone was perfect on the tacos so I can only imagine how much better they would be with the additional toppings.

I’m thinking this is just the start of a taco and margarita summer!

Shrimp Taco Dorado

From Amor y Tacos by Deborah Schneider reprinted with permission from Abrams Books

Ingredients

1 tablespoon plus 2 teaspoons butter or olive oil
1 teaspoon chopped garlic
1 pound medium shrimp, peeled, tails removed and cut in half if large
1 teaspoon finely chopped chipotles in adobo
¼ teaspoon salt
Large corn tortillas
1 ½ cups grated Jack cheese
Cilantro sprigs
Suggested toppings: Chipotle salsa, Guacamole and Mango habanero salsa (recipes provided in cookbook)

Prep

1. In an 8-inch sauté pan, melt 1 tablespoon of the butter or oil over medium heat. When it is heated, but not brown, add the garlic and shrimp, and cook, stirring, until the shrimp are pink. Stir in the chipotles and salt and remove from heat.

Shrimp Taco Dorado | Fake Food Free

2. Preheat a heavy pan or griddle over medium heat and brush it lightly with some of the remaining butter or olive oil. Set a corn tortilla on the griddle and scatter 2 tablespoons of shredded Jack cheese evenly over the tortilla. Set 3 or 4 shrimp on one side of the tortilla. When the cheese starts to melt, fold the tortilla in half over the shrimp, and continue to cook on both sides until the cheese is melted and the tortilla is lightly crisped and golden brown.

3. Open the taco. Dollop 1 teaspoon of the chipotle salsa on top of the shrimp (or drizzle from a squeeze bottle) and follow with the remaining toppings. Tuck a couple of cilantro sprigs into the opening and serve right away.


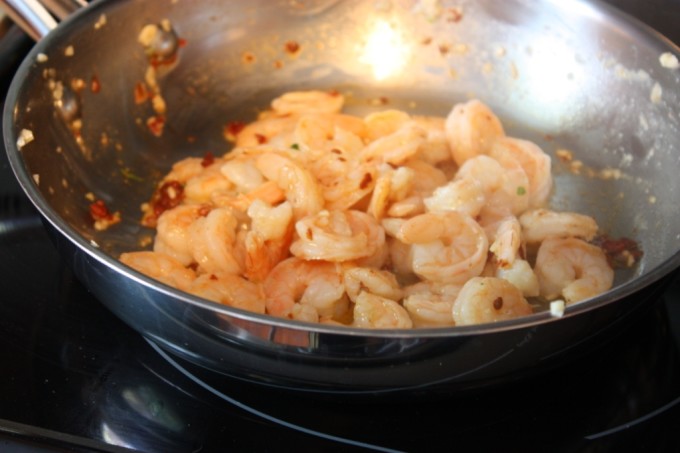
Shrimp Taco Dorado | Fake Food Free
 
The recipe makes 12 substantial tacos, enough for 6 hungry people.
 
 
Disclosure: The review copy of this cookbook was sent to me free of charge. I was not under any obligation to write about it and I did not receive any compensation for doing so. This post contains affiliate links. 

Links to a Healthy Weekend

May 1, 2010

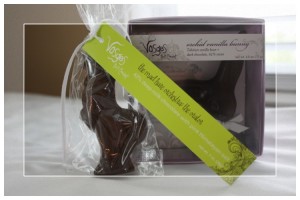
I waited until the perfect time to try it; after all the other treats had gone and day after day of staring at it made the cravings unbearable. You see I got quite the Easter gift this year. My thoughtful husband picked up my Easter gift while in the Chicago airport during a business trip — Vosges Haut-chocolat.

Thus far in my chocolate-tasting experiences, this is the best chocolate I have ever had. I absolutely love it, all the wild flavor combos with the wasabi, peppers, curry, bacon, sea salts. The list goes on and on. When I eat it I feel like one of those people on the tacky chocolate commercials who fall into a relaxing dream-like state of contentment.

It is that good. Promise.

My Easter gift consisted of a 42% deep milk chocolate rooster made with pink Himalayan salt and a 62% dark chocolate bunny made with Tahitian vanilla bean.

First came the rooster. I’m usually a dark chocolate fan, but there was something about the deep milk with its smooth and creamy texture that has me rethinking my preferences. It lacked the bitterness of dark chocolate and was sweet, yet not too sweet. The salt tingles your tongue. A perfect combination.

Next came the bunny. Poor bunny that was at first earless, then headless, and now, all gone. He was full of vanilla bean, and the mix of the bitter, yet sweet bean with the chocolate was nothing short of incredible.

I know. It’s just chocolate, you say. But no, Vosges chocolate is not just chocolate, it is seriously a full food experience.

**************************************************

Now that I have everyone craving chocolate, I’ll move on to the links. I just had to share my Easter gift with you.

It’s a big weekend around here. My husband runs his first marathon tomorrow! He’s going to do great, but feel free to wish him luck anyway! I get to be a spectator and cheer him on as well as test my camera skills with action photos. I’ll report back on Monday.

Until then, I found some great reads over the past couple weeks that I hope you enjoy too.

It’s Derby time and if you don’t know what a Mint Julep is you need to read this. It’s a big part of Kentucky culture and food history. Cheers!

Homemade Strawberry Applesauce from Reluctant Vegetarian makes great use of those spring berries. It looks very easy to make. I probably shouldn’t, but I just keep picturing it over some ice cream!

Getting College Students to Eat Better Using a Stealthy Strategy is a report from Science Daily about recent research which shows that connecting food to environmental and social issues results in better eating habits. Very interesting and it has worked for me as well.

What Came First: The Chicken or the Cancer? is a guest post on the FRESH website regarding that popular fried chicken company that has decided it wants to donate money to cancer research. Even if you don’t have time to read the whole thing, just go read the last line. Sums it up pretty well.

Tips for Tackling the Hawkers and Savoring the Foods of Singapore is my recent post at The 3 Star Traveler. Lots of food photos from our time there last October!

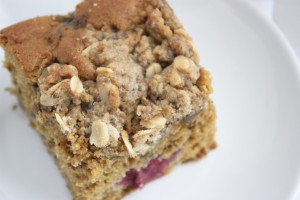
Blackberry Yogurt Coffee Cake

April 30, 2010

My freezer is still full of blackberries from last summer. In fact, it has gotten to the point that my parents are now shuffling off their overabundance onto me because the new harvest will be coming up quickly. Considering that our little sprig-like bushes are going to need some time to come around, I’ve gladly accepted all they have offered.

I’ve been tempted to fill the house with desserts, but have had to pull the reigns the past few weeks as my husband prepares for his first marathon this weekend. Of course, I try to use little to no processed sugar and flour in most of our desserts (there are exceptions on occasion), but we still don’t need an overabundance of sweets around at the moment.

I keep hoping I’ll find more and more people to pawn off my desserts too, but right now most of the goodies end up hanging out in our kitchen for a while. If you work from home, you know exactly how dangerous that can be.

Speaking of that I have a question I’ve been meaning to ask. For all of you who pump out posts of dessert after dessert on your food blogs, what do you do with all of it? Big families, neighbors? I’m interested to know.

So what do you do when you don’t want to make a dessert, but still want to use up frozen berries and have something sweet? Well, you make something that is actually a dessert hidden under a name that classifies it into another meal category.

Coffee cake. Problem solved.

Coffee cake is one of those things that I rarely make so maybe that is why I’ve had it on my mind lately. I’ve seen quite a few posts up on other food blogs featuring it likely because coffee cake is great for springtime brunches. So for whatever reason, I wanted to make one.

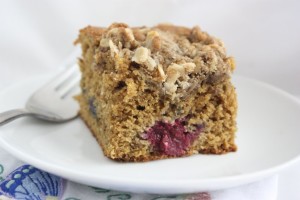
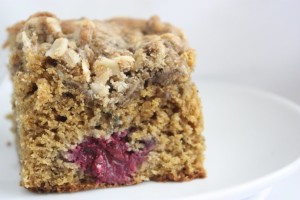
This recipe successfully used up berries and combines some of my favorite ingredients; one of these being honey-flavored Greek yogurt. I recently found Greek Gods Greek Yogurt at our local supermarket and have been hooked ever since. I used it in this recipe and it resulted in a tender, moist cake with a slightly sweet flavor. I suppose you could use any Greek yogurt, but if you decide to use plain you might want to up the sugar in the recipe a bit. Especially if you are using tart berries, or a minimally refined sugar which are typically more complex and not a sweet as processed white or brown sugar.

I ended up using clove as the sole spice as I wanted something more creative than the traditional cinnamon. This resulted in a cake with berries that remind you of summer and a background flavor that whispers of the holidays. I already have plans to make it again. It is simple to throw together and I’m thinking the berry and fruit options are endless.

Blackberry Yogurt Coffee Cake

½ cup unsalted butter, softened
½ cup mascavo sugar
1 egg
¾ cup honey-flavored Greek yogurt
½ tsp vanilla
¼ tsp clove
¼ tsp salt
1 tsp baking soda
1 tsp baking powder
¾ cup white whole wheat flour
1 cup frozen blackberries

Topping:

¼ cup unsalted butter, melted
¼ cup mascavo sugar
¼ cup white whole wheat flour
¼ cup rolled oats

Heat the oven to 350 degrees F and grease a square 8 x 8 inch pan. In a mixing bowl beat together the ½ cup of softened butter and sugar. Add the egg and beat until light and fluffy. Next, mix in the vanilla and yogurt. Sift together the clove, salt, baking soda, baking powder and flour and slowly mix into the wet ingredients until everything is combined. The batter will be very thick. It is almost like a soft cookie dough.

Spread half of the batter evenly into the prepared pan. Evenly distribute the berries over the batter, pressing them in gently. Next, cover the berries with the remaining batter spreading it as evenly as possible.

In a bowl, combine all of the ingredients for the topping. Sprinkle it evenly over the batter. Bake for 30 to 35 minutes or until a toothpick inserted in the center comes out clean. Makes 9 slices.

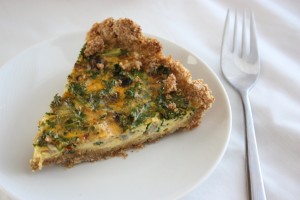
Kale and Mushroom Quiche

April 28, 2010
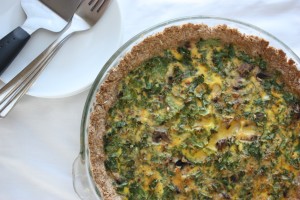
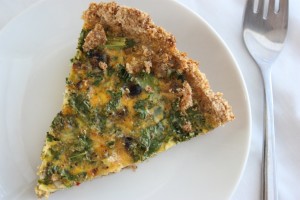
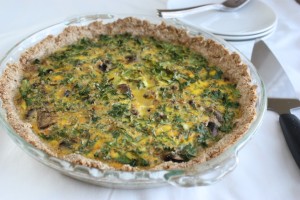
Quiche is such a springtime dish. Funny how I make it this week and the temperature dropped to 35 F last night. Good thing the quiche I made is a little on the hearty side with a whole wheat crust and kale. See, I loved that kale and mushroom combo I made a while back so much that I thought – why not try it in a quiche; take a break from the traditional spinach.

It was so good that I’m bummed my husband took the last piece in his lunch today. Although, I had plenty, I think a piece every day since I made it on Sunday.
I used my favorite quiche crust that I started making last year. It is a pat-in-the-pan butter crust in which I use stone ground whole wheat flour. It is not a light and flaky pastry crust. It is crumbly and the nutty flavor of the whole grain goes well with any quiche combination. I doubt I’ll ever put my quiche in anything different.
I put raw kale in the egg mixture and the cooking time on the quiche was plenty to make it nice and tender. I also sprinkled in some red pepper and hot sauce for a mild kick.
Kale and Mushroom Quiche
1 ½ cups whole wheat flour
½ tsp salt
½ cup unsalted butter, softened
1 to 3 tbsp milk
½ cup fresh button mushrooms, chopped
1 cup kale, finely chopped
2 tbsp fresh parmesan, grated or shredded
1 cup milk
4 farm fresh eggs
1 tbsp white whole wheat flour
½ tsp salt
½ tsp smoked paprika
½ tsp garlic powder
¼ tsp ground black pepper
¼ tsp crushed red pepper
1 tbsp hot sauce
Preheat the oven to 350 degrees F. In a bowl mix together whole wheat flour and salt, cut in the butter and mix with a fork or pastry blender until butter is incorporated and dough is crumbly. Slowly add milk, one tablespoon at a time until the mixture forms a dry, yet cohesive dough. Press the dough evenly into bottom and sides of a deep, 9 inch pie pan.
On top of the crust sprinkle the mushrooms, kale and cheese. In a separate bowl mix together the eggs, milk, flour, salt, spices and hot sauce. Whisk until light and fluffy, or you can also put the mixture in a blender and pulse. Pour the eggs over the crust and arrange your fillings as needed.

Bake for about 40 to 50 minutes. The egg will rise a bit and the top should be slightly browned and the center set. Allow to cool for five minutes, slice and serve. Makes six to eight servings.

If you like this, you might also like my Zucchini Quiche with Whole Wheat Crust

Jackfruit Muffins

April 26, 2010
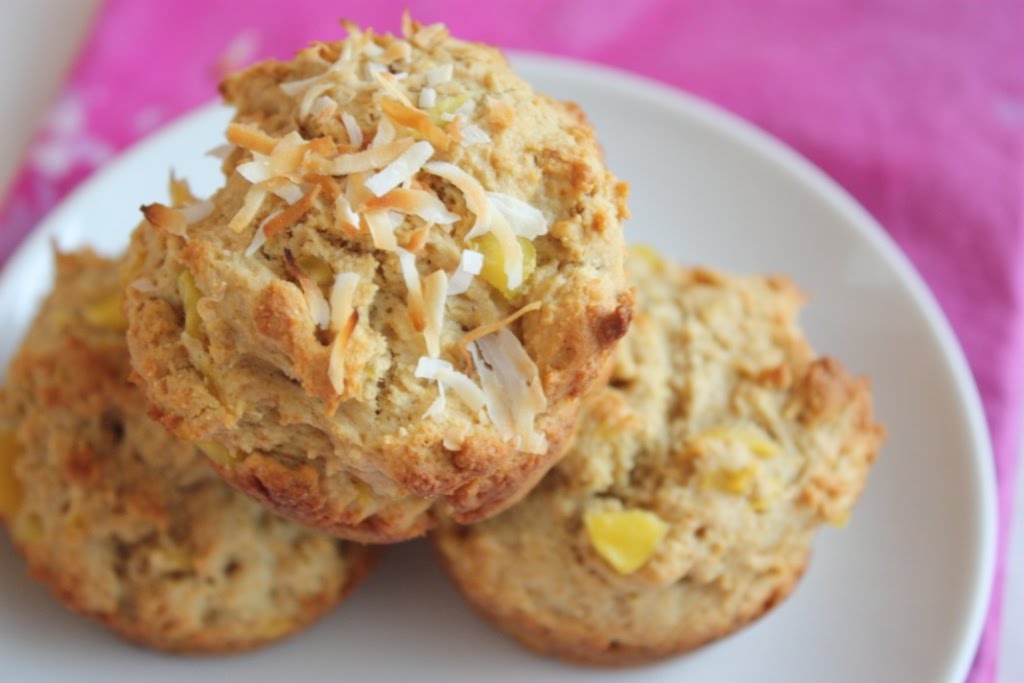
Jackfruit Muffins Recipe | Fake Food Free


What exactly is a jackfruit?

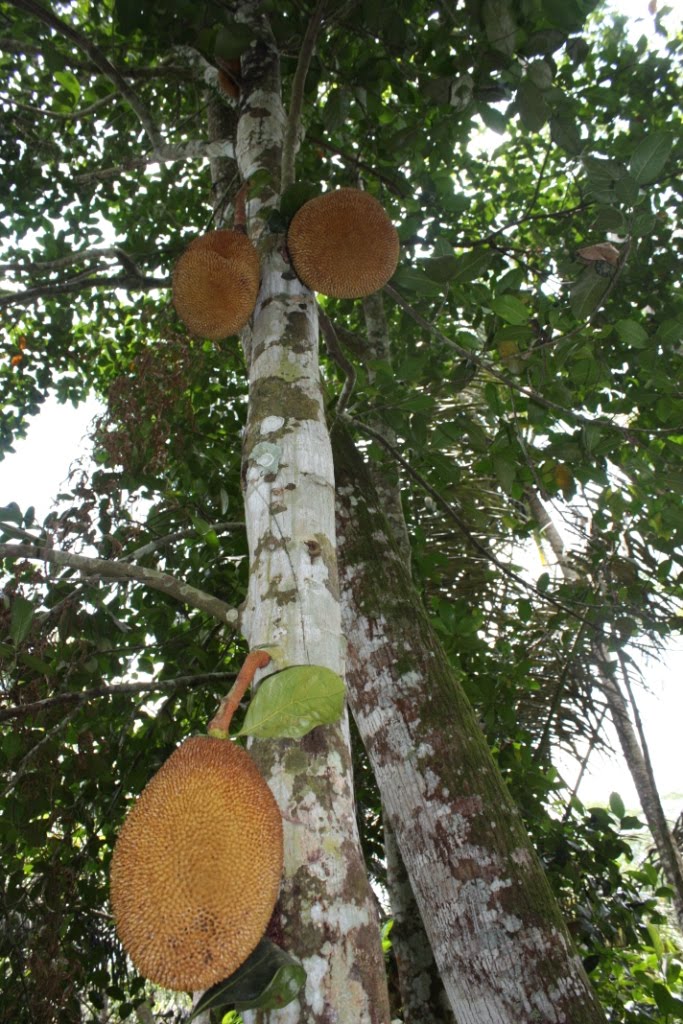
Well, it is likely the largest fruit you’ve ever seen. My first encounter with them was in Brazil, the photo at the right was taken in Ubud-Bali, Indonesia. When I say big, I mean when they are sitting on the ground they would come up to about mid-thigh, some perhaps even to your waist.

I might also mention that they are quite scary. There were many growing in the park around the zoo where we lived in Brazil. On more than one occasion I heard a ripe one fall out of a tree and hit the ground. Beneath such a tree you do not want to be. Loudest thud I’ve ever heard.

Jackfruit Tree

I only tasted them once when we were in Brazil at the local farmer’s market. It was a sticky, gooey piece of fruity flesh that tasted somewhat like a mix between a mango, banana and pineapple. I had a difficult time with the texture, but the fruit has a delicious flavor.

Despite my easy access, I never bought one. I often regret that decision now, but there were two reasons for this. The first was their size. About 98% of the time I went to the market by myself and this required a 20 minute walk each way. Yeah, lugging a fruit the size of my lower body back to the apartment wasn’t going to happen.

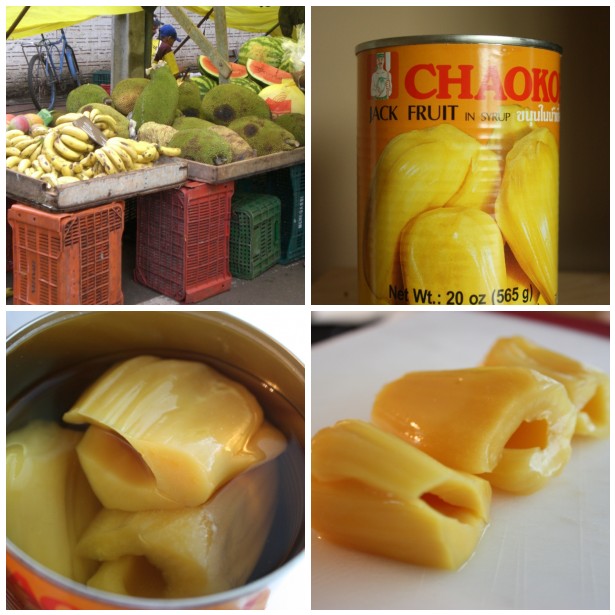
Jackfruit

Second, anytime we got into a conversation about jaca (the Portuguese word for jackfruit) we were warned of the sticky flesh. Apparently it is no less binding than a good glue and I heard horror stories from friends about how they spent days trying to get it off their hands after they would eat them outdoors as kids. I really didn’t want to tackle that either.

Before we left Brazil, Tracey at the Tangled Noodle posted a recipe for Langka Muffins. Langka is jackfruit in the Philippines. What a language lesson you are getting in this post!

After seeing the recipe, I wanted to try it, but still didn’t get up the courage to buy fresh jackfruit. Then, when we were in Thailand I tried a jackfruit shake that was incredible and my interest grew.

The next thing I knew we had moved back to the US and I found canned jackfruit at our international market. I know it is a bit backwards for a real foodie to have access to the fresh and go for the canned, but the canned I knew I could handle.

 I was a bit surprised by the texture of the fruit in the can. It was much different than what we had in Brazil. This might have to do with the fact that the fruit I had in Brazil was overripe and they probably harvest the canned variety early, or it could have been the syrup, or maybe it is a different variety that grows in different regions. Who knows?

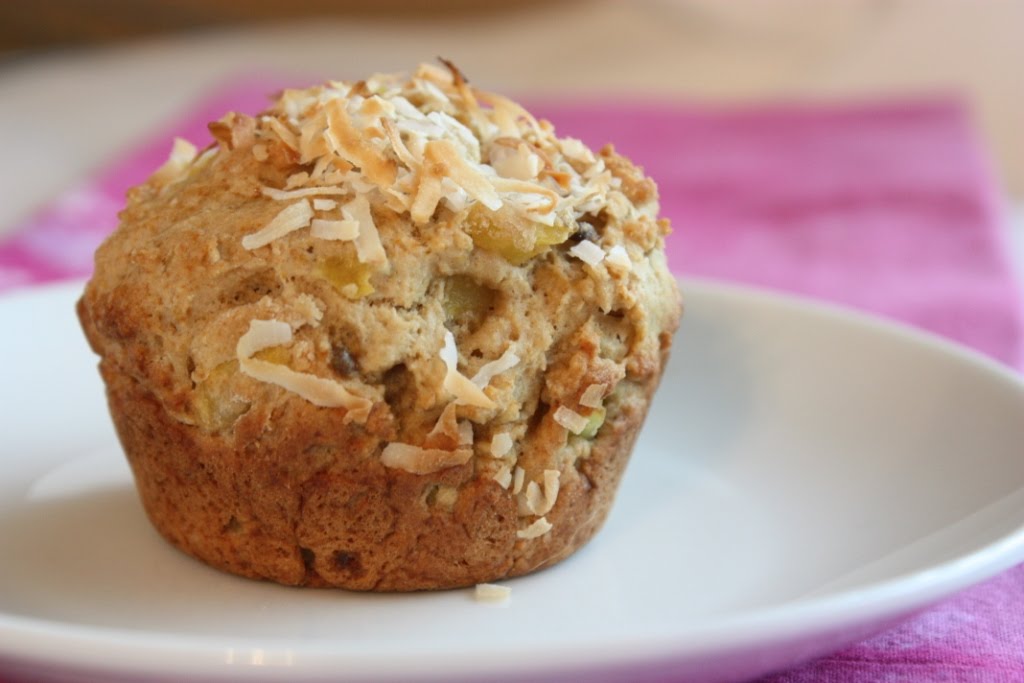
I know one thing though, Tracey wasn’t kidding! Those muffins are delicious! I modified the recipe a bit to use whole grains, coconut oil and some mascavo sugar I have left from Brazil. I also topped some of them with coconut before baking.

Jackfruit Muffin Recipe


Jackfruit Muffins
Modified from Langka Muffins at Tangled Noodle

Ingredients
2 cups white whole wheat flour
3 tsp baking powder
½ tsp salt
¼ cup minimally refined sugar
½ cup milk
1/3 cup virgin coconut oil, melted
1 egg, beaten
1 cup chopped jackfruit with ¼ cup syrup reserved
½ cup shredded coconut,unsweetened (optional)

Preparation
Preheat the oven to 400 degrees and grease or spray the bottom of each muffin tin with coconut oil or non-stick spray. Sift together the flour, baking powder and salt. Set aside. In a separate bowl whisk together the sugar, milk, oil, egg and jackfruit syrup.

Gradually add the wet ingredients to the dry. Stir in the jackfruit just until everything is combined. This batter will be very thick. Divide into 12 muffins. Press coconut into the top of each muffin if using. Bake for 18 to 20 minutes or until muffins are browned and a toothpick inserted in the center comes out clean. Cool and remove from pan. Makes 12 muffins.

An Amateur at Everything: The Garden

April 25, 2010

These days about the only thing that I’m not an amateur at is eating and exercising, everything else is new territory. In fact, I’ve been trying to learn about so many new things lately that it is not uncommon for the mass confusion of new information swimming in my head to become evident in my actions. Between baking, writing and photography, you might find me trying to figure out how to set the aperture and ISO on my oven, or I could be halfway through writing before I realize I don’t need to structure an email to my husband like a query letter.

One of these new activities I’ve taken on is gardening. We had a small garden at our last house and I can handle herbs, but the main reason we moved out of town a bit to our new house was to have more land to grow food. Note to self — big garden is quite the undertaking.

Last weekend was full of outdoor frenzy as my parents came to visit and help put in the garden. My Dad’s truck was loaded with everything from plants, to a tiller, to tomato cages. This proved terribly embarrassing for my Mom who was a bit worried they would run into someone they knew during their 4 hour drive, Beverly Hillbillies-style.

Fortunately, things were strapped down well and it all made it into the garden. The weekend proved to me that I know absolutely nothing about the art. My main problem is I tend to experiment without researching. I mean, I like to research what works and what doesn’t, especially when it comes to nutrition. However, when it comes to things like cooking and gardening I tend to throw things together and see how they do.
I was given some valuable lessons over the weekend including how difficult it is to maneuver a massive tiller through soil. I had done this before when I was younger, but I had forgotten how challenging it was. I also have notes, thoughts and tips floating through my head about how far apart to plant things, which plants need water, when to mound up dirt, what parts to break off a plant, when items will sprout, how to harvest it…….
Yeah, my head hurts too. Good thing my parents are only a phone call away, and that plants can be hearty little suckers because I’m sure I’ll screw a few things up.
This is how it all started last Saturday.
And thanks to the hard work of my parents and husband, this is what we ended up with.
The main thing I have my eye on at the moment are the strawberries. The plants came directly from my Dad’s garden and they were blooming last week and now we even have signs of growing berries!

We’ve planted blackberries and raspberries in the back of our yard. I’ve also got some herbs going up near the house. In addition, there are some new trees around and the beautiful flower we got as a housewarming gift.

So far this is what we have planted:

Carrots, Asparagus, Potatoes (red and white), Tomatoes (Early Girl, Roma, Beef Master and Orange and Red Cherry), Green Beans, Cucumbers, Zucchini (Yellow and Green), Corn, Onions (Red and White), Spinach, Lettuce, Arugula, Bell Peppers (Orange and Yellow), Jalapenos, Banana Peppers, Anaheim Peppers, Strawberries, Kale, Blackberries, Raspberries, Blueberries, Basil, Thyme, Rosemary, Cilantro, Parsley, Dill, Mint. Later will come pumpkins, butternut squash, melons, broccoli and Brussels sprouts.

Whew! Bring on the produce!

What will I master next? Well, canning of course.

PS. Links will be back next weekend!

Pastured Sausage and Jalapeno Pizza

April 23, 2010
When we were in Antigua last December our resort had a lunch restaurant with a wood-fire pizza oven. Well, it wasn’t just a lunch restaurant it was actually open until about 5:00pm. The pizza was delicious, and I’m not going to lie, there were some fourth-meals consumed in the afternoon between lunch and dinner.
A few days before we departed we decided to try the Messicana pizza. This is a bit of an inside joke because everything supposedly Mexican in nature is “Mexicana” in Brazil, which is actually pronounced “meh-sh-cona”. So it is interesting to see what some cultures associate with Mexican cuisine. Trust me, we aren’t the only ones who completely screw it up. For example, the Mexicana pizza where we lived in Brazil often had Doritos on it. I rest my case.
This pizza in Antigua was topped with sausage, and jalapenos. At first I wasn’t incredibly motivated to try it, but once we finally did (very late in our trip) we were beating ourselves up that we hadn’t ordered it sooner. Such a simple combo, but it is so good.

This past weekend when my parents were in, I made my Brown Biscuits with the pastured pork sausage I got from Pike Valley Farm. I held some of it back to use later in the week for this pizza. Fortunately I also had some pizza crust in the freezer so it was a quick meal.

I don’t have a favorite crust at the moment. I typically use the recipe on the back of the Hodgson Mill Whole Wheat flour bag and substitute White Whole Wheat Flour to make it a little lighter. Turns out great.

For the sauce, I use tomato puree in my basic marinara and usually add a little more crushed red pepper to spice it up a bit. Although with the jalapenos on this pizza, that wasn’t really necessary.

Sausage Jalapeno Pizza

2 pizza crusts, about 8 to 9 inch
½ cup pizza sauce
¼ lb. pastured pork sausage, browned
1 cup cheese, shredded (I like cheddar with this combo)
½ cup sliced jalapenos

Preheat oven to 400 degrees F. I know I’m a bit odd with this, but I don’t like my pizza dough to be uncooked or soggy in the middle. The only way I’ve been able to master this with at-home pizza is to bake it for about 5 to 7 minutes before adding the toppings.

Divide the sauce and spread on each pizza. Top with the sausage (with pastured you won’t need to do any draining or rinsing), then the cheese. Next spread your jalapenos evenly on each pizza. Bake 7 to 10 minutes more until cheese is browned and bubbly.

Granola Pancakes

April 22, 2010

Several weeks ago I was watching an episode of Diners, Drive-ins and Dives; one of my favorite shows, if you haven’t gathered as much from my blog thus far. In that particular episode the restaurant being featured served granola pancakes. I quickly jotted down the idea like I always do when I discover something on television that I want to try and recreate.
A few days later Galaxy Granola offered to send me some of their granola to try. Now, I’m all about making my own granola. I’m all about making all my own foods in general. However, I try to find a balance with my blog because I know I can’t sit in front of my computer and tell you that you need to make everything from scratch.
Everyone has different lifestyles and responsibilities. However, I can tell you to make the majority of your own foods and when buying packaged items, choose those with the least amount of ingredients and ingredients you can identify.
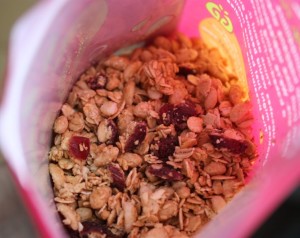
What inspired me to try the granola was the company’s goal of providing a product with less fat. I embrace fat, but not the processed kind in packaged foods. Instead of processed oils, Galaxy uses fruit. I could also live with their list of ingredients such as evaporated cane juice, wildflower honey and spelt and barley flakes.


Once the granola got here I knew I wanted to try making the pancakes with it, but we tried it by itself first. My favorite is the Vanilla Almond which is what I used in my recipe. This is a fine granola, however. No large chunks so it is more ideal to sprinkle over yogurt than eat by hand. Of course, I’m still in favor of making your own, but if you need to grab a bag when you are in a time crunch, or maybe to take on a trip this granola would be a better choice than many out on the market today with their endless list of additives.

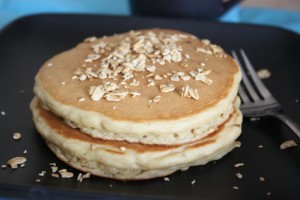
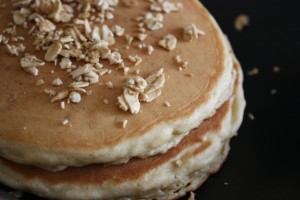
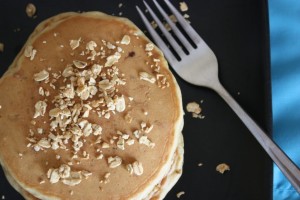
These whole grain pancakes where just what I had envisioned before making them. They are filling, but not too heavy. The granola adds texture and sweetness. I’m sold on adding granola to pancakes to spice up breakfast and will definitely do it again.

Granola Pancakes

1 large egg, beaten
1 cup white whole wheat flour
1 cup milk
1 tablespoon minimally refined sugar (I used mascavo)
2 tbsp virgin coconut oil, melted
3 tsp baking powder
¼ tsp salt
½ cup granola

In a medium-sized mixing bowl combine all ingredients. You may need to add a little more milk, depending on the type of granola you use as it may make the batter thicker.

Use a ¼ cup measure to drop pancakes onto a preheated griddle two to three at a time. Grease the griddle beforehand if it is not non-stick. Once the pancakes begin to bubble, flip to the other side. The pancakes will be cooked after about a minute and a half to two minutes on each side. Makes 6 pancakes.

Want to try some Galaxy Granola?

The company will give away a bag to one of my readers. Tell me in the comments if you make your own granola or buy it (or both) and why. I will pick a winner at random next Monday, April 26, 2010. (The company ships to US addresses only.) You can check out the Fruit Not Fat blog as well where the company posts recipes and workouts.

Disclaimer: Yes, I received this granola for free, and no, I wasn’t required to post about it and received no compensation for doing so.

Chiang Mai Thai Cookery School

April 21, 2010

As I sorted through pictures for this post, I was reminded just how much I miss the outdoor markets of other countries. While I enjoy the markets of large cities in the US with their gourmet cheeses and mixed greens displayed beautifully in a decorative crate, and the markets of small cities offering local honeys and eggs gathered that very morning, I still have not found a site here that excites me the way the markets of Brazil and Thailand do.
There is something about that rustic feel, the atmosphere that most foreigners would consider dirty with flip-flopped feet slapping through puddles as fish are cleaned, noodles are bagged, heart of palm is carved and coconut is shredded. There is nothing like finding yourself surrounded by fruits and vegetables that you’ve never seen before. You know they have to be good for you, but you haven’t the slightest idea how to eat them or how to cook them. It is my very favorite learning opportunity.
My experience with the market in Chiang Mai, Thailand all began when we were trying to decide what to do for my birthday which just happened to fall in the middle of our month long trip around Southeast Asia last October. Once I learned a little more about the cooking classes in the area, the decision was easy. We signed up for a class at the Chiang Mai Thai Cookery School. Not just any class; it was Course 3, one that began the morning with a trip to the local market.
We were picked up from our hotel and taken to the school office where they then drove us to the market. I knew it was going to the perfect day for me as soon as we pulled up. I mean, there was a pug sitting at the market for goodness sake! Our first pug sighting of the trip!

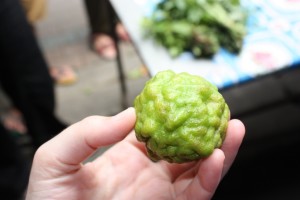
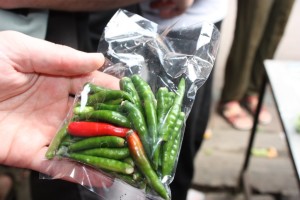
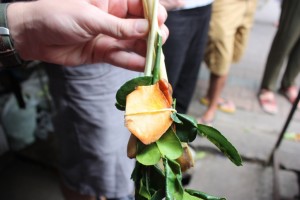
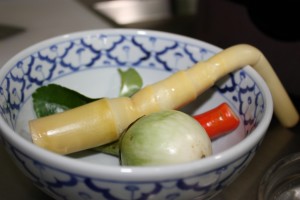
Our guide took us to a table in the middle of the market where she began to explain the ingredients we would be using that day. It was a short session overflowing with discovery. For example, until that point we hadn’t been able to identify the flavor and smell of the Kaffir lime. Within minutes I was holding one in my hand, as well as some Thai bird, or birdseye, chiles responsible for all that heat in the curry. In addition, there was pre-made packs of lemongrass and kaffir lime leaves, and palm sugar.


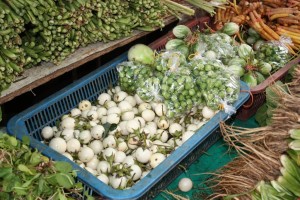
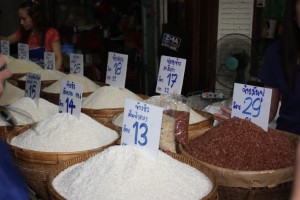
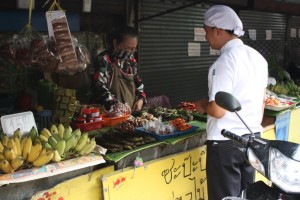
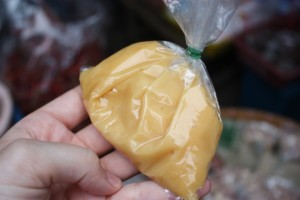
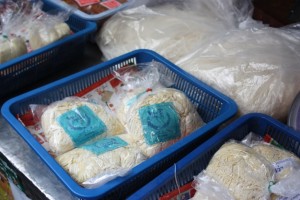
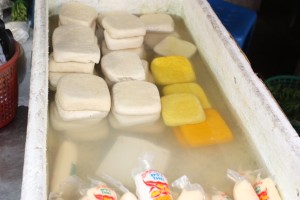
After the explanation, we were invited to look around the market and we took off right away. It was a small market, but the variety of foods, especially those foods that I was witnessing for the first time, was incredible. There was Thai eggplant, noodles, tofu and baskets overflowing with rice. We got a nice shot of a local chef buying some ingredients for the day. I was tempted to hop on the back of the moped he was driving and find out where his restaurant was located!


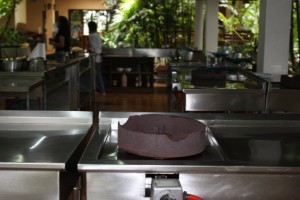
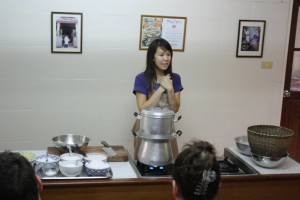
As if the morning wasn’t exciting and informational enough, we left the market to begin our efforts to become experts at cooking the foods of Thailand. We were greeted with a beautiful open air kitchen and given our own cooking station. Considering how leisurely it felt when we arrived, we weren’t at all prepared for how quickly the day would progress.


This is how it went. We were led into the class room where we watched a demo of how the dish was made. We were then instructed to go back to our cooking stations where our ingredients were set out for us. There was a little chopping involved, but not much. We quickly cooked the dish. And I mean quickly – turned up the heat, threw in the oil and ingredients, cooked it up and plated it. Then the group headed over to the dining room where we ate our dishes which were usually served with rice. We didn’t eat every course as soon as we cooked it. For a few of them, we prepared two and ate both courses together.


There was a very international crowd taking the class. There were people from France, England and Australia along with a few other places that I can’t remember now. There was a major discussion about how much garlic was going into each dish. Apparently this was overwhelming for some, which led to some giggles around the room each time the guide added garlic during the demonstrations.
Another fun part of cooking Thai food was guessing how many bird chiles to use. We asked one of our guides how many chiles he would use in a single serving dish and he said six. There were some pretty loud gasps of horror across the room, but we were up for it. We added this amount to our Papaya Salad, Som Tam. It was definitely spicy, but nothing like another papaya salad we had later in our trip. That experience is a post in and of itself.
We made a total of six dishes throughout the day. All the foods below were made by me or my husband and I’ve added a little description about each. Overall, it was an incredible experience; not only to see all the foods, but to cook with them too gave me a much better understand of Thai cuisine. The simplicity of the cooking methods makes one feel guilty for every saying you don’t have time to cook, and fresh produce has never tasted better than when prepared in a Thai dish.
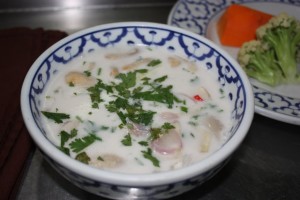
Chicken in Coconut Milk Soup, Tom Kha Gai, is a combination of lemongrass, kaffir lime leaves, chiles mushrooms, coconut water and milk. This dish ties the papaya salad for my favorite.


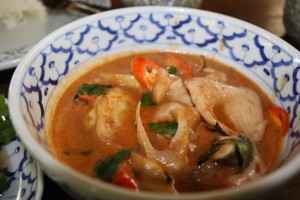
Red Curry with Fish, Gaeng Phed Plaa, was a traditional Thai curry with Thai eggplant and bamboo shoots. We didn’t get to make the curry paste ourselves, but it was explained to us. I prefer my curry with chicken, but this was a nice change.


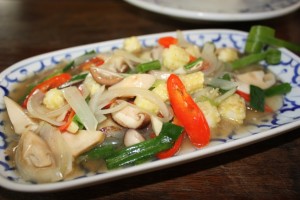
One of the best things about Thai cuisine is all the produce that is used. Fruits and vegetables are everywhere, in almost every dish. So of course, we made a veggie dish, Fried Mixed Mushrooms with Baby Corn, Phad Hed Ruam Khao Pod Orn. The vegetables were great, but I wasn’t a huge fan of the sauce which combined fish, soy and oyster sauces. I’d much rather have curry.


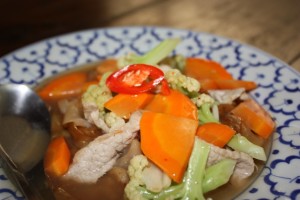
Fried Big Noodles with Thick Sauce and Pork, Raad Nah Muu, was full of mushrooms, cauliflower and carrots. This was good, but those large, paper-thin rice noodles are interesting to cook with.


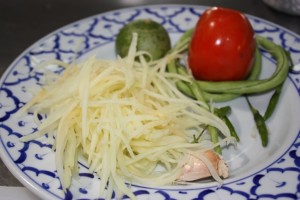
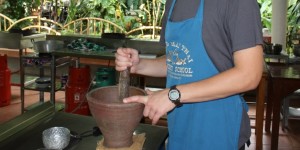
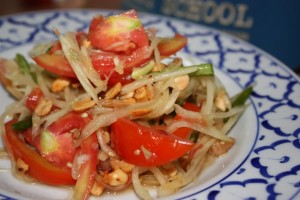
My favorite Thai dish, next to Mango Sticky Rice, is Papaya Salad, Som Tam. It combines grated green papaya with garlic, birdseye chiles, long beans, tomatoes, dried shrimp, lime, palm sugar and peanuts. It’s made with a mortar and pestle and all the delicious ingredients are slightly mashed together. Best. Salad. Ever. Although, I can live without the dried shrimp, a bit salty for me.


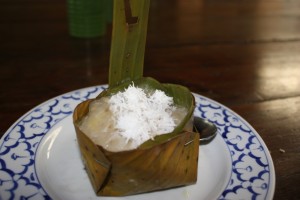
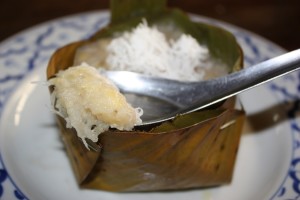
We made a Steamed Banana Cake, Khanom Kluay, in a banana leaf for dessert. What a delicious combo made with simple ingredients. It contains only bananas, rice and tapioca flours, sugar, coconut and coconut milk. Notice the “L” in my flag for the cake. We had to mark our cake because they were all cooked together in one steamer.


Needless to say we left the class stuffed, but as I sit here writing this I would give anything for one more bite of any of those dishes, especially the papaya salad! Now the challenge is to figure out how to get all these ingredients in Kentucky, or at least something that tastes similar.

Links to a Healthy Weekend

April 17, 2010

Good morning! It seems that this particular weekend in April is bursting with things to do. There are Earth Day celebrations, road races, and other events all over the Bluegrass. The Share Our Strength Food Blogger Bake Sales are also taking place across the U.S.

I hate to miss out on it all, but I’ve got some other projects to attend to. My parents are coming in this afternoon to help us put in our new garden! I can’t wait to get things growing. I have a feeling my brain will be overflowing by the end of the weekend because I have a lot to learn.
I came across some good things to share this week. I hope you enjoy them as well. Cheers to a refreshing, productive and relaxing weekend!

Creamy Sweet Basil Smoothie from Petit Gateau is one drink I really have to try. I’m not a huge smoothie fan (although I’ve been craving them lately) but I love when unique ingredients are used. This one has coconut milk, basil, mango and avocado!
7 Foods That Should Never Cross Your Lips from Prevention is an article with a pretty bold title. Despite that, there is a lot of helpful information here that will get you thinking.
How Living Consciously Helps Me Run My Business from ChocBite combines health, work and living mindfully all into a motivating post.
The Dogs Are in a Pickle is a post my husband sent me this week. You will likely never find me on a baseball blog, but this one has to do with ballpark food. Pickle Dogs actually, and they sound incredibly tasty!
This interview with the owners of Grape+Bean in Alexandria, VA was produced by the son of a friend who lives in the Washington, DC area. It’s a great segment that addresses the ups and downs of running a family restaurant. I haven’t been to there yet, but it is definitely going on the list especially since it has strong emphasis on coffee. It also happens to be in a contest based on traffic so I’m helping to spread the word!
Photo of early Dogwood blooms
Want to create beautiful food and product photos that you can't wait to share?!
Discover your style, control the light, and shoot using the tool you know how to use (yes, your phone included). Learn about free resources, Live Q&As with Lori, and online courses you can take from anywhere in the world!
We respect your privacy. Unsubscribe at any time.