Archives

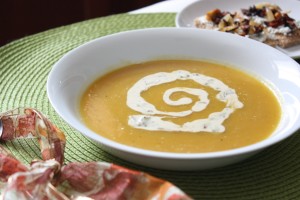
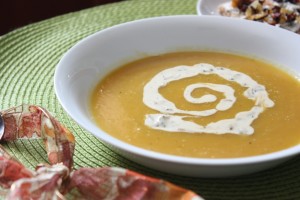
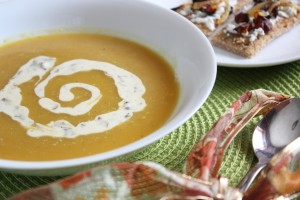
Acorn Squash Soup with Porcini Mushroom Cream and Wild Mushroom Goat Cheese Toasts

October 7, 2010

A Blogger Mushroom Recipe Challenge? I’d love to participate!

That sums up my response when I received an email from Justin of Marx Foods a couple weeks ago. I was invited to participate, and after accepting the offer, a box soon followed in the mail.

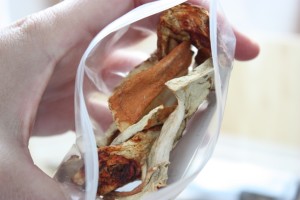
In this box were five – ½ oz sample packs of dried mushrooms – Porcini, Lobster, Morel, Matsutake, and Black Trumpet. To conclude the note that accompanied them, Justin wrote:

One of my own personal pet peeves is when restaurant menus say that a dish is made of wild mushrooms when it is only portabellas, shitakes, or other cultivated varieties. This box contains only mushrooms that are actually hand-foraged from the forests of the Pacific Northwest.

As you can imagine, I was even more thrilled I had accepted the challenge.

My mission? To create a recipe using any or all of the mushrooms in the box.

This recipe will be put up for a vote on the Marx Foods blog.

What could I win if my recipe is voted the favorite? Three shipments of fresh wild mushrooms, one of which can be Oregon Truffles instead of mushrooms!!

I knew right away that I wanted to draw on the flavors of fall and having bought an acorn squash just before the mushrooms arrived, I decided this winter squash would be the mushroom partner. I also decided I wanted to work with the three mushroom types I had received which I’d never cooked with before – Porcini, Lobster and Matsutake.

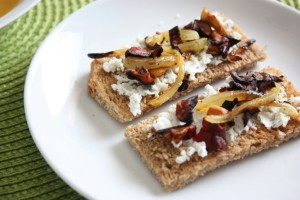
Having chosen soup as the main attraction, I needed some type of sandwich on the side. A simple toast with herbed goat cheese topped with caramelized onions and wild mushrooms seemed the perfect solution.

Just as I was hoping, the earthy flavor of the Porcini mushrooms in a rich cream sauce paired nicely with the slightly sweet acorn squash. It went together even better than I expected, if I do say so myself.

I think Lobster mushrooms may be my new favorite. The combination of the tart goat cheese with the mushrooms goes so well with the soup.

So here you have my entry to the Blogger Mushroom Recipe Challenge by Marx Foods. If you like it too, I’ll let you know where to vote around October 18!

Acorn Squash Soup with Porcini Mushroom Cream

Porcini Cream

½ oz dried porcini mushrooms
½ tbsp olive oil
2 tsp onion, diced
1 clove garlic, diced
1 tbsp butter
1 tbsp white whole wheat flour
1 cup milk or cream (I used a half and half and 2% milk combo)
¼ cup fresh parmesan, grated
½ tsp sea salt
¼ tsp black pepper

Acorn Squash Soup

1 tbsp olive oil
2 cloves garlic, minced
½ large onion, chopped
2 tbsp apple, diced
1 pinch dried sage
1 teaspoon sea salt
½ teaspoon black pepper
1 acorn squash, roasted, flesh removed and mashed
2 cups of mushroom soaking liquid

Make the Cream:

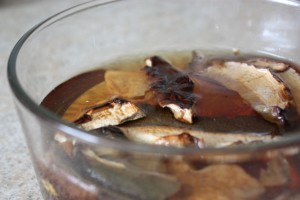
Submerge the dried mushrooms in 2 cups of hot water for at least 20 minutes. Remove the mushrooms and pat dry, reserve the soaking liquid.

Dice the mushrooms. Heat ½ tablespoon olive oil in a skillet over medium-high heat. Add the onions, mushrooms and garlic. Cook for 3 to 5 minutes until the onions and mushrooms are tender. Set aside.

In a sauce pan, melt the butter over medium heat. Add the flour and whisk until incorporated. Add the milk or cream a little at a time whisking vigorously to prevent clumps. Continue to whisk as the sauce thickens. Once it reaches desired consistency, preferably when it coats the back of a spoon, remove from heat. Stir in the parmesan, salt, pepper and cooked mushrooms and onions.

Set aside, but stir occasionally to prevent a film from forming on the top.

Make the Soup:

Heat the olive oil in a small soup pot over medium-high heat. Add the onion and garlic. Cook for about 5 minutes, until the onions are soft. Add the apple, sage, salt and pepper, and cook about 3 minutes more.

Stir in the acorn squash and slowly add the mushroom soaking liquid. Heat through and allow to simmer for 2 to 3 minutes. Using an immersion blender, puree the soup until smooth.

Divide the soup into bowls and garnish generously with the mushroom cream. Makes about 4 appetizer-sized servings.

Wild Mushroom Goat Cheese Toasts

½ oz mixed dried wild mushrooms (I used Lobster and Matsutake)
½ tbsp olive oil
¼ onion, thinly sliced
2 oz herbed goat cheese
8 slices toasted bread or baguette

Soak the mushrooms in hot water for at least 20 minutes. Dry on a paper towel and finely chop.

Heat the olive oil in a skillet over medium-heat. Add the mushrooms and onion. Reduce the heat to medium and cook until onions are browned and mushrooms are tender.

Spread an even amount of goat cheese on each toast. Top with the onions and mushrooms. Makes 8 toasts, two for each person.

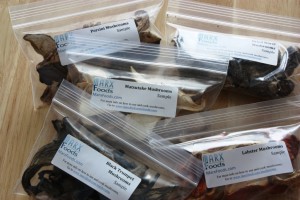
Disclaimer: These mushrooms were sent to me free of charge for the Marx Foods Mushroom Recipe Challenge. I was not required to participate and received no compensation for doing so. 

Alltech FEI World Equestrian Games: Food, Bourbon, Beer and Horses

October 3, 2010

Happy October! As I write this the weather outside sums up everything I love about this month. There are cloudy skies, cool breezes, and just a touch of orange, red and gold colors among the trees and bushes.

As I mentioned earlier this week, a huge event taking place here in Lexington, Kentucky has consumed every second of our free time and I couldn’t be happier about it. The Alltech FEI World Equestrian Games are still going strong and I had the opportunity to experience the opening ceremonies last weekend, an incredible black tie dinner with Irish tenor Ronan Tynan this past week, and plenty of equestrian events yesterday.

Keeping food and drink in mind, I thought I’d share with you a few of the highlights according to yours truly as well as some of the horse action I captured this weekend.

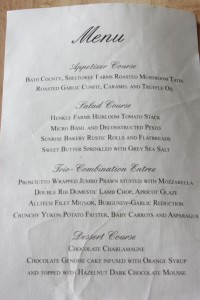
As we sat down to a very elegant dinner on Wednesday night my husband looked at me and said, “Of course, this would be the one time you couldn’t bring your camera!” He was right. It would have been inappropriate for me to be flashing away at this dinner, but the food was worthy of a full feature. I took a photo of the menu so you can get an idea of how outstanding it was.

The grounds at the Kentucky Horse Park are open from 7:00 am to 7:00 pm with different types of equestrian sporting competitions taking place on different days. In addition to those, there are all kinds of booths and exhibits to browse.

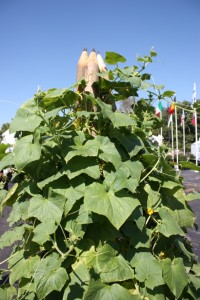
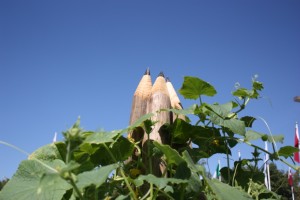
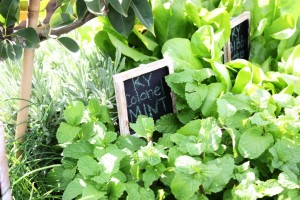
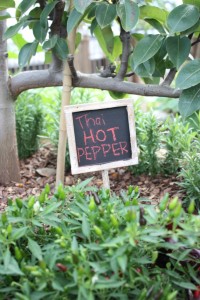
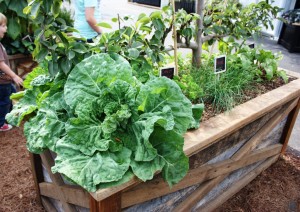
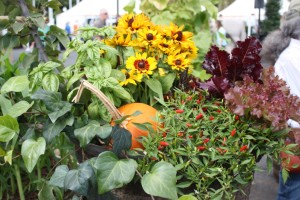
As part of the Alltech Experience there is a Kidzone and an incredible educational garden area. All my garden foodie friends would absolutely love this. Plant boxes and pots fill the area and are overflowing with culinary herbs, bell pepper plants, cabbage, lettuce, and pumpkins and squash plants growing vertically up large wooden stakes shaped to look crayons and pencils. The selection of plants ranged from the local to the international with Kentucky mint to Thai peppers.

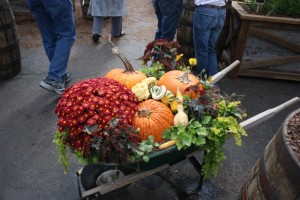
One thing I was happy to see throughout the grounds is decoration highlighting autumn in Kentucky. This is the first time the games have come to the US so I expected everything to be coated with our flag. While there is some red, white and blue what you see more of are mums, pumpkins and gourds. It really shows off what makes Kentucky unique this time of year.

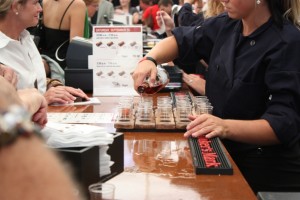
The Kentucky Proud tent features local Kentucky products from candy to pottery. Here you will also find a tribute to the beverages of Kentucky – bourbon, beer and wine. Guests can buy tasting flights which include wines from the state, the three types of Kentucky Ale beer – Kentucky Ale, Kentucky Light and Bourbon Barrel Ale, or several different kinds of bourbon from Maker’s Mark and Jim Beam.

My husband and I closed our night out yesterday with a flight of bourbon. We decided on Baker’s, Maker’s 46 and Basil Hayden. We were surprised that we actually like the Maker’s 46 the best of the varieties we tried.
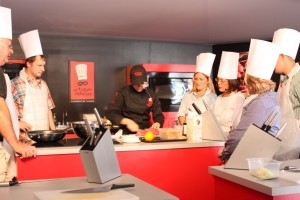
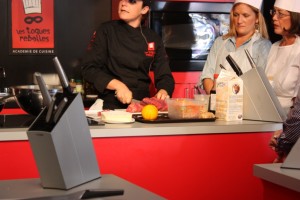
The games 2014 will be held in Normandy, France in 2014 so there is a booth devoted to area. What better to feature in France than food! I was able to sneak in quickly to see one of the cooking demos taking place. The chef was preparing a beef stew dish featuring Kentucky beer.

The equestrian event yesterday was the Cross Country. I have to be honest I knew absolutely nothing about equestrian events before we moved to Kentucky. Once you are here though, even if you didn’t grow up around horses, you can’t help but feel a part of it all.

The horses are athletic and powerful, and the relationship with their riders exemplifies how important animals are to humans. I grew up with a pony and even took some riding lessons for a short time when I was about 9 or 10, but I never understood how intriguing the horse is until experiencing Kentucky.

The Cross Country event takes place around the entire grounds of the horse park. In fact, if you are walking and hear the whistle blow, you better hustle it across the drive because the officials will be pulling up the ropes to block the way and horse and rider will be barreling down through the course less than a minute afterward.

There are difficult jumps some with water and steep drops. Honestly, I usually avoid watching the jumps because I have seen horses and riders fall one too many times. When I take photos I focus, then close my eyes when they jump. Sounds silly, I know, but I just can’t stand to see a horse or rider get hurt. Cross country is actually a very dangerous sport.

Aside from the events, the Equine Village arena offers a variety of presentations and I caught one yesterday with some amazing gypsy horses. These horses show the huge diversity in breeds. While every bit as fit, they are so much different than the horses doing the endurance events with their broad bodies, long, wispy manes, and furry feet.

There is so much more to cover and I will be attending next weekend as well so hopefully I will have more photos for you. For now, I leave you with an example of the beautiful artwork all around the horse park, this a glass sculpture hanging high in the entrance to the Alltech Experience. Even if you can’t get here for the games, put Kentucky on your travel list because I promise the food, bourbon, beer and horses will not disappoint!

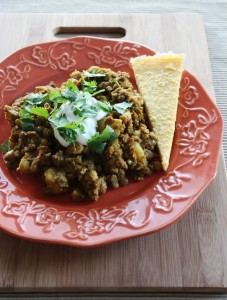
Potato, Chickpea and Lentil Curry

October 1, 2010

When I set out to cook Indian cuisine, sighs can often be heard throughout the kitchen. While I don’t consider most dishes difficult, I can never get them turn out like the foods I have in Indian restaurants (we haven’t been to India ourselves yet.)

Since I can’t seem to make the perfect authentic dish, I typically end up making something that incorporates a handful of different recipes. Our dinner on Tuesday night was a good example of this.

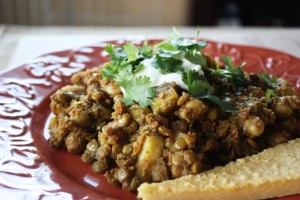
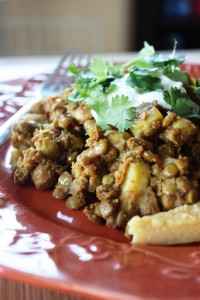
I intended to make aloo cholay which is one of my favorites. I ended up with different spices which likely created a different dish all together, but this time I have to say it wasn’t too bad at all. In fact, it has made quite a nice lunch the past couple days, perfect for the fall-like weather that has finally arrived!

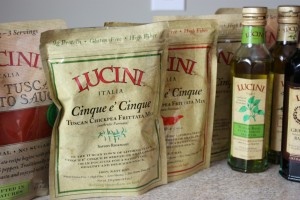
On the side this time, I tried out some Cinque e’ Cinque, also called Farinata. Lucini Italia contacted me several weeks ago with an offer to give this gluten-free, vegan product a try. I almost composed a short response and deleted the email immediately because I was asked if I want to try their new mix. Knowing how I feel about mixes, I figured it would not be for me.

I decided to check out their site though and learned that the mix was actually just flour from chickpeas, custom proprietary milled flour. Some of the varieties also had added spices. As the mixer, I had to add water, olive oil and sea salt.

So I said send it on, and along came a generous box consisting of hand-picked, estate grown Italian olive oil, basil infused olive oil, pasta sauces in three flavors with minimal natural ingredients in BPA-free pouches, no sugar added pizza sauce, 10 year aged balsamic vinegar and bread dipping sauce.

So far everything has been outstanding. I was incredibly impressed by their use of quality ingredients and lack of fillers.

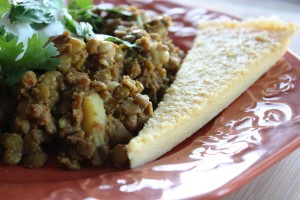
Yes, I realize that the Cinque e’ Cinque is Italian, but with it being chickpea flour I thought it would go wonderfully with an Indian dish. I was right. I received 3 flavors – traditional, rosemary and chili. I chose traditional and it was the perfect replacement for the usual couscous or rice. It has a look similar to baked polenta, but much smoother without all the graininess. With the simple olive oil and sea salt the flavor is delicious.

So, as you can see, not only do I seem to mix dishes of the same cuisine, but now I’ve taken it so far as to mix two cultures as well. Fortunately the Indian and Italian influences complemented each other nicely.

Potato Chickpea and Lentil Curry

2 medium potatoes, peeled and cubed
1 cup lentils
2 medium tomatoes, chopped
2 cups cooked chickpeas
3 tsp garam masala
1 tsp turmeric
2 tsp sea salt
Plain yogurt (optional)
Cilantro (optional)

Place the potatoes and lentils in a soup pot. Cover with water. Bring to a boil over medium high heat, reduce to a simmer and cook, partially covered with a lid, for about 5 minutes.

Add the tomatoes and chickpeas and cook 5 more minutes. Stir in the garam masala, turmeric and about 1 cup of additional water. Cook about 10 to 12 minutes more until the tomatoes have cooked down and disappeared, and the lentils and potatoes are tender.

Stir in the salt and top each serving with plain yogurt and chopped cilantro. Makes 4 to 6 servings.

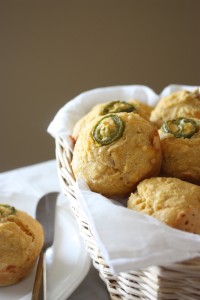
Spicy Cornbread Muffins

September 27, 2010

Full meals have become a rarity around here. I find I’m always making one pot dinners, heating up some pasta with a sauce or stirring together a soup. If you haven’t been following my tweets or Facebook, you may not know that one of the biggest sporting events in the world is taking place right here in Lexington, Kentucky for the next 3 weeks.

The Alltech FEI World Equestrian Games have come to the US for the first time and they are right in our backyard. In addition to that, the company my husband works for is heavily involved which means crazy schedules and high stress levels around our house.


One of the many painted horses at the Kentucky Horse Park. This one is a map of all the horse farms in the area.


Sculpture in the courtyard made for the Games.


Opening ceremonies Saturday night. (Yes, a wide angle lens is on my wish list!)


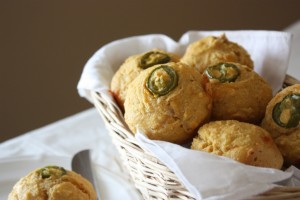
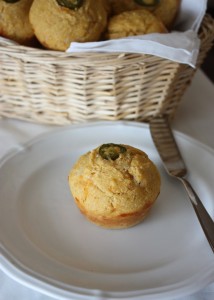
Fortunately, last night we sat down to one of those rare, full meals. As a result I felt the need for some type of roll or muffin, and given the fact that we are finally creeping into real fall weather, cornbread seemed just the thing; spicy cornbread that is.

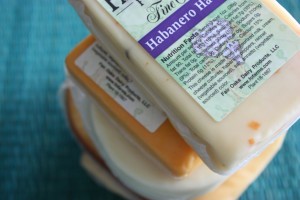
I made some substitutions to the cornbread recipe on the back of the cornmeal package, added some spices and gave it some extra kick with shredded Habanero Havarti cheese. This was a specialty cheese we picked up at a creamery in northern Indiana, Fair Oaks Farm.

This cheese is so good, and hot! Sprinkling a bit here and there is all you need which is why it has lasted so long.

I left the sugar out of the original recipe to make them completely savory. I also tried cutting out the butter, but as a result I thought they were a little dry. So I’d recommend keeping the butter in, or substituting virgin coconut oil.

These muffins make a great side for barbeque or chili. You might even consider slathering on some peach jam like I did for a sweet and spicy combination!

Spicy Cornbread Muffins

Adapted from Martha White Golden Cornbread

2 farm fresh eggs
1 cup milk
¼ cup butter or coconut oil, melted
1 ½ cups yellow cornmeal
1 cup white whole wheat flour
2 ¼ tsp baking powder
¾ tsp salt
½ tsp ground cumin
½ tsp chili powder
¼ cup sharp cheddar cheese, shredded
¼ cup Habanero Havarti cheese (or pepper jack), shredded
12 pickled jalapeno slices (optional)

Heat oven to 400 degrees F and grease a 12-muffin tin.

In a large bowl, whisk together the egg and milk. Stir in the butter or oil.

Gently stir in the cornmeal, flour, baking powder, salt, cumin and chili powder. Add the cheese and stir just until combined.

Divide batter into 12 muffins. If using, place a jalapeno slice on each muffin. Bake for 12 to 15 minutes, or until the muffins are browned and a toothpick inserted in the center comes out clean.

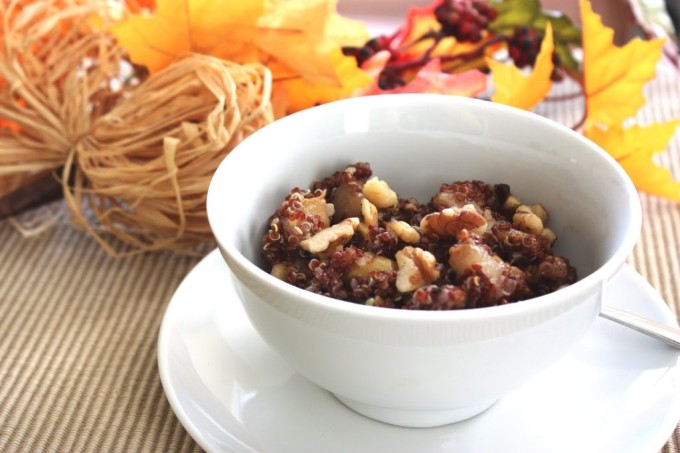
Gingered Pear Quinoa with Walnuts

September 23, 2010

I think I have a problem. I tend to go a little crazy when it comes to buying grains. Wheat berries, couscous, Israeli couscous, millet, brown rice, white rice, sticky rice, oats and quinoa. There have even been occasions when I lost track of which grain was which since I buy them from the bulk bin.

See, I told you I have a problem.

I keep buying because every time I’m in the store I have great ideas of what I will make. Not to mention that if it is a hard grain to find at a great price, I just can’t resist.

As I get settled into the new job I’m finding my cooking creativity is suffering. I trust it will return, but right now I’ve got lots of grains and no cooking going on.

Last night I was motivated, though. Weak as it may have been, I made an attempt to use up my rations. I turned to the red quinoa.

Gingered Pear Quinoa with Walnuts Recipe | Fake Food Free

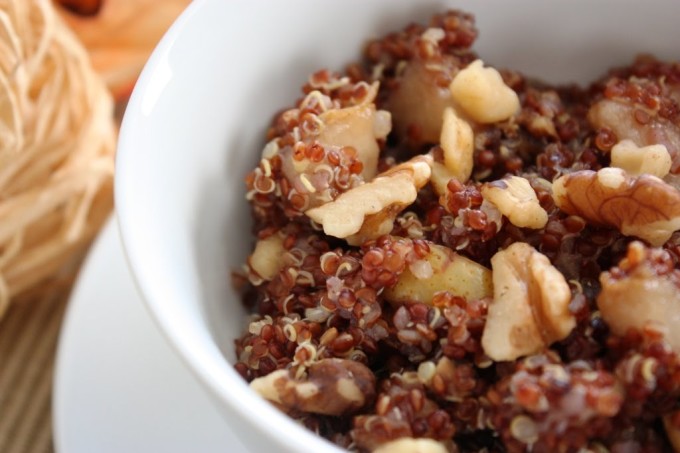
Not in the mood for savory, I went sweet. And not just sweet, but an autumn-inspired sweet. I’m amazed at how well quinoa turns out with fruits and other sweet additions. The nutty flavor comes out and it tastes like it was meant to be.

I sautéed pears with mascavo sugar, cinnamon, ginger and walnuts. Once tossed with some cooked red quinoa, it became this morning’s perfect breakfast. The best meal I’ve had all week!

Gingered Pear Quinoa with Walnuts Recipe | Fake Food Free

Gingered Pear Quinoa with Walnuts

Makes: 2 servings

Ingredients

 1 tablespoon unsalted butter
2 tablespoons mascavo sugar
½ teaspoon cinnamon
½ teaspoon fresh ginger, grated
1 pear, cored and chopped
2 tablespoons walnuts, chopped
1 cup cooked, red quinoa

Prep

Melt the butter and sugar in a skillet on medium heat. Add the cinnamon and ginger and cook until bubbly.

Add the chopped pear, and stir to coat with the sugar mixture. Cook about 1 minute, careful to keep the pears somewhat firm. Add the walnuts.

Stir in the quinoa and serve warm. 


Thanks for reading! All images and content are the property of Fake Food Free unless otherwise stated. Please do not republish full recipes and images without written permission. What is okay? Feel free to Pin images, share links to my posts or share the photo in a round up post with the title of this recipe and a link back to the post. Confused about copyright and food blogs? Here is some helpful information on Recipe Attribution. If you want to use a photo or full recipe, just ask. I’m sure we can work something out.

Remembering Morretes and Barreado

September 20, 2010

I realize that I won’t be able to keep using the phrase, “when we were in Brazil,” forever. As days and years pass, those experiences will become less current and less relevant in my life. That saddens me a bit.
I feel I still have so much left to share of my time there. As the one year anniversary of our departure approaches next month, I’m reminded of a few things I still have yet to post about.

Not long before we moved back to the States we took one final trip to Curitiba with the intentions of heading out to Ilha do Mel again. After making the two hour drive to the coast and sitting in the car at the boat dock for about 30 minutes as it poured rain, we made the decision that while we wanted to see the island again, it wasn’t worth trekking through rain with no gear for the day.

Disappointed, we began the somber drive back to the city. As we continued we began to talk about Morretes, a place many had told us about, but that we hadn’t yet made it to. It is a historic town, nestled between the mountains on the way from Curitiba to the coast.

Many people take the scenic train from Curitiba, a bit of a local tourist excursion. After a quick Google search and a phone call we exited off the highway and began the process of reviving this mini-vacation which we thought was a complete loss only a few minutes before.

Morretes is a tourist-filled little town that is designed for such a population. However, it is not the type of tourist destination you are likely thinking of. It is popular among Brazilians from the surrounding areas, not international visitors. So while the historic display boards in the center of town do contain an English translation, we didn’t hear a word of it during our visit. We loved it.

This small city was incredibly intriguing even during a rainy, dreary day. It holds a significant amount of history for the country in relation to the days of gold discovery and its export back to Europe. However, if you ask someone why they visited Morretes you will likely get the answer “Barreado.”

Yes, they travel there for the food. My kind of people!

Barreado (ba-he-a-doo) is a traditional food from that state of Paraná, and now, Morretes is one of the only places you can find it. It’s surprising that it hasn’t spread to other areas because it was overwhelmingly popular. It was obvious everyone was there to eat it, and every single restaurant in town served it.

We ended up at Olimpo which looked to be new in town, maybe not as historic as the others, but it had a great balcony. Honestly you can’t miss it, or the other places which serve the dish. This town is completely centered on this specific food.

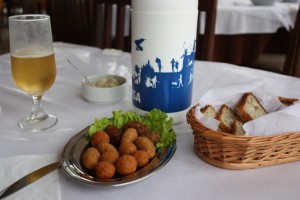
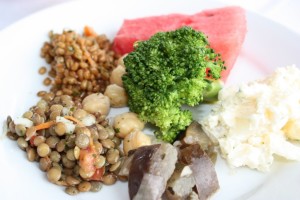
The meal began with an assortment of bolos – basically fried balls, most with fish or vegetable. Then there was a salad bar filled with lentil, wheat berry and mushroom salads along with fruits and vegetables. And if you were so inclined, you could have a shot from the massive jar of cachaça which was filled with marinating fruit. This was common in many of the restaurants we visited during our time in southern Brazil, but not in a jar with this much fruit!

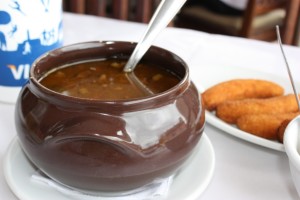
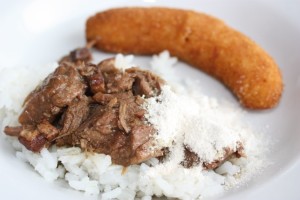
Barreado is a meat stew made with beef, bay leaf, cilantro and other herbs. It is sealed in a clay pot to cook for 12 to 18 hours. Once at your table you eat it with mandioca (cassava, yucca) flour, rice and fried bananas.

Now this picture, I have to admit with embarrassment, is not the appropriate way to eat barreado.

You see, the waitress brought our food and asked us if we were familiar with the dish. We said no and apparently she must have slipped another question in there that we didn’t hear because she took our no to mean we didn’t want an explanation.

Only after we were halfway finished did we see a demonstration at another table. You are supposed to mix the meat with lots (and I mean lots) of mandioca flour. Stir it up and mash the meat, add broth, stir it more and then eat it with rice.

It literally looked like a meat paste when the waiter was done and I have to admit, not appetizing at all. Therefore, we kept eating it our way even after the demonstration.

I was completely surprised how much I enjoyed this dish. Usually when it comes to beef stew it all tastes the same, but the flavor of barreado really stood out from anything I’ve had before. There was an intense, rich and smoky flavor, not to mention the slow roasting made it incredibly tender with no visible fat in sight.

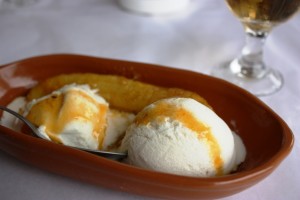
Along with a meal of barreado, ginger was a highlighted ingredient in the area. The small feira taking place during our visit was offering candies made of ginger and the ice cream shop we passed had a ginger flavor as well. I really wanted to try it so I was happy to learn our dessert would be bananas with ginger ice cream.

It was unique and delicious – spicy with fresh ginger and went so well with the bananas and cinnamon.

Looking back at meals like this makes me wonder how I ever complained about the food available to me in Brazil. I’m always reminded of how much I owe to the whole expat experience and the country. It taught me that my perceptions of must-have ingredients are simply that – perceptions, not at all necessities.

Considering the laborious preparation technique and equipment needed to make barreado, I doubt it is something I will ever be able to recreate. That definitely makes for one unique foodie experience that I’ll never forget.


A little more about barreado.

Cranberry Pumpkin Granola

September 19, 2010

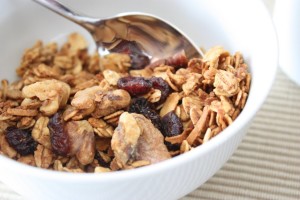
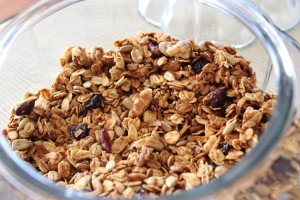
I can’t remember the last time I made granola, which means it has been way to long! With an overabundance of rolled oats at the moment I decided an autumn-inspired granola would be just the thing to use them up.

After seeing a variety of granola recipes online and in cookbooks that called for about a ½ cup of oil or butter, I decided to half that and replace part of it with pumpkin puree. This was from thawed, frozen puree I’m still using up from late last winter so it had a very thin consistency.

The sweetener of choice was maple syrup which worked out great. I didn’t add any other sweetener, but the dried cranberries I used were sweetened with sugar.

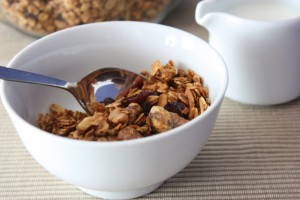
Once baked and browned, this granola has a spiced, slightly sweet flavor with a nutty background from the walnuts, pecans and sunflower seeds. We’ve been eating it up as a snack, cereal and yogurt topping, and after enjoying it so much I think it may be worthy of food gift status this holiday season!

Cranberry Pumpkin Granola

¼ cup unsalted butter
¼ cup pumpkin puree
½ cup maple syrup
4 cups old-fashioned rolled oats
¼ cup roasted, unsalted sunflower seeds
2/3 cup dried cranberries
½ cup chopped nuts (I used pecans and walnuts)
½ cup unsweetened, shredded coconut
¼ tsp ground cloves
¼ tsp ground nutmeg
½ tsp ground cinnamon
½ tsp finely ground sea salt

Preheat the oven to 300 degrees F. In a saucepan, melt together the butter, pumpkin and maple syrup. Cook on medium for 5 minutes.

In a large bowl combine the oats, sunflower seeds, cranberries, nuts and coconut. Pour in the maple syrup mixture and stir to coat all the ingredients. Add the spices and salt and stir to incorporate.

Grease two medium sized baking sheets with butter. Divide the granola on the two sheets and spread evenly in a single layer. Bake for 45 minutes, stirring every 15 minutes. Rotate pans on the oven rack as needed. Remove from the oven once dried and browned. Cool and store in an airtight container for up to a week. Makes about 6 cups.

Spiced Whole Grain Apple Pie

September 15, 2010
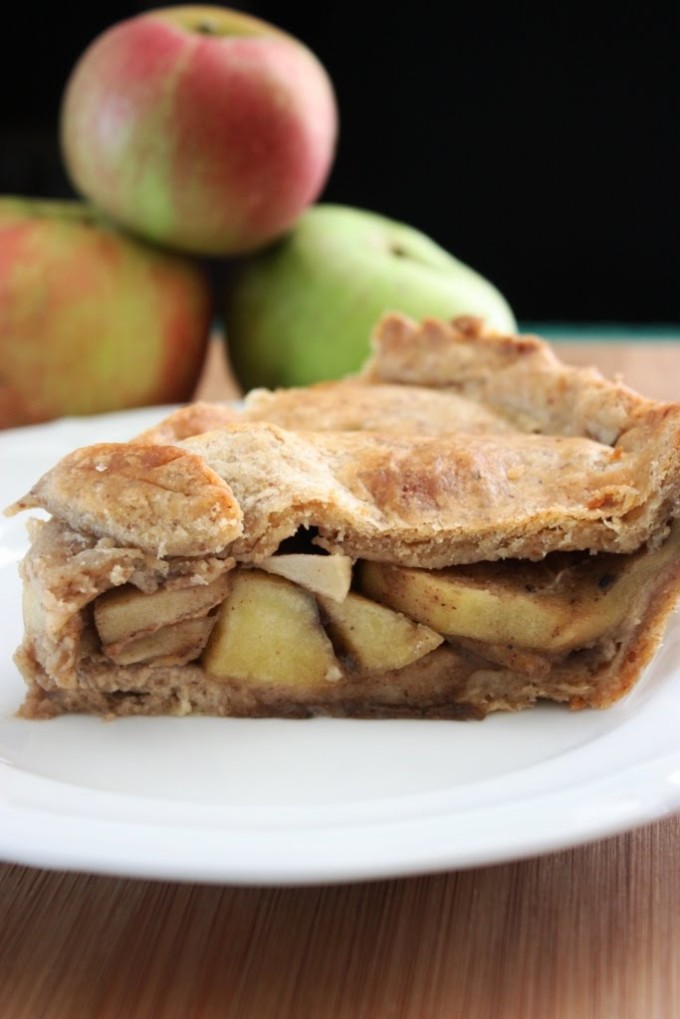
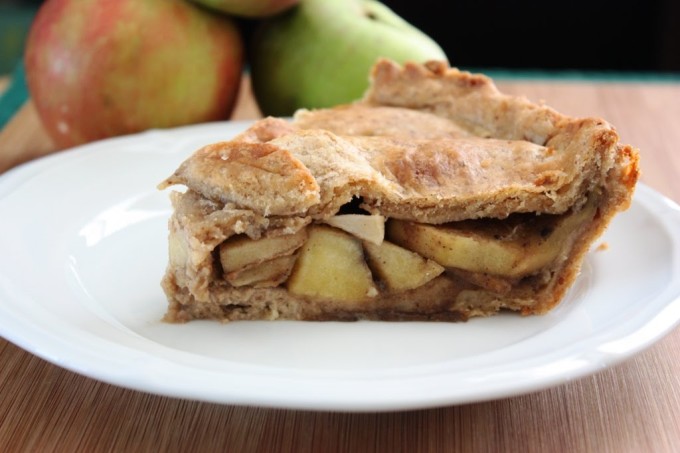
I feel like pie is a dessert that I will always be experimenting with. It’s been several years since I made this hearty spiced whole grain apple pie, but it’s a seasonal favorite! 
 Spiced Whole Grain Apple Pie Recipe | Fake Food Free
 
I will admit that apple pie isn’t my absolute favorite. Any other time of year, I’d prefer lemon or chocolate, but right now I’m all about apple. It isn’t a great year for apples around here. There was some hail damage at the local orchard early in the season and then all this heat. Fortunately I was still able to stop by and pick up a few recently.
 
While apples are the highlight of my season at the moment, the highlight of this post is pie crust. I struggle with finding a good pie crust and with timing it correctly. I like butter crusts, but most need to be refrigerated, often overnight, before you can roll them out.
 
Spiced Whole Grain Apple Pie Recipe | Fake Food Free
 
I finally got ahead of the game and made a crust with some of my favorite ingredients. I refrigerated the dough for about 3 or 4 hours and it worked out nicely. It baked up with what I would consider acceptable flakiness and held together well during cutting and serving. The butter and grains blended well, and gave a nice earthly flavor to match the apples and mascavo sugar.
 
This one may not win any awards for the perfect pie crust, but considering it is whole grain with some flaxseed thrown in, I think it’s pretty darn good.

Spiced Whole Grain Apple Pie Recipe | Fake Food Free

Spiced Whole Grain Apple Pie

Ingredients: 

Crust (makes 2 – 9 inch)
2 cups white whole wheat flour
½ cup brown rice flour
2 tbsp flaxseed meal
1 cup butter, cold, cut into cubes
1 tsp salt
½ cup water

Pie Filling
4-5 apples, peeled, cored and sliced
½ – ¾ cup mascavo sugar
2 tbsp white whole wheat flour
½ tsp ground allspice
1 tsp ground cinnamon
2 tsp spiced rum
2 tbsp butter

Prep:

In a large bowl, sift together the flours and flaxseed. Add the butter and blend with two knives or a pastry blender until the butter is incorporated and in pea-sized pieces. Stir in the salt. Add the water a little at a time and stir to combine the dough. Divide in two pieces and wrap in plastic wrap. Refrigerate 3 to 4 hours, up to overnight.

Preheat the oven to 400 degrees F. In a bowl, combine the apples, sugar (depending on how sweet you want your pie), flour, allspice, cinnamon and rum. Stir to combine and set aside.

Roll each piece of dough on a floured surface to create a 9 inch circle. Transfer one piece to your pie plate, pressing it gently to fit. Pour in the apple mixture and top with pieces of the butter. Place the top crust over the pie filling and pinch the ends around the edge of the pie, removing any excess crust.

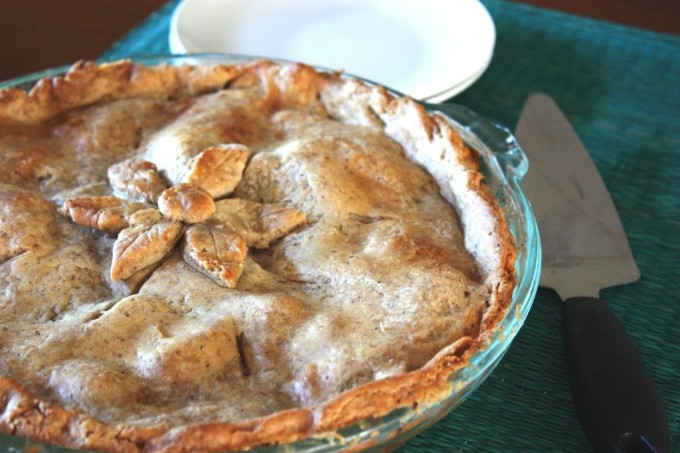
Cut slits in the top crust. Decorate with dough cutouts, if desired. Brush the top of the crust with milk or melted butter. Bake for 35 to 45 minutes, or until the crust is browned and filling is bubbly. Allow to rest for 10 minutes. Serve warm or at room temperature.

Thanks for reading! All images and content are the property of Fake Food Free unless otherwise stated. Please do not republish full recipes and images without written permission. What is okay? Feel free to Pin images, share links to my posts or share the photo in a round up post with the title of this recipe and a link back to the post. Confused about copyright and food blogs? Here is some helpful information on Recipe Attribution. If you want to use a photo or full recipe, just ask. I’m sure we can work something out.  


Food Blog Forum Atlanta

September 12, 2010

Among all the busyness that seems to be going on in my life at the current moment, I was able to sneak off this weekend to the Food Blog Forum Seminar in Atlanta. I have to say that I was thrilled when the event was announced because foodie events don’t make it to the southeast often. I was especially excited that this was the specific event coming because I have great respect for both Jaden (and now Scott) of Steamy Kitchen, and Diane and Todd of White on Rice Couple.

Atlanta is about a 6 hour drive from Lexington and I was able to drive down with my fellow Kentucky-based food blogging friend Melissa, and meet up with Andrea, my favorite food blogging conference roommate and now friend.

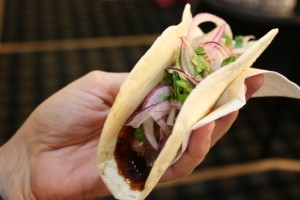
We arrived at the welcome event a little late, but made it in time to see a great cooking demo at the Viking Store featuring bacon and watermelon skewers and pork belly tacos. One of my favorite foods of the weekend was the tacos. The pork belly was combined with a sauce that included homemade hoisin sauce, Sriracha and honey.

We also got there just in time for dessert which for me included lady fingers topped with bananas foster, and pound cake topped with macerated strawberries and basil whipped cream. Yes, basil whipped cream! It was as delicious and interesting as it sounds.

Saturday was the day of the seminar which took place at The Shed. Jaden, Scott, Diane and Todd are some of the most knowledgeable, down to earth people I have had the pleasure to learn from and briefly meet. If you are interested in attending one of these seminars in the future let me give you a list of things you can expect to learn and experience during the sessions.

  • Motivation for determining your personal goals and working with and towards what you are passionate about in life.  
  • How to manage product sponsorship, and the options out there for structuring your relationship. For example, working with companies individually or through PR agencies.  
  • How skilled all of the hosts are at what they do. They all began their journey from scratch with little knowledge. They taught themselves along the way and made smart decisions to excel in food blogging and related work. 
  • Motivation and a fresh approach to food photography and how to develop your skill while keeping budget in mind.  
  • Food styling and eye-opening strategies for creating beautiful pictures regardless of the equipment you have.  
  • Key components for the design or structure of your blog, developing content, and driving traffic.

If I had to pick a favorite, for me it was the photography information. This is because right now my passion with food blogging is weighing heavily on the side of developing myself as a photographer. White on Rice Couple showed easy ways to improve photos and layout without investing in $1,000 lens’ or other equipment.

I also have to admit that I almost shouted, “YES!” when Diane admitted that she rarely uses Photoshop. I really have no desire to learn too much about that, but I thought it was something I was going to have to do to excel. And if you have seen her photos and now know that she rarely uses it, that’s enough to prove that it is not a necessity.

So, if Food Blog Forum comes to your area, should you go? Yes! Not only did I learn a good amount, but from a business and work stand point the weekend was full of inspiration leading to motivation.

About the only complaint you heard around the group was the set up. A long time in wooden restaurant chairs in very tight quarters with lots of people, lots of bags and nowhere to set our drinks or notebooks. We had plenty of breaks and the conditions didn’t negate the benefit of the event, but we were all pretty exhausted and ready to break out of that room after a long day.

There was also a significant distance between the hotel, site and parties so a car was a necessity and if you were the DD you really didn’t get to enjoy the wines and cocktails provided. Not too much of a sacrifice for a great event, but also a bit of a bummer. (Can you tell I was the DD? Ha, ha!)

However, I guess my winning a door prize made up for it. I won a Kitchenaid Countertop Oven! A new model, soon to be released. I’ll let you know when it arrives in the mail!

Thanks to Steamy Kitchen and White on Rice Couple for giving back to the food blogging community and sharing their knowledge.

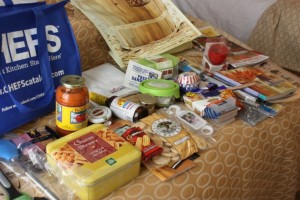
Now I leave you with swag and food!

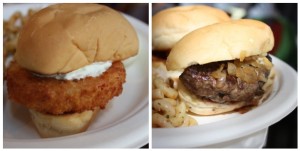
Fried Tomato with Goat Cheese Slider & Sirloin Slider from The Shed

Passion Fruit Whiskey (my correction – bourbon) Fizz from The Spice Market made with passion fruit juice, Maker’s Mark and ginger ale. Taken by candlelight which didn’t turn out too well so I didn’t picture the food. We did enjoy mutiple spring rolls, shrimp and pineapple skewers, beef satay and chocolate.

Good Meat: Cookbook Review and Pig Candy!

September 8, 2010

One word that seems to be synonymous with meat is slab. When I think of a steak, I think of a slab of meat. Similarly, when I received the cookbook – Good Meat: The Complete Guide to Sourcing and Cooking Sustainable Meat – I had the exact same thought.

This is one slab of a cookbook! A thick, hardback of 400 pages that is filled with valuable information, delicious recipes and stunning photography from cover to cover.

Anyone else excited by this book simply by reading the title? I was, and the title pretty much says it all.

Inside you will find everything you wanted to know about grass-fed beef and pastured meat and eggs – what it is, definitions of common terms used when discussing it, how to cook it, and the tools you’ll need to do so. It is described not only as a cookbook, but as a guide and that is spot on. This book is as much a necessary reference for meat in general as it is a collection of recipes.

We don’t eat an overabundance of meat, in fact, I would say our diet is at least 70% vegetarian, but we do eat meat and enjoy it. With the exception of the occasional order while traveling, when we do include meat in our meals it is from local farms utilizing sustainable practices and those which treat the animals as humanely as possible. Fortunately we have a lot of options that fit these criteria here in Kentucky.

Despite my frequency of preparing meat, I always struggle with recipe ideas. It’s just never been my strong point. Well, that could all change after browsing this book. The author, Deborah Krasner, a James Beard Award winning cookbook writer, covers beef, lamb, pork, rabbit, poultry and eggs, and even provides a recipe section for side dishes.

A taste of the recipes include:

Beef and Lamb Meat Loaf
Baked Cured Ham Steak with Honey, Onion Confit, and Bourbon
Roast Chicken with Apples Sausage, and Cider
Sicilian Rabbit Agrodolce
And yes, if you are the adventurous type, there are recipes for sweetbreads, tongue and gizzards.

What I love about this book:

  • The book opens with multiple, homemade spice rubs that are used in many of the recipes to follow.  
  • The recipes are clearly written with straight forward instructions, one recipe per page. 
  • The recipes incorporate a variety of cultural cuisines including French, Indian, North African, Chinese and Cuban. 
  • There isn’t a photo with each recipe, but the photography included is outstanding from farm scenery to completed dishes. There are also pictorial descriptions of meat cuts for each meat type.  
  • The author touches on ethical topics for those of us who care deeply about animals, but still feel that some are meant to be a source of food. One example is her short section on the topic of naming animals.

What I’m not so crazy about:

I really like to make sure I look at cookbooks with a critical eye and mention the good with the bad. I have to be honest, though; there is nothing I don’t like about this cookbook.

If I had to stretch it, maybe I would go with the fact that it is really difficult for me to see a cute calf on one page and a slab of beef on another, but that doesn’t make the photography or the book any less spectacular. The book is also very large and difficult to keep open with the recipe in view while cooking, but I find that with multiple cookbooks in my collection.

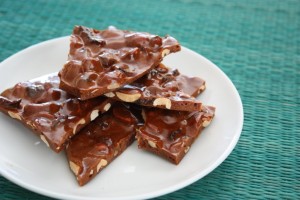
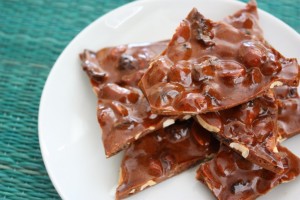
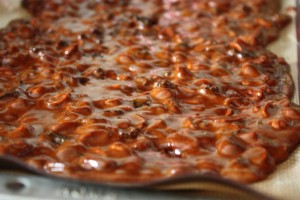
Did I mention that there are dessert recipes in this meat cookbook? I got to test out the Pig Candy recipe and I absolutely love that name. Pig Candy is a peanut brittle-type candy that has the spiciness of crushed red pepper and the saltiness of pastured bacon.

I really wanted to make this recipe with brown rice syrup because I’ve heard that it is a good substitute for corn syrup. However, I couldn’t find it at the markets I went to so I stuck with corn syrup that did not also have HFCS in it. I’m not sure how much of an improvement that is, but I used what I had to work with. In addition, I used Demerara sugar instead of white sugar.

The result? Well, I think I burnt it a bit, and the Demerara did make it much darker. I am a true amateur candy maker and I need a lot more practice so I am going to chalk it up to that. However, despite the fact that I slightly burnt it and it isn’t perfect, we still can’t keep our hands out of it around here.

This recipe is brilliant, in my opinion. Add another one to your holiday baking list!

Pig Candy
Reprinted with permission from Abram Books

Peanut brittle made with crisp pastured bacon and a little red pepper—what could be bad about that? Try this with a glass of Bourbon or cocktails, or serve it at a Super Bowl party—either way, it’s memorable.

MAKES ABOUT 1 POUND BRITTLE

2 tablespoons unsalted butter, softened, plus more for greasing the baking sheet and spatula
1 cup sugar
1⁄2 cup light corn syrup
1⁄2 teaspoon sea salt or smoked salt flakes
1⁄4 cup water
1 cup roasted unsalted peanuts
1⁄4 teaspoon crushed red pepper flakes, or more to taste
1⁄2 cup crumbled crisp-cooked pastured pork bacon (about 6 slices)
1 teaspoon baking soda

Butter a silicone baking liner or cookie sheet, as well as an offset spatula or icing knife, and set aside.

Using a 1-quart saucepan, heat the sugar, corn syrup, salt, and water over medium heat and cook until the sugar dissolves, stirring with a silicone spatula. Stir in the nuts, red pepper, and bacon pieces.

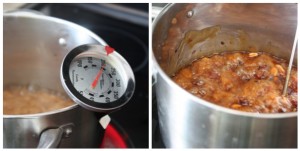
Cook the mixture until it registers 300 to 310 degrees on a candy thermometer—it will form a long thread when you pull the spatula out. Depending on the pan and the efficiency of the burner, this can take up to 20 minutes.

Remove the pan from the heat and carefully but thoroughly stir in the 2 tablespoons butter and the baking soda (take care—the mixture will foam). Immediately pour the mixture onto the prepared pan and, using the offset spatula or an icing knife, spread it into an even layer as thinly as possible. When the brittle is cool enough to handle (but still warm and pliant), use your hands (gloves can help) to stretch and pull it even thinner.

When the brittle is cool, break it into pieces and serve, or store in an airtight tin.

Disclaimer: This cookbook was sent to me free of charge. I was under no obligation to review it and received no compensation for doing so.
Want to create beautiful food and product photos that you can't wait to share?!
Discover your style, control the light, and shoot using the tool you know how to use (yes, your phone included). Learn about free resources, Live Q&As with Lori, and online courses you can take from anywhere in the world!
We respect your privacy. Unsubscribe at any time.