Archives

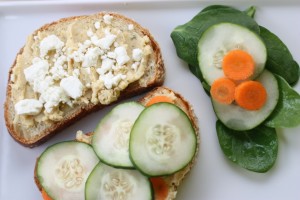
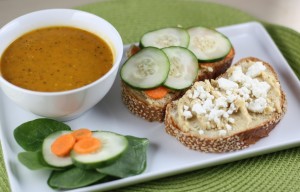
Hummus and Feta Vegetable Sandwich with Cherry Tomato Soup

April 4, 2011

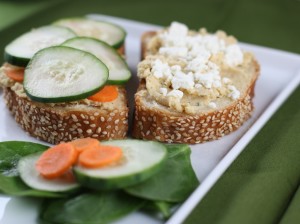
One of my favorite sandwiches is the Mediterranean Veggie sandwich from Panera Bread. If you haven’t had it, let me explain. It consists of fresh bread piled high with vegetables, but what makes it so tasty to me is the combination of hummus and feta cheese.

A few days ago, I decided to try to recreate something similar. I had made a batch of my Hummus with Almond Butter and had some feta on hand. I stopped in Great Harvest and picked up a loaf of Vienna bread, a crusty dark brown loaf on the outside with a soft and slightly chewy inside. Perfect for this sandwich.

I used up some of the vegetables I had on hand which this time around included carrots, cucumber and spinach. Red or green onion, lettuce or ripe tomato slices would be a fine addition as well.

I paired the sandwich with some easy tomato soup. The only tomatoes we have left in the freezer are yellow and red cherry tomatoes so I decided to give them a try. Almost all my tomato soups are now patterned after my favorite which is Simple Tomato Soup from A Good Appetite.

The cherry tomatoes worked well and added a sweet flavor to the soup. I did find that I needed to strain the soup after pureeing it though to remove any tough skins that didn’t cook down. After that, it was the ideal consistency and needed no garnish at all.

This is another picnic worthy combo that welcomes spring!

Hummus and Feta Vegetable Sandwich

4 slices fresh bread
½ cup hummus
¼ cup crumbled feta
1 carrot, peeled thinly sliced
½ small cucumber, thinly sliced
¾ cup baby spinach leaves

Evenly distribute the hummus over the four slices of bread and spread. Sprinkle the feta on two of the slices. On the other two slices pile on the carrot, spinach and cucumber. Press the vegetables into the hummus gently.

Top with the hummus and feta bread slices to make a sandwich. Serves 2.

Cherry Tomato Soup

1 tbsp olive oil
3 cups cherry tomatoes, thawed from frozen
½ cup onion, diced
1 red jalapeno, seeded and deveined, diced
1 clove garlic, minced
2 tsp dried basil
1 tsp salt
½ tsp black pepper
1 tsp balsamic vinegar

In a medium sauce pan, heat the olive oil and add the onions and tomatoes. Cook, stirring often, over medium high heat for 3 minutes. Add the jalapeno and garlic. Cook, partially covered, for another 7 to 10 minutes or until the tomatoes burst and the onion is softened. The water from the defrosted tomatoes help to create a broth for the soup. Add the remaining ingredients. Cook for 1 to 2 minutes more.

Remove the soup from heat. Using an immersion blender, puree all ingredients until mostly smooth. Place a strainer or colander over a heat-proof bowl. Strain the soup to remove any tough skins and seeds.

Pour the strained soup back into the sauce pan and heat through. Serves 2.
This post has been sent to Souper Sundays at Kahakai Kitchen.

Lemon Tuna and Chickpea Salad

March 30, 2011

So this was the plan. A few days ago, when it actually felt like spring, I made a tasty, healthy and refreshing dish that I just couldn’t wait to share with you. I put it off for a bit so I could get some other posts up, then it happened.

Winter came back.

While we haven’t fared as badly as those getting snow, it is in the 30s and misty here. It might as well be blizzard conditions as far as I’m concerned.

It is as if my body was so excited for spring that the few days of 70s we had, it rapidly adapted. Now I have no tolerance. My husband and I even wimped out on our outdoor runs yesterday and waited until we could make it to the warm and toasty gym today.

I’m more than willing to attribute a good mood to sunshine, but I don’t like to blame a bad one on the cold, gloomy weather. I’ve been trying everything to maintain my positive spring attitude.

I did yoga yesterday for enlightenment. I slapped on some coconut lotion to remind me of the beach. We had salad last night for dinner.

Nothing.

Sadly, I’ll just curl up in a blanket and hope the kale, berries and herbs toughen up and hang in there.

So while this salad did nothing for helping me hold onto spring, maybe it will help you quicken its return.

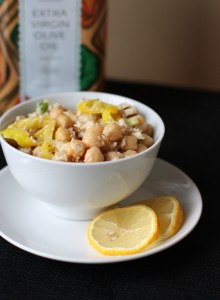
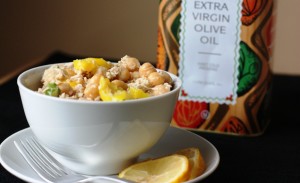
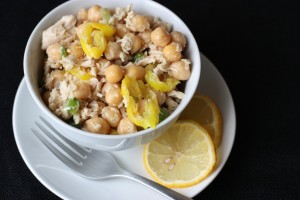
Lemon Tuna and Chickpea Salad

1 ½ cups cooked chickpeas, rinsed and drained
1 can albacore tuna, drained
2 green onions, sliced
½ cup mild banana pepper rings
Juice and zest of one lemon
1 tbsp olive oil
Salt and pepper to taste

Place all ingredients in a medium size bowl and toss to coat everything with olive oil and lemon juice and break up the tuna. Garnish with more banana pepper rings or green onions if desired. Serves 2.


This post has been submitted to Souper Sundays at the Kahakai Kitchen.

Classic Chili Dogs Courtesy of Rocky Mountain Organic Meats

March 27, 2011

I connected with Rod of Rocky Mountain Organic Meats on Twitter some time ago. I’m not sure who followed who first, but I remember in one conversation he shared with me how delicious the grass-fed meats were way out there in Wyoming due to the type of grass the cows were feasting on. My response was that we had some pretty good meat right here in central Kentucky due to our beloved Bluegrass. Secretly though, he had peaked my interest in those meats way out west.
Well, a few months later, I was given the offer to try Rocky Mountain Organic Meats firsthand when Rod asked if I’d like to sample a few items. I thought about it a while and after reading more about the company, I decided I couldn’t pass it up.

As you know, we buy most (were at about 95% now) of our meats locally and ensure that they are sustainably and humanely raised. Rocky Mountain Meats fits all that criteria except the local part. However, I decided this could work in the favor of my readers.

Every time I write about the great meat I get around here, I usually have at least one person tell me in the comments that they wish they had access to similar products in their area. In most cases you do. You just have to venture outside the city a bit, but there are likely some cases where you don’t. So sharing these products with you is to let you know that you do have access to some incredibly tasty, sustainably and humanely produced animal products through the good ol’ internet.

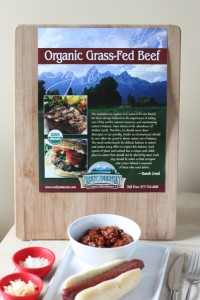
If you want to know exactly what this company is all about there is an abundance of information on their website including a little about what they do, who they are and what they sell. It starts like this:

“Rocky Mountain Organic Meats offers the finest Certified Organic grass-fed beef and grass-fed lamb in the country. All of our meats are 100% grass-fed and grass-finished and come from the best cattle and sheep country the Rocky Mountains have to offer. Our livestock is raised the old-fashioned way; no steroids or growth hormones, no antibiotics and no grain. Our only additives are clean water, lush grasses and fresh air resulting in lean and delicious organic grass-fed beef and lamb.”

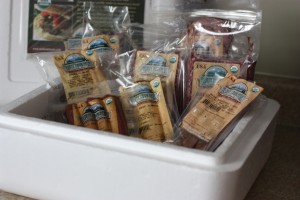
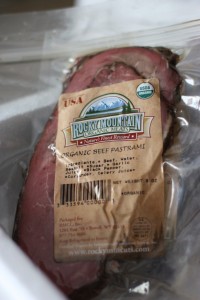
I was a bit overwhelmed when the box arrived at my door. I couldn’t believe the selection! Along with ground beef, lamb and sirloin steak, there was summer sausage, beef breakfast sausage, pastrami, hot dogs and my new favorite snack, Honey Beef Jerky. Wow, that stuff is good! Considering all the beef jerky lovers in my family, a bulk order will likely be on the Christmas list.

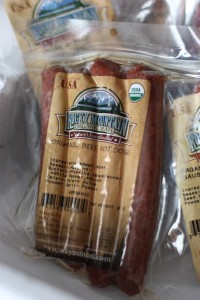
The ingredients used in processing, smoking and aging the products are as natural as the meat itself. I found black pepper, paprika, celery juice and others boldly listed on the front of the packages.

So with all this great meat, you know I had to come up with something exciting to share with you.

I found myself thinking back to some favorite foods that we haven’t had in years. The combination of healthy eating in general, decreasing our support of the current fast food system and increasing our investment in grass-fed meats means that we’ve stopped eating a lot of the foods we might have splurged on in the past.

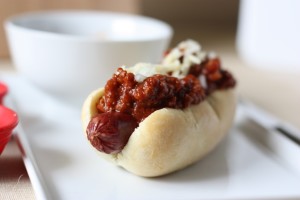
Enter the classic chili dog. Not just any chili dog, but the most sustainable, from scratch, partially local, mostly organic and all grass-fed chili dog you have yet to see.

First I started on the buns using the same recipe I posted a while back for the Bread Bowl. I just portioned the pieces after the bread doubled and made each into hot dog-bun shapes. The bun recipe makes about six so you’ll have a couple left over.

I got to work with the organic grass-fed ground beef and made a chili-type sauce that was part Coney, part Lori’s tastes. My husband said it was a bit more tomato-y than the Coney sauces he’s used to, but that is where the Lori’s tastes come in. I like that tomato flavor in my chili.

That last sentence in the quoted description above is spot on. The beef was so lean that I had no grease to drain from the pan. It was full of the flavor I’ve come to expect from grass-finished beef. Excellent,and it was a perfect match for the chili sauce.

I cooked up their organic beef hot dogs just to heat them through. You could grill, pan fry or boil them depending on your preferences. These hot dogs had a slight sausage texture to them which we didn’t mind at all. They were just right as the main attraction in this dish.

I saved a bit of chopped onion to top off the dogs, and I shredded up one of our new favorite Kentucky cheeses, St. Jerome from Kenny’s Farmhouse Cheese. It has a creamy texture and resembles the flavor of an Asiago to me.

Pile it all together and you have the best dog around. The perfect blend of foods from the past combined with food choices of the present.

Classic Chili Dogs

4 homemade hot dog buns
½ lb organic, grass finished ground beef
1 small onion, finely chopped
2 tbsp chili powder
1 tsp smoked paprika
½ tsp celery salt
½ tsp ground mustard
1 tsp mascavo sugar (or brown sugar)
2 cups tomato sauce
1 tbsp tomato paste
Salt and Pepper to taste
4 organic, grass-finished hot dogs
¼ cup shredded cheese (optional)

In a medium size sauce pan begin to brown the grown beef. Reserve 3 tbsp of the chopped onion for garnish and place the rest in the pan with the beef. Continue to cook until the beef is cooked through.

Next add the chili powder, paprika, celery salt, ground mustard and sugar. Stir in the tomato sauce and tomato paste. Let simmer for 1 to 2 minutes and then add salt and pepper to taste.

Slit each bun down the side, lay a warm hot dog in the bun and top with the chili. Sprinkle on a little chopped onion and shredded cheese for garnish. Serves 4.

 Disclaimer: The products featured were sent to me free of charge from Rocky Mountain Organic Meats. I was not required to post about them and received no compensation for doing so.

Ginger Chicken Pot Stickers

March 23, 2011

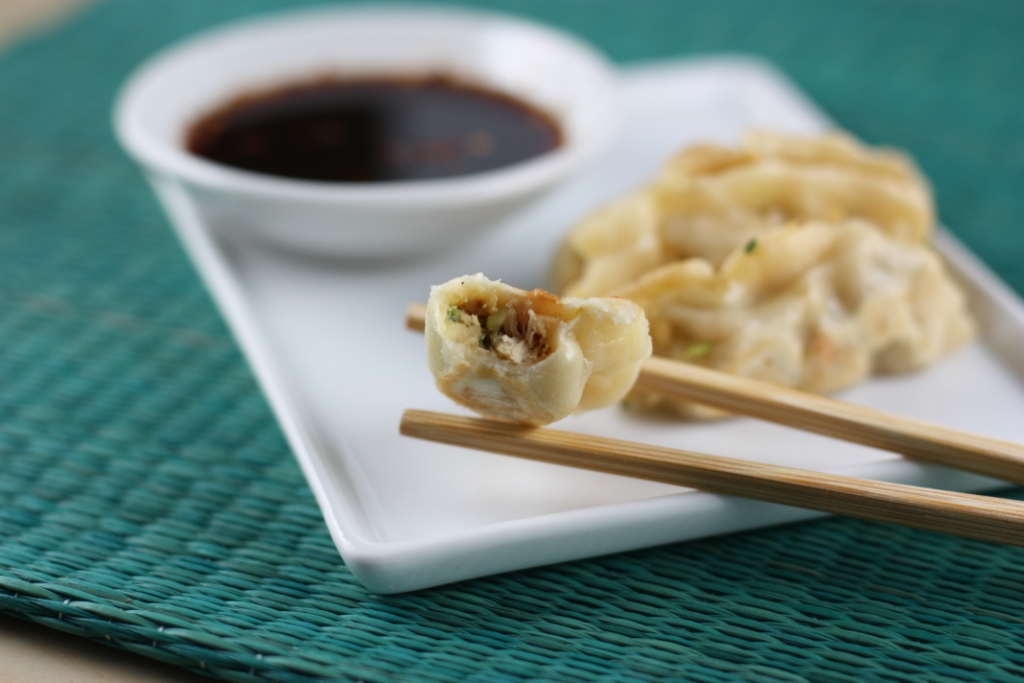
These Ginger Chicken Pot Stickers are one my favorite recipes from the Fake Food Free archives! You can make your own won-ton dough, or take a shortcut and use store-bought wrappers. The filling is also a great use for leftover roasted chicken!

Ginger Chicken Potstickers Recipe | FakeFoodFree.com


When my husband asked me what we were having for dinner this past Sunday, “pot stickers” came out of my mouth before I really even thought about it. Apparently, my stomach knew what it wanted before my brain had time to register it.

Once I said it, I was committed, which really isn’t a bad thing. I had actually had making homemade pot stickers on the back burner since I started my food blog, so we are going on three years. That’s a pretty long time to be meaning to make something.

My first excuse was that I didn’t have a pasta roller to get the dough thin enough. Well, I got one of those last October for my birthday so I was quickly running out of reasons why I shouldn’t make it. Aside from the cutting and stuffing, they really are easy to make, just a little time consuming.

We had grilled a local, pastured chicken a few days before so I had plenty of meat to make a filling. I went through the fridge and pulled out a few things from the vegetable drawer, threw it in the food processor and was surprised at the delicious combination that resulted.


Easy Potstickers Recipe | FakeFoodFree.com 

 I mentioned that I had been meaning to make these since the start of my blog and that is because of this recipe for Soy-Butt Pot Stickers from one of the very first blogs I read regularly, Eating Out Loud.

That is where you will find the very simple dough recipe and some general instructions on making pot stickers. I found that running the dough through the roller just two times on a middle setting worked fine. Be sure to keep your surface well floured to prevent it from sticking. This recipe, both dough and filling, made about 60 pot stickers.


Ginger Chicken Potstickers Recipe


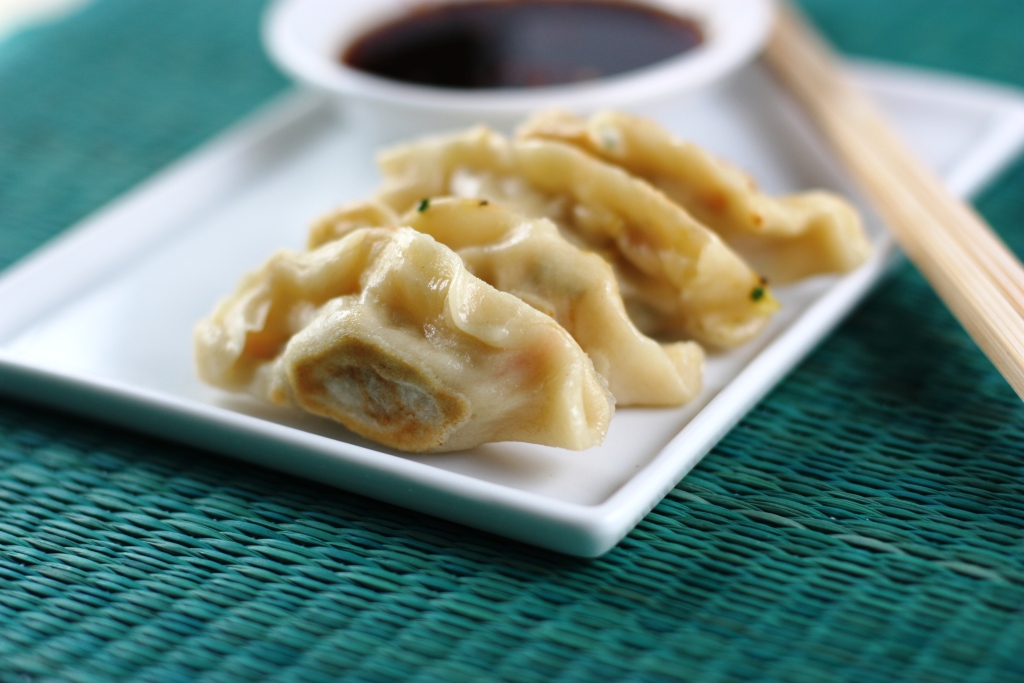
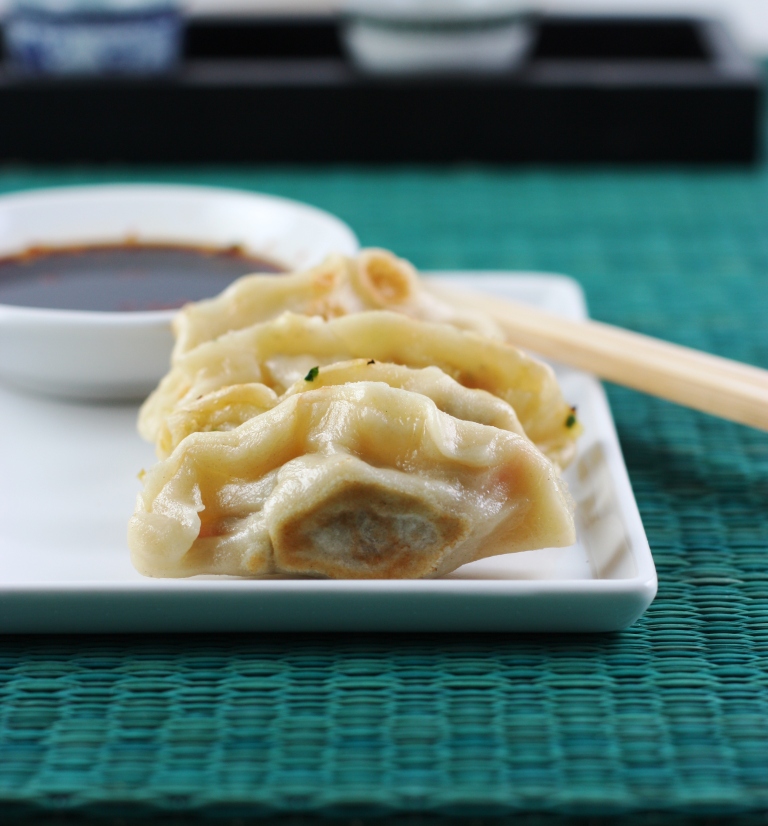
They cooked up beautifully with the exception of a few that got a little too brown on one side. The ginger came out strong in the filling, but it was balanced with the green onion, soy, and cilantro. We made a meal of these, but they would also work great for a party appetizer.


A favorite recipe from the early days of FakeFoodFree.com. Ginger Chicken Potstickers.

Ginger Chicken Pot Stickers
Yields 60
These Ginger Chicken Pot Stickers are one my favorite recipes from the Fake Food Free archives! You can make your own won-ton dough, or take a shortcut and use store-bought wrappers. The filling is also a great use for leftover roasted chicken!
Write a review
Print
Ingredients
  1. 2 cups cooked chicken, shredded
  2. 2 carrots, peeled and grated
  3. ¾ cup cabbage, grated
  4. 3 green onions, finely chopped
  5. 2 tablespoons chopped fresh cilantro
  6. 1 tablespoon finely grated fresh ginger
  7. 3 tablespoons soy sauce
  8. 1/4 teaspoon fine sea salt, or more to taste
  9. 1/4 teaspoon ground black pepper
  10. 60 homemade won-ton wrappers
  11. 1 tablespoon cooking oil
Instructions
  1. Place all ingredients except the won-tons in a food processor. Pulse 3 to 4 times in 10 to 15 second intervals until the ingredients are still slightly chunky, but hold together when pressed into a ball.
  2. Lay all of the won-tons out on a flat surface. Place an equal amount of filling in the center of each won-ton. Brush the edges of each won-ton with water. Fold in half and pinch and fold the ends to make a half moon.
  3. Preheat about 1 tablespoon of oil in a large skillet over medium-high heat. Work in batches and place the pot stickers on their sides in the skillet. Allow to cook on medium-high heat for about 4 minutes. Avoid moving them around. Once they are stuck to the skillet, pour about 1/8 of a cup of water into the skillet. Cover with a lid or foil and cook for about 1 minute. Remove the lid and let any remaining liquid evaporate. Remove the pot-stickers and serve warm.
  4. You can freeze extra pot-stickers before cooking. They also hold up well if you cook them and store them in the fridge to reheat and finish off in a day or two.
Fake Food Free https://www.fakefoodfree.com/
  

Thanks for reading! All images and content are the property of Fake Food Free Productions, LLC and Lori Rice unless otherwise stated. Please do not republish full recipes and images without written permission. What is okay? Feel free to Pin images, share links to my posts or share the photo in a round-up post with the title of this recipe and a link back to the post. Confused about copyright and food blogs? Here is some helpful information on Recipe Attribution. If you want to use a photo or full recipe, just ask. I’m sure we can work something out.

A Dog Biscuit Cookbook, a Rescue Pug and a Fundraiser

March 20, 2011

Last Christmas I received the cutest cookbook. It was full of creative recipes and I couldn’t wait to try a few out. The catch, however, was that this cookbook was not meant to benefit myself or my husband, or any human for that matter.

No, this cookbook was meant to benefit these two characters:

And when I say characters, boy do I mean it. Back in December we adopted pug #2.

This is how my husband affectionately refers to them, pug 1 and pug 2. Upon telling this to a friend, she told him that they likely refer to us as human 1 and human 2.

Fair enough.

Dixie, or Dixie Land, has fit in nicely at our house. She and Macy still have a few squabbles, but they have learned tolerance and perhaps even like each other a little. Dixie had been living with 5 other pugs so I really don’t think she understands what the big deal is with Macy. She has no problem sitting on top of her or squeezing in next to her.

Macy, on the other hand, is incredibly offended by these gestures. She likes to reminisce about the days when she had the house, couch and dog beds to herself.

We adopted Dixie from Kentuckiana Pug Rescue. She was surrendered by a breeder who went out of business, so up until a few months ago (with the exception of the time with her foster family) her purpose was having babies. She is now warming up to the idea that her purpose is for pug kisses, snuggling and a receiver of lots of love.

Although adorable, I will say she isn’t innocent. She gets into a bit of trouble eating from the open food bin, jumping into the dishwasher. Yes, that actually happened.

She is also a very proud carnivore. She barks during our dinner time when we have meat, but not when we are dining vegetarian. This is too amazing to me to make up. The dog knows her meat.

So back to this cookbook.

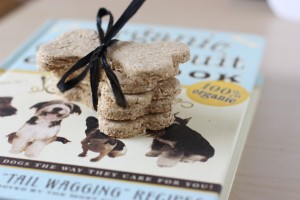
The Organic Dog Biscuit Cookbook from the Bubba Roses Biscuit Company is full of all kinds of fun food ideas for your buddy. There is everything from complete entrees to roll and cut out biscuit recipes. In fact, there are over 100 recipes in the book along with tips that point out beneficial ingredients for dogs as well as foods to avoid. A great gift for the cooking dog lover in your life and your pup will be especially grateful if you grab a copy for yourself.

There is a reason why I decided to feature this book right now. I’m in the middle of training for my second half marathon. I’ll be running the Flying Pig half in May and my husband will be running the marathon. Through my training and racing, I’m on a mission to raise funds for an organization close to my heart – Kentuckiana Pug Rescue, the organization through which we got our adorable Dixie last December. You can find a link to my campaign in my right sidebar.

I appreciate every dollar donated to help pugs in need, and even if you can’t give, spreading the word is the second best thing. My husband gets emails daily from KPR with the most heart wrenching stories, asking for foster homes or medical assistance. Dixie is such a sweetheart, I can’t imagine someone not loving and keeping her and I know there are so many pugs out there like her so I want to help as much as I can.

Now about the dog biscuits.

I tried out the Ohm My These Are Good biscuits to share with you. Now, I realize it might not mean much to say an animal liked a treat when said animal will eat just about anything that drops on the floor, but the girls were big fans of these cookies.

As soon as Macy realized I was photographing dog and not human treats, she sat below the table whining. She is a sit and stay-er, so she sat in agony while I snapped a few photos. Dixie on the other hand is still working on her sit and stay so she just looked at me wondering what in the world I had in my hand until I let her have it, then it was gone before I could blink.

Ohm My These Are Good Dog Biscuits
Reprinted with permission from Cider Mill Press

1 cup oat flour
1 cup brown rice flour
½ cup canned or fresh pureed pumpkin
1 tsp cinnamon
1 egg
1/3 cup water

These treats are high in fiber, low in fat, meat-free and low in protein.

Preheat oven to 350 degrees F. Combine all ingredients together and mix until a dough forms. Roll into small balls (about 1” in diameter) and place on an ungreased cookie sheet (they can be rather close together as they don’t spread while cooking.)

Bake 20-25 minutes. Remove from the oven and let cool completely on a wire rack. Store in an airtight container in the refrigerator.

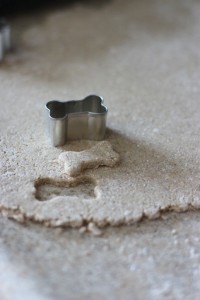
*I wanted to use the new cookie cutters I also got when I received the book so I added about ¾ cup whole wheat flour which allowed me to roll out the dough and cut the biscuits into shapes.

Road Trip to South Carolina – Seafood and More

March 17, 2011

I briefly mentioned that my recent absence was due to some time spent in the south. More south than Kentucky, that is. Last week we took a family road trip to Hilton Head Island with my husband’s parents. Then, completely by coincidence, I went back to Charleston later in the week for a conference for work.

We left Kentucky on Friday afternoon and spent the night in Asheville, NC. I was as excited about this stop as the visit to HHI because I’d never been to Asheville. Using my work and blogging connections I got a great tip for dinner – Tupelo Honey Cafe. (Thanks, Melissa!)

There are two locations in Asheville, but since we had never seen downtown we took a cab and came upon this earthy, quaint, yet trendy joint.

The menu is full of local, naturally raised ingredients. The foods are made from scratch and they had a nice selection of local beers. While we were waiting for a table, I tried the organic Pisgah Porter while I checked out the restaurant’s cookbook.

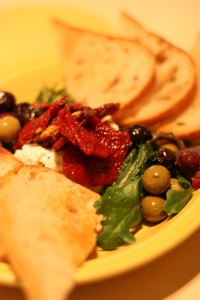
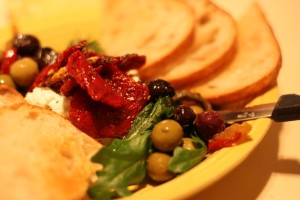
Scratch-made biscuits with jam arrived at the table soon after we sat down. For a starter, we went with the Local Goat Cheese Plate for Two. Fantastic! A generous mound of light, tangy goat cheese topped with marinated sun-dried tomatoes and olives with greens, surrounded by grilled bread.

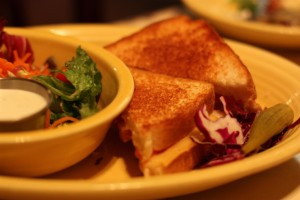
We shared entrees – one on the lighter side and one a bit heavy, but completely worth its weight. The grilled Tupelo Tomato Sandwich had fresh tomato, havarti cheese and mayo, served with a house salad. This was a great sandwich that reminded me that spring and summer are on the way.

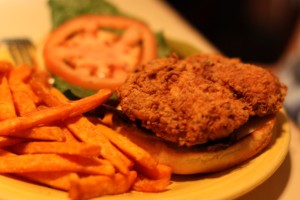
While I didn’t order them often, I do miss a good fried chicken sandwich. It’s nearly impossible to find naturally raised chicken served like this, but not a Tupelo Honey. The Southern Fried Chicken BLT included fried free-range chicken and maple peppered bacon on an artisan bun. It was crispy and tender. They allow substitution of any side dish for the standard home fries so I had to go with sweet potato fries.

I could have stayed in Asheville a lot longer, but the next morning we were off to Hilton Head. This is the point where I introduce you to lots and lots of seafood. My husband and I were determined to overdose on the fresh stuff. It’s way too rare here in central KY.

Our first restaurant feast was Skull Creek Boathouse with a beautiful sunset view.

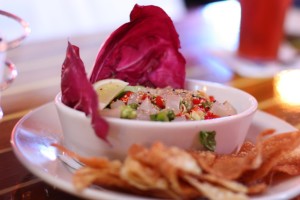
We first ordered the Triggerfish Ceviche special that was prepared with Asian flavors. It was beautiful and the fish tasty, but we all agreed we like traditional ceviche better with the tangy bite of citrus.

My husband and I split most of our meals so we could try more things and I’m pretty sure we got at least one fried platter each time. We love seafood of all kinds, but when by the water with beer, some type of fried seafood is always on our menu.

Here he ordered the oyster, shrimp and flounder combo. Everything was lightly fried and full of flavor.

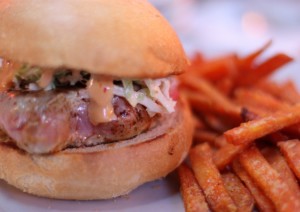
I ordered the Big Kahuna Tuna Burger. This sandwich was outstanding! My second favorite meal of the trip. It included a tuna steak topped with Japanese slaw and sashimi aioli. Again, tasty sweet potato fries.

Now, on to the most cultural culinary part of the trip. I read about Dye’s Gullah Fixins’ on Trip Advisor and learned it is one of the top rated restaurants on the island (for the people who discover it). It is tucked away in an almost empty strip mall and the food that comes out of this small restaurant is nothing short of amazing.

Dye takes your reservations (they are required) and will greet you at the door. She prides herself on making recipes passed down from generations that are Lowcountry, Gullah cooking. She came to our table during our meal to explain that the basis of this type of cooking is to keep it simple. Very few spices, long, slow cooking times and using only what is readily available in the area. It was southern food at its finest with such a strong history.

Drink orders came around and my husband couldn’t pass up trying authentic sweet tea. I have to be honest, to me, sweet tea is sweet tea, but everyone in South Carolina promises theirs is the best. I would expect this one was as good as it gets.

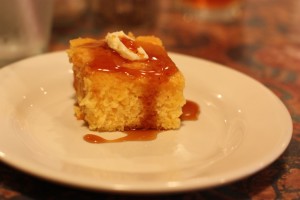
We started with Sweet Potato Cornbread – light, tender and melted in the mouth. Dye’s had pieces of sweet potato in it. (I later had some in Charleston made with sweet potato flour, which I found interesting and need to learn more about.)

The syrup on top wasn’t maple, but made from cane sugar. It was intensely sweet and complex, and went well with the buttery cornbread.

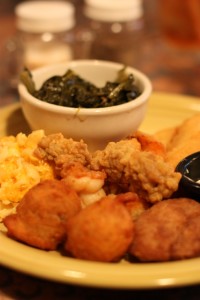
Of course we couldn’t pass up Dye’s Fried Seafood Platter. This one had whiting, shrimp, oysters, a crab cake and hushpuppies. For my sides I went all out with mac and cheese, and I couldn’t pass up the opportunity to try her collard greens.

Everything was very lightly breaded and not as heavy as one would expect. The greens were by far the best collards I’ve eaten.

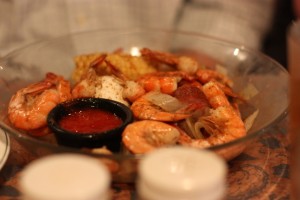
My husband ordered the Lowcountry Boil. This platter was as incredible as it looks – shrimp, sausage, peppers and onions, potatoes, corn and a hardboiled egg. It was all lightly seasoned and the flavors of the fresh seafood made it so simple, yet so delicious.

If you’re in the area, I highly recommend all these stops! Locavore eating all around, the food on our trip fulfilled all we were wanting from our short time by the shore.

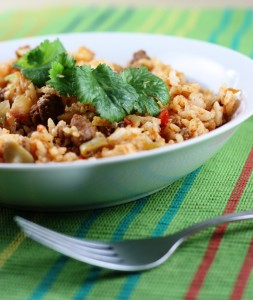
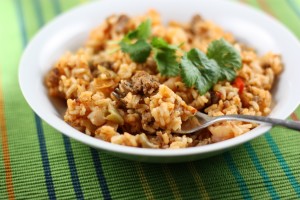
Pastured Sausage and Shrimp Rice

March 16, 2011

I’ve only had jambalaya a couple times in my life and I’m certain I’ve never had what could be considered the real thing. So I have no idea why I was craving it earlier this week. There was just something about shrimp, sausage and rice with a slight tomato-y flavor that sounded really good. Not to mention our temps dropped back to mild winter status so some warm comfort food was necessary.

Since my version follows no authentic recipe, I decided it really should be called by the official name. We’ll just say it is similar to some of the versions I’ve had before. Regardless of its authenticity, it did fulfill the comfort food craving.

I used local, pastured Italian sausage so that added a lot of the flavor to the dish. Except for the onion and garlic, all my veggies were thawed from frozen. I had a variety of frozen peppers from last summer so I used sweet banana and one red jalapeno for a kick. My tomatoes were Romas from last year’s garden as well. You can use raw or cooked shrimp. If you use cooked, just throw it in at the end and heat it through.

Pastured Sausage and Shrimp Rice

¾ lb pastured Italian sausage
20 – 25 shrimp, peeled and deveined, chopped into pieces
5-6 small peppers (any variety), sliced
½ large onion, diced
1 clove garlic, minced
6 small tomatoes, peeled, seeded and chopped
1 ½ tsp smoked paprika
½ tsp garlic powder
1 ½ tsp chili powder
¼ tsp black pepper
1 tsp salt
4 cups cooked long grain rice

In a large, deep skillet brown the sausage over medium-high heat until fully cooked. If using raw shrimp, add and cook until just barely cooked through. Drain, rinse if needed, and remove from the skillet to set aside leaving a small amount of fat in the skillet for the veggies.

Add the onion, garlic and peppers. Cook over medium-high heat for about 3 minutes. Add the tomatoes and cook 5 to 7 minutes or until all vegetables are slightly browned and tender and the tomatoes begin to soften and break up.

Add the paprika, garlic powder, chili powder, pepper and salt. Stir to coat all of the vegetables. Add the rice, stirring to incorporate it and cook 2 to 3 minutes or until heated through. Stir in the sausage and shrimp and cook for another minute. Serves 6.

****************************************************************

I know I’m a bit behind schedule and I apologize for the delay, but I finally selected the winners of my new book – The Everything Guide to Food Remedies. I stole a fun idea from Deb at Kahakai Kitchen and copied everyone’s name taken from the comments. I put them all in my cute cupcake bowl, shook it, closed my eyes and drew.

So here you go.

The three people who will receive a copy of my book are Joanne at Eats Well with Others, Aoife of The Daily Spud and Pearl! Please email me your address at lori (at) fakefoodfree (dot) com and I will send you a copy.

I will email you if you provided me an address and will give everyone one a week to respond, so by next Wednesday. After that I will select another winner.

Thank you for all the congrats and the thoughtful comments! I really enjoyed reading your philosophies on health and food.

Irish Soda Bread with Pistachio Vanilla Butter

March 14, 2011

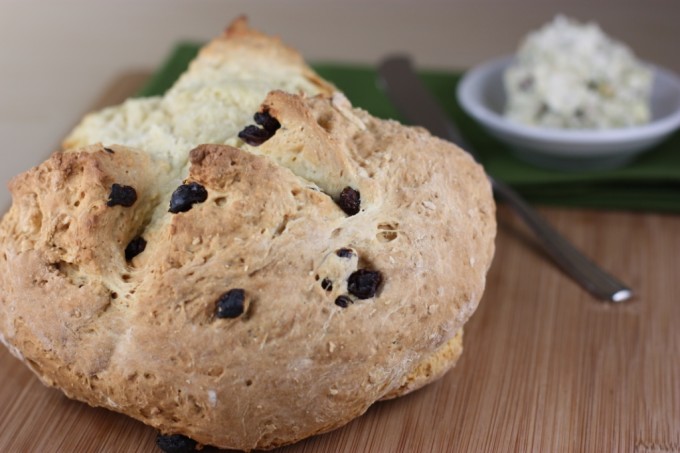
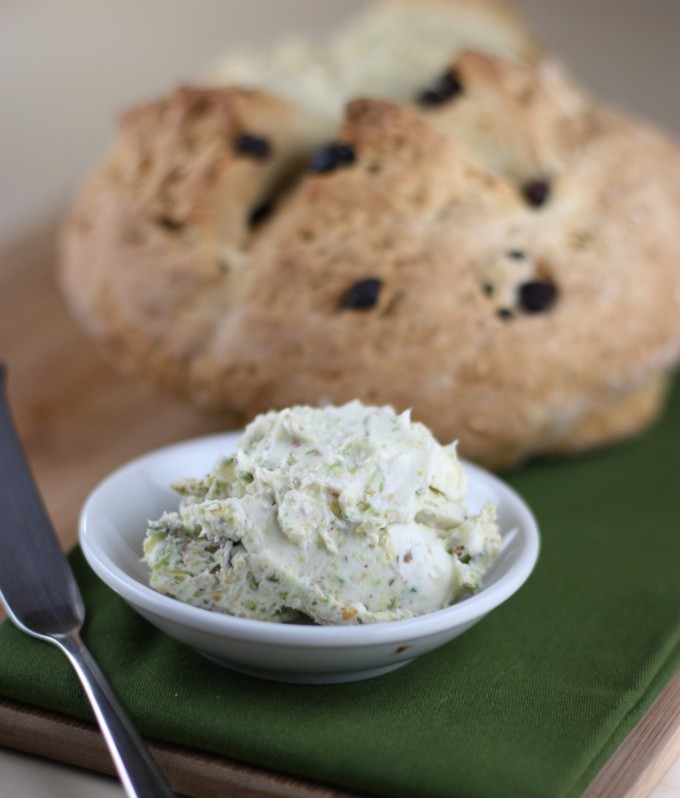
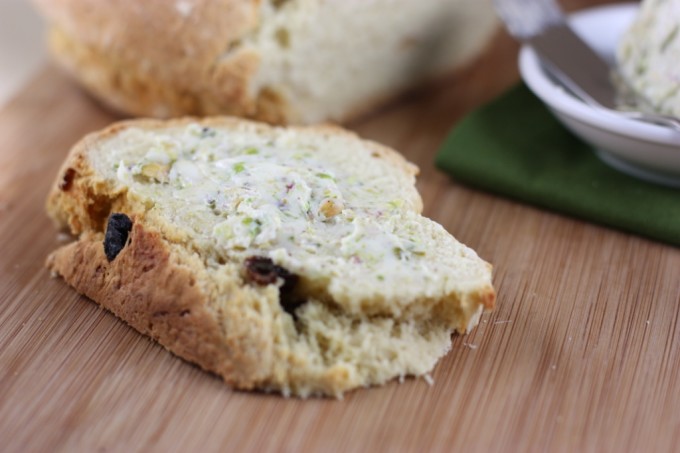
This pistachio vanilla butter makes a quick and easy spread for a favorite St. Patrick’s Day staple, Irish Soda Bread!

I’m finally back in the kitchen! After travel with family to Hilton Head Island last week and then a trip to Charleston, SC for work I’m settling back into shopping and meal planning this week. I’ll recap the food portion of my trip later, but right now I’m happy to say I made it back to the kitchen just in time for St. Paddy’s Day.

Last year, I let the holiday slip by without a celebratory food in sight. I must admit I didn’t go over the top this year with a full meal, but I guess I do still have a few days left.

Pistachio Vanilla Butter for Irish Soda Bread | Fake Food Free | An easy spread for a St. Patrick's Day staple.

While Irish Soda Bread may be the St. Patrick’s go-to for many, this is the very first time I have baked it. To add to the Irish flavor, I made sure I got the recipe from one of my favorite Irish chefs, Rachel Allen. We are headed to Ireland this summer and I already have space and weight set aside to stock up on several of her cookbooks.

So I tried my hand at her Irish Soda Bread and it was a hit! Crusty and chewy on the outside and soft on the inside. I guess it would be difficult to mess up so few ingredients, but given my baking history I can never be too sure. I used unbleached all-purpose flour for this one and substituted Demerara sugar. I also added some raisins for color and sweetness.

Pistachio Vanilla Butter for Irish Soda Bread | Fake Food Free | An easy spread for a St. Patrick's Day staple.

Once I had the bread, I felt the need to spread on something green. Pistachios were the first thing that came to mind. I chopped them up, added them to some butter and added just a drizzle of pure vanilla. The nutty vanilla flavor goes so well with the slightly sweet raisins in the bread. Not to mention, the finished product is flecked with festive pieces of green.

The White Soda Bread recipe can be found on Rachel Allen’s website. The quick and easy butter is below.

Pistachio Vanilla Butter

Makes: 1/4 cup

Ingredients


½ stick unsalted butter
25 to 30 shelled, salted pistachios, finely chopped
1/8 tsp pure vanilla extract.

Prep

Place all the ingredients in a small food processor and pulse until the butter is softened and everything is combined. If you’d like the butter slightly sweet you can add a teaspoon of honey or confectioner’s sugar to the butter before mixing.

Pistachio Vanilla Butter for Irish Soda Bread | Fake Food Free | An easy spread for a St. Patrick's Day staple.

This post has been submitted to the St. Paddy’s Day Food Parade at The Daily Spud.
 

The Secrets of People Who Never Get Sick: a review

March 6, 2011

I’ve been trying to determine if I know anyone who never gets sick. I’m not sure that I do. My husband would likely be the closest candidate, but even he will get the sniffles a couple times a year. In fact, most people I know are always complaining of being sick or feeling like they are about to get the latest bug.

I have very little doubt that getting the common cold and flu has everything to do with eating and exercise patterns along with sleep and stress, but it’s nice to have a little science to support my claims.

A couple weeks ago I was asked to review the book The Secrets of People Who Never Get Sick by Gene Stone. I took a close look before agreeing to do so. I usually only review cookbooks here, but with my book recently being published I had the healing power of food and other healthy practices on my mind.

No stranger to research and writing in health and wellness, Stone has offered himself up as a human guinea pig, taking part in everything from scientific trials to the latest fad diet. In his recent book, Stone interviewed 100 people who could rarely, if ever, be found under the weather. The book contains the top 25 secrets which also have some scientific evidence to back them up.

Most of us associate several of the practices with wellness including running, yoga and avoiding germs. Others give credit to the culinary suggesting plant-based diets and garlic. Some extend to the far reaches of the up-and-coming or the hard-to believe such as probiotics and cold showers.

There are habits associated with those things we often underestimate such as friends and positive attitudes. Then there are those you want to start doing whether they really work or not like napping and moving to Costa Rica.

While all of these things may have the potential to keep us healthy and well, what makes this book worth the read are the stories told about the people who strongly believe in their method to avoid illness. Each chapter goes on to give an unbiased view of the current research that supports or contradicts the idea.

You will also step away from these pages a whiz at health trivia. For example, did you know the first doctor who suggested that medical professionals should disinfect their hands before entering the maternity ward to deliver babies was thought to be crazy and died in an asylum? It wasn’t until Pasteur that this practice became widely adopted. Talk about conversation starters at your next party.

As it turns out, the book is not without recipes. Throughout the chapters you will find recipes for Chicken Soup, Sweet Potato-Vegetable Lasagna and a Salad Wrap.

If you want your next read to be as intriguing as it is informative, creative as it is research-based and historic as it is cutting edge, then this book is it. You just might find your own method and you’ll be the one sharing your never-get sick-secret.

I already eat a lot of garlic and a largely plant-based diet, so I think it only appropriate that I start experimenting with the napping theory first.

Disclaimer: This book was sent to me for review purposes. I was not required to write about it and received no compensation for doing so.

______________________________________________________________________________

Between work travel and very little creative time in the kitchen, recipes will be slim for the next week. I’ll be back before you know it with some culinary tours and springtime meals and desserts so no need to miss me. As always, thanks so much for reading!

Vegetable Stir-fry with Orange Soy Glaze

March 3, 2011

I can think of few things easier to make than a hearty vegetable stir-fry. When the vegetable drawer needs a good cleansing, it is my go-to dish. Chop, cook, spoon on top of rice and you are done.

The only catch for me is that I need a little something extra for flavor. It can be as simple as a little crushed red pepper and tamari sauce, but I must go beyond vegetables, salt and pepper.

This orange soy glaze does the trick. It is full of orange zest which gives the vegetables a fresh, slightly sweet flavor.

Don’t feel confined to the vegetables included here. Use what you have and what you like. I like my vegetables with some texture so once the cauliflower is just barely tender, about 10 minutes, in goes the glaze and I take it off the heat.

Vegetable Stir-fry with Orange Soy Glaze

2 tbsp olive oil
3 cloves garlic, thinly sliced
1 medium onion, sliced
10 white button mushrooms, sliced
3 stalks celery, sliced
2 medium carrots, peeled and sliced
2 cups cauliflower florets, sliced
2 cups broccoli florets, sliced
8 – 10 spears asparagus, cut into1 inch pieces
¼ cup unsalted, dry roasted peanuts
Juice and zest of one orange
¼ cup tamari
1 tbsp cornstarch or arrowroot
2 tsp mascavo sugar (or brown sugar)

Heat the oil in a wok or skillet over medium heat. Add the garlic and cook for about one minute. Add the onion, mushrooms, celery, carrots, cauliflower and broccoli. Increase the heat to medium high and cook, stirring often, until vegetables are tender, 10 to 20 minutes. About 3 minutes before vegetables are cooked to your preference, add the asparagus.

In a small bowl, combine the orange juice, zest, tamari, cornstarch and sugar. Add the peanuts to the stir-fry, and pour in the orange soy sauce.

Stir to coat the vegetables and cook for 1 to 2 minutes more, or until the sauce is slightly thickened. Eat by itself or with rice. Serves 4 to 6.

Want to create beautiful food and product photos that you can't wait to share?!
Discover your style, control the light, and shoot using the tool you know how to use (yes, your phone included). Learn about free resources, Live Q&As with Lori, and online courses you can take from anywhere in the world!
We respect your privacy. Unsubscribe at any time.