Archives

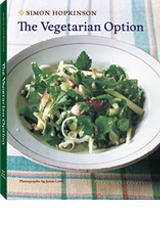
The Vegetarian Option: Cookbooks for Christmas

November 10, 2011

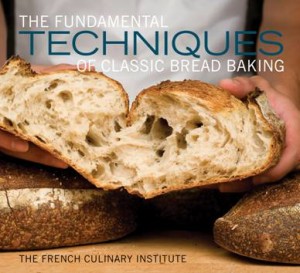
This is the second in my series of Cookbooks for Christmas with the purpose of sharing a few gift ideas for the foodie in your life. Be sure to check out the review and recipe for my first post The Fundamental Techniques of Classic Bread Baking.

I’d estimate that about 75% of our meals each week are vegetarian which means I often find myself in a rut. Just the other night I was standing in the kitchen idea-less with a few winter vegetables in front of me and a couple options for grains to bulk them up.

Then just as I thought I would be swallowed in a boring, repetitive sea of vegetable stir-fry and rice, along comes this cookbook – The Vegetarian Option by Simon Hopkins accompanied by gorgeous photography by Jason Lowe.

This cookbook is perfect for the person who almost has the basics mastered and is ready to incorporate some more challenging and internationally-inspired combinations. The chapters are divided by vegetables such as Cauliflower & Broccoli, Cabbage & Chard, Spinach & Sorrel and Beets & Turnips.

The reader is greeted in each chapter with a bit about how to handle the vegetable in the kitchen and then turns the page to be awed by the final results. Most of recipes are filling enough for main courses or they can be used as side dishes. Fair warning if using them as a side dish, though. They might steal the show all together.

Just to give you a few examples of what you’ll find between the covers, for the adventurous there is New-crop Garlic Saffron & Tomato Quiche, Asian Fried Turnip Paste or Spinach Mousse with Parmesan Cream. If you are looking for some basics you will also find it full of simple, yet creative salads, stock recipes and condiments.

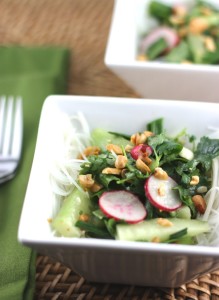
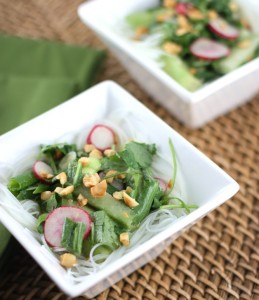
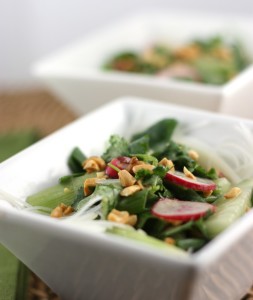
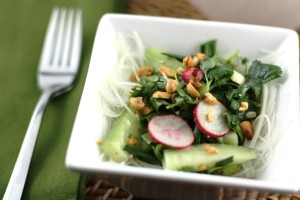
Personally, my eyes lit up when I saw the recipe for Asian Scallion, Radish & Cucumber Salad with Cashews & Vermicelli . You will rarely hear me use the word dazzled, but my goodness, I was dazzled by this recipe.

As I mixed together the ingredients for the nutty, spicy dressing and poured it over my bowl of mixed vegetables I wondered how it was going to come together. One bite and I was sold – crunchy, nutty, refreshing with just a touch of spiciness from the radishes and ginger.

Just a note before you get started. The ginger syrup used in the dressing needs to be made the night before. Also, I found that while it won’t have the same full flavor, if you are short on time and ingredients tahini can work as a substitute for the homemade sesame paste.

Asian Scallion, Radish & Cucumber Salad with Cashews & Vermicelli

Serves 4
Before you start, you will need on hand both ginger syrup and sesame paste. Also, feel free to add more of one ingredient or another, and to adjust the sweet-sharp balance of the dressing.

1/4 pound dried thread vermicelli (or glass noodles)
2 heaping tablespoons unsalted cashew nuts
salt
a little sunflower oil
6 radishes, trimmed
6 scallions, trimmed
1 cucumber, 7 inches long
generous handful each of cilantro and mint leaves
1 or 2 large red chilis, sliced

for the dressing

1 tablespoon ginger syrup (see below)
1 tablespoon sesame paste (see below)
juice of 2 limes
1 tablespoon Asian fish sauce or light soy sauce
1 tablespoon sesame oil

to garnish

2 teaspoons toasted sesame seeds

Snap the vermicelli into shorter lengths, one-third of the original, folded skein.

Soak in cold water for about 30 minutes, or until well softened. Drain and return to the bowl. Now cover with boiling water, and fork and lift the noodles around for a few minutes until they have become silky, soft, and tender (eat one). Drain, rinse in cold water, and set aside.

In a small skillet, gently toast the cashews with a little salt in a little oil until golden all over. Cool, and then crush each cashew lightly with the back of a knife. Reserve.

Cut the radishes into quarters or rounds, the scallions into diagonal shreds, and the cucumber into thick matchsticks. Tip the prepared vegetables into a large bowl and add the vermicelli. Tear the cilantro and mint leaves into smaller pieces and add to the salad with the chili. Mix together with your hands to distribute everything evenly.

Now whisk the dressing ingredients together in a small bowl. Add to the salad and mix together once more with two forks, lifting and dropping the salad so that all is evenly dressed. Pile onto a shallow serving dish and sprinkle the crushed cashews and sesame seeds over. Best eaten pleasantly chilled, with warm sake or ice-cold beer.

Ginger Syrup

2 cups (scant) granulated sugar
11/2 cups water
finely pared zest of 1 lemon (use a potato peeler)
11/2 cups peeled and coarsely grated fresh ginger

Dissolve the sugar in the water in a pan over medium heat, then bring to a boil and cook for 2 minutes. Immediately add the lemon zest and ginger and stir together. Bring back to a boil for a few seconds and then pour into a bowl. Cover and leave to infuse overnight.

The following day, add 2 tablespoons water and warm through until liquid and pourable. Strain through a sieve and press on the solids with the back of a ladle to extract all the ginger and lemon flavors. Pour the syrup into a screw-top jar and store in the refrigerator until needed, where it will keep for several weeks.

Sesame Paste

Makes about 1 ¾ cups
You need a powerful, small food processor to make this paste. For the best flavor, I feel it is important to use Asian brands of chili and sesame oils.

2/3 cup sesame seeds
3 tablespoons finely grated ginger (juice saved!)
1 large garlic clove, peeled
2 tablespoons light soy sauce
4 tablespoons mirin (Japanese cooking wine)
1 to 2 tablespoons chili oil
1/3 to 1/2 cup sesame oil, plus a little extra to serve
2 tablespoons lemon juice
1/2 cup warm water
1 to 2 tablespoons sugar, to taste

Lightly toast the sesame seeds in a dry pan over medium heat until fragrant, and
cool slightly. Tip into a small food processor and add all the other ingredients.

Grind and pulse until you have a paste that is fully emulsified and super-smooth.

Disclosure & Credit: This cookbook was sent to me free of charge. I was not required to write about it and received no compensation for doing so. All recipe reprinted with permission from Abrams Books.

**************************************************************************************

Today is the last day to sign up for the 2nd Annual International Blogger Cookie Exchange! Come join us!

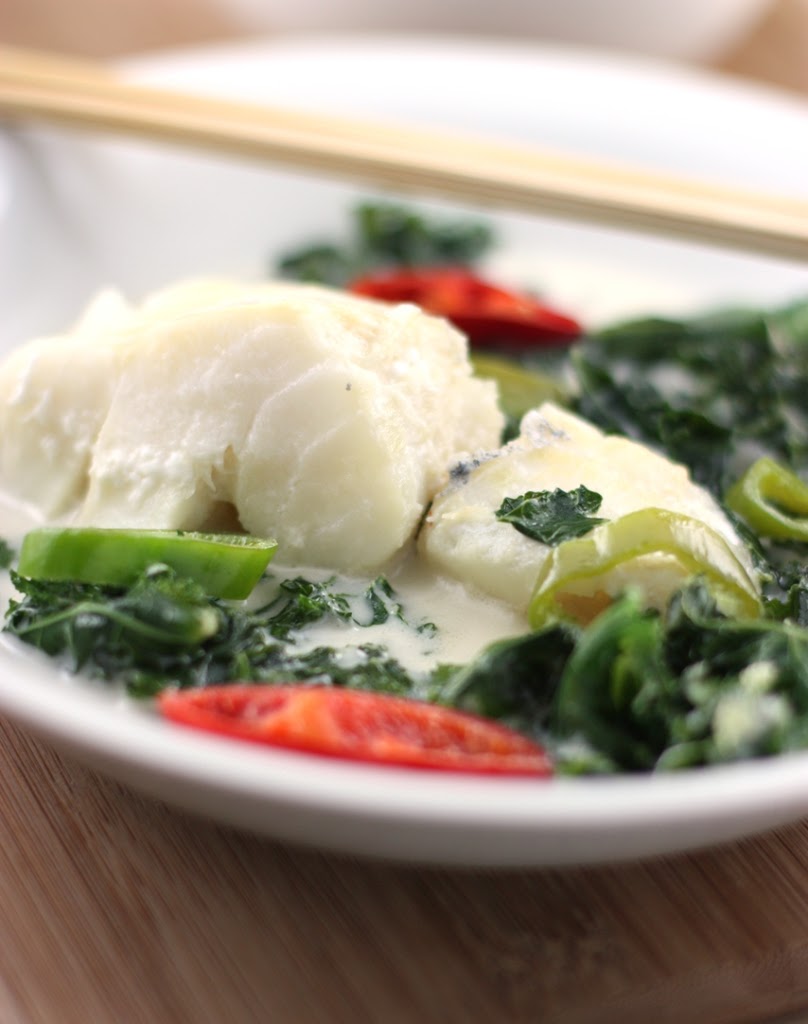
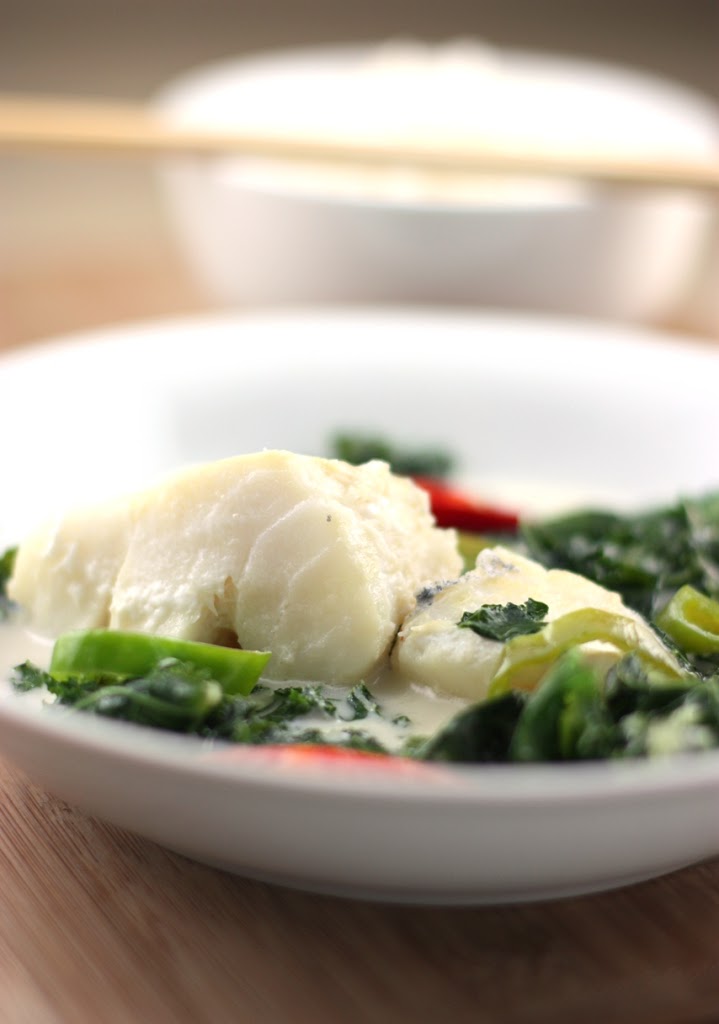
Coconut Fish with Kale

November 6, 2011

It’s difficult for a meal to be light, but at the same time comforting and filling. Somehow, though, this recipe seems to do it.

Coconut Fish with Kale Recipe | Fake Food Free

The idea of poaching fish in coconut milk was new to me when I came across a recipe for Coconut Poached Mahi Mahi in the September 2011 issue of Better Homes and Gardens. I did some modifying by first using some heartier greens – kale. I then used up the very last of our Anaheim peppers from the garden and pulled out one Thai chili I had harvested earlier in the season and tucked away in the freezer.
You can serve this alone, with rice or have it like I did with a nutty serving of quinoa. I’m convinced that this is the one and only way to enjoy good fish! The coconut milk is sweet with a warming heat. Matched with the kale, it’s the perfect dish for a cold evening while the fish adds a light, refreshing note.

Coconut Fish Recipe

Coconut Fish with Kale
Modified from Coconut Poached Mahi Mahi Better Homes and Gardens Sept 2011

1-15 oz can coconut milk
4 Anaheim peppers, thinly sliced
1 Thai chili, thinly sliced
½ cup water
1 tsp fresh ginger, grated
½ tbsp raw sugar
3 cups kale, de-stemmed and chopped
3-4, 4oz cod fillets

Using a medium to large pot (I used a 5 ½ qt Dutch oven), set the stove to medium-high and add the coconut milk, peppers, water and ginger. Stir and slowly bring to a simmer. Add the sugar and the kale.

Slowly turn the kale to coat it with the coconut milk until it begins to wilt, about 3 min.

Place the fish in the coconut milk. Partially cover the pot with a lid, slightly increase the heat to bring the milk to a simmer. Allow to cook for 5-7 minutes, or until the fish is white, cooked through and flakes when using a fork.

Place each piece of fish in a shallow bowl, add some kale and ladle coconut milk over the top. Serve with rice or quinoa if desired.

Coconut Fish with Kale Recipe


2nd Annual International Holiday Cookie Exchange

November 3, 2011

The International Blogger Holiday Cookie Exchange is back for 2011!

Last year Adrienne of Gastroanthropology and I created this event as a way to have a cookie exchange across international borders. Since it’s not always feasible to ship cookies, we trade recipes instead.

Adrienne has a lot going on this year that has taken her away from food blogging for a bit (including a new baby – congratulations!), so one of my favorite blogging buddies has stepped up to partner with us this year, Andrea of Food Embrace!

Without further delay, here’s how it works:

As a part of this recipe exchange you’ll be doing three things – sending a recipe to another blogger, making the recipe another blogger has sent to you, then posting about the recipe you made.
The recipe should be something you’d find on a holiday cookie plate, so anything from rugelach to alfajores to fudge squares to gingerbread men qualifies!

To participate email me at Lori (at) fakefoodfree (dot) com or Andrea (at) foodembrace (dot) com (or leave a comment with your email address below).

So here are the important dates:

Let us know you want to participate by next Thursday, November 10th.
(We will email you soon after with whom you should send your recipe to and who you will be receiving one from.)
Send your recipe to the blogger randomly selected for you by Sunday, November 20th.

Make, photograph and post about the recipe you received from a fellow blogger by Sunday, December 11th.

The round up will be featured here at Fake Food Free and Food Embrace the week of December 12th.

We hope you will join us!
Cookbooks for Christmas: The Fundamental Techniques of Classic Bread Baking

November 1, 2011

If you aren’t quite ready for the holiday season, don’t stop reading. I’m not either. I do, however, have several great cookbooks to review for you that just might get you thinking about gifts for your foodie friends even if that foodie friend is yourself. So I’m beginning a series that will extend through December – Cookbooks for Christmas. If holiday celebrations aren’t a tradition in your house, these books can certainly work for any occasion. As I keep telling my husband, it’s impossible to have too many cookbooks!

When I learned that The Fundamental Techniques of Classic Bread Baking from The French Culinary Institute was available I jumped at the chance to get a copy. Why? Because I need it. Not want it, but desperately NEED it.

Bread and I go way back, but as I’ve mentioned before I can never seem to master exquisite skill at home.

I worked in a bakery for several years. In addition, to customer service and sales, I was the go-to nutrition and ingredient person. Every time a question was asked such as, “How many calories, carbs or protein are in this type?” or “What are the grains in this one?” It would be followed by my coworkers turning to me and saying, “Lori?”

I could rattle off grams and kilocalories followed by an extensive list of grains. Not sure why this type of information sticks with me, but it has a lot to do with why I studied nutrition. Everyone has their thing, and for me, food and nutrition just clicks.

When it came to the actual bread, I was on the oven side of things. Someone else prepared the sponge and dough, while I worked on the kneading team and eventually became a baker.

So…I can definitely shape your loaf and tell you when your bread is done baking.

What I struggle with is measuring your ingredients and making your bread rise correctly.

See, I needed this book.

I haven’t been exposed too much in the way of professional culinary training, speaking specifically about the training provided in this cookbook. This book is science – the flour, the yeast, the sugar. The role of all ingredients required for baking the perfect loaf of bread are explained.

The truth is it might overwhelm someone new to baking. That being said, it also contains essential information that someone new to (or familiar with) baking needs to know. So, I say, take a chance and help educate.

In addition to the abundant information about baking terminology, tools, shapes, cuts and techniques are the recipes. Sigh. The recipes.

French, German and Italian recipes. The real deal with gorgeous photos to accompany many.

Some I was familiar with such as Challah, Rye, Stollen and Panettone . Others were new discoveries like La Mouna, Pane Siciliano Semolina and Landbrot mit Sauerkraut. The last section even covers some gluten-free varieties.

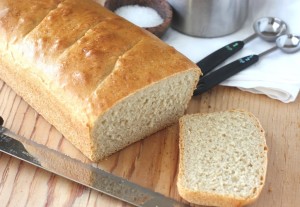
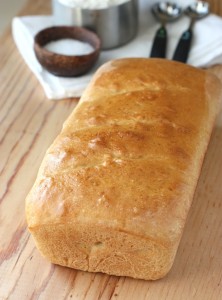
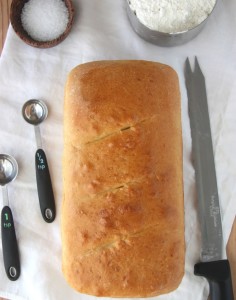
I decided to select one that was fairly straight forward and simple to start with – Pain de Mie Complet.

The process itself could not have been easier. It can be made in a weekend afternoon with little else than letting it rise the appropriate amount of time.

And back to that rising thing.

The result? I really like the flavor of this bread. We’ve been using it for grilled sandwiches and toast this week. I’ll be making it again, along with several other recipes from this book.

However, my result was far from perfect. I needed a bit more puff to my loaf, but otherwise we ended up with a delicious bread. And of course, now I have an excuse to make it again.

Pain de Mie Complet

Reprinted with permission from Abrams Books

Makes 2 loaves
Estimated time to complete: 5½ hours
Improved mix
Desired dough temperature (DDT): 75°F (25°C)

Ingredients

Bread flour    276 grams / 9¾ ounces (Baker’s Percentage 50%)
Fine whole wheat flour    276 grams / 9¾ ounces (50%)
Water    359 grams / 122⁄3 ounces (65%)
Powdered milk    22 grams / ¾ ounce (4.06%)
Unsalted butter    28 grams / 1 ounce (5%)
Cool heavy cream    17 grams / 2⁄3 ounce (3%)
Salt    14 grams / ½ ounce (2.5%)
Fresh yeast    8 grams / 1⁄8 ounce (1.56%)

Total    1000 grams / 2 pounds 31⁄3 ounces (181.12%)
Oil for greasing bowl
Flour for dusting
Butter for greasing pans
1 large egg for egg wash

Equipment

Scale
Digital thermometer
Standing electric mixer fitted with the hook
Large bowl or container
Bowl scraper
Plastic film
Two 9-inch loaf pans
Small bowl
Whisk
Pastry brush
Wire racks

Prepare the mise en place, taking care that the cream is about 60°F (15°C).

Combine the bread and fine whole wheat flours with the water, powdered milk, butter, heavy cream, salt, and yeast in the bowl of a standing electric mixer fitted with the hook. Mix on low speed for about 4 minutes, or until blended. Increase the mixer speed to medium and mix for about 8 minutes, or until the dough is smooth and almost shiny. Check the gluten development by pulling a window. Lightly oil a large bowl or container.

Scrape the dough into the prepared bowl. Cover the bowl with plastic film and set aside to ferment for 1 hour.

Lightly flour a clean, flat work surface.

Uncover the dough and divide it into two 500-gram / 18-ounce rounds on the floured surface. Cover with plastic film and bench rest for 15 minutes.

Lightly butter two 9-inch loaf pans.

Uncover the dough and, if necessary, lightly flour the work surface. Gently press on the dough to degas and carefully shape each round into a bâtard. Place each bâtard into a prepared loaf pan, seam side down. Cover with plastic film and proof for 90 minutes.

About an hour before you are ready to bake the loaves, preheat the oven to 350°F (177°C).

To make the egg wash, combine the egg with 14 grams / 1 tablespoon water in a small bowl, whisking to blend.
Uncover the dough and, using a pastry brush, lightly coat the top of each loaf with the egg wash.

Transfer the loaves to the preheated oven. Bake for 35 minutes, or until the crust is golden brown and shiny and the sides are firm to the touch.

Remove from the oven. Then, turn the loaves from the pans and transfer to wire racks to cool.

Disclosure: A review copy of this cookbook was sent to me free of charge. I was not required to post about it and received no compensation for doing so.

Spicy Chocolate Peanut Butter Cookies with Curry Glaze

October 29, 2011

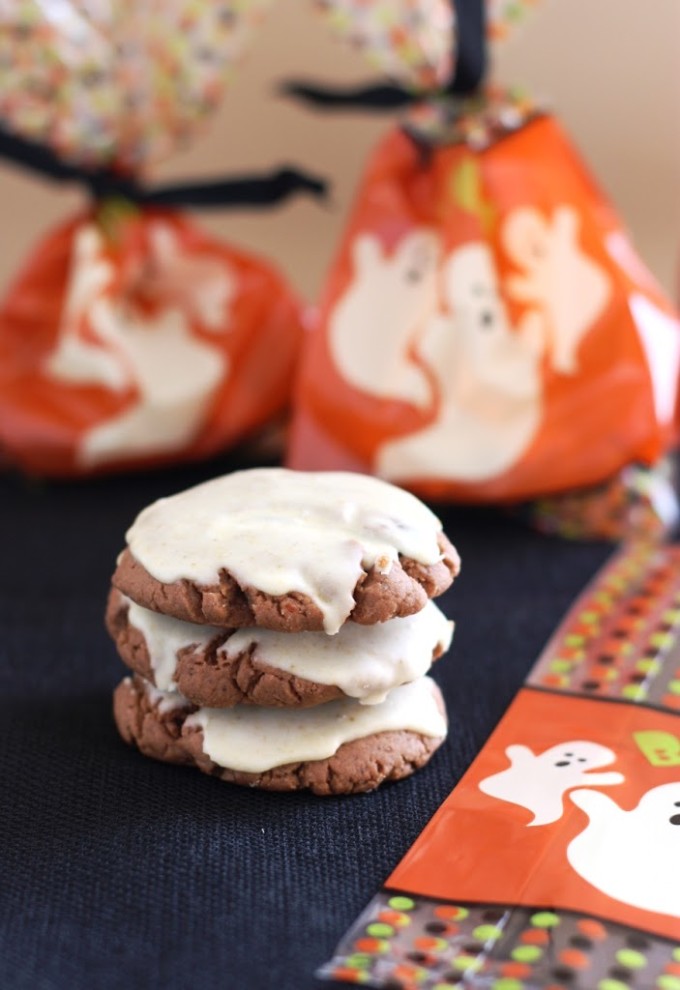
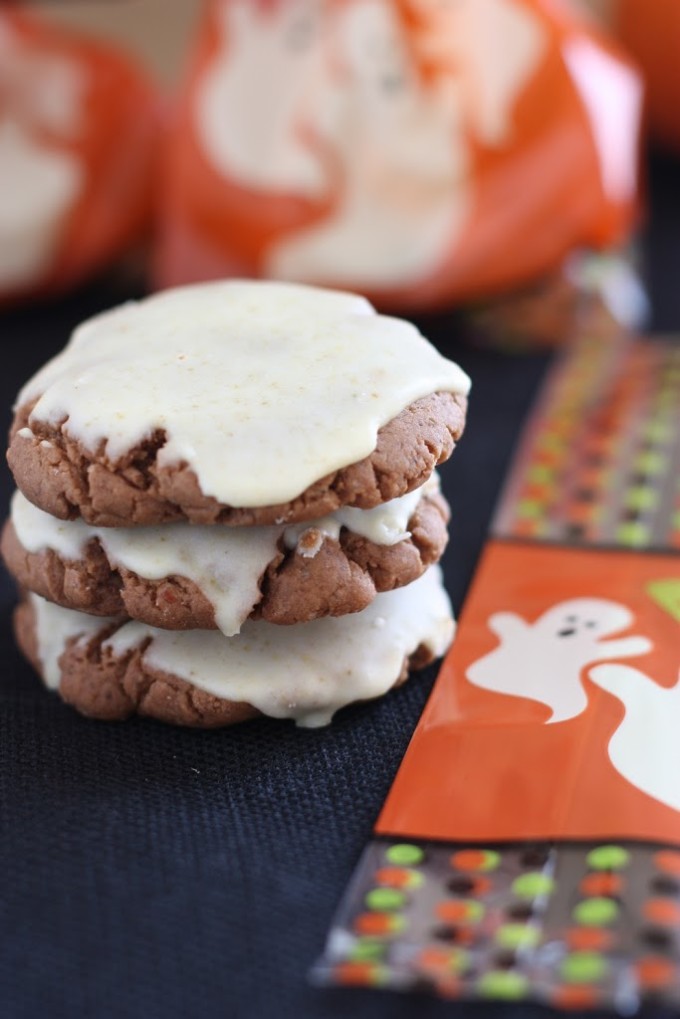
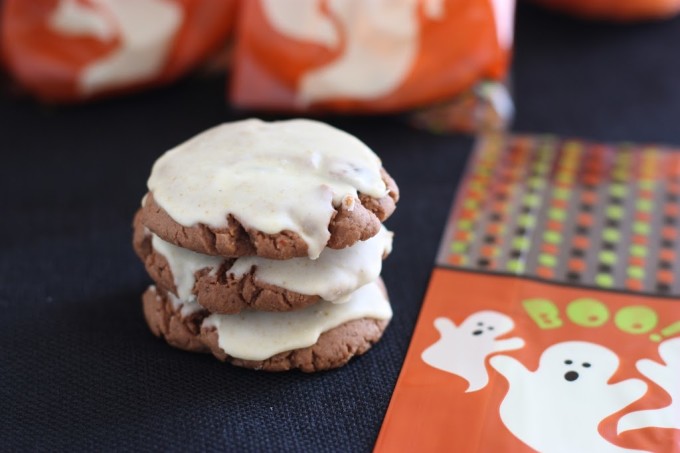
It’s been a few years since I made these cookies, but I still love a bit of heat in my dessert baking. They are made with PB & Co The Heat Is On peanut butter that was sent to me to try back then. As expected, I was an instant fan.
 
Spicy Chocolate Peanut Butter Cookies with Curry Glaze Recipe | Fake Food Free


Ever since I made Fiery Peanut Butter Cookies with Peanut Butter & Company’s The Heat Is On, I’ve wanted to experiment more with spicy desserts.

Thanks to my minor addiction with Vosges Haut-chocolat, I can’t get enough of sweets with savory spices. So for Halloween I thought I’d try out a new version of cookies. I figure if nothing else you can trick a few people into trying them.

Despite the initial response you might get to the name, I promise after one bite they will want another. The warm heat, rich dark chocolate, nuttiness and curry turn out to be some pretty amazing partners in a cookie.

Happy Halloween!

Spicy Chocolate Peanut Butter Cookies with Curry Glaze Recipe | Fake Food Free

Spicy Chocolate Peanut Butter Cookies with Curry Glaze

Makes: About 18 cookies

Ingredients

½ cup Demerara sugar
½ cup mascavo sugar
½ cup unsalted butter, softened
1/3 cup PB & Co The Heat Is On
1 large egg
1 ¾ cups white whole wheat flour
2 tablespoon unsweetened cocoa powder
¾ teaspoon baking soda
½ teaspoon baking powder
¼ teaspoon salt
½ cup dark chocolate chips

Glaze
1 cup confectioner’s sugar
2 tablespoons meringue powder
½ teaspoon curry powder
Milk (any variety)

Prep

Preheat your oven to 350 degrees F. In the bowl of a mixer combine the sugars and butter. Cream on medium-high until light and fluffy. (Note: white and brown sugar will substitute for the sugars listed). Add the peanut butter and continue to mix until all ingredients a combined. Blend in the egg.

In a separate bowl, whisk together the flour, cocoa powder, baking soda, baking powder and salt. Gradually add dry ingredients to the mixing bowl and blend on medium speed just until combined. Stir in the chocolate chips.

Roll into balls about ¾ inch in diameter. They will not spread much during baking, flatten slightly with your hand. Bake for 10-12 minutes or until cookies are firm in the center. Transfer to a wire rack and allow to cool completely.

In a small bowl, combine the confectioner’s sugar, meringue powder and curry. Add milk, a 1/2 teaspoon to 1 teaspoon at a time until the glaze can be poured, but is thick enough to still coat the spoon. Take cooled cookies one by one and dip the tops into the glaze. Place on a cooling rack that has been set over a baking sheet to allow excess to drip on the sheet. Use a spatula to spread glaze if necessary.

Allow to sit untouched for about 15 – 20 minutes for glaze to harden. 

Spicy Chocolate Peanut Butter Cookies with Curry Glaze Recipe | Fake Food Free


Disclaimer: Peanut Butter & Co sent me the peanut butter used in this recipe free of charge. I was not obligated to blog about it and received no compensation for doing so.


Thanks for reading! All images and content are the property of Fake Food Free unless otherwise stated. Please do not republish full recipes and images without written permission. What is okay? Feel free to Pin images, share links to my posts or share the photo in a round up post with the title of this recipe and a link back to the post. Confused about copyright and food blogs? Here is some helpful information on Recipe Attribution. If you want to use a photo or full recipe, just ask. I’m sure we can work something out.   

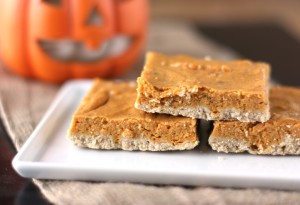
Sweet Potato Date Bars

October 27, 2011

I’m always up for a challenge in the kitchen. This time it was sugar, or rather the challenge of not using it.

Sweet potatoes and dates, that’s what I had to work with. I’m not quite sure why those were the two ingredients I wanted to use, but I had them on hand so I went with it. Knowing dates are perfect for sweetening up desserts, I wanted to use as little sugar as possible.

It turns out I didn’t need to use any.

Now this doesn’t mean they are sweetener free. I did add a little bit of pure maple syrup, which by make-up is a form of sugar. Kentucky Maple Syrup actually which I never knew existed until this year. Turns out it’s excellent.

I decided to go sans butter as well and the coconut oil was perfect. I used it at a softened, cold butter like consistency for the crust and melted for the filling. You can make your own oat flour by simply pulsing old fashioned rolled oats in a food processor a few times.

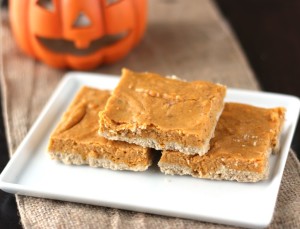
Like a sweet potato pie, these bars have a soft, spiced filling and a crisp crust. The potatoes, dates, maple syrup and coconut oil (not to mention a wee bit of bourbon) come together to provide just the right amount of sweetness. I promise you won’t miss the sugar at all.

Sweet Potato Date Bars

Crust

¼ cup oat flour
¾ cup white whole wheat flour
1/3 cup virgin coconut oil, at a soft butter-like consistency
1 tbsp pure maple syrup
1 tbsp water

Filling

1 cup cooked sweet potato, peeled and mashed
4 whole, pitted dates, chopped
1 tbsp bourbon
6 tbsp milk
1 tbsp pure maple syrup
¼ cup virgin coconut oil, melted
1 egg
½ tsp baking powder
½ tsp pumpkin pie spice
½ tsp salt

Preheat the oven to 350 degrees F. Grease an 8 x 8 inch baking pan with coconut oil.

In a small bowl, combine the oat flour and wheat flour. Add the coconut oil and with a pastry blender break it up into small pieces as you incorporate it into the dough. You should end up with pea size coconut oil pieces throughout the flour.

Add the syrup and the water. The dough should be somewhat crumbly, but hold together when pressed. Transfer to the baking dish and press evenly into the bottom of the pan. Bake about 5 minutes. Remove from the oven and set aside.

In a small food processor add the sweet potato, dates, bourbon and 2 tablespoons of milk. Pulse until smooth and the dates are blended in and almost visibly unnoticeable. Add a little more milk if it is too thick to blend.

Transfer sweet potato mixture to a medium size bowl. Stir in the remaining milk and maple syrup. Add the melted coconut oil and stir well. Make sure the batter isn’t too warm if you used warm coconut oil. Allow to cool before adding the egg if it is. Add the egg and mix until combined. Finally stir in the baking powder, pumpkin pie spice and salt.

Pour the mixture over the crust, spread evenly. Return to the oven and bake 25 – 30 minutes, until the center is firm and an inserted knife comes out clean. Makes 9-12 bars depending on how large you’d like to cut them.

Woven Shrimp for Number 33

October 20, 2011

I turned 33 last week. And I emphasize the word week because the celebrations lasted roughly 7 days. Around here we believe that celebrating just one day simply isn’t enough.

In honor of the big day, there was one specific meal I wanted. Nothing else would do.

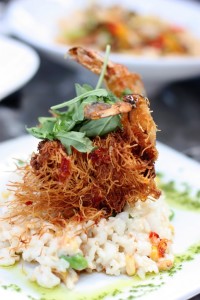
That meal was Woven Shrimp from Azur Restaurant and Patio in Lexington, KY.

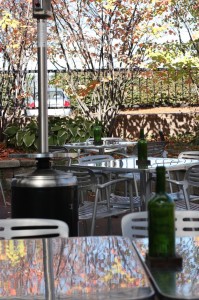
If you find yourself in Lexington you should find yourself a seat at Azur, but don’t look for it downtown. Azur is actually located in a strip mall on the southwest side of the city. But don’t let the description of the location fool you. This modern establishment which serves lots of local products such as Kentucky beef and Kentucky seafood from our up and coming aquaculture farms, also boasts an inviting patio area.

So back to that Woven Shrimp. Actually let’s go back to the first course because those were equally exciting.

We opted for a Saturday lunch and settled in on the patio with jackets and the space heaters going (it was just too beautiful not to sit outside) and ordered a Kentucky Ale.

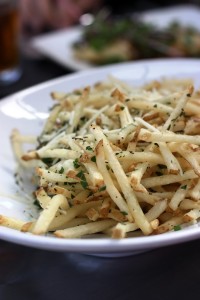
Next up for me, well, us, were Truffle Fries. These are one of life’s simple pleasures. No French Frie tastes the same after you’ve had one graced by the presence of truffle oil.

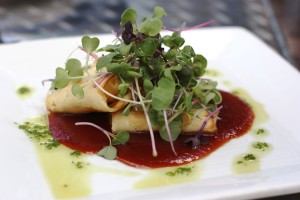
My husband ordered his favorite, Lobster Crepes. Crepes with a creamy lobster-based filling set on top of guava sauce and garnished with microgreens. Sweet, salty, rich – this is the crepe of all crepes.

We enjoyed our starters to their fullest extent and some a bit longer. We had to keep fries on the table and nibbled throughout our meal. You don’t just give Truffle Fries back to the waitress. You finish them even if you are full. I mean, it’s truffle oil!

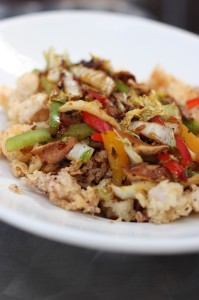
Now on to the main course which for my husband was actually a starter. He was sold on the Fried Calamari which came topped with sautéed peppers, onions and Napa cabbage. This was a bowl of perfection. The calamari was light and tender. It almost melted in your mouth.

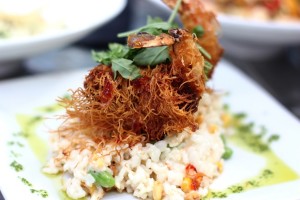
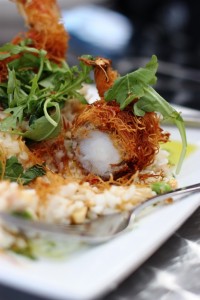
Now for this woven shrimp. To get you thinking in the right direction, consider coconut shrimp with three times the flavor and ten times the creativity.

Woven shrimp is jumbo shrimp covered with shredded filo and fried until crispy. Good, but it gets even better. It is set on top of risotto. Creamy coconut risotto with edamame and corn. Then it’s topped with a chili sauce.

It’s brilliant, classic and a bit breathtaking all at the same time. Hands down my favorite dish at a restaurant.

So remember, Azur, Lexington, Woven Shrimp.

Birthdays aren’t complete without dessert. My mom is a fabulous cake decorator and has owned a shop for years, so growing up I was never without a beautiful birthday cake. Now that I’m all grown up, I usually still get one, but it’s when we are able to get together near my birthday, not always on it.

So I usually have a substitute the day of and this year my husband went to Twisted Sifter, a nearby bakery whom I also mentioned in my post about Danville, Kentucky. On a side note, I might have mentioned rather strongly that I wanted a cake from there.

Inside this beautiful cake was the seasonal flavor, pumpkin pecan with a cream cheese filling covered in buttercream frosting. We kept saying we would freeze part of it, but then we made an excuse everyday as to why we needed another piece. Needless to say, we’ll just have to order another when we get a craving because none made it past my birthday week!

Thirty-two was a big year for me. We got a new pug, I published my first book, I ran my 2nd half marathon and we visited a few new places. All of that has me more than ready to face 33 and excited to find out what’s in store!

Banana Bourbon Scones with Walnuts

October 17, 2011

I seem to be big on adding spirits to my breakfast pastries. I justify this by considering them brunch-friendly. I mean, you break out the champagne or vodka at breakfast and people will look at you like you are a weirdo. Name your breakfast brunch and they’ll have a glass with you.

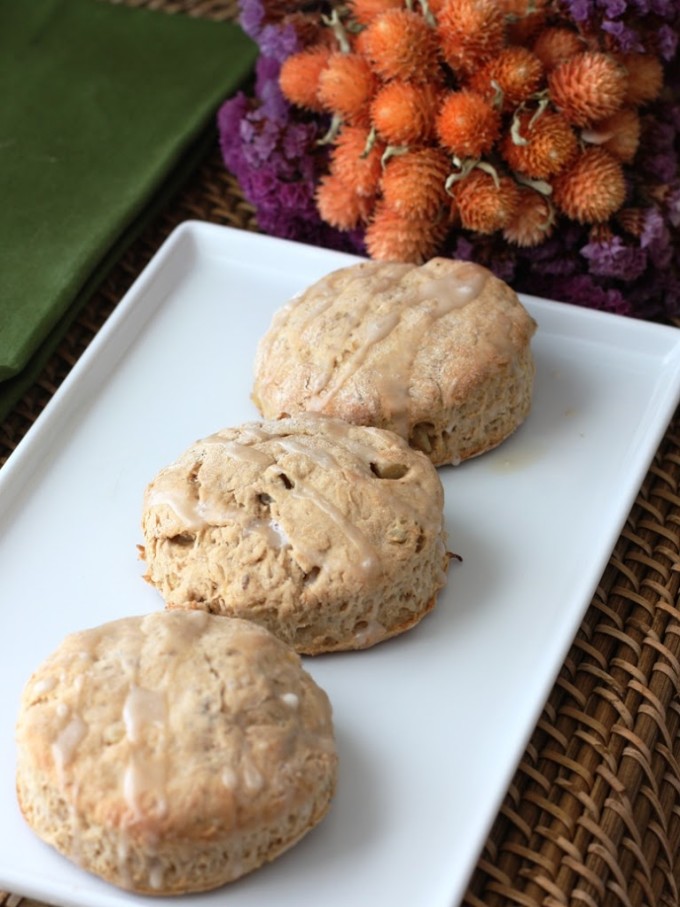
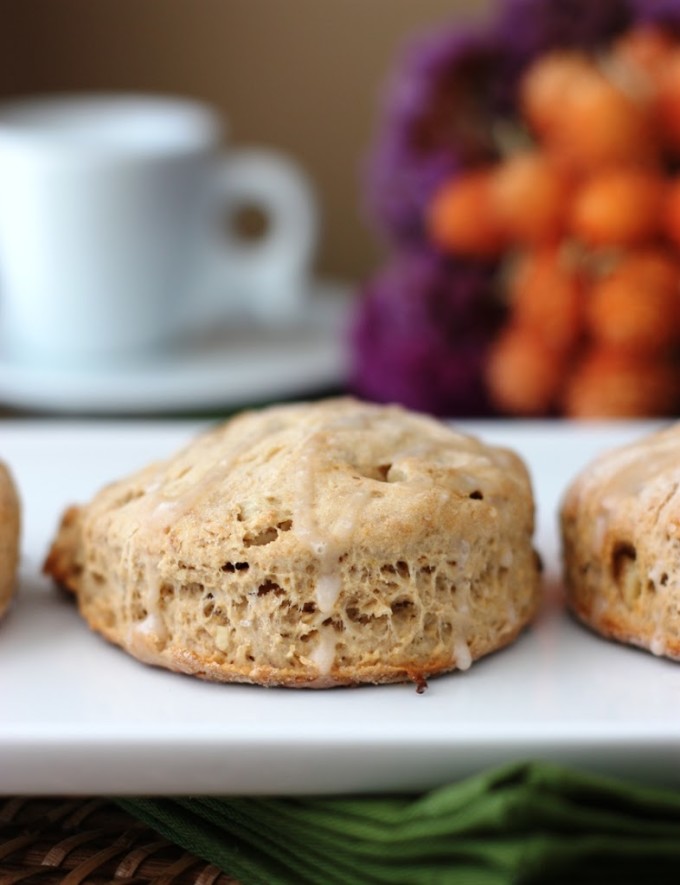
I experimented with bourbon in my scones back in April for Derby with Mint Julep Scones. I was happy with the result, so when those oh-so-common brown bananas were staring at me from the counter, scones came to mind, followed by bourbon.

Banana Bourbon Scones with Walnuts | Fake Food Free

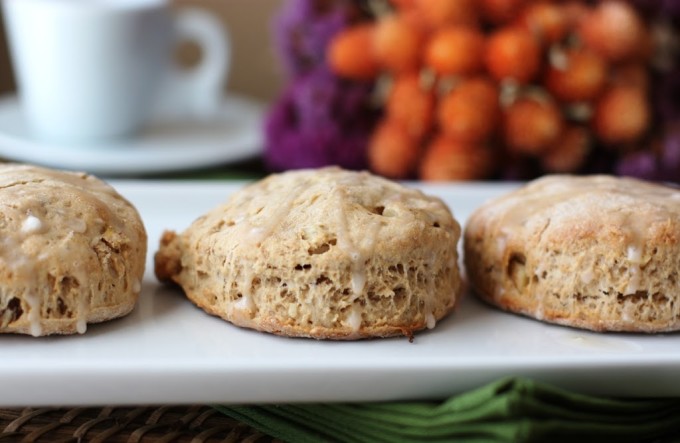
With these scones, I cooked the banana down with butter and bourbon, caramelizing it just a bit. That went into the white whole wheat flour and I added a little crunch with walnuts. These scones are pretty sweet on their own, but for a little seasonal flavor I did a very light drizzle of a maple glaze.

Once again, don’t be afraid to have a little bourbon for breakfast.

Banana Bourbon Scones with Walnuts | Fake Food Free

Banana Bourbon Scones with Walnuts

Makes: 6 to 8 scones

Ingredients


1 overripe banana
1 tbsp unsalted butter
2 tbsp Kentucky bourbon
2 cups white whole wheat flour
2 tsp baking powder
2 tbsp Demerara sugar
½ tsp salt
¼ cup unsalted butter, cold and cubed
¼ cup walnuts, chopped
1-2 tbsp milk or cream

Glaze (optional):
3 tbsp confectioner’s sugar
1 tbsp maple syrup
Milk

Prep

Preheat the oven to 400 degrees F. In a skillet over medium-high heat, melt the butter. Add the banana and mash with the butter. Pour in the bourbon and cook, stirring often, for about 3 minutes. Set aside

In a mixing bowl, combine the flour, baking powder, sugar and salt. Add the butter and blend with a pastry blender or fork until the butter is in pea-size pieces throughout the flour.

Pour in the banana mixture and stir until incorporated. Add the walnuts. Slowly add the milk or cream a tablespoon at a time until a dough forms. It should be firm enough to roll out for cutting the scones.

Place the dough on a floured surface and use your hands (or a rolling pin) to press it out to about ¾ inch thickness. Use a biscuit cutter or drinking glass to cut out the scones. Place on an ungreased baking sheet.

Bake for about 15 minutes, until the scone begins to brown and is firm in the center. Remove from the oven and place on a cooling rack. 

To glaze, mix the confectioner’s sugar with the maple syrup in a small dish. Slowly add milk, one teaspoon at a time, until a thin, drizzling consistency is reached. Drizzle over cooled scones and let set before serving.

Banana Bourbon Scones with Walnuts | Fake Food Free
 
Thanks for reading! All images and content are the property of Fake Food Free unless otherwise stated. Please do not republish full recipes and images without written permission. What is okay? Feel free to Pin images, share links to my posts or share the photo in a round up post with the title of this recipe and a link back to the post. Confused about copyright and food blogs? Here is some helpful information on Recipe Attribution. If you want to use a photo or full recipe, just ask. I’m sure we can work something out.  

Kentucky Food Blogger Weekend Part Two: Incredible Food Show

October 16, 2011

As a general rule, I don’t get star-struck. Honestly the only person who might make me so excited I’d be nervous should I meet her face to face is Dolores O’Riordan of the greatest band ever, the Cranberries. Otherwise, I have favorite actors, singers and chefs, but I couldn’t care less about what they do on a day to day basis. No, I’m not a celebrity magazine readin’ kind of girl.

So when I found out that the Kentucky Food Bloggers were invited to attend the Kentucky Proud Incredible Food Show last weekend with special guests Michael and Bryan Voltaggio, I was thrilled with the offer, but not to the point where I was telling everyone I knew.

Then we got invited to a private meet & greet. Okay, the excitement grew a little. Not because I was star-struck, mind you, but that I thought it would be really great to talk with some chefs with such exciting restaurant concepts like Volt and ink.

Just to fill you in a bit on the Incredible Food Show, this is an event in Lexington, KY that has been growing in popularity by leaps and bounds. It is the place for Kentucky food producers to shine. Not to mention lots of our cookbook authors, established local chefs and those soon-to be chefs coming out of Sullivan University.

For a food blogger like myself it’s an ideal place to network and learn about more ways to promote dreams that have come to life in the form of Kentucky food products.

So this year’s show included a presentation by the Voltaggio Brothers. I headed to the arena with a few other food bloggers not quite sure what to expect. I thought a simple dish would be prepared with a few tips thrown out here and there.

Yeah, not even close.

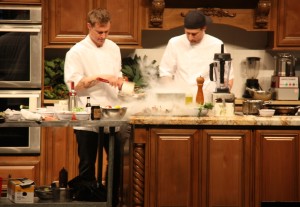
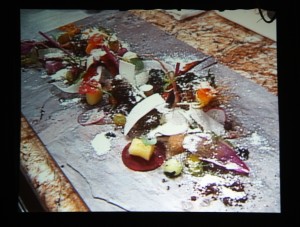
Michael and Bryan were given a huge array of Kentucky products to work with – sorghum, soy sauce, produce. They claimed they had no real plan until they arrived at the show. What they decided on as we watched was an edible, vegetable landscape which reflected their expertise in molecular gastronomy.

I can’t keep all the great tips they had to myself, so here are a few things I learned from the show:

  • Roast parsnips and puree them with dates for a vegetable based spread for toast.
  • Use the greens of leeks by burning them. (Apparently burnt is the new caramelize.) Bake them in an oven like you would kale chips, just take them a step further to bring out more complex flavors.
  • Use a food vacuum sealer to tenderize raw foods. Toss thinly sliced kale with olive oil and seal. The olive oil breaks down the chemical structure of the cell resulting in a flavored vegetable that is tender, but still raw.
  • Soak fresh, thinly sliced jalapenos in ice water for about 2 hrs. The water will extract the heat and you can eat them like pickles.

Little by little, the vegetable landscape came together and things got crazy when it was time for the dressing. They went with a homemade ranch, but a typical dressing poured over the masterpiece just wouldn’t be good enough.

The goal was ranch snow. So out came the liquid nitrogen!

It was incorporated into the dressing and then put in the blender. Finally the ranch sprinkles finished off the dish. This picture is one of the dish via the big screen, so not super clear, but you get the idea.

The show was so much more than I was expecting. Awesome.

For the meet & greet after the show we were welcomed by the IFS staff into a room with an array of truly Kentucky foods – country ham biscuits, bourbon balls and Kentucky wines. When we finally got the chance to speak with the brothers we introduced ourselves as KY Food Bloggers and I was delighted when their face lit up a bit which showed recognition of what we do.

Funny, our first conversation went to their tattoos – Michael’s ink (his restaurant) and Bryan’s pig and rabbit which represented his son and daughter, one born in the year of the pig and the other in the year of the rabbit. After that we talked a bit about their restaurants.

Bryan shared about how Volt source’s food from several local CSAs in Maryland and often get the overflow which challenges them to use products and always be creative.

Michael told us a bit about ink.sack, the lunch extension of ink restaurant. They make everything in-house such as the corned beef tongue in their Reuben. They focus on small sandwiches so you can order two or three varieties. I have to say I was incredibly intrigued by the sandwich with curried chicken skin!

After the show I had a long time to browse vendors. My husband ran the Bourbon Chase over the weekend, a 200 mile overnight relay through bourbon country. They finish in downtown Lexington so it was a big weekend all around. I got to chat with vendors and authors while I waited to go to the finish line.

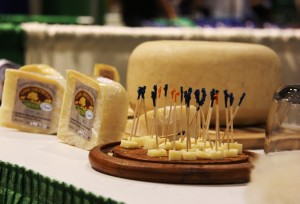
I ended the day with a few favorites so I’ll tell you about those. The first is Good Shepherd Sheep’s Milk Cheese from eastern Kentucky. Our first sheep’s milk creamery in Kentucky. I talked with them about a possible tour in the future and I’m hoping to make that happen in the spring when all the baby lambs are around! The cheese was a hard cheese with a smooth flavor. I’m due for a gourmet cheese purchase and this is on the list.

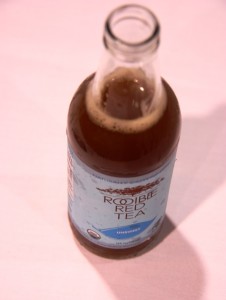
Next was Rooibee Red Tea out of Louisville. I had a nice talk with Jeff who you’ll see in the video if you check out the site. I still have quite a bit to research on Rooibos Tea and its extract, but this stuff is delicious. I tried an unsweetened version – no artificial sweeteners, certified organic. It is so nice to have bottled drink options that aren’t soda!

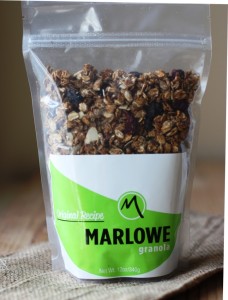
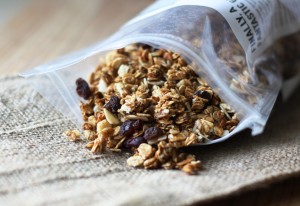
Finally, on my way out, I ran into Marlowe Granola. To think, I almost missed this booth! Now, I’m all for making my own granola, but when I find a product that uses the same ingredients I would, I have no problem buying it.

Marlowe Granola is also a perfect example of a great story and a dream that came to life. I talked with the owners a bit and the granola is “Mom’s recipe” that’s been made for over 30 yrs. They use local Kentucky sorghum as well. We even chatted a bit about food photography as the owner’s daughter took the photos for the site and they are gorgeous. I guess I should also mention that the product is darn tasty too! We’ve been enjoying it with milk and yogurt all week.

I can’t believe it’s been a week since our fun food blogger weekend, but now we are looking forward for all that is to come with such a great group of people who share the desire to support Kentucky foods!

Disclosure: The experiences and foods mentioned in the post were given to me free of charge. I was not required to post about them and received no compensation for doing so.

Roasted Pumpkin with Gorgonzola

October 12, 2011

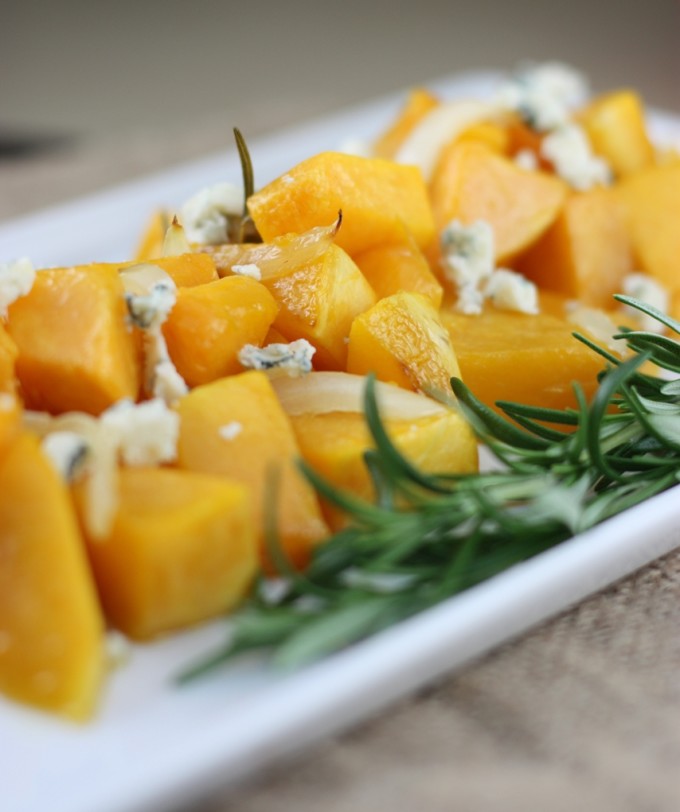
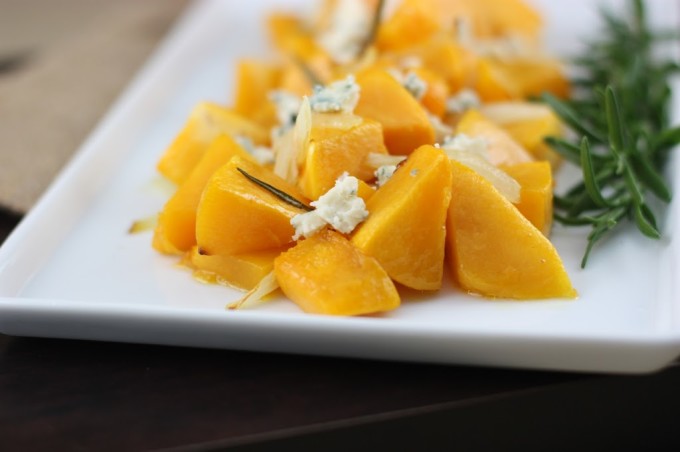
If you need a new roasted pumpkin recipe, look no further! This dish combines the flavors of sweet winter squash with rich Gorgonzola cheese. It’s a recreation of a dish I enjoyed when we lived in Brazil. 

Roasted Pumpkin with Gorgonzola | Fake Food Free


About three months before we moved back to the US and ended our time living abroad in Brazil, I took a trip. My husband was headed off to Ireland on business and I just happen to find a crazy good deal on a flight to Belo Horizonte.

I’d met a couple expats there through blogs, so I hopped a plane and headed off on my own little adventure. My new friends there showed me the ins and outs of the city of Belo Horizonte as well as Ouro Preto. To this day Ouro Preto ranks as one of my favorite places visited.

Ouro Preto - Brazil | Fake Food Free

At the beginning of my trip, we stopped by one of their favorite places for lunch. A per kilo buffet lunch which was the most common form of lunch I came across while living in the south and visiting the north.

The food was good and the selection was pretty typical. Fresh salads, pastas, meat and fruit. Although there was one dish that stood out and I’ve never gotten around to making it until now.

Roasted Pumpkin with Gorgonzola | Fake Food Free
 

It’s one of those dishes that is so simple, but it’s the simplicity that makes it so good. It’s basically roasted pumpkin topped with crumbled gorgonzola. I’ve never been exactly sure of the herbs or flavorings used in the original dish so I made up my own with a bit of rosemary and onion.

This makes such a great side dish or top it with some roasted walnuts or black beans for protein and call it a meal.

Roasted Pumpkin with Gorgonzola | Fake Food Free

Roasted Pumpkin with Gorgonzola

Makes: 2 – 3 servings

½ small pumpkin, peeled and cut into large chunks (about 2 ½ cups)
1 sprig of rosemary
¼ medium onion, sliced
Olive oil
¼ cup crumbled Gorgonzola or Blue Cheese
Salt and pepper to taste

Prep

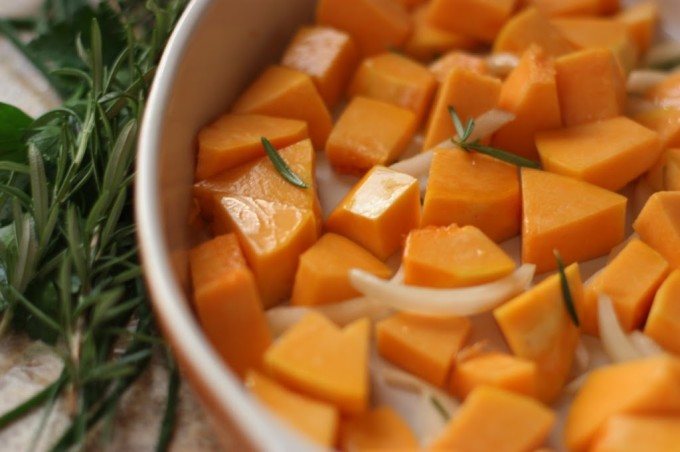
Preheat the oven to 400 degrees F. Place the pumpkin in a single layer in a baking dish. De-stem the rosemary and place the leaves with the pumpkin. Add the onion. Toss to coat all ingredients with olive oil.

Bake for 10 minutes. Stir the pumpkin, and bake for 10 more minutes or until the pumpkin is tender, but not mushy. Remove from the oven, salt and pepper to taste, place the pumpkin in a serving dish and top with crumbled Gorgonzola. Serve immediately. 


Thanks for reading! All images and content are the property of Fake Food Free unless otherwise stated. Please do not republish full recipes and images without written permission. What is okay? Feel free to Pin images, share links to my posts or share the photo in a round up post with the title of this recipe and a link back to the post. Confused about copyright and food blogs? Here is some helpful information on Recipe Attribution. If you want to use a photo or full recipe, just ask. I’m sure we can work something out. 
 
Want to create beautiful food and product photos that you can't wait to share?!
Discover your style, control the light, and shoot using the tool you know how to use (yes, your phone included). Learn about free resources, Live Q&As with Lori, and online courses you can take from anywhere in the world!
We respect your privacy. Unsubscribe at any time.