Archives

Holiday Baking

December 15, 2011

At the beginning of the holiday season I set a goal for what I want to bake; then I plan to fall short of that goal. I know that sounds awful, but there is never enough time to make all I would like to and I find if I prepare myself I’m not disappointed when it all doesn’t get done.

I love to bake and make candies, but there is something about the marathon sessions of the holidays that truly wear me out. I always feel so motivated when I start, but by the time I dry the last dish I’m ready to throw in the towel for a while. Fortunately, I get my groove back in time for Valentine’s Day.

This year wasn’t quite so bad. I was much better at taking on only what me and my mixer could handle. I had planned on trying many new things this year, but ingredients that required extra errands made me choose to fall back on some old favorites. 

I did throw one new candy into the mix – peanut butter cups! I’d never made my own before. The recipe isn’t mine, but it is one that I will keep around for many holidays to come.

Here’s a sampling of this year’s treats. The links will lead you the original posts with the recipes.

I put a twist on my Cafe & Cream Shortbread this year, literally. Instead of the original checkerboard shape, I simply rolled out each batch of dough after it had chilled for 30 minutes. Next I put one on top of the other, rolled and sliced. I actually think I like them better this way. It is definitely a less labor intensive process.

Recipe: Cafe & Cream Shortbread

The Ginger Rum Molasses Cookies I reviewed last year from the cookbook Baked Explorations remain my favorite gingerbread. This year I cut them into gingerbread men (and women) and Christmas trees. I iced a few for variety as well. If you like a soft gingerbread, don’t roll the dough too thin. Keep it a bit thicker, at least a quarter of an inch, and they will be perfect.

Recipe: Ginger Rum Molasses Cookies

Now for the newbie this year. These Peanut Butter Cups come from Brown Eyed Baker. The only change I made was I used dark chocolate chips (60%) and I added about 1 tbsp of unsalted butter instead of vegetable shortening to smooth the chocolate. These must be hidden. Much too dangerous.

Recipe: Homemade Peanut Butter Cups

I will be taking a short blogging break until after Christmas. I hope you have a wonderful couple of weeks regardless of what you may or may not celebrate. Here it will be Christmas followed by a much anticipated New Year. Happy Holidays!

2011 International Blogger Holiday Cookie Exchange

December 13, 2011
Christmas Cookie Recipes

Let the parade of cookies begin!

Over the past few weeks several bloggers have been trading recipes, baking up treats and posting about their goodies. The 2011 International Blogger Holiday Cookie Exchange has been a huge success.

So get your oven preheated and your flour measured, and check out these great recipes from food bloggers around the globe!

Picture Perfect Cooking – Pumpkin Cookies with Brown Sugar Glaze
The World in My Kitchen – Double Chocolate Snowball Cookies
Quick and Easy Cheap and Healthy – Cranberry Pistachio Cookies
Urban Sacred Garden – Cinnamon Pecan Pinwheels
Flex Your Food – Mexican Wedding Cakes
The Rauber House – No Bake Peanut Butter Cookies
Open Mouth Insert Cookie – Oatmeal Raisin Drop Cookies
The Heritage Cook – Green Tea Shortbread Cookies
Mele Cotte – Chinese Almond Cookies
Eats Well with Others – Sweet Potato Chocolate Chip Cookies
Fake Food Free – Crunchy Peanut Butter Date Balls
My McDonald Meal – Biscotti Regina
 
Each of the photos in this post are the property of the participating bloggers.

Eggnog Latte Cupcakes

December 8, 2011
 My favorite holiday coffee drink becomes a dessert in this recipe for eggnog latte cupcakes!
 Eggnog Latte Cupcakes | Fake Food Free 
 

What’s the first food or drink you think of when you hear the word culture?

For me, it’s coffee.

Coffee brings about memories of travel and some of my favorite places in this world. And it’s not just the coffee itself that I enjoy; it’s the culture that surrounds it. I love to smell it brewing in the morning, and sharing a cup over conversation with my husband or friends. I find it fascinating to watch it grow in the fields, and I feel fortunate to support those who grow it as they share a piece of their world with me in each cup. 

So a few weeks ago when I was asked if I would like to review a very special coffee, I was given a great opportunity to offer my support. 

Equal Exchange buys products directly from small-scale farmer cooperatives for Fair Trade prices. Then they pass these amazing things on to us in the form of chocolate, cocoa, tea and coffee. The Congo Coffee Project was created by Equal Exchange in partnership with Panzi Hospital in the Democratic Republic of Congo. 

The Congo Coffee is a blend of African coffee beans that was described to me as smooth and balanced. I have to agree. I took it to work with me this morning and enjoyed every sip. This is a coffee that is worth an online order. 

This is coming from someone who still recruits friends and colleagues to bring me coffee from Brazil, and who stocks up on 100% Blue Mountain coffee any time my feet touch ground in Jamaica.  Yes, I love quality coffee. 

And now is a great time to place that order as Equal Exchange will donate $2.00 per bag sold through their retail web store to the Panzi Foundation. The Panzi Hospital offers treatment, counseling and aftercare programs for over 2,000 survivors of sexual violence each year. 

So, go. Buy the coffee-lover in your life a bag for the holidays. 

When I agreed to review the coffee, I knew that I couldn’t show you a simple cup of coffee and be done with it. Although, a simple cup alone is worth a photo and sip. No, I needed to figure out a way to get it into some of my baking. 

My favorite holiday coffee drink turned cupcake? That will work.

 Eggnog Latte Cupcakes | Fake Food Free

 
These Eggnog Latte Cupcakes start with a rich chocolate, coffee-flavored cake that uses virgin coconut oil, mascavo (muscovado) sugar and white whole wheat flour. Feel free to substitute butter, brown sugar and your favorite flour, if you desire. 

Although, I will say that these are made only slightly sweet on purpose. The eggnog frosting on top is the real deal and full of sugar. I wanted a less sweet cake to balance out the frosting so my final produce wouldn’t make your teeth hurt. The minimally refined sugar and strong brewed coffee did the trick.

Eggnog Latte Cupcakes
Makes: 8 cupcakes
 
Ingredients
 
Cupcakes 
3 ½ tbsp virgin coconut oil, soft, at room-temp
½ cup mascavo or muscovado sugar
2 large eggs 
3 tbsp Congo Project Coffee, brewed strong and cooled 
¼ cup cocoa powder 
½ tsp baking soda 
½ cup white whole wheat flour 
1/8 tsp nutmeg 
½ cup plain Greek yogurt
Eggnog Frosting 
½ stick (1/4 cup) unsalted butter, softened
2 ½ cups confectioners sugar 
7 tbsp eggnog 
1 tbsp coffee, ground extra fine
Prep
Preheat your oven to 350 degrees F. Line a muffin tin with 8 cupcake liners. 

In a bowl of a mixer fitted with the paddle attachment, combine the coconut oil and sugar. Mix for about 2 minutes, until almost smooth. Beat in the eggs, one at a time. Add the coffee. 

In a separate bowl, stir together the cocoa powder, baking soda, flour and nutmeg. Gradually add the dry ingredients to the batter. Mix just until combined. Fold in the yogurt. 

Divide the batter evenly among the 8 cups in the tin. Bake for 18 minutes or until a toothpick inserted in the center comes out clean. Remove from the oven and cool completely. 

For the frosting, combine the butter and confectioner’s sugar in a mixing bowl and mix on medium and then medium-high until well combined. Slowly add the eggnog, 1 tablespoon at a time. Frost your cupcakes once cool and sprinkle each with a dusting of finely ground coffee. 

Eggnog Latte Cupcakes | Fake Food Free 

 
Eggnog Latte Cupcakes | Fake Food Free

Disclosure:  This coffee was sent to me free of charge. I was not required to use it in some pretty rockin’ cupcakes or write about it, and I received no compensation for doing so. 

Jerk-style Country Ham and Pineapple Tamales

December 6, 2011

This is the fourth in my series of Cookbooks for Christmas. Be sure to check out The Fundamental Techniques of Classic Bread Baking, The Vegetarian Option and How to Cook Indian.

Before I moved to Kentucky, country ham was nothing more than the step-child of meat options on the Cracker Barrel breakfast menu. I had no idea why someone would select ham over bacon or sausage despite the fact that they all came from the same animal.
Then I moved to Kentucky. Suddenly country ham is everywhere. There are country ham biscuits as party appetizers and skillet-fried country ham for breakfast. It is a regular offering in the meat case at my local butcher, and my most recent job exposed me to a youth agriculture program where the kids made their own country hams to auction off at the local stock sale.
See, I told you. It’s everywhere.
My first encounter with country ham had me gasping for a drink of water. Salty. Very salty. Things haven’t changed much since that first impression, but I have found that I like country ham in things. Meaning, those things it is in helps balance the salty flavor.
A few weeks ago I got a copy of the cookbook Ham: An Obsessionwith the Hindquarter by Bruce Weinstein and Mark Scarbrough. I never knew there was so much one could do with ham. The book contains 100 unique recipes from the around the world.

Guess what is featured from my part of the world. Yep, country ham.
As I flipped through I saw recipes for Collards and Country Ham, Country Ham Butternut Squash and Chile Stew, and Country Carbonara. That doesn’t include all the things that don’t use country ham such as Steamed Ham Buns and Roasted Fresh Ham with Apple Wheatberry Salad.
If you’ve read a cookbook by Weinstein and Scarbrough before you know it’s as much about the text as it is about the recipes and photography. It is part comical novel, part recipe book. I was immediately sucked into the story about the taking of their pig from farm to market.  

So back to this country ham.

One thing that I wasn’t expecting (nor would most Kentuckians), was to see country ham Caribbean-style with a side of Mexican cuisine thrown in. The second I turned to page 151 I knew what I was making.

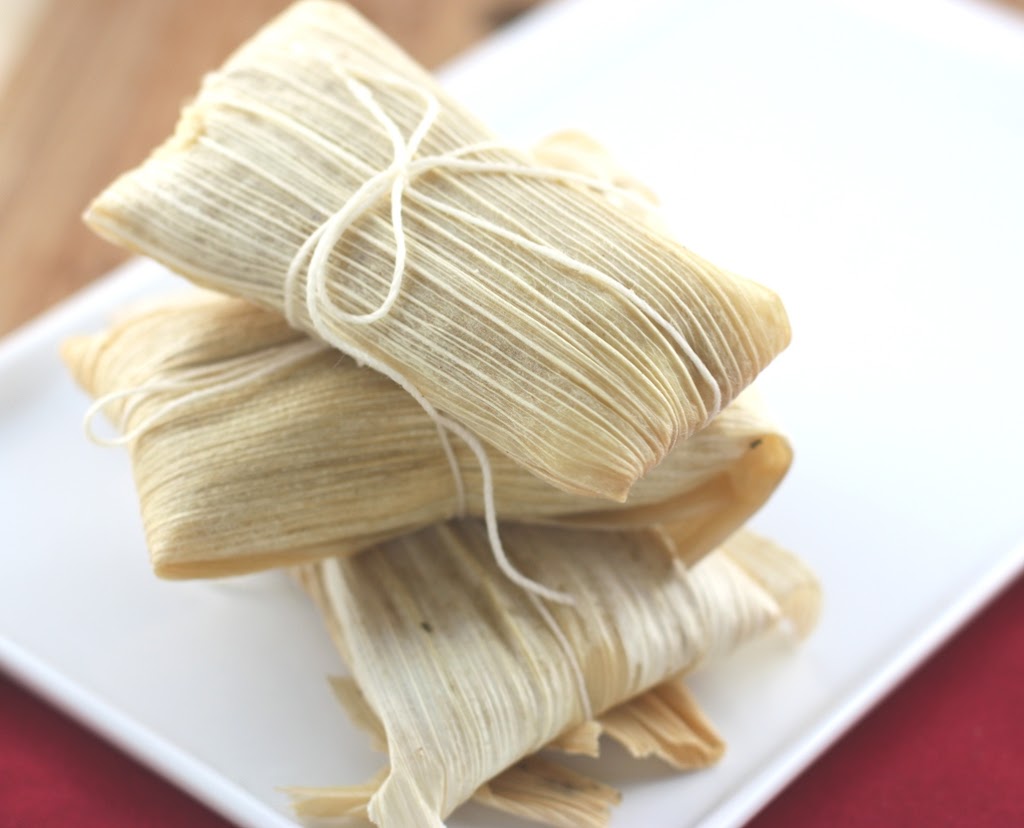
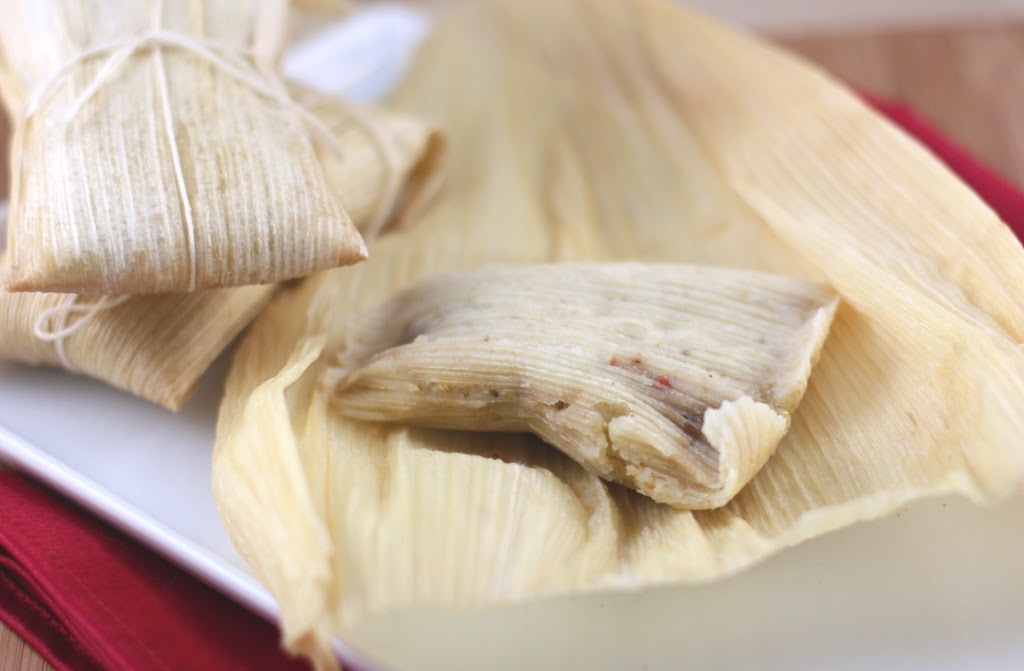
Jerk-style Country Ham and Pineapple Tamales.
Sounds pretty amazing, right? Not only was I excited about these flavors, but this was my very first time making tamales. As with post things I put off, I was left thinking – why in the world did I wait so long?
These tamales are simple to make. The construction takes a little time, but not so much that it’s overwhelming.
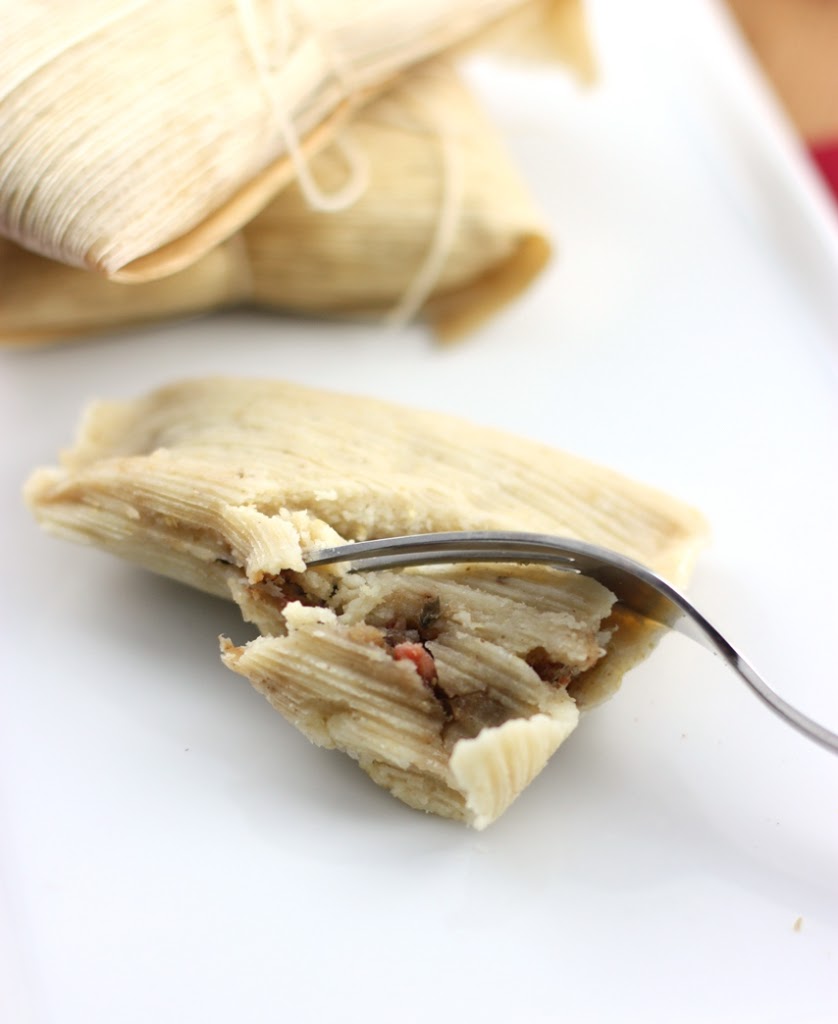
Now, let’s talk about these flavors. The spices, pineapple and rum are just what the country ham needs. The tamales are sweet with just a touch of saltiness. With all of the spices, the flavor explodes in your mouth with each bite. This recipe is such a creative representation of Kentucky meets Caribbean!

Jerk-style Country Ham and Pineapple Tamales
Reprinted with permission from Abrams Books

Makes 20 Tamales

Call this Bruce’s culinary free-for-all: a Caribbean filling made with American country ham and served as a Tex-Mex delicacy in corn husks. There’s not much more I can say, except they freeze well. Make them in advance, then wrap them individually in plastic and freeze for up to 3 months; thaw on the counter for 30 minutes before steaming as directed.

20 large, dry corn husks for tamales
6 ounces dried pineapple
10 ounces cooked country ham, rind removed and discarded, the meat cut into little cubes (a little less than 2⁄3 cup)
3 medium scallions, cut into 2-inch pieces
1/4 cup dark rum such as Myers’s
2 tablespoons minced peeled fresh ginger
2 tablespoons packed dark brown sugar
2 tablespoons red wine vinegar
2 teaspoons ground cumin
1 teaspoon ground coriander
1 teaspoon dried oregano
1 teaspoon dried thyme
1/2 teaspoon ground allspice
1/2 teaspoon ground cloves
1/2 teaspoon grated nutmeg
1/2 teaspoon cayenne
1/4 teaspoon garlic powder
4 cups instant masa harina
3 cups very hot water
2⁄3 cup peanut oil
1 teaspoon onion powder
1. Put the corn husks in a large bowl and cover with boiling water. Set them aside to soak until soft, about 30 minutes. If they all won’t stay submerged, place a little plate over them in the bowl to force them down into the hot water.
2. Meanwhile, put the dried pineapple in a medium bowl and cover with boiling water. Soak for 10 minutes, then drain in a colander set in the sink. Chop the pineapple into tiny bits.
3. Transfer those pineapple chunks to a food processor fitted with the chopping blade. Add the ham, scallions, rum, ginger, brown sugar, vinegar, 1 teaspoon cumin, the coriander, oregano, thyme, allspice, cloves, nutmeg, cayenne, and garlic powder. Pulse until well chopped and thoroughly blended but not pureed. This is the filling for the tamales, so you want some tooth in the thing—in other words, no baby food.
4. Mix the masa, hot water, oil, onion powder, and remaining 1 teaspoon ground cumin in a large bowl to make a wet dough.
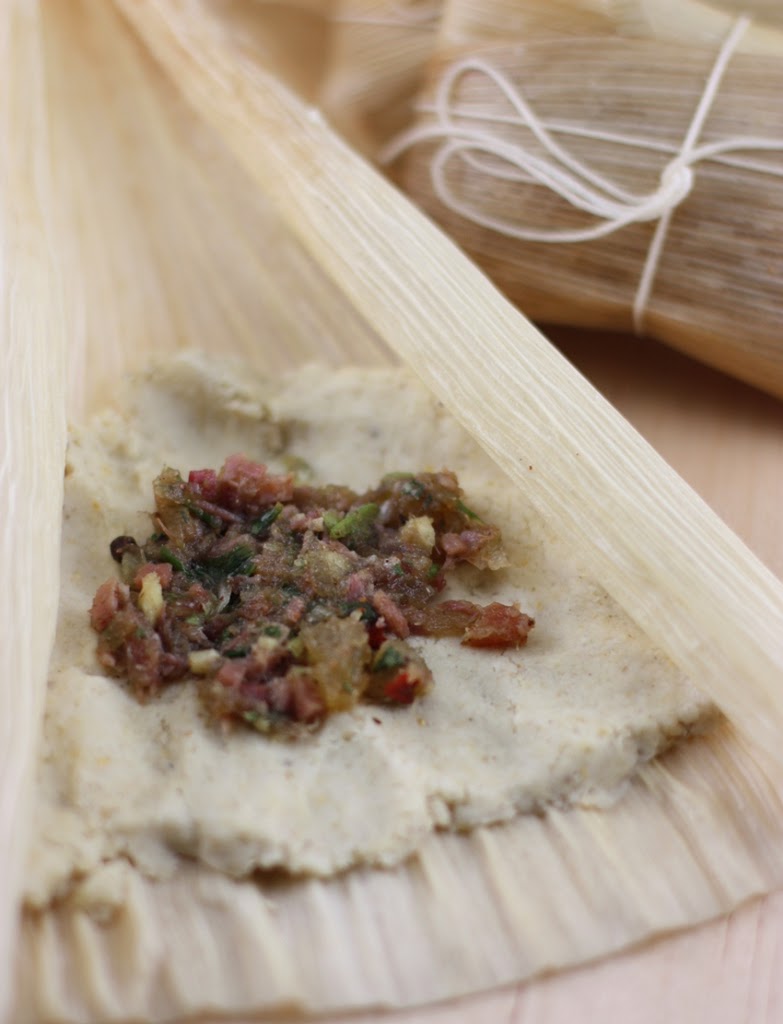
5. Take a corn husk out of the hot water and spread it on your work surface so that its natural curl faces you. Spread a generous 1/4 cup of the masa dough into the corn husk, smoothing it out but also keeping it near the thicker bottom of the husk, like a little bed of dough for the filling. Spread the dough out to the sides a bit so that when you roll the husk closed the long way, that dough will encircle and even cover the filling.
6. Place about 11/2 tablespoons of the ham mixture in the center of the dough in the corn husk.
7. Fold the sides of the husk up and over the filling, thereby also bringing the masa dough up and around the filling inside. Make sure the sides overlap and fully close, holding the filling tightly inside. Fold the wider bottom up over the husk and do the same with the narrower top. Tie these in place with butchers’ twine so the tamale will stay closed.
8. Repeat steps 5 through 7 with the remaining husks.
9. Set up some kind of steaming contraption: either a large vegetable steamer in a large saucepan with about an inch of so of water in the bottom, or a couple of bamboo steamers placed over a wok with a similar amount of water in it. Bring the water to a boil over high heat.
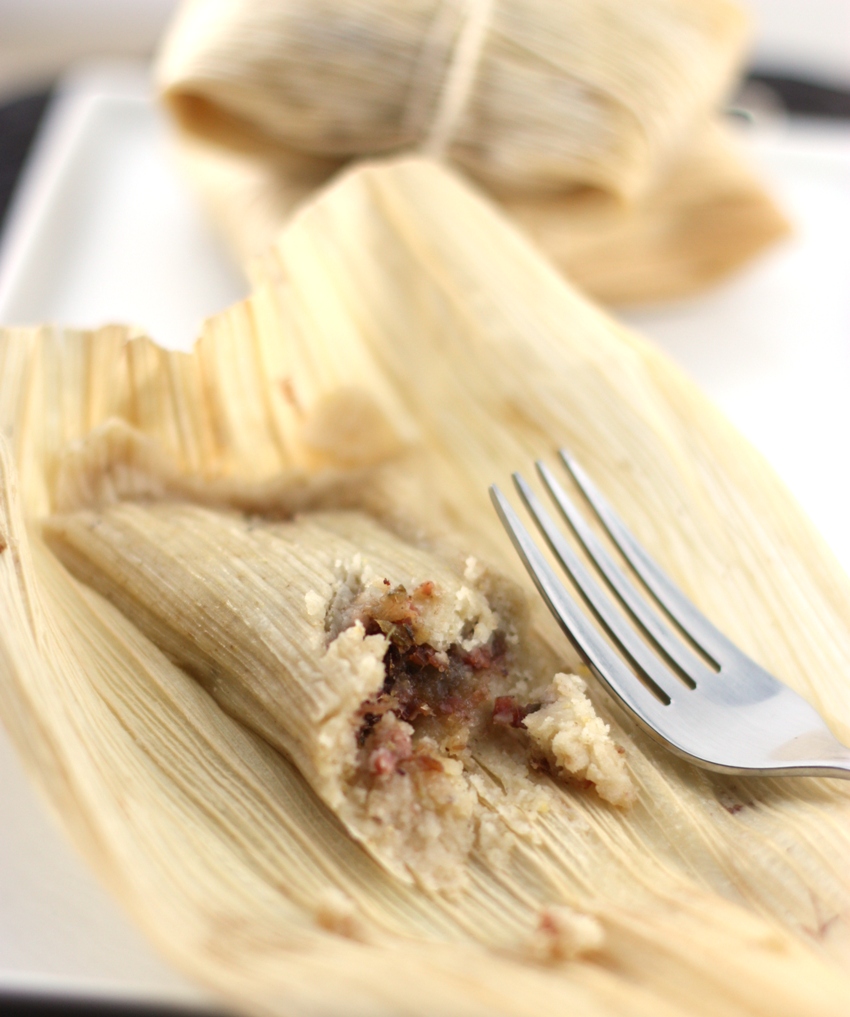
10. Stand the tamales up in the vegetable steamer or lay them in the bamboo steamers. Cover, reduce the heat, and steam for 40 minutes, checking the water occasionally and adding more if necessary. In no event should the water rise and come in contact with the tamales. You want the water gently simmering in the pan or wok but not boiling vigorously. Once steamed, set the tamales aside for 5 minutes before serving, just so no one gets a steam burn from the incredibly hot filling inside. And don’t be a Gerald Ford. In the 1976 presidential race, he tried to eat a tamale still in the husk while campaigning in Texas. He lost the state. Unwrap the husk and fork out the tender filling inside.

Crunchy Peanut Butter Date Balls

November 30, 2011
A few weeks ago I put out a call out for bloggers interested in the 2nd Annual International Holiday Cookie Exchange. I’m excited to say that we had nearly 20 people respond and they are all now sharing recipes and baking away.
The idea behind the exchange is to share cookies or candies without the shipping; so we share recipes instead. Over the next couple weeks those participating will be posting about the recipes they received from a fellow blogger.
So now it’s my turn. There is no way I could help host such a fun event without participating myself!
My recipe comes from Melissa of My McDonald Meal. Melissa just happens to be a fellow Kentucky Food Blogger and friend. If you haven’t checked out her blog, definitely stop by. She creates delicious, real food recipes that are kid-friendly and approved by her beautiful daughters.  
When Melissa sent me the recipe, she wrote:
I tend to stick with old time favorites when it comes to holiday cookies; not something you would likely see on my blog during the rest of the year… I’m going with a favorite of mine from my childhood. — Date Balls. Sounds kind of boring but I found a way to kick these up a notch!
I have to say, while I’ve heard of Date Balls, I had never made them. I’ve used dates in a few recipes, but they aren’t a staple for me. So, long story short, I had no idea what to expect.
Well, Melissa wasn’t kidding when she said she kicked these up a notch. Wow, they are so good! I’d be tempted to say that even if you are not a date fan, you will like these. The flavor of the nuts and peanut butter really come through and the cereal adds a great crunch.
I got a little creative with my dark chocolate; a different style depending on how much you like – a drizzle, half and half or a solid dip.
Crunchy Peanut Butter Date Balls
Recipe from My McDonald Meal
1 cup natural peanut butter (crunchy or smooth)
1 cup confectioners’ sugar
1 cup finely chopped almonds
1 cup brown rice crispy cereal (you can use regular rice crispy cereal too) 
1 cup finely chopped dates (pits removed)
1 tbsp unsalted butter, melted
4 oz. dark chocolate
Mix peanut butter and sugar together in a large bowl. Add in almonds, cereal, dates, pour in butter and combine.
Scoop out rounded tablespoons of mixture to make balls and place on a wax paper coated cookie sheet. Place balls in freezer for about 10-15 mintues. Melt chocolate in a double boiler. When balls are ready, dip the top of them in the melted chocolate and let cool. Makes about 50-60 balls. (I made mine a bit larger and came out with about 30). 
Stay tuned for the official round-up of the International Blogger Holiday Cookie Exchange the week of December 12! There will be lots of great ideas for your cookie tray.

Cookbooks for Christmas: Tandoori Chicken from How to Cook Indian

November 25, 2011

This is the third in my series of Cookbooks for Christmas with the purpose of sharing a few gift ideas for the foodie in your life. Be sure to check out the review and recipe from my other posts The Fundamental Techniques of Classic Bread Baking and The Vegetarian Option.


After a week of eating traditional US favorites at every meal, it doesn’t take long for me to start craving something a little more culturally diverse in flavor. With this in mind last year, I set a goal for myself at the beginning of 2011 to cook more ethnic foods, specifically Thai and Indian. I’m sad to say I’ve failed miserably. 
I’ve done some recreation and my own versions of Asian and Indian-inspired foods, but my real goal was to cook authentically. Maybe I bit off more than I could chew, but with only a few weeks left in the year, I’m not ready to give up just yet. 
So with a craving to put something different on my plate, I turned to my new cookbook – How to Cook Indian by Sanjeev Kapoor. This monster of a cooking resource has been my reading material of choice for the past few weeks. Like a mystery novel I can’t seem to stop turning the page to see what happens next – to the curry, the coconut milk, the ground lamb and the chicken. 
I find this cookbook ideal for anyone ready to add a little diversity to their kitchen whether beginner or advanced. There are over 500 recipes. Yes, 500. Everything from what I consider standard Indian foods (which simply means they can be found on the buffet at my favorite Indian place here in town) to things I have never heard of before. It’s been an adventure in culinary discovery for me. 
No food photography in this one, but those spaces are filled with even more recipes and instructions that are straight forward and easy to understand. The book begins with base spice mix recipes for things such as Chai Masala and moves on to everything from vegetarian dishes, to lamb, to chicken, to fish. 
For each recipe name the original is given followed by a description for those of us not well versed in cuisines or languages of India. There is Pyaaz Ki Tarkari (Onions with tamarind), Kolhapuri Sukka Lamb (Spicy coconut lamb) and Maa Chole Di Dal (North Indian Lentils) to name just a few. 
This weekend my husband brought home some fresh chickens so we decided to go with what I consider rather classic – Tandoori Chicken. I say we because while he doesn’t make an appearance on the food blog often, he helped with this dish as much as I did. 
This was my first time making Tandoori Chicken at home and I have to admit, it was pretty darn easy. As long as you take into consideration marinating times with your preparation I have a feeling you will think so too. This recipe calls for either Kashmiri red chili powder or paprika powder which is what gives the chicken that identifiable red color. Mine didn’t turn out as red as varieties I’ve had before, but I think that is because I did use paprika instead of the chili powder.
The flavor of the chicken is outstanding. With all the spices and marinating flavor is fully infused into the meat. Delicious. And with 499+ recipes to go, there is a lot more where that came from!
Tandoori Chicken
Chicken marinated in spicy yogurt and baked
 Reprinted with permission from Abrams Books
This darling of the Indian palate, traditionally cooked in a clay oven called a tandoor, is one of my per­sonal favorites. Leaving the bone in ensures that the final dish will be succulent and juicy.
Serves 4.
1 (1¾-pound/800-gram) whole bone-in chicken
1 teaspoon Kashmiri red chile powder or paprika powder
1 tablespoon freshly squeezed lemon juice
1 teaspoon table salt
For the marinade:
1 cup (250 grams) plain yogurt, drained until thick
2 tablespoons fresh ginger paste
2 tablespoons fresh garlic paste
1 teaspoon Kashmiri chile powder or paprika powder
½ teaspoon table salt
2 tablespoons freshly squeezed lemon juice
½ teaspoon garam masala
2 tablespoons filtered mustard oil
To cook and serve:
2 medium red onions
Melted butter
½ teaspoon chaat masala
2 lemons, cut into wedges
1. Cut the chicken into 4 pieces: 2 leg quarters and 2 breast halves. Make incisions in the flesh with a sharp knife. Put the chicken in a deep bowl. 
2. In a small bowl, stir together the chile powder, lemon juice, and salt, and rub it onto the chicken pieces. Cover the bowl with plastic wrap and put in the refrigerator for 30 minutes to marinate. 
3. Make the marinade: Put the yogurt in a bowl, add the ginger paste, garlic paste, chile powder, salt, lemon juice, garam masala, and mustard oil, and stir. 
4. Add the marinade to the chicken pieces and toss so that all the pieces are well covered with it. Cover the bowl again and put it in the refrigerator for 3 to 4 hours to marinate. 
5. Cut the onions into round slices and then separate the rings. Put in a bowl of iced water and soak for 30 minutes. Drain well and set aside in the refrigerator until needed. This will keep the onions crisp. 
6. Preheat the oven to 400°F/200°C. Put the chicken pieces onto metal or presoaked wooden skewers, arrange in a single layer on a rimmed baking sheet, and cook for 10 to 12 minutes or until almost cooked through. Baste with butter and cook for 8 minutes more. 
7. Sprinkle with chaat masala and serve hot with the onion rings and lemon wedges. 
Disclosure: A review copy of this cookbook was sent to me free of charge. I was not required to post about it and received no compensation for doing so. 

Caribbean-style Pumpkin Soup

November 20, 2011
This creamy pumpkin soup uses scotch bonnet peppers for a subtle, pleasant heat.
 
Caribbean-style Pumpkin Soup | Fake Food Free


When we travel to Jamaica we always look forward to the pumpkin soup. Although the version I make at home uses a similar squash, I like the pumpkin soup of the Caribbean much better. It has taken me a long time to figure out what exactly makes the difference in the flavors.


First of all, there are the spices. Despite the fact I use pumpkin in all sorts of dishes, the temptation to put in a seasoning such as cinnamon or nutmeg is a force I can rarely overcome. After years of only eating pumpkin pie and bread it’s as if my brain says – there’s pumpkin, must add some variation of pumpkin pie spice – even when it’s a savory dish.


Second is the heat. I never added any type of hot peppers to my version, but I now believe that is what makes a pumpkin soup outstanding. It isn’t spicy; it’s just a mild, warming heat in the back of your throat after each bite. That’s accomplished with Scotch Bonnet peppers which I just happened to grow in our garden this year. They came on late, but I have a nice bag full in the freezer to pull from for occasions like this one.

Scotch Bonnet Pepper | Fake Food Free 
 

On one of our recent trips I picked up the cookbook, Eat Caribbean by Virginia Burke. Inside is a recipe for Pumpkin Lobster Bisque. Now pumpkin I had, but lobster I did not, so I tried modifying the recipe hoping it would turn out like the pumpkin soups we’ve had while traveling.


It’s definitely the closest I’ve come and much better than my standard version of winter squash soup. In this case, I think it’s the closest I want to get. Sometimes you want to make sure that there is still plenty of reasons to travel for the real thing.

Caribbean-style Pumpkin Soup | Fake Food Free


Caribbean-style Pumpkin Soup

Adapted from Pumpkin Lobster Bisque from Eat Caribbean by Virginia Burke

Makes: 4 to 6 servings

Ingredients

2 tbsp butter
3 cloves garlic, minced
1 small onion, chopped
4 cups mashed roasted pumpkin 
3 tbsp of tomato sauce (or 2 plum tomatoes, peeled and chopped)
1 sprig fresh thyme
1 whole scotch bonnet pepper
1 ½ cup chicken or vegetable stock
1/3 cup cream or half and half
1 tsp fine ground sea salt, or to taste
1/4 tsp ground black pepper, or to taste
Croutons for garnish
 
Prep
 
In a small soup pot over medium-high heat, melt the butter and add the garlic and onion. Cook for about 3 minutes, reduce the heat if necessary to prevent burning the garlic. Add the pumpkin and tomato sauce. Next, add the thyme and scotch bonnet pepper. 
 
Pour in the stock, stir and bring to a simmer. Simmer over low to medium heat for 10-15 minutes, stir occasionally. If you want more heat, gently pierce the scotch bonnet pepper as it cooks. 
 
Remove the thyme sprig and pepper and discard. Remove the soup from the heat. Using an immersion blender, puree all the ingredients. Or you can transfer the soup to a blender, blend until smooth and return it to the pot. 
 
Stir in the cream. Add salt and pepper to taste. Return to low heat if necessary to heat the soup through.  Garnish with croutons, if desired. 
 
______________________________________
 
Thanks for reading! All images and content are the property of Fake Food Free unless otherwise stated. Please do not republish full recipes and images without written permission. What is okay? Feel free to Pin images, share links to my posts or share the photo in a round up post with the title of this recipe and a link back to the post. Confused about copyright and food blogs? Here is some helpful information on Recipe Attribution. If you want to use a photo or full recipe, just ask. I’m sure we can work something out.
 

Smoky Chili Non Carne from The Kentucky Fresh Cookbook

November 17, 2011

This morning, still groggy, I opened the door to let the dogs out.

Whoa! When did winter get here?

After several weeks of warm autumn temperatures, I do believe we are finally headed into the next season. I don’t mind it at all, but it’s going to take me a while to adapt. Maybe this will help.

If it wasn’t time for chili before, well it certainly is now! And not just any chili, but Smoky Chili Non Carne.

I had the opportunity to review The Kentucky Fresh Cookbook by Maggie Green and loved every minute of it. Maggie’s book is a wonderful, seasonal cooking resource divided by month. The chili can be found in November along with other warming, comforting foods perfect for the season.

You can head over to Cooks & Books & Recipes to read more about it and get the recipe.

Fried Egg over Kale and Quinoa

November 15, 2011

The words big breakfast lead one to conjure up all types of vivid images. Maybe it’s omelets with bacon and toast, waffles with country ham or biscuits and sausage gravy. Or, if you are anywhere near the vicinity of the southern US it might mean all of the above.

As much as I enjoy all of our traditional breakfast favorites, I also love redefining the big breakfast. Considering that I can barely go a day without eating kale in one form or another it’s no surprise that I’m now having it in the morning. Greens with eggs and grains have recently climbed the ranks as a favorite breakfast which can also easily pass as lunch and dinner.

I went to a farm to table breakfast a couple weeks ago and was greeted with sautéed kale over grits topped with a fried egg. Morning meal contentment right there.

I decided to recreate it at home and since I already had some cooked quinoa on hand from the Cranberry Orange Quinoa Stuffing, I thought I’d use that instead of grits.

I learned a little tip at that breakfast from the chef who was preparing our meal – add a splash of apple cider vinegar to your greens to perk up the flavor. I’d never done that before, but it gives the greens a nice tang. It doesn’t take much. Just a splash in the pan a few minutes before they are done cooking is perfect.

I’ve just come around to undercooked eggs, i.e. a runny yolk. It’s taken me a while, but I now find when I use farm fresh, local eggs and they are served over something like greens or grits that I love them. No worries if they aren’t your thing, just take the egg to your desired doneness.

Then, if you are like me, you’ll want to drizzle whole thing with your favorite hot sauce. My hot sauce of the hour is Sriracha which is amazing with sautéed greens.

Fried Egg over Kale and Quinoa

1 tbsp olive oil
1 to 1 ½ lbs kale, stem removed and chopped
½ large onion, thinly sliced
10 – 15 white button mushrooms, sliced
¼ cup chicken or vegetable stock
Splash of apple cider vinegar
1 tbsp sunflower seeds (optional)
½ tsp sea salt
¼ tsp black pepper
¼ tsp crushed red pepper
4 farm fresh eggs
1 cup cooked quinoa, seasoned to taste

In a large skillet, heat the olive oil over med-high heat. Add the kale and turn to coat in the oil. Add the onions and mushrooms. Cook 3 to 5 minutes. As the kale begins to wilt, add in the chicken stock and simmer until it evaporates gently turning the kale to cook it down further. Add the apple cider vinegar.

Stir in the sunflower seeds if using. Cook 1-2 minute more. Season with the salt, pepper and red pepper. Remove from heat and set aside.

In a non-stick skillet, fry all 4 eggs to your desired doneness. Top will a little ground black pepper on each side.

On each plate, place ¼ cup quinoa, ¼ of the kale and one egg. Top with hot sauce and serve warm.

Pin It

Cranberry Orange Quinoa Stuffing with Pecans in an Acorn Squash

November 11, 2011

The first smells of Thanksgiving drifted through our kitchen this week. I’m talking about that aroma of celery, onion and sage cooking on the stove; the very core of the standard stuffing.

From that point, stuffing can go just about any direction. This time mine headed straight towards cranberry, orange and quinoa and then took a right turn and hopped directly into an acorn squash.

I used the unseasoned croutons I made from leftover Pain de Mie Complet and instead of using all bread as I would with my usual stuffing; I substituted some of it with cooked quinoa. Pecans added a little crunch and I loaded mine with cranberries. You can adjust most of the ingredients to your liking and perhaps add some diced apple or apricots, use walnuts or change the flavors with a sprinkle of cinnamon.

I was a little unsure of what the result would be, but was pleasantly surprised. This could easily make the Thanksgiving table both for flavor and appearance, but we used it as a main course and training for the big day.

Cranberry Orange Quinoa Stuffing with Pecans in an Acorn Squash

1 small acorn squash
2 tbsp butter or olive oil
½ lg onion, diced
2 ribs celery, sliced
2 cloves garlic, minced
Zest and juice of one orange
1 ¼ tsp poultry seasoning
¼ tsp dry mustard
¼ tsp celery salt
½ tsp salt
¼ tsp black pepper
1 cup unseasoned croutons
½ cup cooked quinoa
1 – 1 ½ cups chicken or vegetable stock
1/3 cup chopped pecans
½ cup dried cranberries

Preheat the oven to 400 degrees F. Prep the squash by splitting it in half. Remove the seeds. Gently pierce the flesh with a fork. Drizzle and coat with olive oil. Place in a greased baking dish and sprinkle with a bit of salt. Set aside.

In a large skillet, melt the butter or heat the oil over medium-high heat. Add the onion and celery and cook for about 3-4 minutes. Add the garlic and cook an additional 2 minutes. Next, stir in the orange zest, poultry seasoning, dry mustard, celery salt, salt and pepper. Cook 1 minute.

Turn off the heat and add the croutons and quinoa. Stir in the orange juice and then add the stock one ½ cup at a time. The amount of stock you need will depend on the type of bread pieces you use. Mine were chopped fine so I used about 1 cup. You want the stuffing to absorb all the liquid, but be moist enough so that you can firmly stuff it into the squash. It should be able to hold its shape when pressed together.

Once the stock is added, stir in the pecans and cranberries. Evenly divide the stuffing and use a spoon to transfer and gently stuff the mixture into each half of the acorn squash.

Bake for 30-35 minutes or until the squash is tender when pierced with a fork. Serves 2 as a main course and 4 as a side dish.

Need some more ideas for ways to stuff your acorn squash? Check out A Healthy Passion and Find Your Balance Health.

Want to create beautiful food and product photos that you can't wait to share?!
Discover your style, control the light, and shoot using the tool you know how to use (yes, your phone included). Learn about free resources, Live Q&As with Lori, and online courses you can take from anywhere in the world!
We respect your privacy. Unsubscribe at any time.