Archives

Coconut Milk Flap Jacks: CakeLove in the Morning

April 18, 2012

I appreciate a big breakfast. 
I didn’t realize exactly how much until a few months into our time living abroad. I knew that not every country celebrated the morning meal the way we do in the U.S., or in countries such as Ireland or the U.K.  But I was taken aback by the confused looks I got when describing pancakes, omelets, bacon, biscuits, and grits to our new friends. 
Brazil is a bread or pastry and coffee culture when it comes to breakfast. In many ways, I guess we are around here too, except for the weekends. Oh the weekends! Or rather, the weekend breakfast!
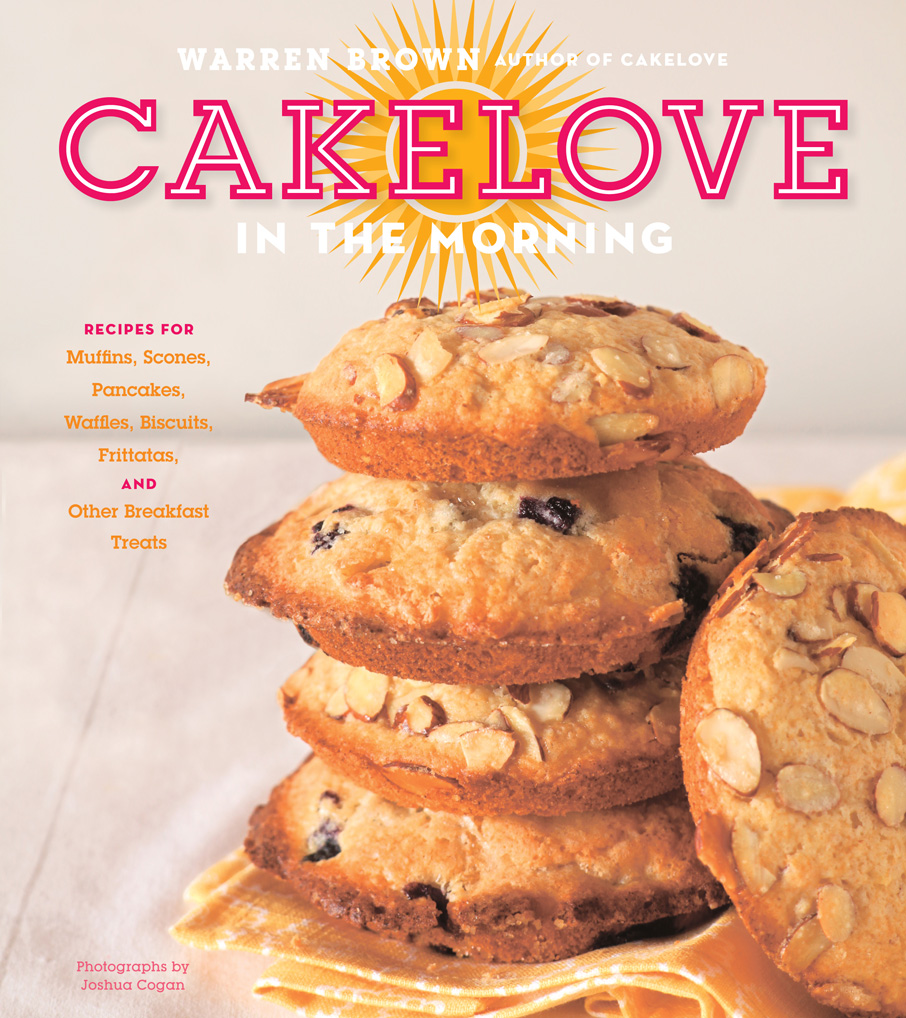
So when I get a cookbook that highlights this meal you can imagine my excitement. This time it was CakeLove in the Morning by Warren Brown.
Cake? In the morning? I’m in!
I’ll admit when I first looked through this cookbook, I thought it might be best for a beginner in the kitchen. With recipes such asApple-Cranberry Oatmeal and Zucchini Bread, it provides excellent instruction for the basics.
But then I took a closer look. 
I’ve reviewed one of Warren Brown’s cookbooks before and I used to watch his show on the Food Network. While I remembered that he is a lawyer turned baker, it had escaped me that he has a degree in public health and practiced health care law. 
My point? Upon my closer look at the book, his background in health is evident. 
His recipes have a delightful combination of healthy, whole ingredients from buckwheat flour to yams, and I was even introduced to a new oil that I have yet to explore, rice bran oil. This book would be perfect for health-minded beginners, but it has plenty to keep those of us who cook a bit more interested as well.
Aside from baked goods such as White Chocolate Waffles and Chocolate Chip Bacon Pancakes, there are several savory breakfast recipes, and condiments to go with it all – Dairy-free Butternut Squash Frittata, Breakfast Lasagna (I know! Isn’t that a great idea?), Jalapeno Honey Butter. And you can’t forget cake in the title; there are a few of those too. 
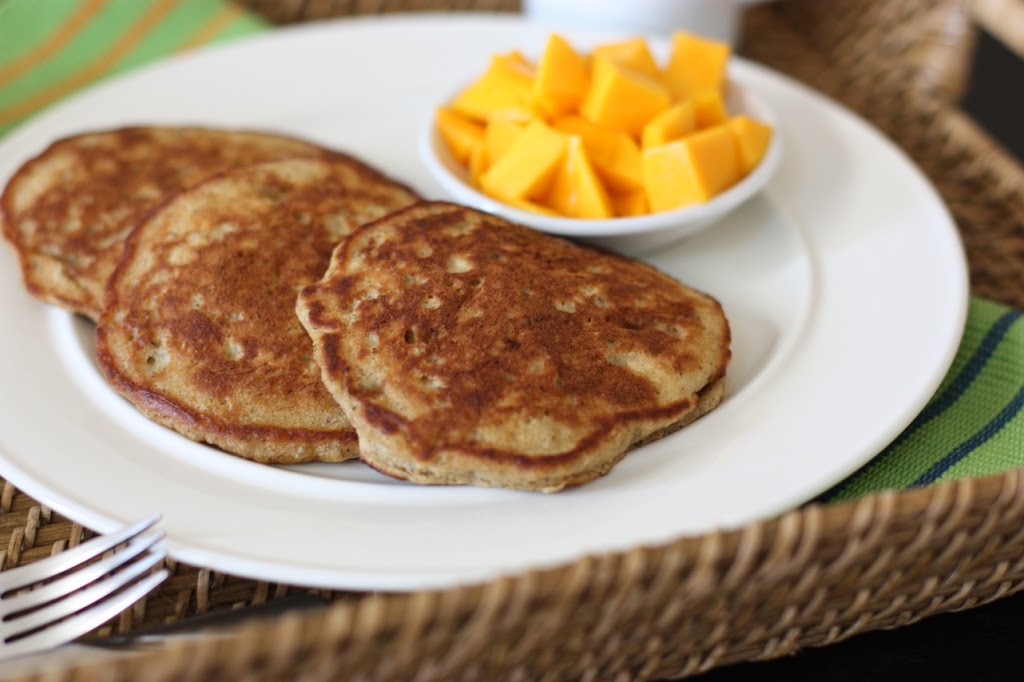
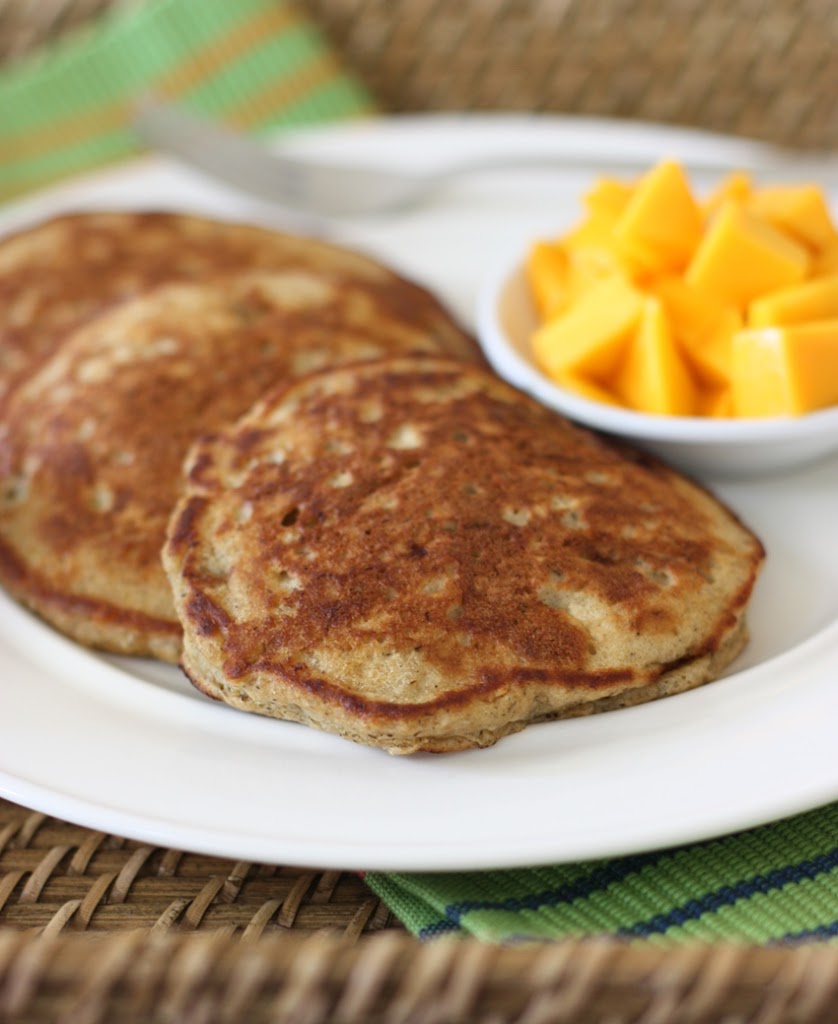
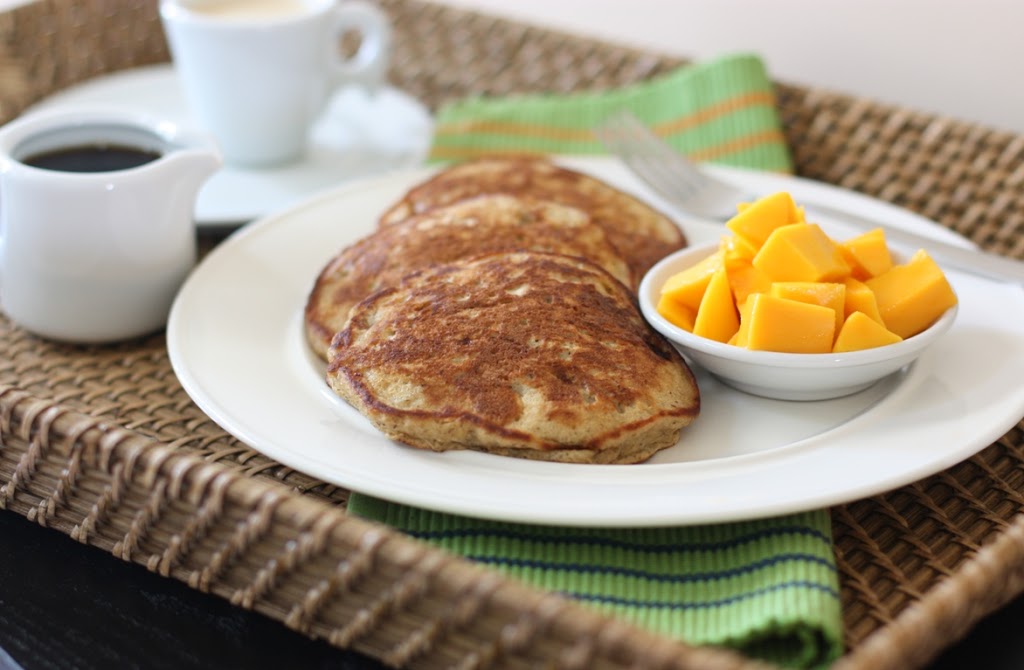
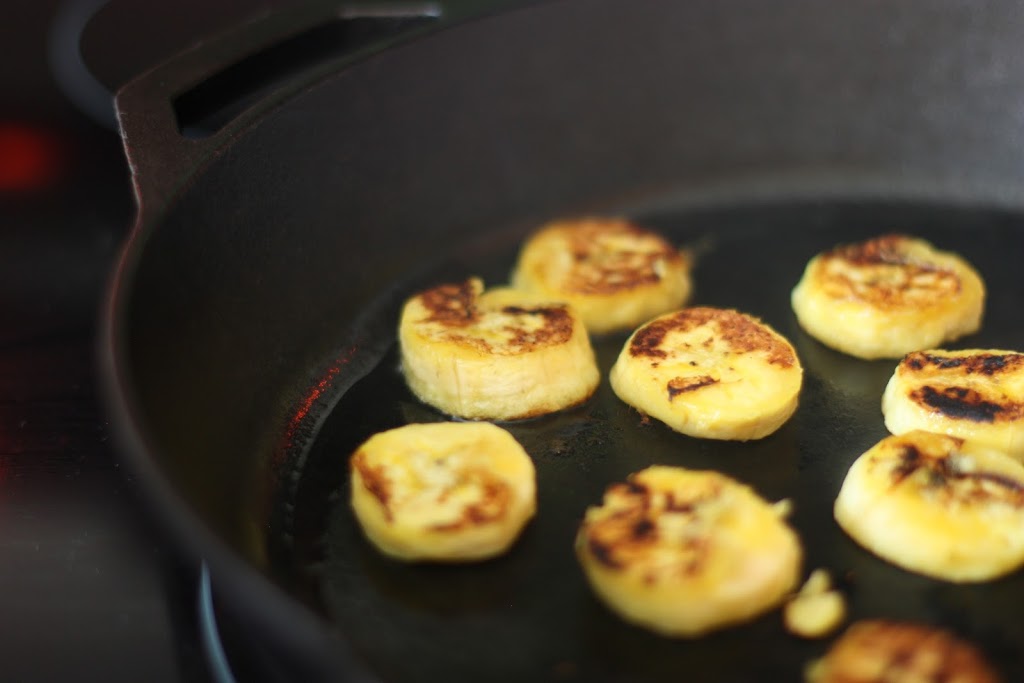
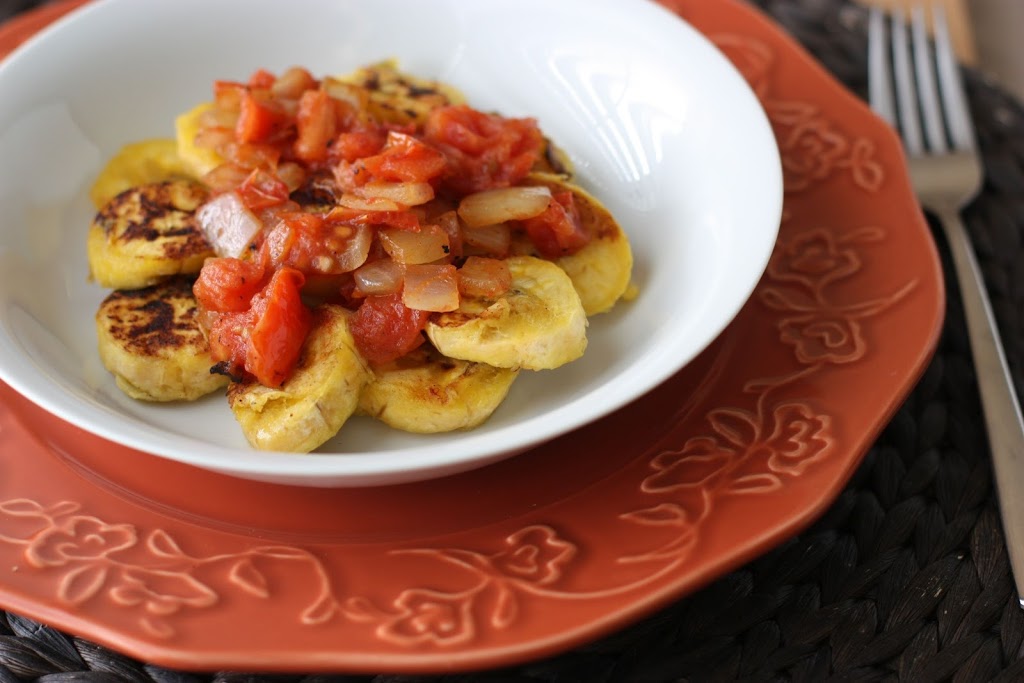
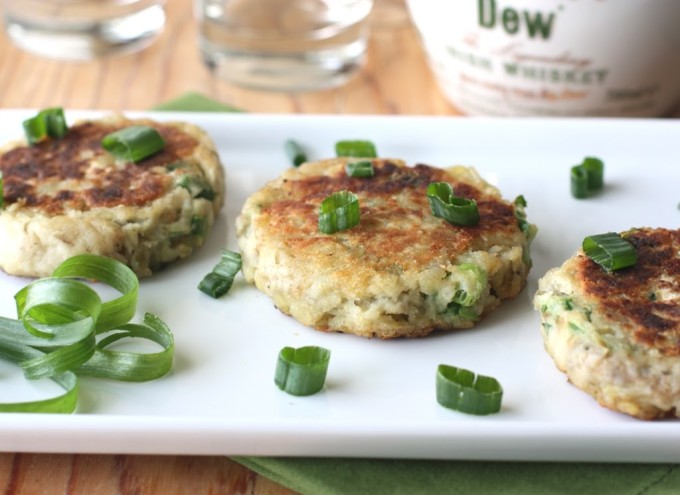
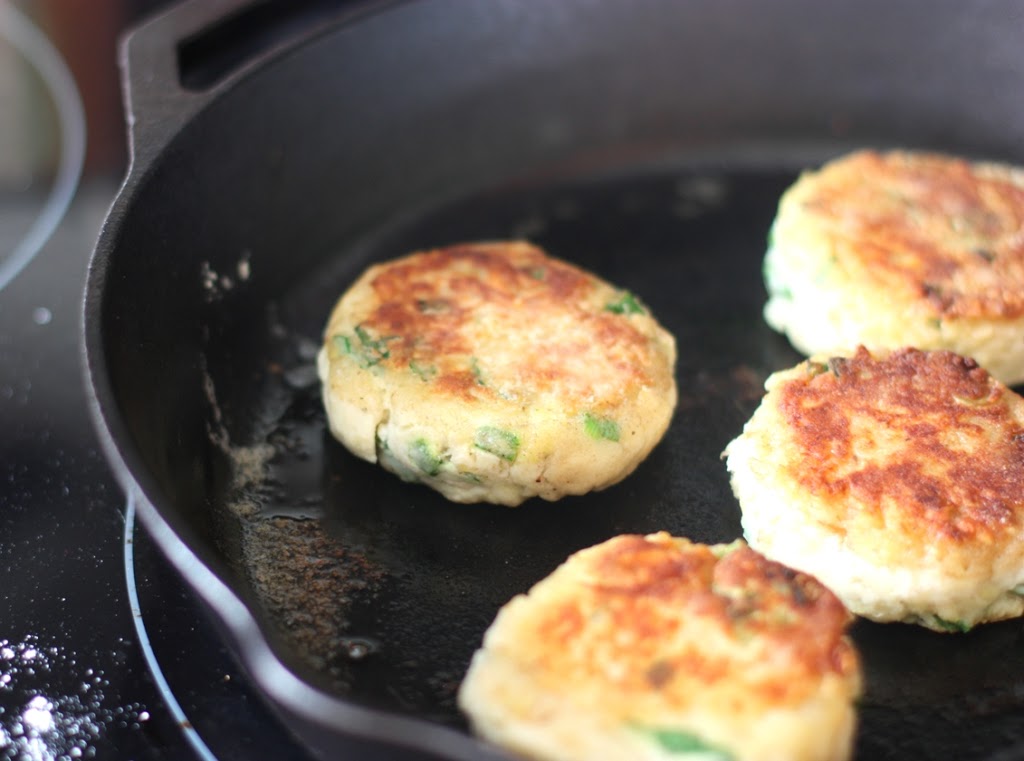
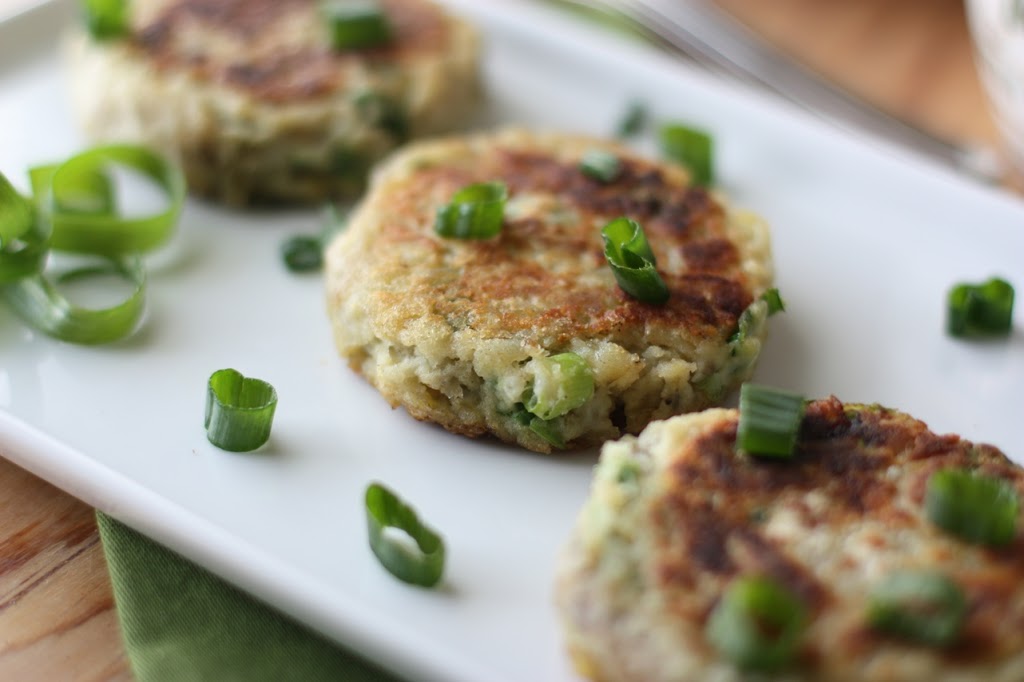
I went with a traditional favorite that had an interesting twist – Coconut Milk Flap Jacks. This whole grain recipe uses whole wheat and buckwheat flours, oats, honey and, of course, coconut milk. 
I am no expert pancake maker, and these turned out beautifully. They were light and fluffy despite the hearty grains. I agree with the recipe description that the pancakes bring the flavor of the Caribbean. That’s why I added a little mango on the side!
This one is perfect for Mother’s Day brunch, and you can serve them with the cookbook on the side because it would make a great gift.

Coconut Milk Flap Jacks

From Cake Love in the Morning by Warren Brown, reprinted with permission for Abrams Books
Serves: 4
1 cup (about 6 ounces) banana, mashed
1 cup coconut milk (or milk)
1 egg
2 tablespoons fresh lemon juice
2 teaspoons honey
1 teaspoon vanilla extract
1 cup whole-wheat flour
¼ cup whole rolled oats
2 tablespoons buckwheat flour
1 tablespoon superfine sugar
1 ½ teaspoons baking powder
½ teaspoon baking soda
¼ teaspoon salt
1 tablespoon butter or vegetable oil
Cinnamon and Allspice to sprinkle
Preheat the oven to 275 degrees F to keep the finished pancakes warm.
Combine the banana in a medium bowl with the coconut milk, egg, lemon juice, honey, and vanilla extract. Set aside for 5 minutes.
In a large bowl, whisk to combine the whole-wheat flour, oats, buckwheat flour, sugar, baking powder, baking soda, and salt.
Gently fold the liquid ingredients into the flour mixture, but don’t fully combine. Let the batter rest for 10 minutes to soften the oats.
Meanwhile, heat a large skillet or griddle over medium heat. When the surface is hot, add the butter or vegetable oil and spread it out.
Using a ¼-cup measure, drop 4 to 6 pancakes into the pan. Flip when bubbles appear, after about 3 to 4 minutes. 
Cook for another minute, then remove the pancakes to a heat-resistant plate in the warmed oven.
Sprinkle with a dusting of cinnamon and allspice and serve with warmed maple syrup. 

Disclosure:  A review copy of this book was sent to me by Abrams Books. I was not required to post about it and received no compensation for doing so. I only review books and products that I enjoy enough to have in my own kitchen.  

Smoky Ham Salad with Olives

April 15, 2012


Smoky Ham Salad with Olives | Fake Food Free
 
 
I think I need to plan a picnic. I can’t stop thinking about picnic foods.
 
This is surprising because I’m not much of a picnic person. All that mayo sitting out for hours in 80 degree weather is enough to turn a person off. But for some reason I’m ready to set my food safety phobias aside for the sake of nice weather and a meal outside.
 
One food from my picnic memory book is ham salad. We always had it growing up, and I really liked the way my mom would make it. She ground up the ham so it was more of a spread than other versions I’ve seen. 
 
Despite being a fan, I have never made ham salad myself. But with some ham leftover from Easter I thought it was a good time to try and put my stamp on it. 
 
I decided to use what I now call my classic combo for former mayo-only based salads – plain Greek yogurt, a little mayo and spicy brown or Dijon mustard. I’ve had success with coleslaw, potato salad and chicken salad, and I actually like it a lot more than the all mayo versions. 
 
I’d suggest using full fat Greek yogurt. I hear over and over again that people don’t like Greek yogurt, and for the life of me I haven’t been able to figure out why. Then I bought some fat free Greek yogurt by one of the popular brands. (The ones famous for their flavored, diet yogurt who decided to do Greek because it’s cool.)
 
I now know why people say they don’t like Greek yogurt. I’m not exaggerating when I say it was one of the worst things I have tasted. I threw it out.
 
So try a full fat version (Greek Gods and Fage are my favorites). I promise it will change your life, at least as far as yogurt is concerned. And because it is yogurt the way it was meant to be, you’ll need much less of it to fill you up, and for flavor and fat in your recipes. 
 
Smoky Ham Salad with Olives | Fake Food Free
 
 
Back to the ham salad. I keep a small amount of mayo in the recipe because it cuts the sour flavor of the yogurt just enough so that it’s not overpowering. I also added some olives, and finished it off with just a bit of smoked hot paprika.
 
Crackers or a crusty baguette make the best form of transport. And be careful, it might put you in the mood for a picnic. That’s fine by me. I could use the company!
 
Smoky Ham Salad with Olives | Fake Food Free


Smoky Ham Salad with Olives

Makes: About 3 cups

Ingredients 

2 ½ cups cooked ham, finely chopped
1 large rib celery, chopped
¼ cup green olives, diced
½ tbsp grated onion
¼ cup plain Greek yogurt
1 tbsp mayonnaise
1 tsp spicy brown mustard
¼ tsp black pepper
¼ tsp smoked hot paprika
 
Prep
 
In a bowl, combine the ham, celery, olives and onion. Set aside.
 
In a separate bowl stir together the yogurt, mayo, brown mustard, pepper and paprika. Pour the yogurt mixture over the ham. Stir to mix all ingredients. Refrigerate at least 30 minutes before serving. 
 
hamsalad3
 
Thanks for reading! All images and content are the property of Fake Food Free unless otherwise stated. Please do not republish full recipes or images without written permission. What is okay? Feel free to Pin images, share links to my posts or share the photo in a round up post with the title of this recipe and a link back to the post. Confused about copyright and food blogs? Here is some helpful information on Recipe Attribution. If you want to use a photo or full recipe, just ask. I’m sure we can work something out.

Shrimp and Asparagus with Coconut Sticky Rice

April 11, 2012

This shrimp and asparagus dish is something I made when I first learned how to cook with sticky rice after our a trip to Thailand.  

          Shrimp and Asparagus with Coconut Sticky Rice Recipe | FakeFoodFree.com

I didn’t know sticky rice existed until 2009. Even after I discovered it in Thailand, we got back to Kentucky and I couldn’t find it anywhere. When I did finally locate it, first in Chicago, then eventually in Lexington, I went a little overboard. Looking back I think I was making up for lost time since I spent the majority of my life without it.

There are two large bags of white sticky rice sitting in my pantry accompanied by a small bag of purple sticky rice.  My new found access has taught me that it takes two people a long time to use up that much rice.

So my thought process in meal planning tends to be – what can I make that would go with sticky rice?

Coconut Sticky Rice topped with shrimp and asparagus | Recipe at FakeFoodFree.com

This time I threw together a little stir fry using up some asparagus from the garden, some cabbage and shrimp. I recently learned that you can freeze lemongrass so I was able to preserve my last purchase before it went bad. That went into the mix as well. I love coconut sticky rice, and it is easy to get the flavor by stirring in a small amount of coconut milk before serving.

This dinner could not be easier. Soak your rice the night before, and then let it steam while you chop everything and toss it in the wok. A bamboo steamer is ideal, but a metal vegetable steamer works fine, too.

Shrimp and Asparagus with Coconut Sticky Rice Recipe | FakeFoodFree.com
Shrimp and Asparagus with Coconut Sticky Rice
Serves 3
This recipe is something I came up with after learning how to cook sticky rice after a trip to Thailand.
Write a review
Print
Ingredients
  1. 1 tablespoon virgin coconut oil
  2. 2 cloves garlic, minced
  3. 2-inch piece lemongrass, minced
  4. 2 teaspoon fresh ginger, minced
  5. 1 teaspoon dark sesame oil
  6. ½ pound asparagus, cut into 1 inch pieces
  7. 10 to 15 shrimp, cleaned
  8. 2 cups cabbage, thinly sliced
  9. 1 tablespoon tamari or soy sauce
  10. 1 tablespoon toasted sesame seeds
  11. 2 tablespoons fresh chives, chopped
  12. 1 ½ cups sticky rice, steamed
  13. 3 tablespoons coconut milk
  14. Dried, unsweetened coconut for garnish
Instructions
  1. In a wok, heat the coconut oil over medium-high heat. Add the garlic, lemongrass, and ginger. Cook for 1 to 2 minutes. Sprinkle with the sesame oil. Add the asparagus and cook 1 to 2 minutes more, or until the pieces begin to turn bright green. Add the shrimp and continue to cook.
  2. When the shrimp are almost opaque add the cabbage and cook just until it wilts slightly. Add the soy sauce and toss to coat the vegetables and shrimp. Sprinkle with the sesame seeds and chives. Set aside.
  3. Gently stir the coconut milk in to the rice and divide into 3 servings. Sprinkle with the unsweetened coconut. Serve with the shrimp and vegetables on top of the rice or on the side.
Fake Food Free https://www.fakefoodfree.com/


Thanks for reading! All images and content are the property of Fake Food Free Productions, LLC and Lori Rice unless otherwise stated. Please do not republish full recipes and images without written permission. What is okay? Feel free to Pin images, share links to my posts or share the photo in a round-up post with the title of this recipe and a link back to the post. Confused about copyright and food blogs? Here is some helpful information on Recipe Attribution. If you want to use a photo or full recipe, just ask. I’m sure we can work something out.

Lemon Sugar Cookies

April 7, 2012

Happy Easter!

I hope this weekend is full celebration for you and your family.

If you are in need of a last minute dessert, I highly recommend these Lemon Sugar Cookies from Two Peas & Their Pod. As with all of Maria’s recipes, they are outstanding! Sweet, chewy, and full of lemon flavor.

Mine look a bit like Snickerdoodles, I know. This is because all I had on hand was Demerara (raw) sugar. The good news is, they turn out great with the substitution!

Savory Fried Plantains

April 4, 2012
West African Style Savory Fried Plantains Recipe | Fake Food Free

African is one cuisine that I’m not all that familiar with. Soon after we moved back to Kentucky we learned that a place opened up nearby serving West African food. As you can imagine, I was intrigued, and over the past month or so I’ve finally had the opportunity to try it.

After two visits, I already have a favorite dish – the fried plantains. I’m sure that seems a bit unexciting. You’ve likely tried plantains in African, Latin or Caribbean dishes, and if so, you’ve probably had them fried.

But these savory fried plantains are different.

A recipe for Savory Fried Plantains


Every time that I’ve had a plantain it has been prepared in a way that adds sweetness to a dish. These plantains are topped with sautéed tomatoes and onions making them much more savory than sweet. The plantains themselves do have that sweet banana flavor, but it’s balanced by the acidic tomatoes and the small amount of added salt.

It’s a simple dish, but completely different and delicious at the same time. I’ve done my best to recreate it without a recipe. This one is right on target. I’ve made it with frozen and fresh tomatoes, and both versions turned out well.

Plantains on Fake Food Free

If you’ve never had a plantain, check for them in the exotic fruit area of the supermarket or at an international store. In US supermarkets I usually find them near the mangos and coconuts. Use one that is fully ripe and almost black on the outside. If you buy them early they will ripen on your counter over time, just like a banana. The ones I’ve had ripen a little more slowly, though.

Plantain for Savory Fried Plantains

I’ve eaten these plantains as a meal, but they would also be great as a side with something off the grill!

Savory Fried Plantains
These fried plantains are one of my favorite side dishes. Honestly, I could eat them as a meal! Makes:  1 to 2 servings
Write a review
Print
Ingredients
  1. 1 tablespoon virgin coconut oil
  2. 1 plantain, peeled and cut into ¼ inch slices
  3. 2 Roma tomatoes, chopped
  4. ½ medium yellow onion, chopped
  5. Salt to taste
Instructions
  1. Add the oil to a skillet, and heat to medium-high. Once the oil has melted, place the plantain slices in a single layer in the skillet, cut side down. Cook 1-2 minutes, or until browned and flip. Cook 1-2 minutes more until they are softened, but not mushy. Remove the plantain from the skillet and place on a plate lined with a paper towel to absorb some of the oil.
  2. Add the tomatoes and onions to the hot skillet. Cook 3 to 5 minutes, until the onions are softened and the tomatoes begin to break down. Salt to taste.
  3. Place the plantains in a bowl and top with the onions and tomatoes to serve.
Fake Food Free https://www.fakefoodfree.com/
Fried Plantains


Savory Fried Plantains


Thanks for reading! All images and content are the property of Lori Rice and Fake Food Free unless otherwise stated. Please do not republish full recipes and images without written permission. What is okay? Feel free to Pin images, share links to my posts or share the photo with the title of this recipe and a link back to the post. Confused about copyright and food blogs? Here is some helpful information on Recipe Attribution. If you want to use a photo or full recipe, just ask. I’m sure we can work something out.

Black Lentil Salad with Roasted Asparagus

March 30, 2012

This simple black lentil salad uses spring asparagus with sweet onions to create a delicious side dish for a seasonal meal.

 
Black Lentil Salad with Roasted Asparagus Recipe | Fake Food Free
 

So far we’ve been harvesting single servings of asparagus from the garden. My husband got the first serving, and I got the second. He’s a much bigger asparagus fan than me so I thought that was only fair.

It’s coming up slowly, but I’m not going to complain because it’s a bit early for asparagus anyway. I’ll take the slow arrival as a trade off for having it so early. It must have known how desperate I was to get the garden going this year. Despite the warm winter, I still felt like I’d been cooped up inside for way too long.

This week I did manage to collect enough asparagus to make a salad, and this got me thinking about some black lentils in the pantry. It goes without saying; we are still in clean out mode. It’s amazing how much you can stuff into a small pantry when you are as obsessed with grains and legumes as I am.

The tang of the balsamic vinegar in the dressing for this salad adds a good balance to the asparagus that has turned sweet from roasting. I rounded up all the asparagus I could, but if you have more, add it. It only makes this salad better.


Black Lentil Salad with Roasted Asparagus Recipe
Black Lentil Salad with Roasted Asparagus
Serves 2-3 for a main, or 4 for a side
Write a review
Print
Ingredients
  1. ¼ cup white onion, finely diced
  2. 1 cup dried black lentils
  3. ¼ cup chopped fresh chives
  4. ½ to 1 pound asparagus, roasted or grilled
  5. 3 tablespoons balsamic vinegar
  6. 1 tablespoon extra virgin olive oil
  7. 1 teaspon mascavo sugar
  8. Salt and pepper to taste
Instructions
  1. Place the onion in a bowl of ice water and allow it to sit while you prepare the rest of the salad. This will draw some heat out of the onions. If your onions are already sweet, you can skip this step.
  2. In a medium sauce pan, add the lentils and 4 cups of water. Bring to a boil, reduce heat and simmer partially covered for 20-25 minutes. You want the lentils to be slightly firm for a salad. Drain and rinse with cold water until cooled. Pour into a medium bowl.
  3. Drain the onion. Add the chives and onion to the lentils. Chop the asparagus into ½ inch pieces and add to the lentils.
  4. In a small bowl, whisk together the vinegar, olive oil, and sugar. Add salt and pepper to taste. Pour the dressing over the lentils and toss to coat. Add more salt or pepper, if desired.
Notes
  1. To roast the asparagus, spread in a single layer on a baking sheet. Bake at 400 degrees F for about 15 minutes, or until dark green, but still crisp.
Fake Food Free https://www.fakefoodfree.com/
 

Black Lentil Salad with Roasted Asparagus Recipe
 

Soon I’ll be looking for ideas to use up all our asparagus. What’s your favorite way to prepare it?

Thanks for reading! All images and content are the property of Fake Food Free unless otherwise stated. Please do not republish full recipes and images without written permission. What is okay? Feel free to Pin images, share links to my posts or share the photo in a round up post with the title of this recipe and a link back to the post. Confused about copyright and food blogs? Here is some helpful information on Recipe Attribution. If you want to use a photo or full recipe, just ask. I’m sure we can work something out.

Hummus Sandwiches with Carrot and Cilantro

March 28, 2012
 

Hummus Sandwiches with Carrot and Cilantro Recipe | Fake Food Free

Blog posts aren’t always planned. They have been the opposite of planned more times than I can count. I may spend time plotting and planning a recipe only to end up with something that never sees the food blogging light of day.

Other times I have no intention of putting a meal on the blog only to finish and think – that’s kind of pretty, and darn tasty. In these cases you can find me sprinting through the living room with a plate in hand to the room where I take my photos. I usually mumble something to my husband like – it will be ready in just a minute – as he waits patiently for dinner.

This sandwich is a perfect example of that. It’s a super simple dinner that you can turn to on a busy night. 

You can use any type of hummus you like. I added a link in the recipe for my almond butter hummus as one idea. The veggies are open for experimentation as well. I love this combo, but you might find a few more in your fridge that would dress it up nicely. Feel free to go crazy with the veggies. I have no doubt that it will only make it better. 

Vegetarian sandwich recipe loaded with hummus and fresh vegetables. | Fake Food Free


Hummus Sandwich with Carrot and Cilantro

Makes:  2 servings

Ingredients
2 pieces baguette (about 4 inches each)
1 large carrot, peeled and shredded
2 green onions, whites and greens sliced
3 white button mushrooms, diced
Small handful of fresh cilantro
Hot sauce (optional)
 
Prep
Slice open each piece of baguette, careful not to cut all the way through. You’ll be stuffing in a lot of ingredients so it’s better to leave one side intact.
 
Spread the bottom piece of each with half of the hummus and sprinkle with shredded carrot. Divide the onions, mushrooms and cilantro, and add to each sandwich. Drizzle with hot sauce, if desired. That’s it. They’re ready to eat. 
 

Easy vegetarian sandwich recipe with hummus, fresh vegetables and cilantro. | Fake Food Free 


Thanks for reading! All images and content are the property of Fake Food Free unless otherwise stated. Please do not republish full recipes and images without written permission. What is okay? Feel free to Pin images, share links to my posts or share the photo in a round up post with the title of this recipe and a link back to the post. Confused about copyright and food blogs? Here is some helpful information on Recipe Attribution. If you want to use a photo or full recipe, just ask. I’m sure we can work something out.

Broccoli and Pastured Bratwurst over Pumpkin Quinoa

March 23, 2012

Quick and easy. That’s the motto for cooking around here right now. It’s not that I don’t want to cook. Well, okay, maybe just a tiny bit. I’m going through that seasonal transition thing when, despite a love of cooking, you still need a break.
That aside, it is more that other things are taking up my time. Fun things like this:
Gardening season has arrived, and we are prepped and ready to go. So far kale, Brussels sprouts, arugula, and radishes have been planted. The strawberries are blooming, and asparagus is popping up.
Longer days mean I’d rather be outside than in the kitchen, but that will soon change when the plants start producing.
For now, it’s quick and easy.
My husband picked up some smoked local, pastured bratwurst from Marksbury Farm Market. There is something I like about broccoli and sausage together so I combined the two once again. We are still on a mission to clean out the pantry, and I found some quinoa hidden behind the rice. I promise I try to keep it organized, but grains have tendency to get lost in there.
The quinoa needed a little something. I had frozen a small amount of leftover pumpkin that I roasted with rosemary over the winter, so that got stirred in. The result was a bowl that balanced comfort food with spring vegetables and grilling season!
Broccoli and Pastured Bratwurst over Pumpkin Quinoa

1 tbsp olive oil

½ large onion, sliced
4 cups broccoli florets
3 smoked bratwursts, sliced
Salt and black pepper to taste
1 cup quinoa, cooked
¾ cup pumpkin puree
Salt to taste
In a large skillet or wok, heat the oil over medium-high. Add the onions and cook until almost translucent, about 4-5 minutes. Add the broccoli, and continue to cook until it reaches your desired doneness. That’s about 5 minutes for me. Add the bratwursts and cook about 1 minute longer, just to heat the sausage through. Add salt and pepper to taste.
Stir the pumpkin into the hot quinoa. Salt to taste. Place the quinoa on a plate or in a bowl, and top with the broccoli and sliced brats. Serves 4.  

Pie It Forward: Chocolate Fleur de Sel Caramel Tart

March 20, 2012

I vaguely remember writing about reducing added sugar a few posts ago.

Then this arrived in my mailbox.

Pie It Forward by Gesine Bullock-Prado is the perfect reason to put your sugar sacrifice on hold, at least for one dessert.
Before opening the cover of this book I should warn you that if your perception of pie is two pieces of buttery crust filled with fruit or cream prepare to broaden your horizons. Among the classic apple and berry, cookie-crusted tarts and puff pastries proudly claim their pie identity.
I am a work in progress when it comes to baking so I have no doubt that the first few chapters of this cookbook are meant for me. The dos, don’ts, and most importantly, the whys of pie making are well explained. It’s the why that I need. The “we do this so it doesn’t do that” is the kind of logic I need to better myself in any culinary undertaking, and this book has it.
It also has beautiful food photos by Tina Rupp, and recipes such as Chocolate Stout Pudding Pie, Yuzu-Ginger Rice Pudding Meringue Pie, and Gooseberry Fool Tartlets. And for all of you out there who have somehow escaped the burden of a sweet tooth, there is a section devoted to savory pies as well.

For better or worse, I was drawn to the Chocolate Fleur de Sel Caramel Tart. I say worse because it took me two tries to get a presentable dessert. First, the sides of the tart fell, second I burned the caramel.

In my defense I did rock the truffles. Oh, did I mention there are chocolate truffles on the top? Yes, just when you think caramel in a chocolate crust couldn’t get any better, along comes a truffle.

I’m still a work in progress, but I did close this adventure with a delicious, albeit slightly modified version, of this brilliant tart. The main differences you’ll see between mine and the gorgeous photo in the book is a darker caramel (I came a mere fraction of a degree from a second burning), and I had an 11-inch tart pan instead of the 8-inch the recipe calls for. Don’t be discouraged if your access to tart pans is as limited as mine, you can still make this dessert, as well as several other tasty recipes, in this book.
I probably don’t need to tell you that the combination of a chocolate cookie crust with a hint of coffee tastes amazing with a caramel filling. Or that the added bonus of a truffle on top will fulfill any chocolate craving to come your way.
Anyone attending a potluck or party with me in 2012 should most definitely expect pie. I’ve only got one recipe down, and there are so many more to go!

Chocolate Fleur de Sel Caramel Tart
From Pie It Forward by Gesine Bullock-Prado. Reprinted with permission from Abram Books

This is a sophisticated candy bar wrapped up in tart’s clothing. It features caramel that leaves ropy tendrils behind after you’ve taken a bite. And while you can use a fork, I have to tell you it’s so much easier to pick up your slice to convey it to your mandibles.

MAKES 1
(8-inch/20-cm) tart

For the crust

Chocolate Cookie Tart Crust (recipe below)  1/2 batch

Soft Caramel Filling (recipe below) 1 batch

For the truffles

heavy cream ¾ cup; 177 ml
unsalted butter 2 tablespoons; 28 g
salt pinch
corn syrup (optional) 1 tablespoon; 15 ml
bittersweet chocolate, finely chopped 8 ounces; 225 g
cocoa powder 1/4 cup; 20 g

For the assembly

large-grain fleur de sel (sea salt) 1/2 teaspoon; 2.5 g

Procedure for the crust

1. Preheat the oven to 350 degrees F (175 degrees C). Line an 8-inch (20-cm) tart pan with
the dough. Dock and freeze it for 20 minutes. Line the crust with parchment, fill it with pie weights, and bake it for 15 minutes. Remove the pie weights and parchment and bake the crust for 15 minutes more, or until
the bottom is golden brown and baked through. Allow it to cool.

2. Prepare the caramel filling as instructed on page 36 and pour it into the cooled crust. Refrigerate until firm, about 2 hours.

Procedure for the truffles

1. In a small, heavy saucepan, simmer together the cream, butter, salt, and corn syrup, if using, making sure the butter melts completely. Take the pan from the heat and add the chocolate. Allow it to sit for a few minutes undisturbed, then whisk the mixture until the glaze emulsifies and all the chocolate melts. Cover and refrigerate until set, about 1 hour.

2. Using a melon scoop, a teaspoon-sized cookie scoop, or a teaspoon, form small rounds of ganache and roll them into balls with your hands. Roll the truffles in cocoa powder to coat them evenly.

Assembly

1. Place the truffles around the perimeter of the tart, sprinkle fleur de sel over all, and serve at room temperature.

Chocolate Cookie Tart Crust

This is a scrumptious and elegant chocolate tart dough. The key is using the right cocoa powder. You can’t go with your grocery-store variety of anemic cocoa. No, sir. I’ll know if you use it, too. You must use a high-quality, very dark cocoa: Cacao Barry or Valrhona are excellent choices. For this one, I use Cacao Barry Extra Brute. You’ll thank me later.

Makes enough dough for 2 (8-inch/20-cm) tarts,
8 (4-inch/10-cm) tarts, or 16 mini tarts

eggs 2
sweetened condensed milk  2 tablespoons; 30 ml
brewed coffee, cooled   2 tablespoons; 30 ml
all-purpose flour, cold 1 1/2 cups; 185 g
cocoa powder 1/2 cup; 40 g
sugar 3/4 cup; 150 g
instant espresso powder 1 tablespoon; 3 g
salt 1 teaspoon; 6 g
unsalted butter, cut into small pieces and chilled ¾ cup; 180 g

1. In a small bowl, whisk together the eggs, condensed milk, and coffee.

2. In the bowl of a food processor fitted with the blade attachment, pulse together the flour, cocoa, sugar,
espresso powder (if using), and salt.

3. Add the butter and pulse until the mixture resembles course cornmeal. While pulsing, add the liquid ingredients, and continue until the dough just holds together when you press it with your fingers.

4. Turn the dough out onto a large piece of plastic wrap. Form it into a flat disk, cover it completely with the plastic wrap, and refrigerate it for at least 30 minutes.

Soft Caramel Filling

Makes approximately 2 cups (480 ml)

sugar 1 cup; 200 g
corn syrup 1/4 cup; 60 ml
salt 1 teaspoon; 6 g
unsalted butter 2 tablespoons; 28 g

heavy cream ⅓ cup; 75 ml
vanilla bean paste 1 teaspoon; 5 ml

1. In a large, heavy saucepan, combine the sugar, ⅓ cup (75 ml) water, the corn syrup, and salt and cook, stirring, over medium-low heat until the sugar has melted.

2. Brush down the sides of the pan with a damp pastry brush to eradicate any errant sugar crystals.

3. Stop stirring, increase the heat to medium-high, and clip on a candy thermometer. Heat the sugar syrup to
245 degrees F (120 degrees C).

4. Once the syrup has reached temperature, take the pan off the heat and carefully add the butter and cream. The mixture will bubble vigorously at first. Stand back and let the hot sugar do its molten dance. When the syrup has calmed, stir until the butter has completely melted. Add the vanilla and stir again. Pour the caramel immediately into your pastry vessel (or other vessel) of choice and allow it to cool and set completely, 1 to 2 hours.

Pie It Forward day was 3/14, but you can still download Gesine’s Wild Blueberry Pie recipe and watch the video to get a few inside tips!

Irish Boxty

March 17, 2012

Despite multiple trips to Ireland, I have failed miserably at taking an important culinary opportunity. I’ve read about it, and put it on the agenda, but pudding, scones, and chips always get in the way of Irish Boxty.

Irish Boxty | Fake Food Free | An easy dish to make for St. Patrick's Day!

This week, as I thought about what Irish food to make in celebration of March 17, I found a beautiful Instagram photo by Edible Ireland. Just like that, my plan was made.
 
Boxty is a potato pancake. I know that sounds simple enough, but with the right ingredients it is so flavorful and comforting that you may never turn back to baked potatoes or fries. I hate that I missed the opportunity to try authentic boxty in the past. It prevents me from being sure if I have really nailed a recipe, but that doesn’t stop me from giving it a try anyway.
 
Irish Boxty | Fake Food Free | An easy dish to make for St. Patrick's Day!
 
 We had potato cakes made from leftover mashed potatoes growing up, but now I know – boxty is different. The shredded raw potato mixed with the mashed potatoes gives it texture, and after pan frying there is a crispy, golden edge that is rich with butter flavor. Our version was meat-less, but I have no doubt bacon would make these even better.
 
Irish Boxty | Fake Food Free | An easy dish to make for St. Patrick's Day!

I decided not to adapt the recipe at all other than leaving out the bacon, so you can head over to Edible Ireland for the Boxty with Bacon and Scallions recipe. While you are there, take a look around. It is one my favorite new-to-me blogs in 2012.

Happy St. Patrick’s Day!
 

Pin It

Thanks for reading! All images and content are the property of Fake Food Free unless otherwise stated. Please do not republish full recipes or images without written permission. What is okay? Feel free to Pin images, share links to my posts or share the photo in a round up post with the title of this recipe and a link back to the post. Confused about copyright and food blogs? Here is some helpful information on Recipe Attribution. If you want to use a photo or full recipe, just ask. I’m sure we can work something out.

Want to create beautiful food and product photos that you can't wait to share?!
Discover your style, control the light, and shoot using the tool you know how to use (yes, your phone included). Learn about free resources, Live Q&As with Lori, and online courses you can take from anywhere in the world!
We respect your privacy. Unsubscribe at any time.