Archives

Kentucky Bourbon-Vanilla Soaked Cherries Recipe

June 26, 2013
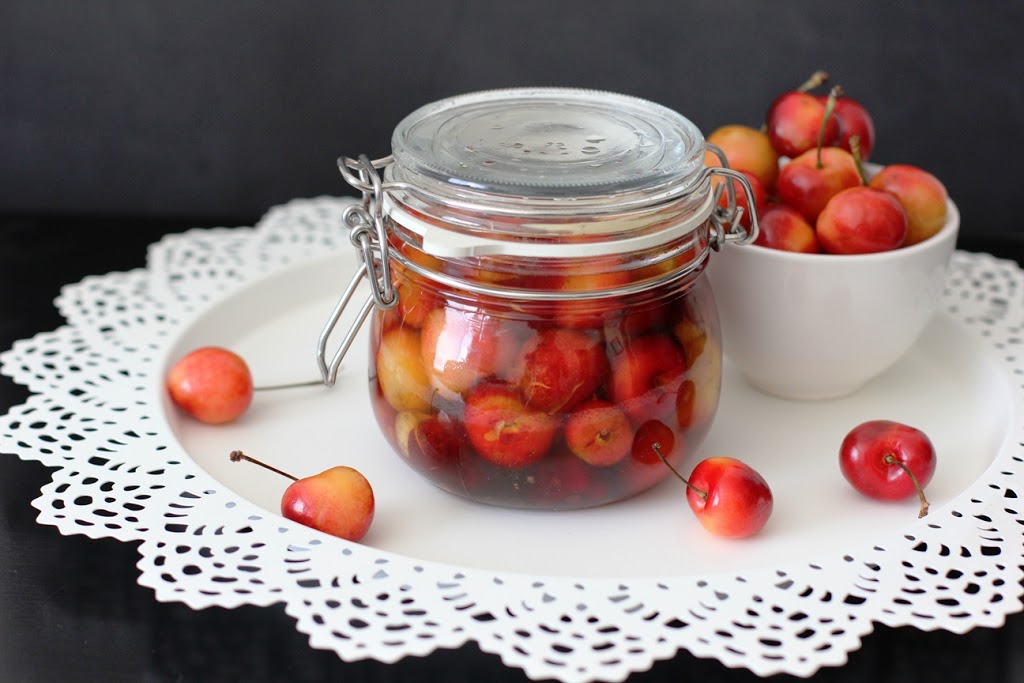
Kentucky Bourbon-Vanilla Soaked Cherries | Fake Food Free | The perfect ice cream topping or cocktail garnish!

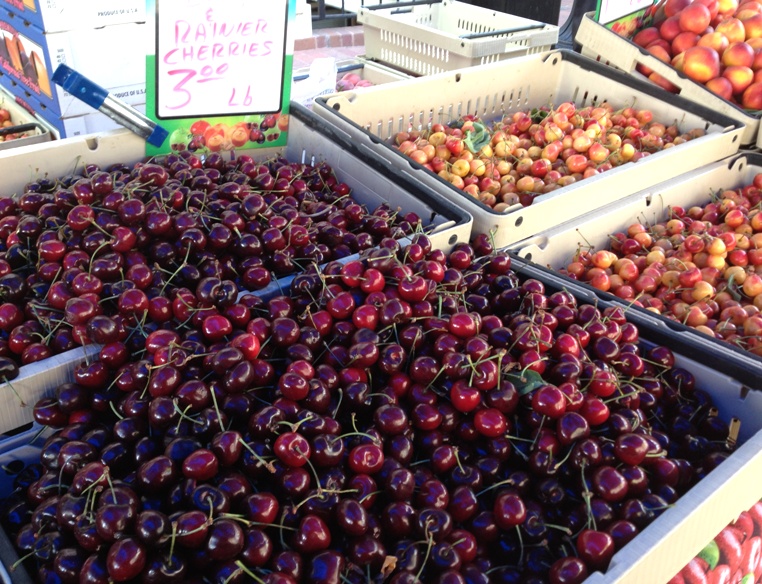
Last week at the Farmers Market, I saw this sign.

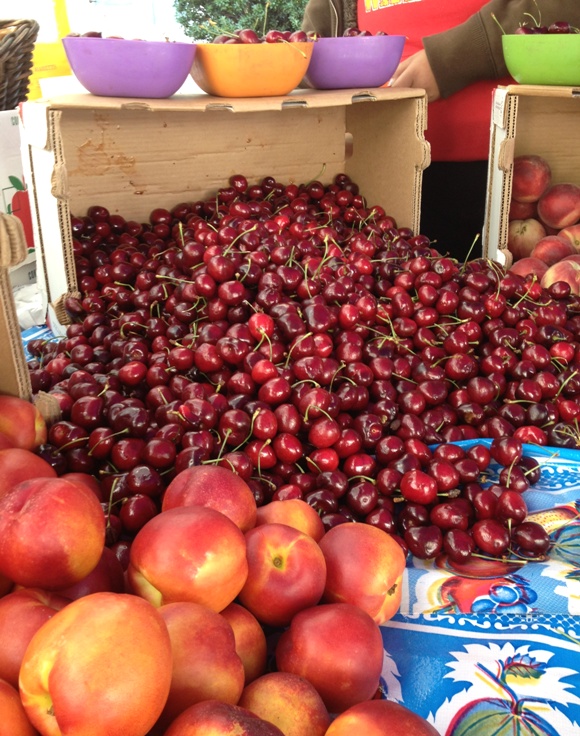
That sad face sums up my feelings pretty well. I have enjoyed my first cherry season in California so much. I think it’s because I wasn’t expecting to have such a selection. It completely took me by surprise.

Aside from a few cherry trees here and there in Kentucky, I’ve always associated cherries with Michigan. My past experience includes picking out a few in the grocery store and barely getting enough from a tree to make a mini cherry pie. This year, I had all the cherries I wanted. I took full advantage, too. I can’t begin to estimate how many pounds I carried home throughout the season.

But alas, it is coming to an end. I know there will be other fruits to take their place, but I will miss them all the same.

Every time I carried home by big bag of joy I said I was going to make bourbon cherries. It was now or never. Well, maybe now or next season, but the pressure motivated me to get on it.

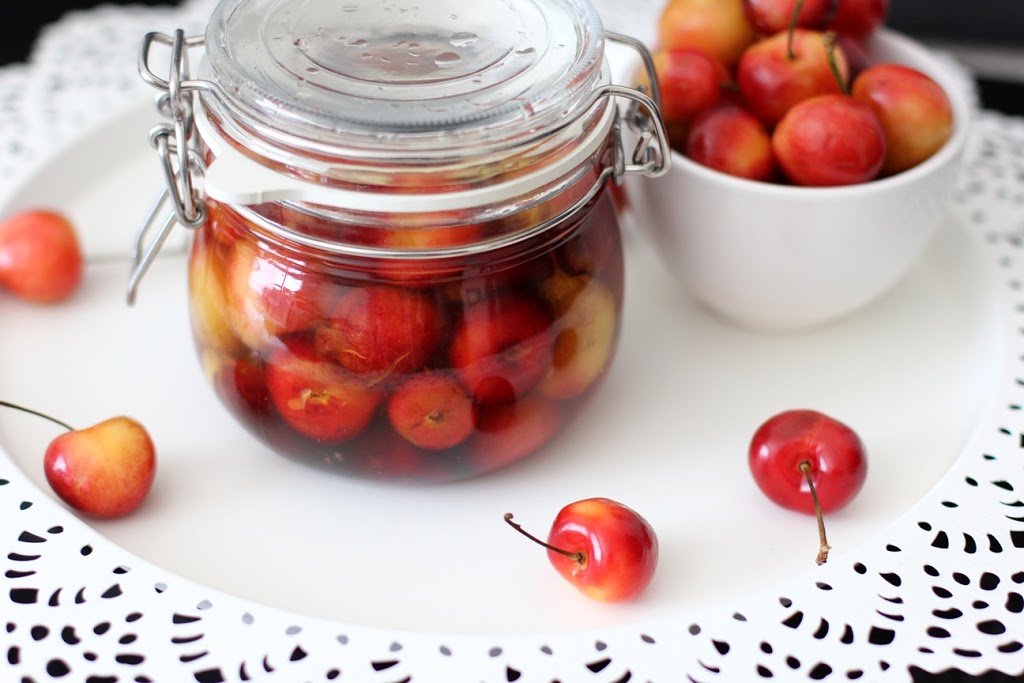
Kentucky Bourbon-Vanilla Soaked Cherries | Fake Food Free | The perfect ice cream topping or cocktail garnish!

I came across these Vanilla-Bourbon Cherries at Sweetsonian a little while back. (Aren’t her pictures gorgeous?) I wanted those same flavors so I adjusted it and then got some exact measures for the ingredients. I know I’ll want to make them again and I’m horrible at remembering what I did from recipe to recipe so I’m hoping this will help me recreate them next year.

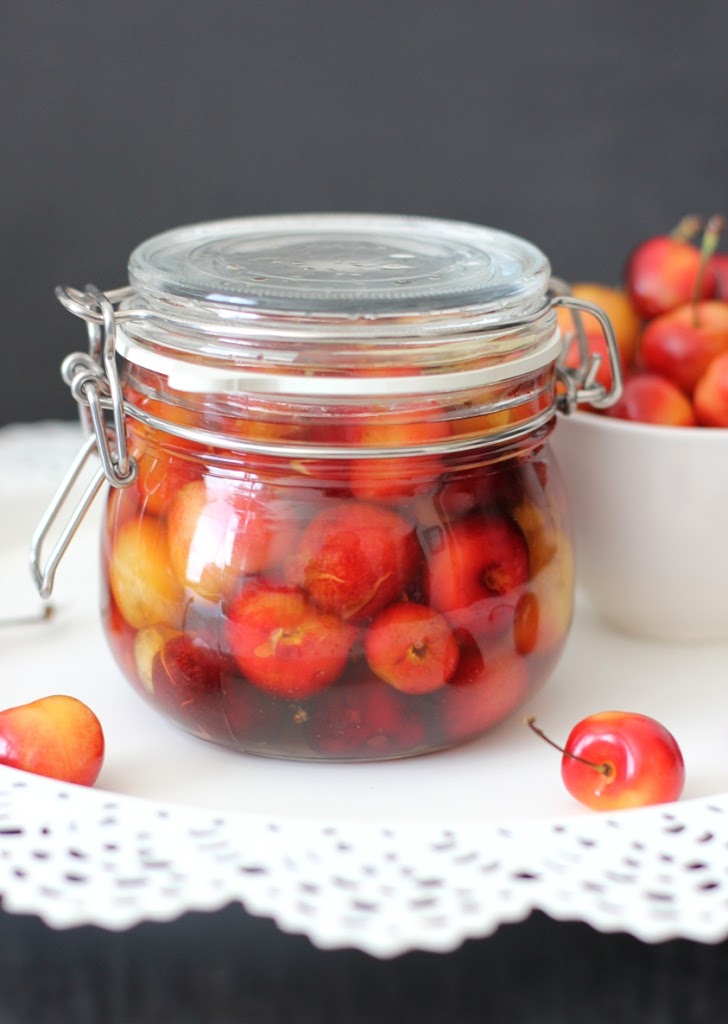
Dark red Bing cherries make pretty soaked cherries, but as always, I was steered by the sale. These yellow-red Rainier cherries were priced to sell so my cherries look a little lighter in their bourbon bath.

I’ve had them in the fridge a little over a week and they are delicious. I’ve dropped a few in our cocktails and I hope to use them on a dessert if I can stop eating them straight from the jar.

Kentucky Bourbon-Vanilla Soaked Cherries

Inspired by Vanilla-Bourbon Cherries by Sweetsonian

Ingredients

1 pint cherries, pitted
4 tbsp sugar
3 tbsp water
1 tsp pure vanilla extract
1/3 to ½ cup Kentucky bourbon

Prep

Tightly pack the cherries into a clean pint jar leaving about ½ inch headspace.

In a small sauce pan, heat the sugar and water on medium-high. Bring it just up to a simmer and cook until the sugar dissolves and it thickens a little, about 2 to 3 minutes. Remove from the heat and stir in the vanilla.

Pour the sugar syrup over the cherries. Pour the bourbon into the jar. How much you need will depend on how tightly your cherries are packed in. Ensure that all the cherries are covered, leaving about a ½ inch headspace.

Seal the jar. Give it a shake to mix the sugar syrup and bourbon.

Store in the refrigerator for at least 3 days before eating to allow the flavors to soak into the cherries. Then they should keep in the fridge for about a month.


Thanks for reading! All images and content are the property of Fake Food Free unless otherwise stated. Please do not republish full recipes and images without written permission. What is okay? Feel free to Pin images, share links to my posts or share the photo in a round up post with the title of this recipe and a link back to the post. Confused about copyright and food blogs? Here is some helpful information on Recipe Attribution. If you want to use a photo or full recipe, just ask. I’m sure we can work something out.  

Gluten Free Baked Shrimp Etouffée Recipe

June 14, 2013

I laughed out loud.

I’m not talking about chuckling or giggling here. I’m talking about a huge, hearty laugh. Again, and again, and again.

I’m not sure I’ve ever had a book make me laugh like Gluten Is My Bitch, Rants, Recipes and Ridiculousness for the Gluten-Free by April Peveteaux. At first it might seem odd to laugh at such a serious health condition, but laughter is medicine and humor is healing.

Now I should explain that I don’t have celiac disease or gluten sensitivity, nor do I opt out of eating gluten for personal reasons. I have had my fair share of stomach issues in the past, but mine were corrected by cutting out all artificial sweeteners and fat replacers. In an indirect way, I can relate.

Keeping up on the various ways of eating and nutritional issues is also part of the deal after you spend your college years studying nutrition. The science, the mechanisms, the nutrients – as much as I love food and eating from a creative standpoint my left brain would never be satisfied without the scientific side.

This book has it all, and a little something extra.

When reading about conditions like celiac disease, what you don’t often get is the personal side. A side explaining what it is really like to be forced to change your diet. To eliminate things you love, not because you want to lose weight or reduce risk of disease, but because if you don’t, you will be in serious discomfort. It’s not a choice. There is no option.

I wouldn’t have thought there was a way to make such a serious issue so completely hilarious, but April figured it out. Along the way there are tips for eating out, feeding kids with gluten intolerances, traveling and substitutes for your old favorite foods.

Along with all this laughter and helpful information, there are also lots of recipes, bringing us to reason I wanted to review the book here. Cocktails, cakes, cookies, pasta dishes and meaty main courses like Fried Chicken and Waffles and Italian Meat Loaf.

I knew that the timing of this post would likely align with prepping for my first marathon (it’s Sunday!), so I wanted to make something filling. Something with plenty of (gluten-free) carbs. I also wanted it to be something I hadn’t tried before.

Enter, the Baked Shrimp Etouffée.

This hit the spot. For a gluten free version, April’s recipe calls for millet flour and gluten-free bread crumbs. The flavors are delicious and I love that this baked version is a one pot meal.

Whether you have a gluten intolerance, want to learn more about it, want some great recipes, or simply want to laugh out loud, add this book to your summer reading list.

Baked Shrimp Etouffée 

Copyright © 2013 April Peveteaux, reprinted with permission from Abrams Books

Cajun food makes an impression. Or maybe that’s all the booze you ingested with your boudin. Which is why I still remember an etouffée that had a little extra somethin’-somethin’ from my very first trip to New Orleans, which was ages ago.

After experimenting, I do believe the crust atop this shrimp etouffée is spot on with the roux, and the stew, and now a little cheesy crunch. Laissez les bons temps rouler.

Prep time: 20 minutes  Cook time: 35 minutes
Makes: 10 servings

INGREDIENTS

1 tablespoon butter
1 tablespoon olive oil
5 garlic cloves, minced
1 bell pepper, chopped
1 Spanish onion, chopped
2 celery stalks, chopped
¼ cup millet flour
2 cups chicken stock
½ teaspoon sea salt
1/8 teaspoon freshly ground black pepper
1 teaspoon hot sauce
1/8 teaspoon cayenne pepper
1/8 teaspoon paprika
½ teaspoon oregano
1½ pounds shrimp, shelled and deveined
5 cups cooked rice
2 tablespoons gluten-free bread crumbs
1 tablespoon grated Parmesan
Parsley, for garnish

Preheat the oven to 350ºF.

In a cast-iron skillet over medium heat, heat the butter and oil. Add the garlic, pepper, onion, and celery, and cook until soft.

Whisk the flour into the onion mixture until well combined. Add ½ cup of the chicken broth and whisk to combine. Gradually add the remaining broth and cook until the mixture has thickened.

Add the salt, pepper, hot sauce, cayenne, paprika, and oregano. Stir, reduce the heat to low, and simmer for about 6 minutes. After 6 minutes, add the shrimp and continue cooking for about 4 minutes more, until the shrimp are pink. Do not overcook the shrimp.

Remove the mixture from the heat and pour it into a medium bowl. Place the cooked rice in the skillet, and top it with the shrimp mixture.

Sprinkle the gluten-free bread crumbs and Parmesan evenly over the shrimp mixture and place the skillet in the oven. Bake until slightly golden brown, 10 to 15 minutes.

Remove from the oven, top with the parsley, and serve.

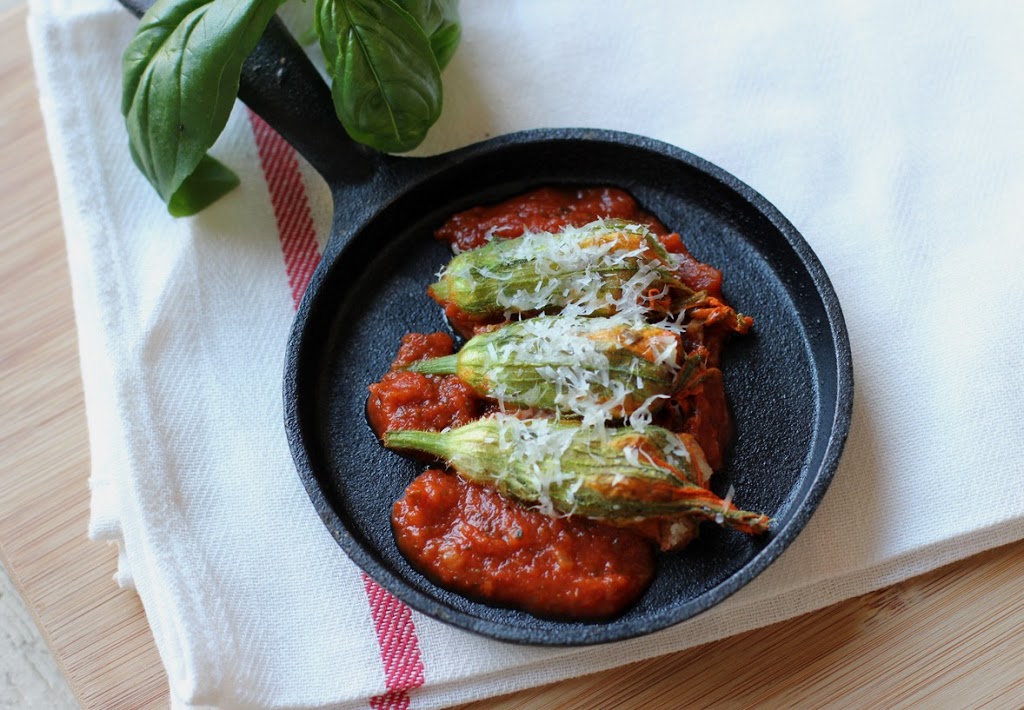
Bacon and Oyster Mushroom Stuffed Squash Blossoms Recipe

June 11, 2013

It’s surprising that with all the squash plants I’ve grown, I’ve never tried cooking with squash blossoms. I always blamed it on bad timing.

Those pretty yellow flowers would appear in early summer and I would think – No way am I picking those. I want a squash out of that. What if the plant doesn’t produce much this year?

Then (as you know if you’ve grown squash) by mid to late summer when I was buried with summer squash up to my eyeballs, I wish I had used some of those blossoms. 

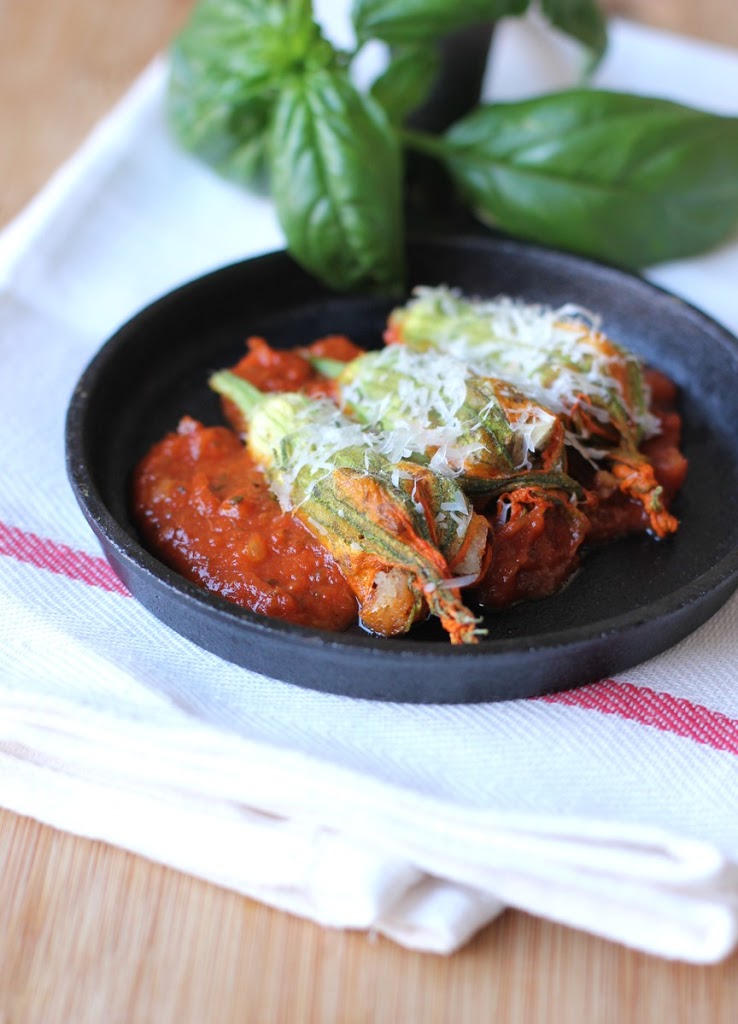
I no longer have my own squash plants, but I did spot some of those pretty blossoms at the Ferry Building Farmer’s Market last weekend. I wasn’t quite sure what I would do with them, but I had oyster mushrooms, bacon, bread and tomato sauce, too, so this is how it went. And when I have my own squash plants again someday, I will definitely be picking those blossoms.

Bacon and Oyster Mushroom Stuffed Squash Blossoms

1.5 ounces oyster mushrooms, chopped
2 slices bacon, chopped
2 tbsp finely chopped onion
1 clove garlic, minced
1/3 cup bread crumbs
3 leaves fresh basil, chopped
Salt and pepper to taste
12 small to medium squash blossoms
¾ cup your favorite marinara sauce
2 tbsp grated Parmesan cheese

Preheat the oven to 350 degrees F.

Preheat a deep skillet over medium-high, add the bacon and mushrooms. Cook for about 3 minutes. Add the onion and garlic. Continue to cook until the bacon is browned and the mushrooms are tender, about 3 to 4 minutes more.

Stir in the bread crumbs and the basil. Add salt and pepper to taste. Remove from the heat.
Fill each squash blossom with about a heaping tablespoon of the stuffing, depending on the size of the blossom. Twist the end of the flower to seal.

Pour the marinara in a baking dish and spread over the bottom of the dish. Arrange the blossoms in a single layer over the sauce. Top with the Parmesan cheese.

Bake for 20 minutes or until the blossoms become tender and the cheese begins to brown. Serves 2 to 3, if the squash blossoms are on the smaller side.


 Thanks for reading! All images and content are the property of Fake Food Free unless otherwise stated. Please do not republish full recipes and images without written permission. What is okay? Feel free to Pin images, share links to my posts or share the photo in a round up post with the title of this recipe and a link back to the post. Confused about copyright and food blogs? Here is some helpful information on Recipe Attribution. If you want to use a photo or full recipe, just ask. I’m sure we can work something out.  


Vegetarian Bell Pepper Adobo (Adobong Sili) Recipe from The Adobo Road Cookbook

June 4, 2013
  

Over the years, one of my favorite things about having this blog has become reviewing cookbooks. There are a lot of great cookbooks out there. To be honest, I have never reviewed any that were bad. But what makes a cookbook excellent to me, what makes it stand out among all the others, is when I can sense the passion for the food as I read the pages.

Lately I’ve had the opportunity to review several, but what I don’t always get to do is interact with the authors. Since our move to the Bay Area, one thing I am loving is that I can meet some of these cookbook authors at cookbook signings in the city.

That was the case with The Adobo Road Cookbook: A Filipino Food Journey-From Food Blog, to Food Truck, and Beyond by Marvin Gapultos (also the author of Burnt Lumpia). I received a review copy of the book and I was invited to the book signing at Omnivore Books. Having the chance to read it before the signing, I could not wait to learn more about the passion behind this book.

Yes, this book falls in the excellent category for me. The stories behind each recipe make you want to start creating, and continue to savor, family food memories of your own.

We haven’t been to the Philippines yet, but I’m continually intrigued by this cuisine. The tangy adobos and tasty lumpias, I’ve been wanting to try more dishes and The Adobo Road stepped right in with plenty of opportunities to do so. The best part is that the the recipes have a unique quality of being authentic without overwhelming the cook.

I enjoyed myself so much at the signing. Marvin described more about how the book came to be, and about the work that went into translating family cooking and memorized steps into a measured and written recipe that he could share with readers.

I knew what I was going to make prior to the signing, but I was even more encouraged when someone in the group asked what a person new to Filipino food should cook for the first time. His answer? An adobo. When I told Marvin that I hoped to make his Vegetarian Adobo for the blog, he told me more about his grandfather’s dish and how he hasn’t found the exact pepper used, but that this was incredibly close.

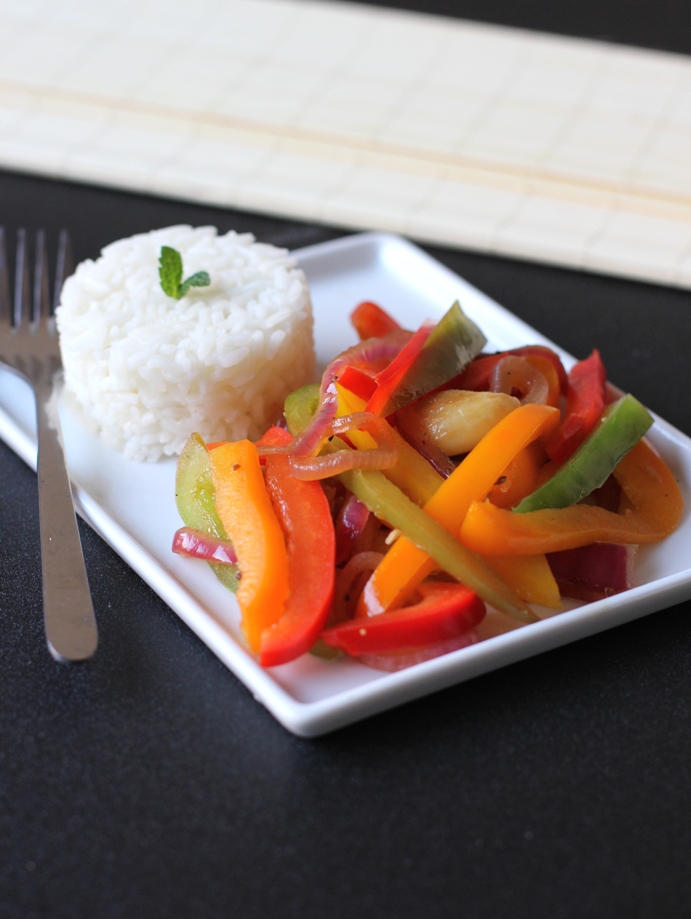
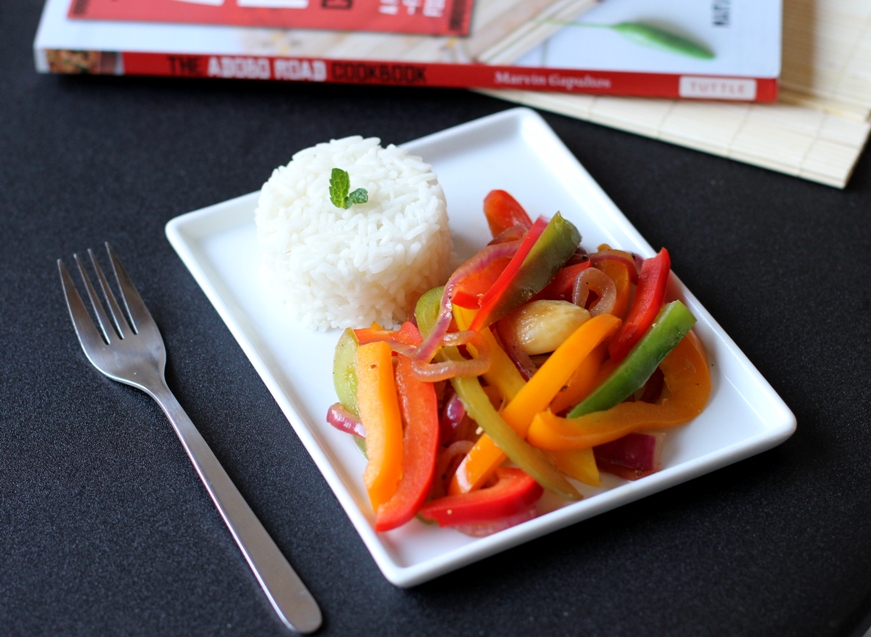
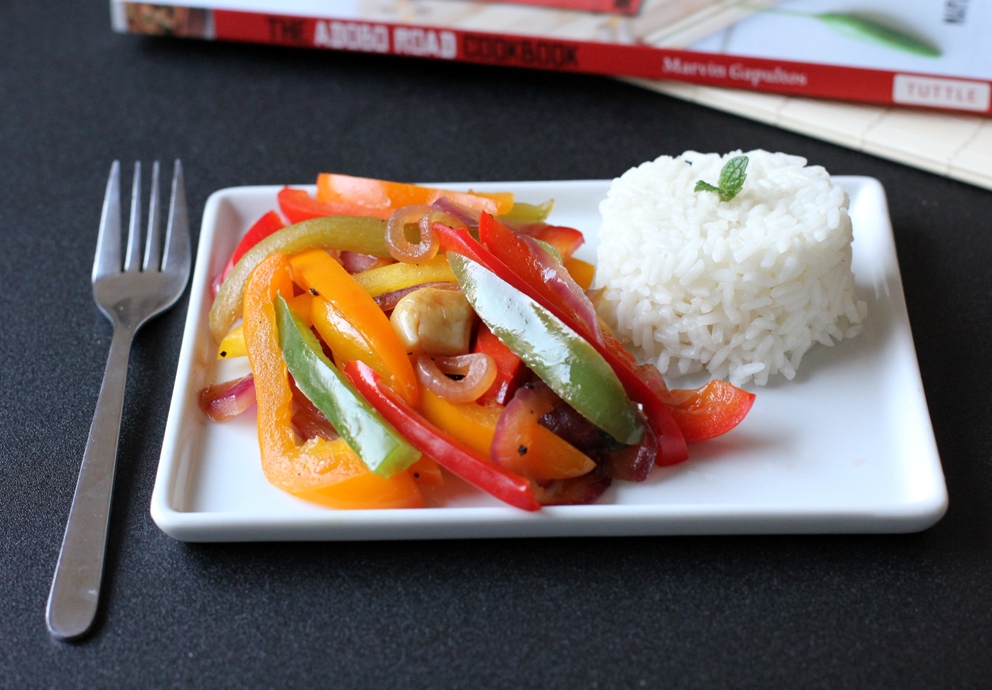
I’ve never made adobo before and the Vegetarian Bell Pepper Adobo (Adobong Sili) stood out for me due to it’s flavor and simplicity. In fact, I thought that it might be too simple or not as exciting as I hoped.

I underestimated its potential. I loved this dish! I wanted it to be as authentic as possible so I ordered the coconut vinegar online. I really think the slightly sweet flavor of this made the adobo. I’m so glad I decided to get it. Especially because it means there are more adobo dishes in my future.

If you’ve considered trying to make Filipino foods in your kitchen, definitely start with this book. The best way to describe it is easy authentic with plenty of passion to get you inspired!

Vegetarian Bell Pepper Adobo  Adobong Sili

Copyright © 2013 Marvin Gapultos. Reprinted with permission from Marvin Gapultos and Tuttle Publishing.

Serves 4–6

Prep Time: 15 minutes

Cooking Time: 30 minutes

2 tablespoons oil
1 red onion, thinly sliced
5–6 cloves garlic, smashed with the side of a knife and peeled
4 bell peppers of differing colors (green, red, yellow, orange), deseeded and cut into thin strips
¼ cup (65 ml) Filipino coconut vinegar, or distilled white vinegar
¼ cup (65 ml) soy sauce
¼ cup (65 ml) water
1 tablespoon brown sugar
1 teaspoon freshly ground black pepper
1 bay leaf

Heat the oil in a large sauté pan over moderately high heat. Add the onion and garlic and sauté until the onion is soft and translucent, 3–5 minutes. Toss in the bell peppers and sauté until they just begin to soften, 3–5 minutes.

Pour in the vinegar, soy sauce and water, stirring to scrape up any browned bits from the bottom of the pan. Stir in the brown sugar and black pepper, and add the bay leaf. Increase the heat to high and bring the liquid to a boil.

Reduce the heat to low, and simmer uncovered for 20 minutes, or until the bell peppers become tender but not mushy. Discard the bay leaf and serve the adobo with steamed white rice.

From the book:

Adobo: What’s in a name?
Despite foreign influence on Filipino cuisine, Filipino adobo is indigenous and unique to the Philippines, existing before colonial rule. In the Philippines, “adobo” refers to a technique, rather than a singular dish. In the Spanish context, adobo generally refers to a marinade used to flavor meats, whereas Mexican adobo refers to any number of spices. In all likelihood, Spanish colonists simply applied their term to what the Filipinos were already cooking and eating because it was similar in appearance to Spanish adobo, though not prepared the same way.

Disclosure:  This book was sent to me for review purposes. I was not required to post about it and received no compensation for doing so.

Coconut Bamboo Rice with Green Garbanzo Beans Recipe

May 31, 2013

I consider myself well-versed in fresh foods and in what my food looks like before it gets to my plate. I’ve grown a lot, and I have seen a lot in my travels. And that’s not to mention all the things I come across online. Yet, California continues to surprise me when it comes to produce.

I find something new to me at the Farmers Market almost every week. As you’d probably expect, I’m not shy. Many of the foods don’t have signs and at the market I go to some of the signs are only in an Asian language. As soon as something catches my attention, I walk right up to the vendor and ask what it is. I refuse to pass up on any food knowledge.

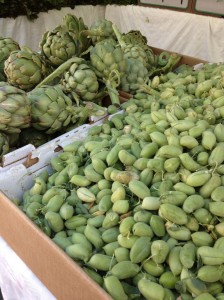
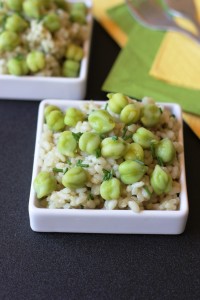
This past week, I spotted some small pods that I’d never seen before. Guess what they were. Garbanzo beans! I use garbanzo beans all the time, but I’ve never once seen the fresh version. I purchased a couple handfuls, not quite sure what I would do with them.

After posting the picture on Instagram, I got some help with how to cook them. The easiest way is to steam or boil them, and they cook rather quickly, similar to peas. I shelled and boiled mine, it took about 7 minutes or so to cook them.

It’s hard to describe the taste. They are obviously similar to the cooked-from-dried and canned versions, but they are fresher and lighter in both flavor and texture. I don’t know. Maybe it is just that green color making me think that, but either way, I loved them!

I picked up some bamboo rice (short grain rice infused with bamboo extract) a little while back and I’ve been hungry for something coconut. I used both and put together this very simple dish. It hit the spot for lunch after my mid-morning run.

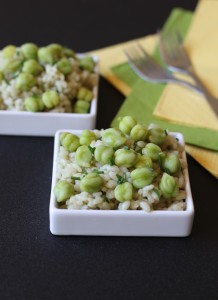
Coconut Bamboo Rice with Green Garbanzo Beans

1 tsp extra virgin olive oil
¾ cup bamboo rice
¾ cup chicken or vegetable stock
¾ cup lite coconut milk (I chose lite this time because it’s thinner)
1 tbsp chopped, fresh chives
¼ tsp salt (optional)
1 cup cooked, fresh (green) garbanzo beans

Heat the oil in a large saucepan over medium, add the rice. Cook about 60 to 90 seconds, stirring often. Pour in the stock and coconut milk. Bring to a low boil. Lower the heat and simmer for about 15 minutes, stirring occasionally. Cook until the liquid is absorbed and the rice is softened.

Stir the chives and the salt into the rice. Note: if you are using salted stock you may not need the salt, so taste before adding it.

Divide the rice onto two plates and top with a ½ cup of the garbanzo beans. Serves 2.

Cookie Monster Ice Cream Sandwiches from I Scream Sandwich by Jennie Schacht

May 22, 2013
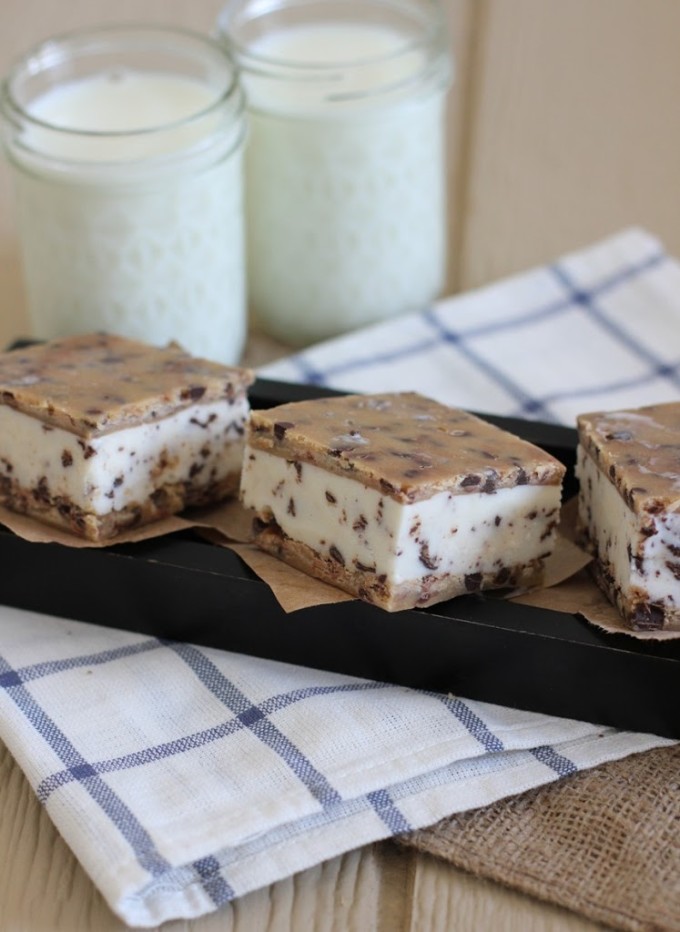
Cookie Monster Ice Cream Sandwiches from I Scream Sandwich by Jennie Schacht on fakefoodfree.com

There is a local ice cream shop in my hometown that has the best ice cream sandwiches. Chocolate chip cookies with chocolate chip ice cream. The cookies are thick and they turn chewy once frozen. They also have just enough of a salty flavor to offset the sweetness of the ice cream, making the whole treat incredibly tasty.

I’ve not made many ice cream sandwiches myself so it’s never occurred to me to try and recreate that version I loved growing up. Then I received a copy of I Scream Sandwich by Jennie Schacht. Those ice cream sandwiches from back home came to mind, but I wanted to try something that sounded different. Maybe the Vietnamese Breakfast with coffee flavored ice cream or the Got Your Goat with goat’s milk ice cream.

This book is full of ice cream sandwiches that will spark your curiosity. You’ll be pulling out the ice cream maker and calling dibs on bringing dessert to all your summer picnics. Creamy ice creams, rich gelatos and fruity sorbets are surrounded by more than just cookies.  Croissants, cakes, bars and buns are just a few of the creative exteriors to the sweet sandwiches in this book.

After my husband voiced his craving for something more classic, I decided to make the Cookie Monster. Let’s just say that after reading the recipe I realized that this sandwich was classic only in flavor. I wanted something a little different and, wow, did I get it.

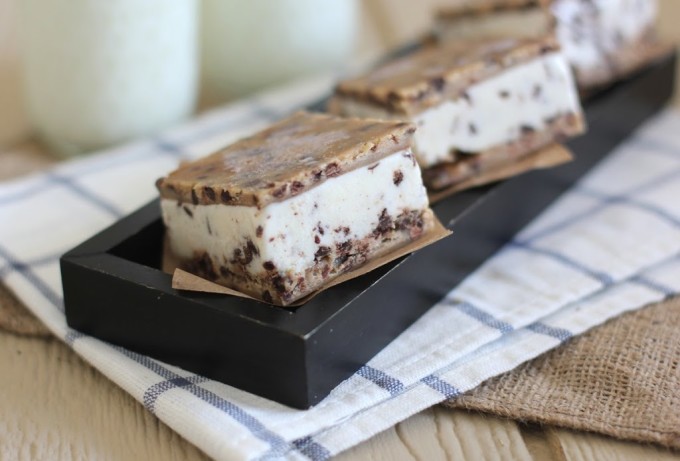
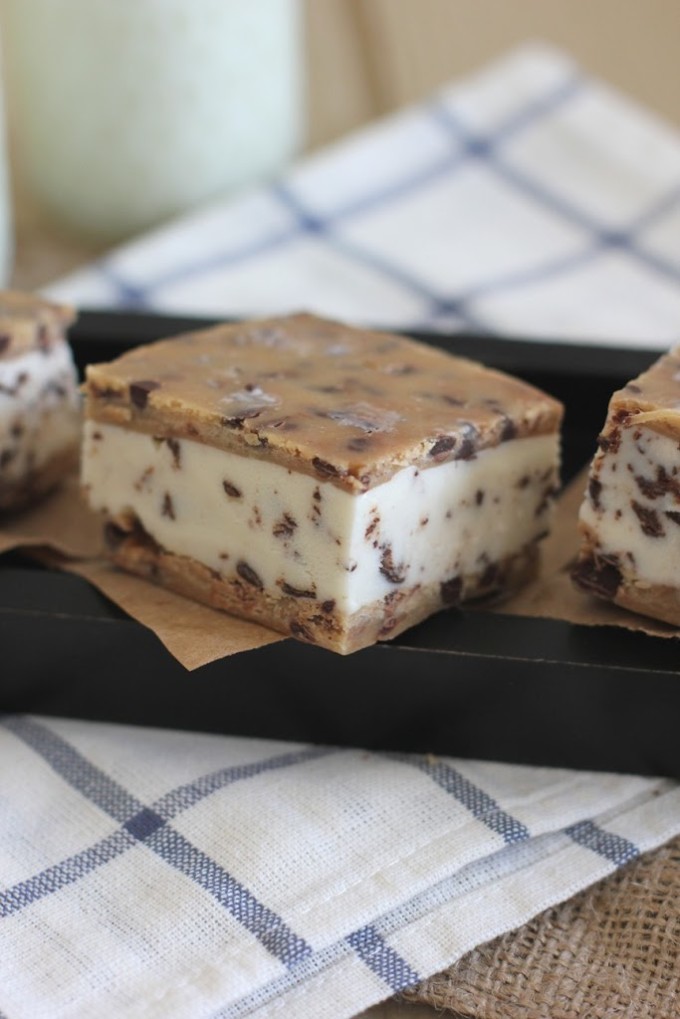
Why? Well, this sandwich isn’t surrounded by a cookie, but by cookie dough! Frozen (yet soft) cookie dough around homemade chocolate chip ice cream. It’s a brilliant idea.

And you know what is even better? Despite the fact that it’s cookie dough and not a baked cookie, it tastes almost exactly like that ice cream sandwich I grew up with!

Just a few tips if you are not a regular ice cream sandwich maker (like I wasn’t). Plan, plan, plan ahead. You will need to plan for freezing time, greased parchment paper and cold bowls. Read through the recipe and read it again. It’s really not that much work when all is said and done, but you’ll want to know what to expect before you get into it. Also, some of the methods for assembly are explained in the first few pages of the book so give them a browse before you start the recipe.

Cookie Monster Ice Cream Sandwiches from I Scream Sandwich by Jennie Schacht on fakefoodfree.com

Finally, don’t expect to have much will power around these things. I thought a batch would last us a while, but these have to be the most vocal desserts I have ever made. I could hear them calling me from the freezer all day long.

Cookie Monster Chocolate Chip Ice Cream on Cookie Dough

Copyright © 2013 Jennie Schacht, reprinted with permission from Abrams Books

Chocolate Chip Ice Cream (GF)

2 cups (480 ml) whole milk
¹⁄3 cup (67 g) granulated sugar
2 tablespoons golden syrup, inverted sugar syrup or light agave nectar
2 tablespoons tapioca starch
¼ teaspoon kosher salt
1 cup (240 ml) heavy cream
½ teaspoon pure vanilla extract
½ cup (100 g) bittersweet (60 to 70 percent) chocolate, chopped or chips
1 tablespoon neutral vegetable oil or coconut oil

Whisk ½ cup (120 ml) of the milk with the sugar, syrup, tapioca, and salt in a medium saucepan until no lumps remain. Stir in the remaining 1½ cups (360 ml) milk and the cream. Heat the mixture over medium-high heat, stirring with a heatproof spatula, until it begins to steam and slightly bubble at the edges. Adjust to a simmer and cook, stirring constantly, until the mixture thickens to the consistency of a cream sauce, about 3 minutes longer; do not fully boil.

Transfer the mixture to a metal bowl set over a larger bowl of ice and water. Stir occasionally until the mixture is cool, taking care not to slosh water into the bowl. Stir in the vanilla, then cover and refrigerate until very cold, at least 2 hours. Transfer the bowl to the freezer for the last half hour before spinning it.

Freeze the mixture in an ice cream maker according to the manufacturer’s directions. While the mixture spins, melt the chocolate and oil in the microwave or in a small saucepan until you can stir it smooth. Let cool to room temperature, keeping it fluid. With the machine running, drizzle in the cooled melted chocolate during the last minute of spinning. (Alternatively, drizzle the chocolate over the ice cream as you transfer it to the container, folding it in with a spatula or ice cream paddle to break it up as you go.) Transfer the ice cream to a chilled container, cover, and freeze until firm but still spreadable, at least 4 hours.

Cookie Dough

½ cup (1 stick / 113 g) unsalted butter
¹⁄3 cup packed (67 g) light brown sugar
¼ cup (50 g) granulated sugar
2 tablespoons milk, whole or 2%
½ teaspoon pure vanilla extract
½ teaspoon kosher salt
1¼ cup (165 g) all-purpose flour
1 cup (200 g) mini chocolate chips
Neutral vegetable oil, for the waxed or parchment paper

Melt the butter with the brown and granulated sugar in a small saucepan, stirring to dissolve the sugar. Transfer to a bowl and stir in the milk, vanilla, and salt until well blended. Stir in the flour until completely smooth. Let cool completely, then stir in the chips. (If the chips begin to melt, stop stirring—the swirls will be pretty.)

Line an 8-inch (20-cm) freezer-safe baking pan with two pieces of lightly oiled waxed paper or parchment paper so the papers extend well beyond the edges of the pan on all four sides as a sling for easy removal. Scatter half of the dough into the pan and use your fingers to pack it into an even layer. Top with lightly oiled waxed or parchment paper, oiled side down.

Place another lightly oiled waxed or parchment paper in the pan, leaving 2 inches (5 cm) of paper extending at each end. Scatter and press the remaining dough into an even layer. Top with lightly oiled waxed paper or parchment, oiled side down. Freeze the dough layers until firm, at least 1 hour.

SANDWICH!

Use the flaps to lift out the top cookie dough layer. Peel the paper from one side and loosely replace it. Flip the layer over and do the same to the other side. Repeat with the second cookie dough layer. Place both layers back in the freezer.

Form sandwiches using Method #4* on page 19, starting with step 3, using the bottom two pieces of parchment extended on all sides to line the pan in place of the plastic wrap. Freeze hard before cutting the sandwiches into 4 strips in each direction to form 16 bars. To make 64 bite-size treats, cut each bar into quarters.

*Place one slab of cookie dough top-side down in the pan and spread softened ice cream over it in an even layer. Top with the second slab, top-side up, pressing firmly to evenly distribute the ice cream. Wrap tightly in plastic wrap and freeze until very firm, at least 6 hours or overnight, for easiest cutting.

Cookie Monster Ice Cream Sandwiches from I Scream Sandwich by Jennie Schacht on fakefoodfree.com

I should probably mention that I happily have many cookbooks to review this summer. Don’t worry, I haven’t stopped creating my own recipes. They will be interspersed regularly. But I have a passion for cookbooks and enjoy the opportunity to support the art by sharing ideas for new books for your library. I hope you enjoy them as much as I do.

Disclosure: I received a copy of this book for review purposes. I was not required to post about it and received no compensation for doing so. Thoughts here are my own.


Thanks for reading! All images and content are the property of Fake Food Free unless otherwise stated. Please do not republish full recipes and images without written permission. What is okay? Feel free to Pin images, share links to my posts or share the photo in a round up post with the title of this recipe and a link back to the post. Confused about copyright and food blogs? Here is some helpful information on Recipe Attribution. If you want to use a photo or full recipe, just ask. I’m sure we can work something out.  

Grapefruit Moon from Beer Cocktails by Howard and Ashley Stelzer

May 16, 2013

I think it was last year. Or maybe the year before. I was reading one of those food trend articles. You know, the ones that tell us what we will be eating, drinking, making, and demanding from restaurants in the coming year. This particular article was declaring that beer cocktails would soon be in

I was pretty excited about this prediction. I mean, they were right about cupcakes and bacon, so they must be right about beer cocktails. Yet, I think I’ve only come across one beer cocktail on a menu since reading that article. Perhaps we dine at the wrong places, but considering how our food explorations have increased this year, I’m surprised I haven’t found more. 
Just where are these beer cocktails?
Guess what. I found them! And they aren’t at your favorite restaurant. They are in the book Beer Cocktails by Howard & Ashley Stelzer

I’m now calling this my – drinks of summer – book. It’s filled with 50 beer cocktails and I won’t be surprised if we try them all. It’s a must-have to keep in your bar at home when you want to break out of the sangria and mojito ruts of the summer season. And there are quite a few recipes that will carry you on into the holiday season.You might just want to run out and get a copy now so you can close out American Craft Beer Week with a bang.

The recipes are categorized by beer type – ale, lager, stout, etc. Some are a simple combination of beer and a spirit. Others include fruits, juices, preserves and syrups. Many will make you question – will those ingredients actually taste good together? Yes, they will. Let me prove my point. 

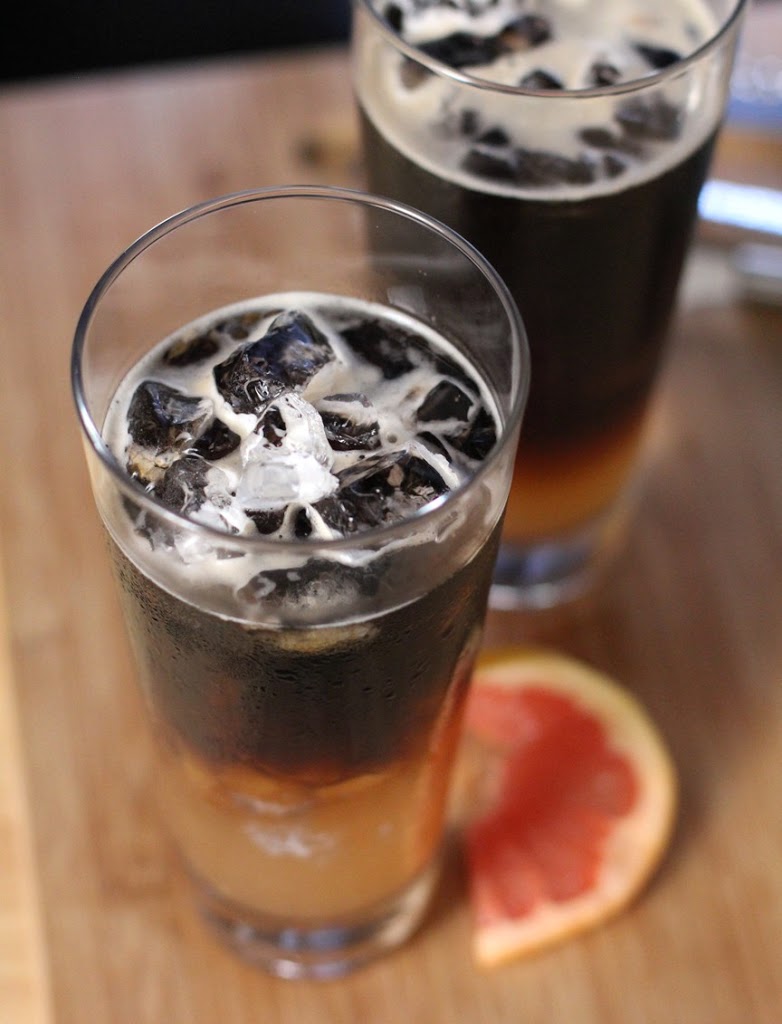
I’m crazy for grapefruit. Love it. So when I came across the Grapefruit Moon I knew I had to try it. This time it wasn’t because it has bourbon in it. That was just a bonus. 
I’ll admit I was skeptical about the combination right up until my first sip. After that, I was sold. So was my husband. He’s actually hijacked the book for a while to pick out our next drink. 
So go ahead and stop searching for those supposedly trendy beer cocktails. Get this book and start making them at home. You can start with the Grapefruit Moon.

Grapefruit Moon

Recipe © 2012 by Howard & Ashley Stelzer and used by permission of The Harvard Common Press
Serves 1

Ice cubes
1 ½ ounces bourbon
1 ½ ounces freshly squeezed grapefruit juice
1 tablespoon simple syrup or maple syrup (I used maple)
3 ounces stout
1. Fill a cocktail shaker halfway full with ice cubes. Add the bourbon, juice, and syrup, and shake well.
2. Fill a pilsner glass with crushed ice, and strain the mixture into the glass. Top with the stout, and serve.

 Disclosure:  This book was sent to me for review purposes from The Harvard Common Press. I was not required to write about it and I received no compensation for doing so. Thoughts are my own.

Peanut Tea Cookies Recipe and a Weekend with The Peanut Institute

May 13, 2013

This year was our first time spending Derby Day in California and I had every intention of celebrating big — dressing up, mint juleps, meeting some University of Kentucky Alumni folks at a party in the city. And then I got an invitation that caused me to quickly trade pecan chocolate chip bourbon pies for peanuts.

I spent the first weekend in May at a sponsored Science & Culinary retreat on Plant-Powered Eating in Napa hosted by The Peanut Institute. A combination of nutritional research and cooking — I can think of few things that are more, well…me.

Truth be told, I was already a huge fan of peanuts. My preferred sandwich growing up was not PB&J, but straight up peanut butter. Now days I tend to skip over the sweetened versions and fully enjoy natural peanut butters with nuts and salt only. We also eat a fair share of dry roasted, unsalted nuts and I find shelling my own peanuts oddly rewarding.

So I really needed no convincing as to why one should eat peanuts as part of a plant-based diet, but I enjoyed the informative research presentations about recent studies using peanuts and the resulting health benefits.

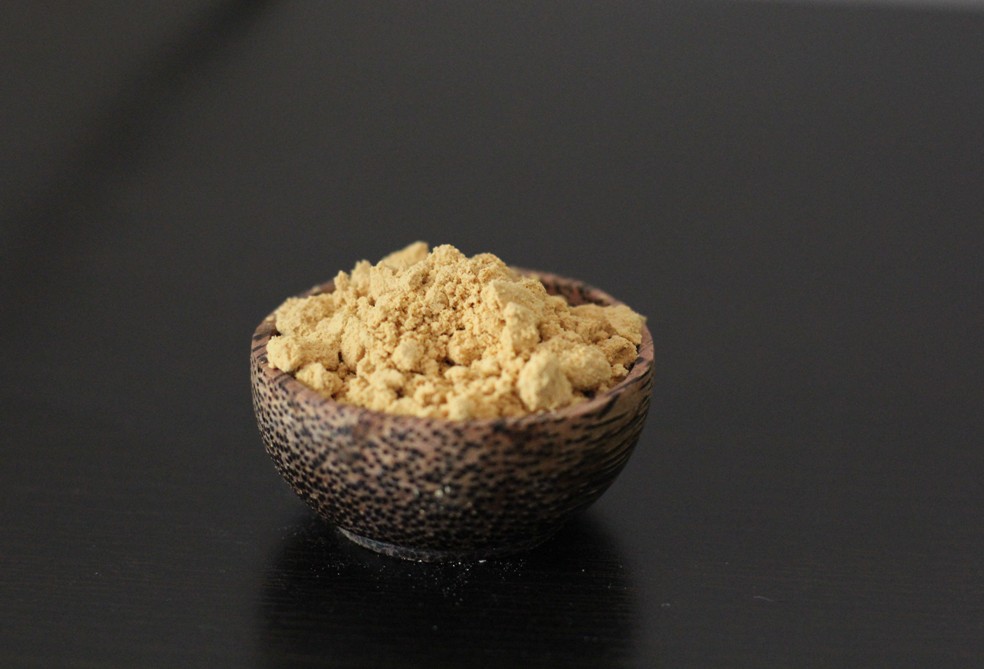
You can expect more posts sharing the information learned at the retreat, but first I want to focus on a few things — the cooking (at the Culinary Institute of America at Greystone in Napa, no less!), the incredibly diverse uses for peanuts in both sweet and savory cooking, and finally, my new favorite ingredient — peanut flour.

As you can imagine, almost every course of every meal of the weekend was touched by the peanut in some way. On Saturday night, we enjoyed an outstanding meal from the chefs at Hess Collection Winery. This was my first visit to this winery, but I encourage you to make it a stop if you are in Napa. The Chardonnay was outstanding and the tour of the art collection still has me a bit speechless.

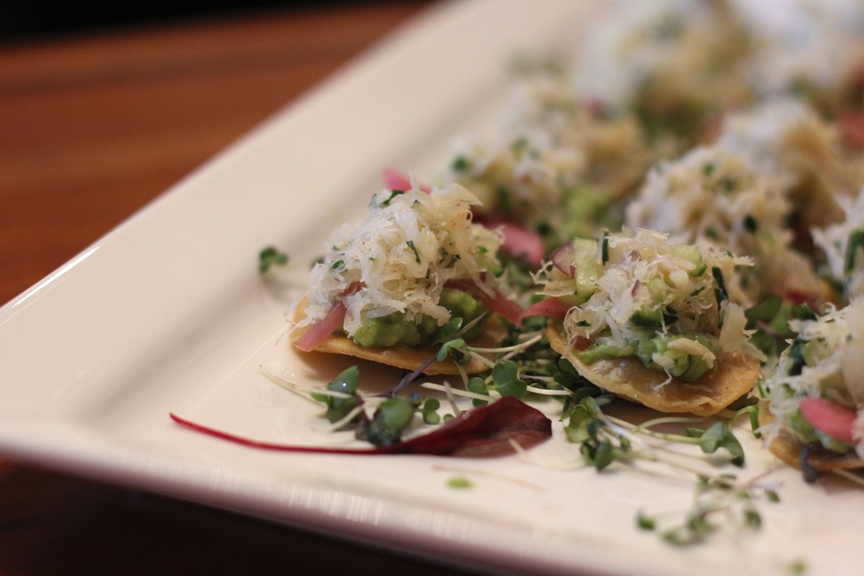
It started with appetizers of Crab Ceviche.

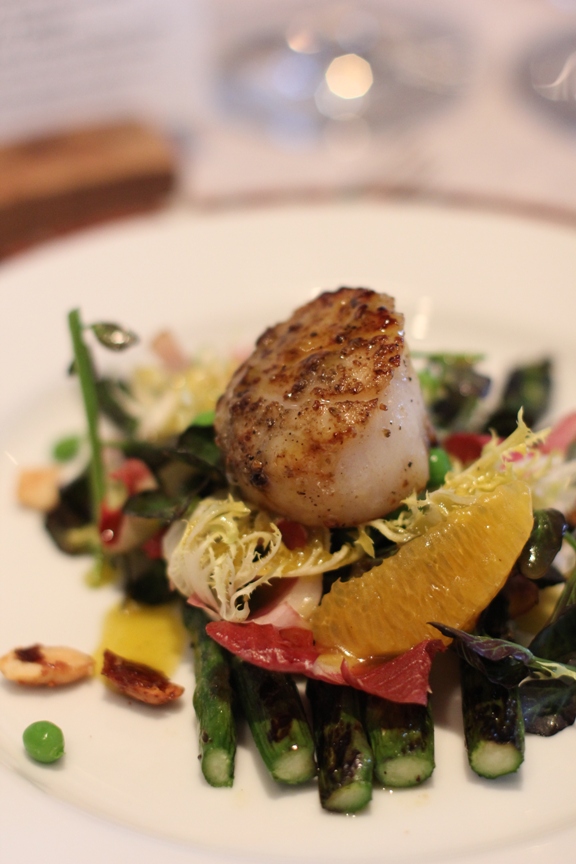
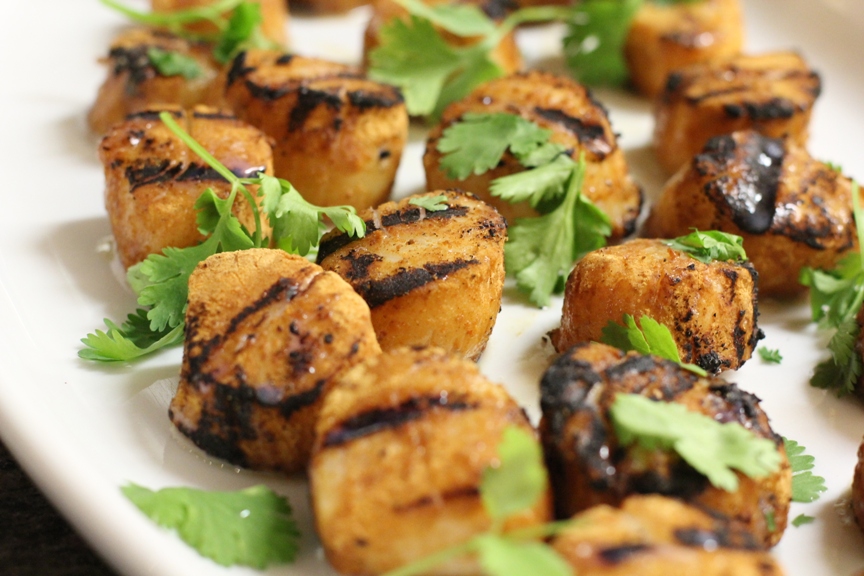
Our salad included a Fennel Dusted Scallop over Red Watercress, Frisee, Endive, English Peas, Navel Oranges, Grilled Asparagus and Togarashi Candied Peanuts with a Wildflower Honey Citrus Vinaigrette. Is it possible to fit more seasonal ingredients in one dish? I think it may have been my favorite of the weekend.

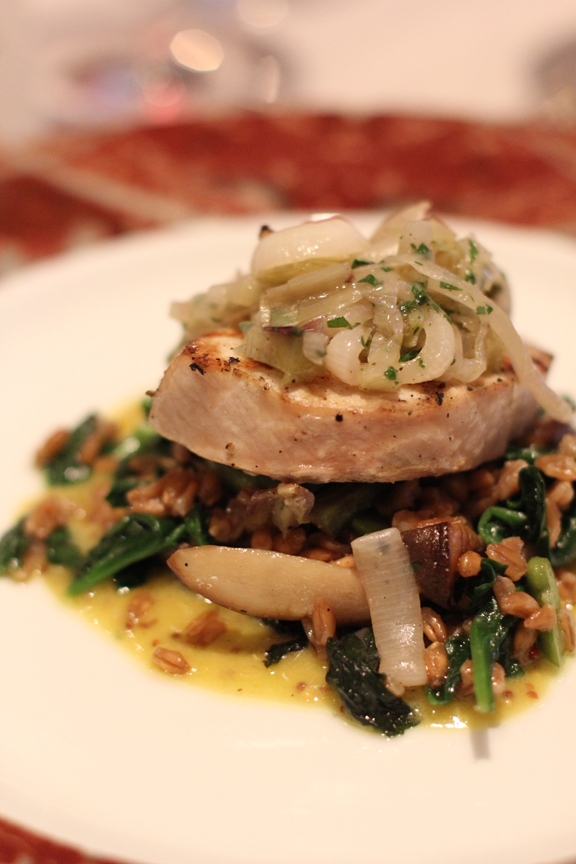
Dinner included Oak Fire Grilled Line Caught Local Swordfish with Toasted Farro, Lollipop Kale, Royal Trumpet Mushrooms and Fava Beans with Truffle Whole Grain Mustard Sauce and Fresh Herb & Spring Onion Relish.

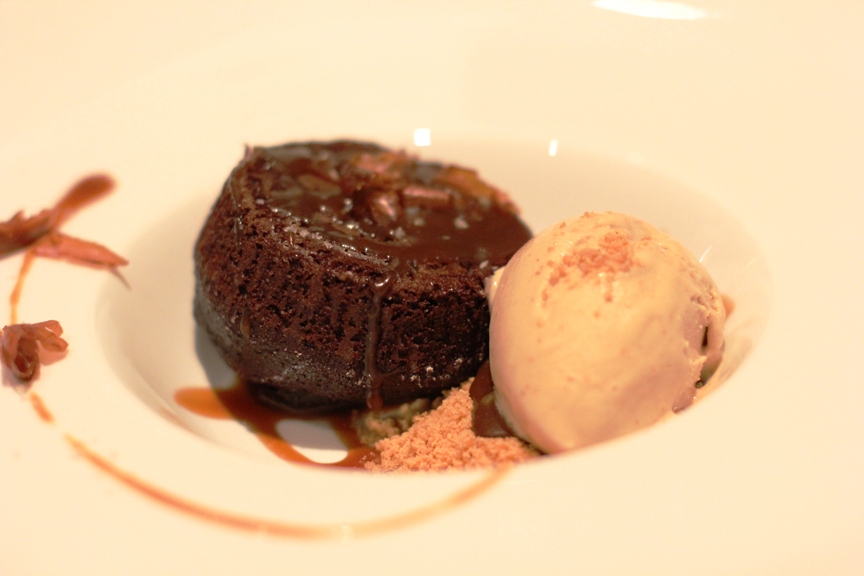
Dessert was a creative twist on the southern practice of dropping a few salted peanuts into a bottle of cola before drinking it — Chocolate Cola Cake, Peanut Horchata Sorbet and Cola Caramel.

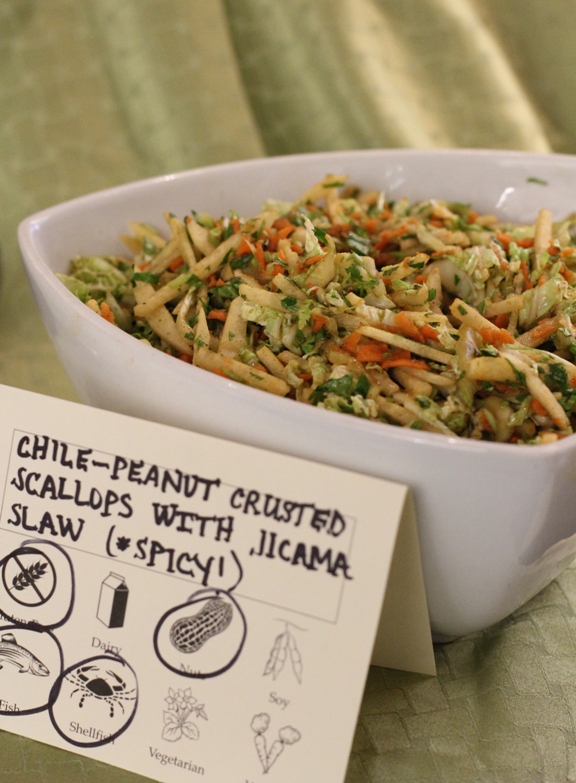
Sunday was spent at the CIA with peanut-focused cooking demos and group cooking sessions. Our lunch feast was pretty incredible. We were split into teams, each assigned recipes to make which were focused on a food region. Our group had Latin, and this was our final dish.

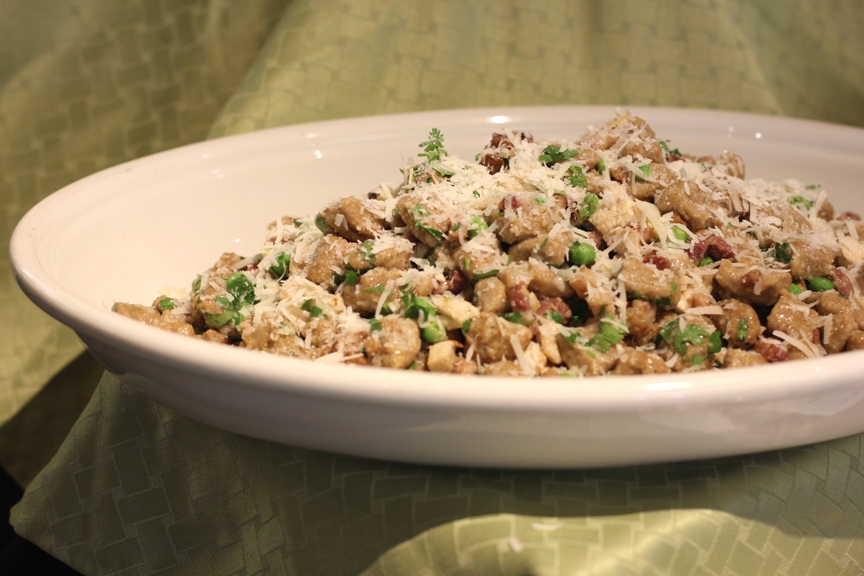
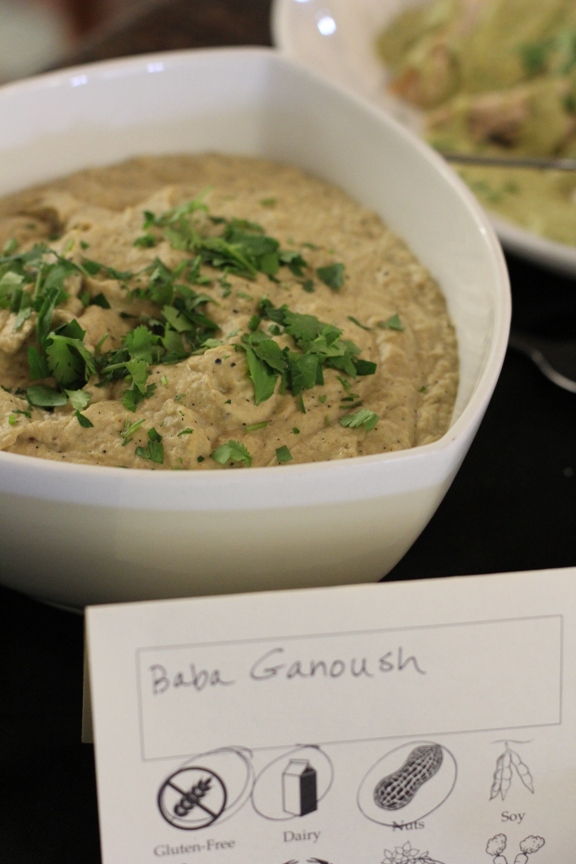
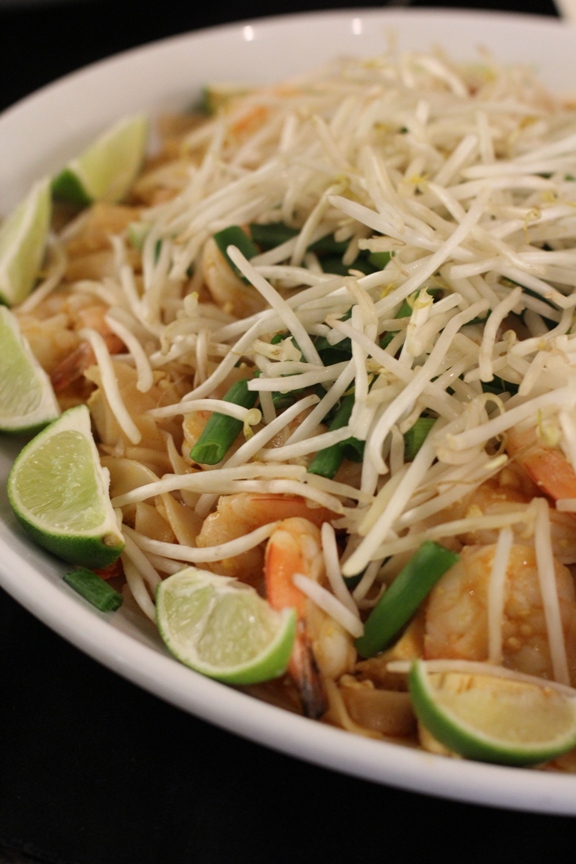
The other dishes ranged from a gnocchi made with peanut flour to baba ganoush made with peanut butter. Here are a few.

Peanut Gnocchi with Peas and Pancetta

 Pad Thai

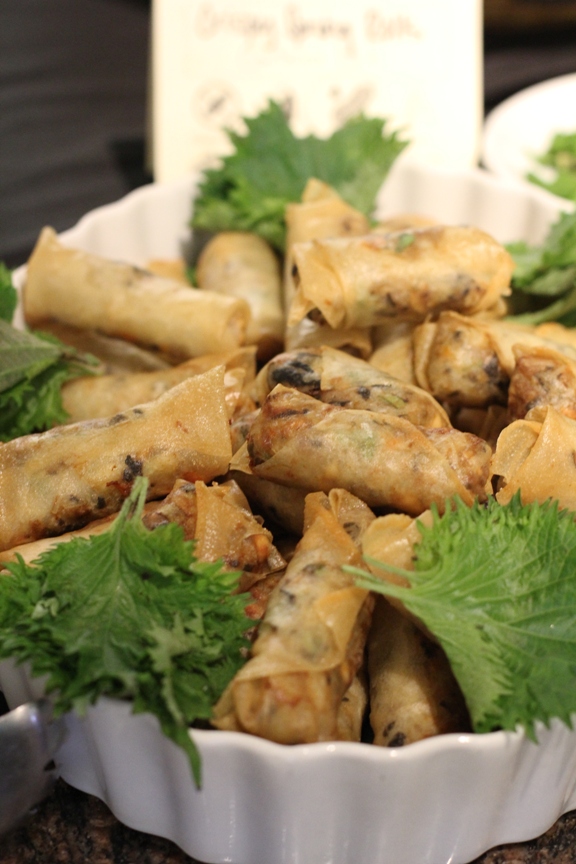
Crispy Spring Rolls

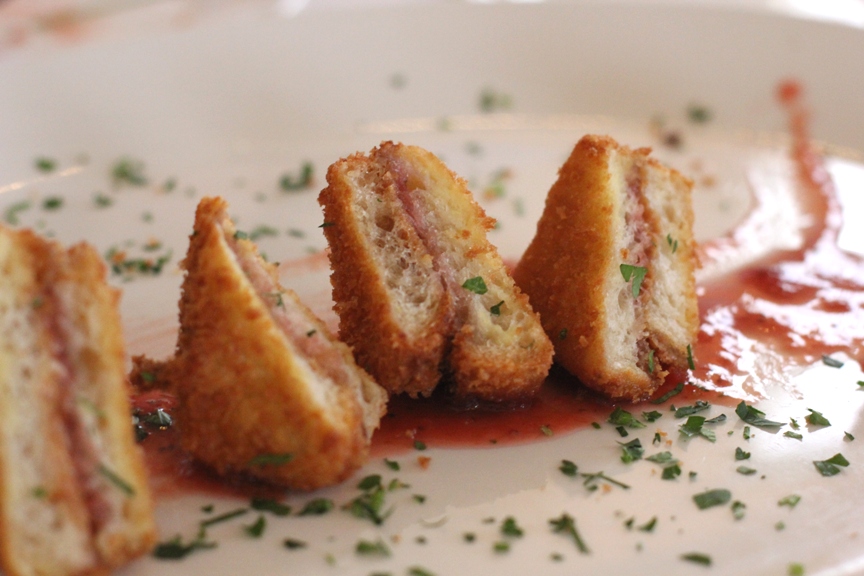
Our dinner Sunday night was at the quaint Cindy’s Backstreet Kitchen in downtown Napa. The food was delicious, but with lots of lively conversation I got fewer pictures this time around. That is, except for the one dish that gets the reward for the most peanut creativity.

Crispy Peanut Butter & Jelly Sliders! These were like little Monte Cristo sandwiches without the meat. Seriously tasty!

Not a bad weekend learning about the versatility of peanuts, right?

But now let’s talk about this peanut flour. It was mentioned the first day of presentations and everyone’s ears immediately perked up. Some people said they once bought it at Trader Joe’s, but that they no longer carry it. I had heard of it before, but that was the extent of my knowledge.

There are a few different varieties — lightly toasted, darker toasted and varying fat contents. Several of the recipes that were demonstrated or that we made used peanut flour. So I had a few ideas in my head before I got my bag home.

First of all, I’m a little amazed by it. If you taste it straight out of the bag, it’s actually quite good with a roasted peanut flavor without any grittiness. This is what makes it perfect for stirring into oatmeal and also for breakfast shakes. In fact, I’ve found the flour helps me get a more concentrated form of protein (and peanut flavor) into breakfast while reducing the calories I would get from adding peanut butter.

Aside from all this healthy breakfast stuff, I couldn’t wait to try the peanut flour in  my baking. I was flipping through old posts when I got an idea. A few years ago, as part of the annual blogger holiday recipe exchange, I made Russian Tea Cakes. These were very similar to Mexican Wedding Cakes – light and tender cookies with nuts, coated in powdered sugar. I immediately wondered what might happen if I made a peanut version.

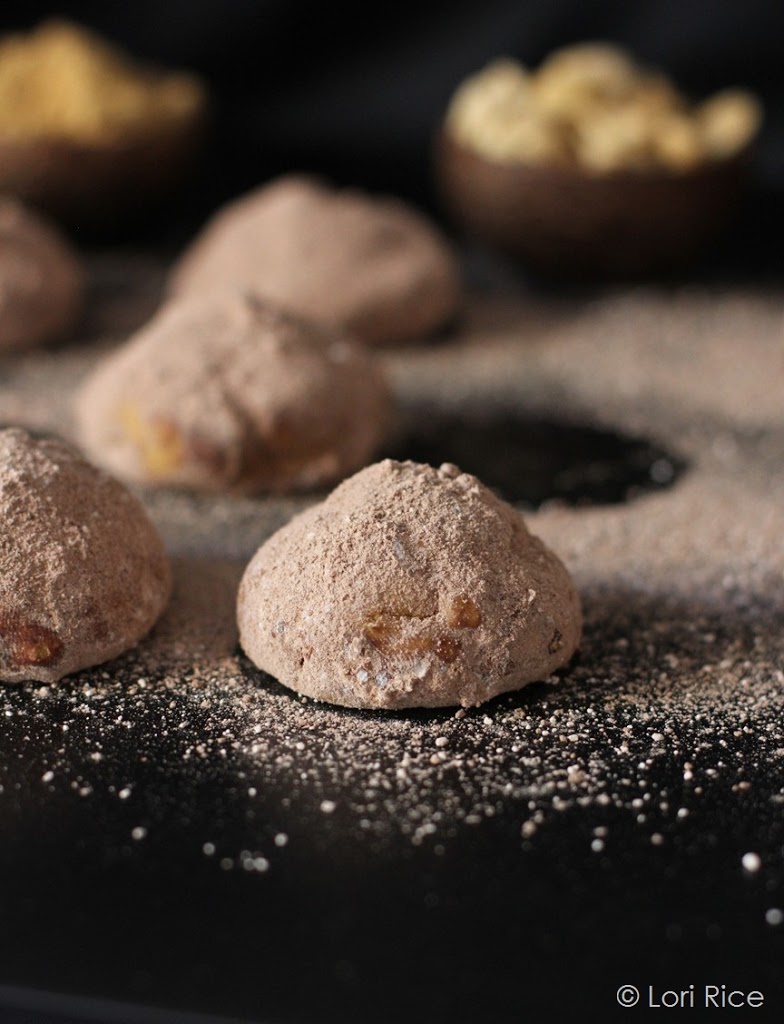
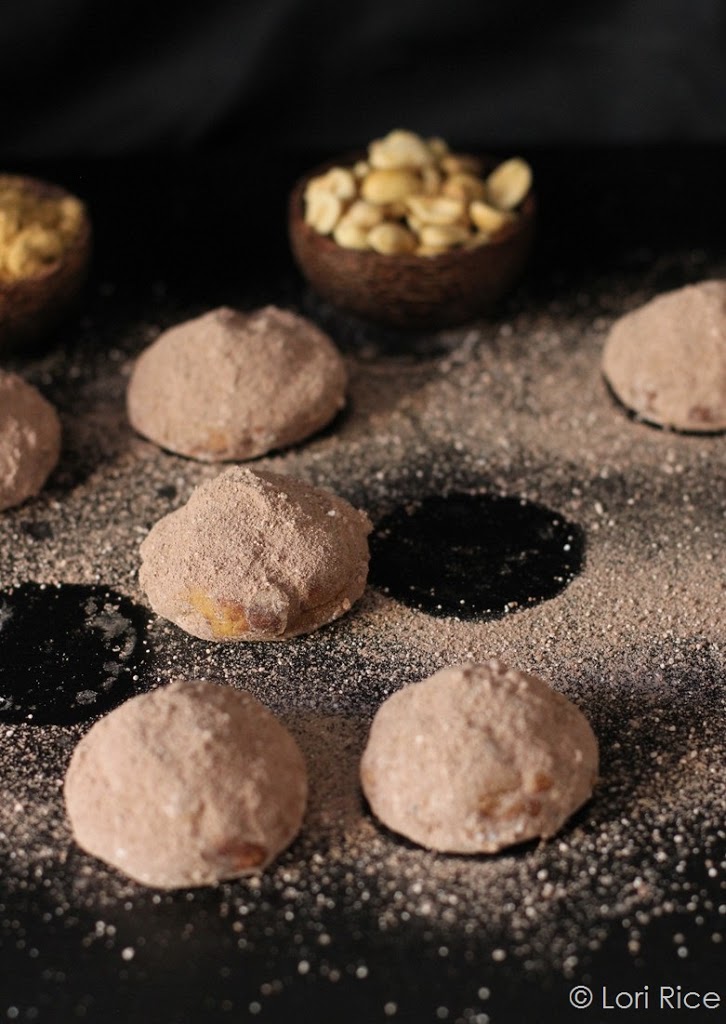
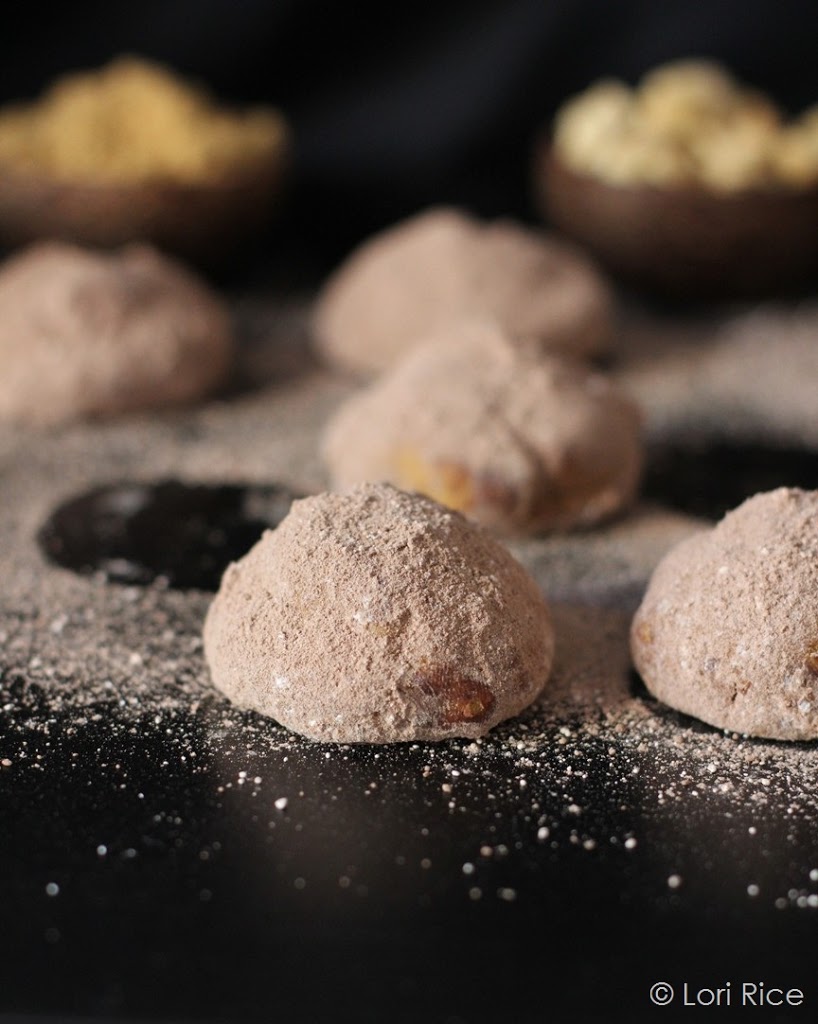
I was hoping to use all peanut flour, but I couldn’t get the consistency of the dough just right so I did add in a ¼ cup of unbleached, all-purpose flour. I used chopped dry roasted, lightly salted peanuts (so I omitted any extra salt in the recipe) and dusted the cookies with powdered sugar and cocoa powder.

First, your kitchen will smell amazing for hours after baking these cookies. And I’m thrilled with the result. They are a tasty peanutty twist on a classic.

Peanut Tea Cookies 

Modified from Russian Tea Cakes

½ cup unsalted butter, softened
½ cup powdered (confectioner’s) sugar
½ tsp vanilla
1 cup + 2 tbsp 28% fat, light peanut flour
¼ cup unbleached all-purpose flour
⅓ cup dry roasted, lightly salted peanuts, chopped

For dusting:

¼ cup powdered sugar
¼ cup unsweetened cocoa powder
Preheat the oven to 400 degrees F.

In the bowl of an electric mixer, add the butter and powdered sugar, beat until smooth, about 2 minutes. Mix in the vanilla.

Add the peanut flour and white flour and mix on low until combined, scraping the sides as needed. Mix in the peanuts.

Roll the dough into balls just shy of the size of a golf ball. Place on an ungreased baking sheet or a baking sheet covered with a baking mat. Bake for 10 minutes, or until the bottom edges begin to brown. Be careful not to over bake.

Remove the baking sheet from the oven and do not disturb. The cookies are very fragile when warm.

In a flat dish, stir together the powdered sugar and cocoa powder.  Once the cookies are completely cool, after about 15 -20 minutes, carefully remove them from the baking pan and roll in the dusting powder until completely coated. Store in a single layer in an airtight container for up to three days. Makes 12 cookies.


Disclosure: My attendance to the Science & Culinary retreat May 4-6, 2013 was fully sponsored by The Peanut Institute. The peanut flour from Old Virginia Byrd Mill used in this recipe was provided to me at this event. I was not required to post about this event or any products received, and I received no compensation for doing so. Thoughts are my own. I liked peanuts and peanut butter long before blogs existed and the FTC set disclosure regulations for them.

Strawberry, Mango and Avocado Cupcakes with Strawberry Avocado Frosting Recipe

May 3, 2013


I was still caught up in the amazing California citrus season when the strawberries began to arrive at the Farmers Market. It started with one or two vendors offering a few containers. Now, they are everywhere – organic, conventional, big, small, full flats, or small pint baskets – you can get just about anything you want. 
 
I’ll admit they aren’t quite as tasty, or as rewarding, as the buckets we used to pick from our own garden, but they will certainly do. I’ve been buying loads, eating some and freezing others to use in my oatmeal when the season is over. 
 
 
With ataulfo mango season falling at the same time as the strawberries here, and with easy access to avocados, I felt compelled to combine all three.
 
I also can’t seem to get over the desire to play with avocados as a substitute for butter in my baked goods. First it was the Avocado Pound Cake with Blood Orange Glaze, and now cupcakes.
 
 
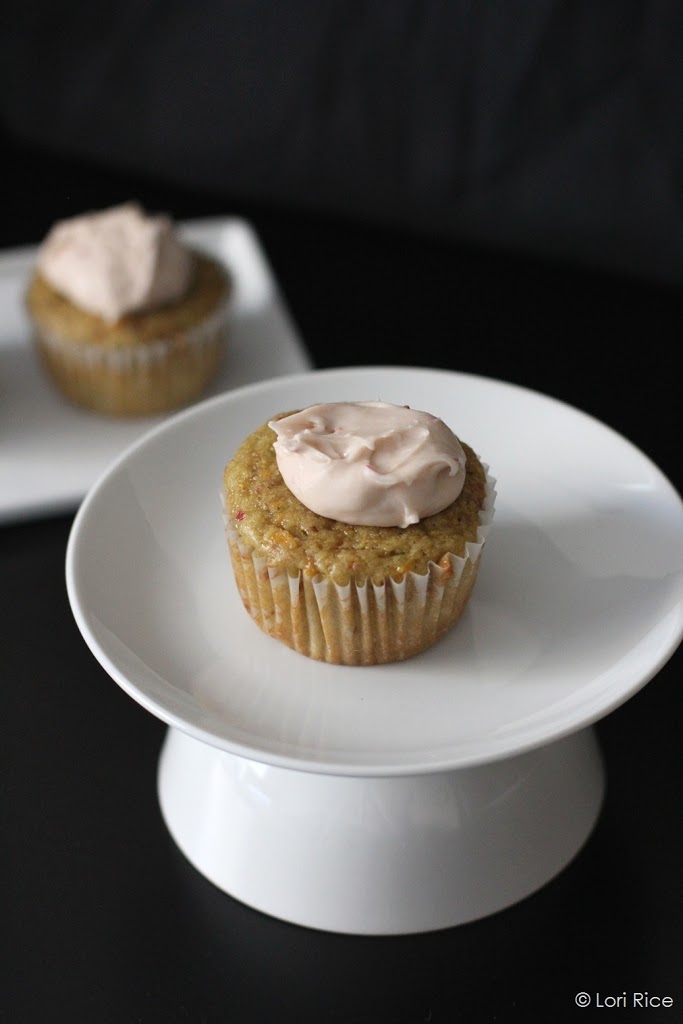
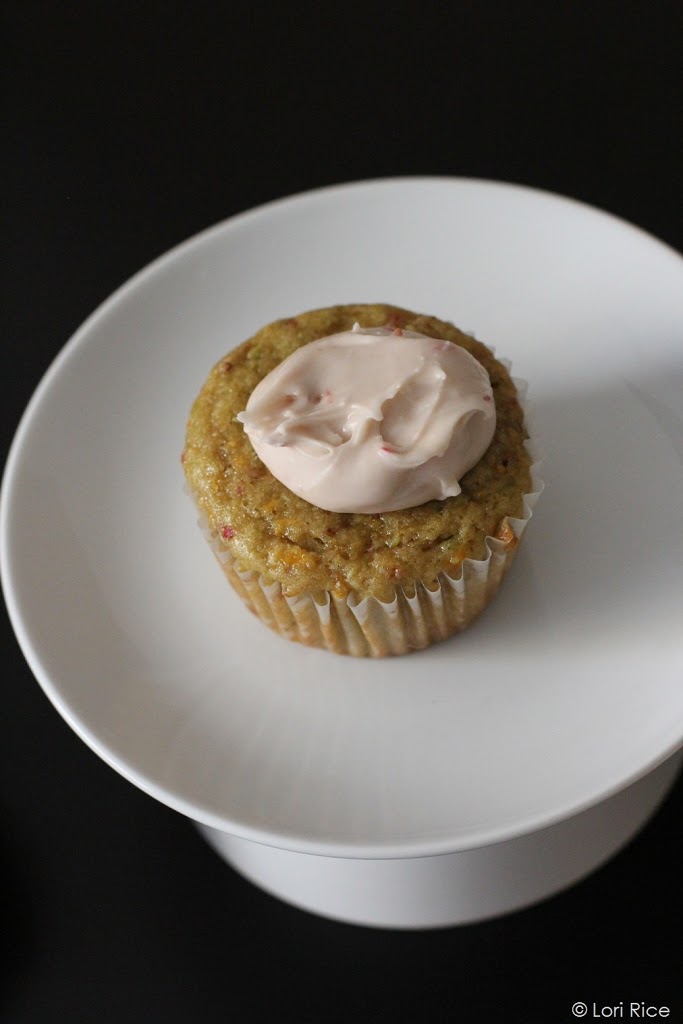
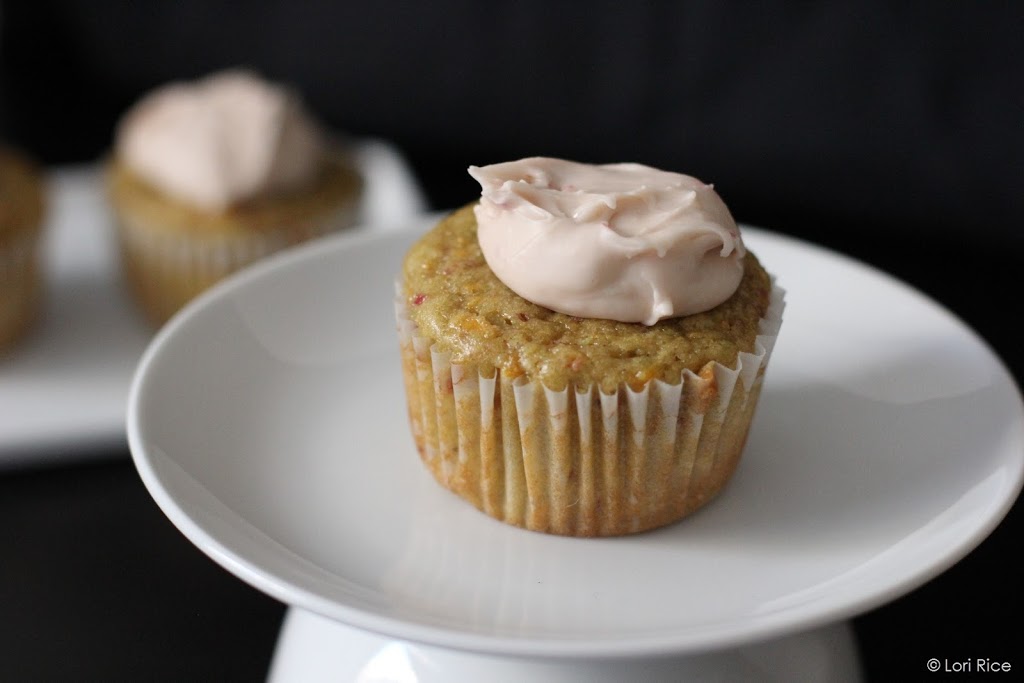
These cupcakes are soft and fruity, and the frosting? I think I may be making my frosting with avocado from here on out. I’ll admit, I tried it with just avocado and it was a little too green-tasting (for lack of a better term). The addition of strawberry puree did the trick. It sweetened it up and balanced the flavor of the avocado.
 
These don’t keep long. I’d suggest baking them just before you will need them, cool, frost and eat soon after. If you don’t plan to finish them off, keep unfrosted cupcakes in the refrigerator for only a day or two. The oils from the avocado tend to surface when they sit for over a day. 
 

Strawberry, Mango and Avocado Cupcakes with Strawberry Avocado Frosting

Makes: 12 cupcakes

Ingredients

½ cup mashed avocado (about 1 Hass avocado)
2 large eggs
1 cup raw sugar
½ cup pureed strawberries
½ cup pureed mango
1 teaspoon pure vanilla extract
1 ¼ cup unbleached, all-purpose flour
3 ½ teaspoon baking powder
1 teaspoon fine ground salt

Frosting
2 tablespoon mashed avocado
5 ¼ cups powdered (confectioner’s) sugar
½ teaspoon pure vanilla extract
1 tablespoon milk (any variety)
½ tablespoon fresh lime juice
2 tablespoon pureed strawberries
Pinch of salt
 
Prep
 
Preheat the oven to 350 degrees F. Place cupcake liners in a 12-cupcake baking pan. Spray the liners with olive oil or non-stick cooking spray. 
 
In the bowl of an electric mixer, beat the avocado, eggs and sugar until blended, 60 to 90 seconds, scraping the bowl as needed. Add the strawberry and mango purees and mix just until all ingredients are combined. Add the vanilla. 
 
In a separate bowl, whisk together the flour, baking powder, and salt. Add the dry ingredients (a little at a time) to the wet ingredients, stirring gently, just until everything is combined.
 
Transfer the batter to the cupcake tins, filling each liner with an equal amount. 
 
Bake 15 to 17 minutes, or until a toothpick inserted in the center of the cupcakes comes out clean. Remove from the oven and let cool.
 
For the frosting, add the avocado and powdered sugar to the bowl of a mixer. Using the whisk attachment, mix on medium-high until the two are combined to create a very thick paste. 
 
With the mixer on low, add the milk, lime juice and strawberry puree. Continue to mix until all ingredients come together to form a spreadable frosting. Mix in the salt. 
 
Use a small cookie dough or ice cream scoop to top each cupcake with about 1 tablespoon of frosting. Serve right away. 
 
 
Thanks for reading! All images and content are the property of Fake Food Free unless otherwise stated. Please do not republish full recipes and images without written permission. What is okay? Feel free to Pin images, share links to my posts or share the photo in a round up post with the title of this recipe and a link back to the post. Confused about copyright and food blogs? Here is some helpful information on Recipe Attribution. If you want to use a photo or full recipe, just ask. I’m sure we can work something out.  

Green Tea-Sesame Butter from Flavored Butters by Lucy Vaserfirer

April 22, 2013
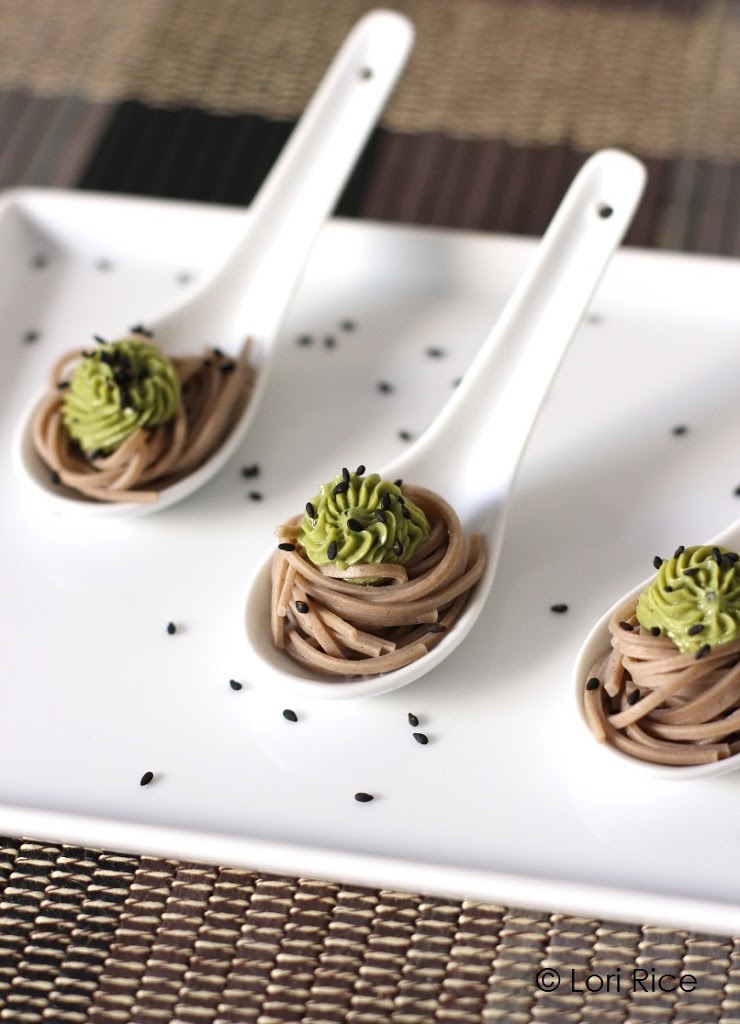
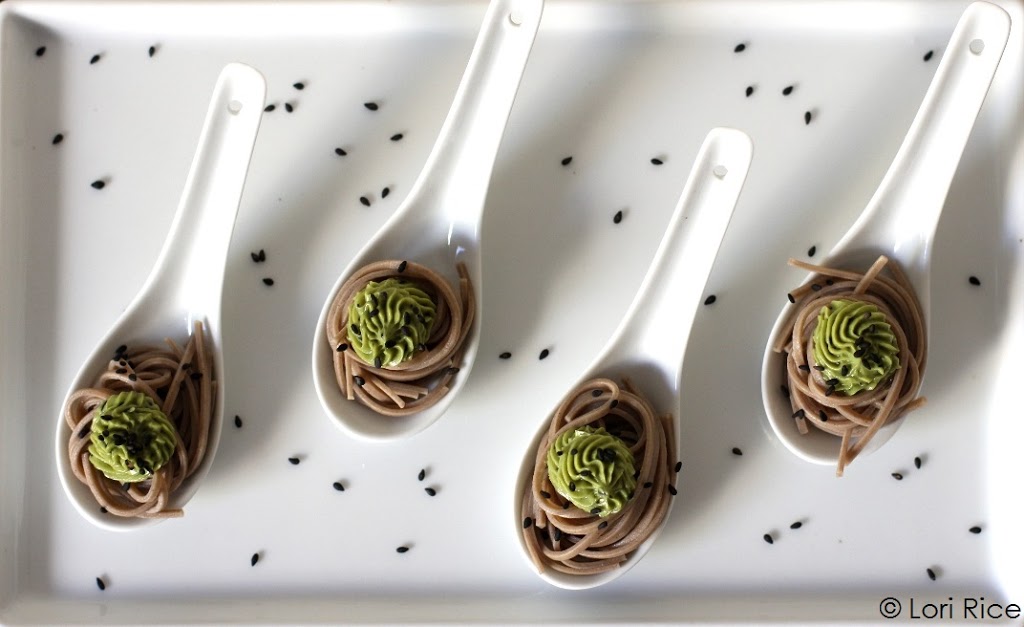
 Green Tea-Sesame Butter over chilled soba noodles | FakeFoodFree.com

Cream, salt and a special marble go into a sealed cup. Then shake until arm cramps, and then keep shaking. Finally, after what feels like hours to your arm, you end up with creamy butter. I can still remember the grade school experiment, as well as how good that butter tasted.

Then along came the junior high years, an obsession with the scale, and many false accusations directed at real food. This was followed by a growing interest in nutrition and fitness. Next, the work toward my degrees in nutrition.

And through all of this, there was no butter.

I wouldn’t touch the stuff. I even convinced myself that I liked dry biscuits and pancakes. I can still remember family cookouts and preparing those foil packets filled with potatoes for the grill. Knowing I was partially in charge, my grandmother would make sure I heard her say, “I want mine with butter. REAL butter.”

Now, the thought brings a smile to my face. Oh, if she could only see how much I’ve changed.

As you know, I am now a believer in real food — grassfed and pastured meats, garden grown vegetables, and yes, sweet butter. No trans-fat filled imposters make it into my kitchen and biscuits and pancakes have never tasted so good.

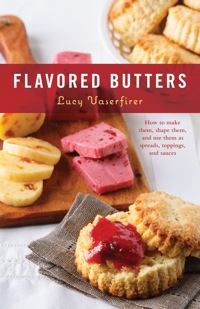
Naturally, when I was given the opportunity to review a cookbook all about butter, I jumped at the chance. Flavored Butters by Lucy Vaserfirer celebrates the simplicity of butter while showing how exciting we can make it. 

The book is filled with simple (yet taste-bud thrilling) recipes that can turn a pat of butter into the highlight of your breakfast, brunch or dinner. Curry Butter and Coffee Butter were two that immediately caught my attention.

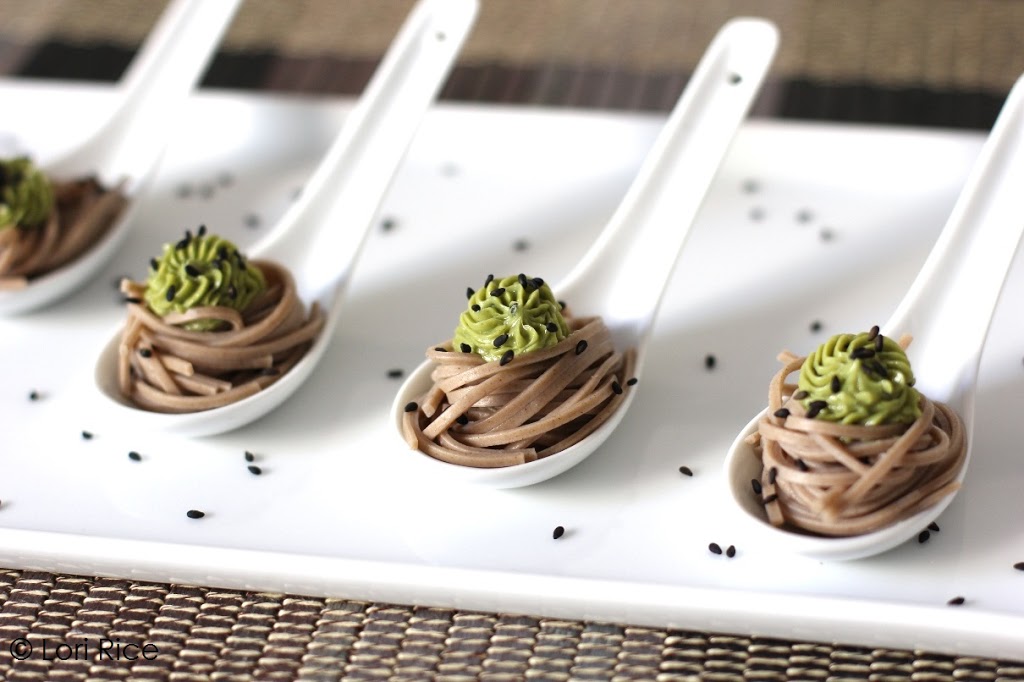
Then I saw the Green Tea-Sesame Butter! Despite my love of Matcha, I had yet to see it in butter. I promise you, a dollop of this gorgeous green, shaken cream will completely transform a meal.


Green Tea-Sesame Butter
In one of the beautiful photos by Lucy, the book shows this butter on top of grilled salmon, which I’m sure is delicious. I decided to take a little creative liberty and used it to top Japanese soba noodles which I plated as bite-sized appetizers. Either way you choose to have it, you’ll love this recipe, and the many more ways this book will introduce you to the amazing potential of butter.

GREEN TEA–SESAME BUTTER
Recipe © 2013 by Lucy Vaserfirer and used by permission of The Harvard Common Press

From the author: This green-hued butter is flavored primarily with matcha tea, which gives it a subtly sweet vegetal note that complements both sweet and savory foods. It pairs nicely with seafood—particularly salmon fillets—and steamed vegetables. But it’s also delicious spread on ginger scones.

Matcha is the powdered green tea traditionally used in the Japanese tea ceremony and can be found at tea shops, many Asian markets, and online.

Ingredients
8 tablespoons (1 stick) unsalted butter, softened
2 teaspoons matcha tea, sifted
2 teaspoons toasted sesame seeds (use black sesame seeds if you want to see the speckles)
2 teaspoons sugar
1⁄4 teaspoon kosher salt, or to taste
1⁄8 teaspoon toasted sesame oil

Instructions
Blend together the butter, tea, sesame seeds, sugar, salt, and sesame oil in a medium-size bowl. Form into a log and refrigerate until firm before slicing and serving, or use another shaping method.
MAKES 8 SERVINGS

Green Tea-Sesame Butter over soba noodles | Fake Food Free

Disclosure:  This book was sent to me for review purposes from The Harvard Common Press. I was not required to write about it and I received no compensation for doing so. Thoughts are my own, and I love butter.


Want to create beautiful food and product photos that you can't wait to share?!
Discover your style, control the light, and shoot using the tool you know how to use (yes, your phone included). Learn about free resources, Live Q&As with Lori, and online courses you can take from anywhere in the world!
We respect your privacy. Unsubscribe at any time.