Archives

Slow Cooker Mushroom and White Bean Soup with Red Wine Recipe

September 4, 2013

Red wine adds rich flavor to this hearty mushroom and white bean soup. It’s easy to throw together in the slow cooker making it perfect for a busy day when you need a warm and filling meal.

Slow Cooker Mushroom and White Bean Soup with Red Wine | Fake Food Free

About one year ago, I made my first road trip across the country – Lexington, Kansas City, Cheyenne, Salt Lake City, Reno, and finally Oakland. I dropped off my husband to start his new job and I went back to Kentucky to wrap things up before making the move final.

So while I haven’t been in California a full year, he has. This month marks when things really began to change. I’ve probably mentioned before that we love change. This past year of change has been rewarding, challenging, and exciting.

And of all the things I could have made to mark this anniversary, I picked soup?

Well, we just got back from a very low key, and enjoyable trip to Las Vegas over Labor Day weekend. We could really use a break from heavy food. It is also now September and my favorite season of the year (regardless of where I live) is almost here – fall!

To justify things more, I love that I can now get mushrooms at the Farmers Market! I like all kinds of mushrooms, but I always default to the white button. I find that I can do so much with them – stuff them, put them in soups, add them to tacos. Don’t let anyone fool you into thinking they don’t have benefits either. As I put in my book, even white buttons have plenty of immune boosting power.


Slow Cooker Mushroom and White Bean Soup with Red Wine | Fake Food Free


I bought a bag that fortunately decided to hang on until I got back from traveling. I had to make the decision to use them now or never. When I spotted the half bottle of red wine on the counter the meal began to come together.

So grab the slow cooker! It may not be crisp and cool yet, but fall is coming! Feel free to start off the celebrations with this rich and hearty soup.

 
Slow Cooker Mushroom and White Bean Soup with Red Wine Recipe
Serves 4
Red wine adds flavor to this hearty mushroom and white bean soup. It's easy to throw together in the slow cooker making it perfect for a busy day when you need a warm and filling meal.
Write a review
Print
Ingredients
  1. 1 pound white button mushrooms, halved or sliced
  2. ½ medium yellow onion, sliced
  3. 3 cloves garlic, minced
  4. 1 quart chicken, beef or vegetable stock
  5. 1 cup red wine
  6. 1 ½ to 2 teaspoons fine sea salt
  7. ½ teaspoon ground black pepper
  8. 1 sprig rosemary
  9. 1 ½ cups (or 15-ounce can) cooked white kidney beans, rinsed and drained
Instructions
  1. Place the mushrooms, onions, garlic stock, wine ,and 1 cup of water in the bowl of the slow cooker. Add ½ teaspoon of salt and ¼ teaspoon of black pepper. Place the rosemary sprig in the bowl and stir.
  2. Cook on high for about 3 ½ hours, until the mushrooms are almost tender. Remove the rosemary and add the beans. Add an additional 1 to 2 teaspoons of salt and ¼ teaspoon of black pepper to taste. Let cook on high for 20 to 30 more minutes, and serve.
Fake Food Free https://www.fakefoodfree.com/
 
Slow Cooker Mushroom and White Bean Soup with Red Wine | Fake Food Free
 
Thanks for reading! All images and content are the property of Fake Food Free unless otherwise stated. Please do not republish full recipes and images without written permission. What is okay? Feel free to Pin images, share links to my posts or share the photo in a round-up post with the title of this recipe and a link back to the post. Confused about copyright and food blogs? Here is some helpful information on Recipe Attribution. If you want to use a photo or full recipe, just ask. I’m sure we can work something out.

Smoky Boiled Peanuts Recipe

August 27, 2013

One thing I wasn’t expecting to find at the markets here were fresh peanuts. I know that there are a few areas on this side of the U.S. where they are grown, but I was definitely closer to the peanut growing states of Virginia and Georgia when we lived in Kentucky.

Yet, I can’t remember ever coming across a fresh peanut. But then again, I wasn’t looking for them either.

When I saw the light blond shells piled up on the tables at the market, I knew right away that they were peanuts. It took me longer to figure out that they were fresh. (Often called, green peanuts.)

Never one to resist the urge to buy a new ingredient, I bagged up a few handfuls still speckled with the dirt and brought them home. Honestly, I had no idea what else to do except boil them.

After researching several recipes, I made my first batch which was a huge fail. According to a few recommendations, I soaked them in water first, drained them and then boiled them. They were much too wet and soggy for my taste.

So when I picked up another bagful last week, I skipped the extra soaking step. I covered the 1 pound of peanuts in about 5 cups of water. I added salt, garlic powder and smoked hot paprika and let them boil.

Full disclosure. I forgot about them.

I had intended to boil them for 2 hours, but I returned to the stove about 2 hours and 45 minutes later to find almost no water left in the pan. Oops.

I pulled the pan off the burner and gave them a stir to distribute some of the seasonings that had collected at the bottom. Then, I tried one. They were delicious! They really reminded me more of the pinhão (pine nut) we used to find in Brazil, like a firm bean with a nutty flavor.

So there you have it. I accidentally discovered exactly how I like my boiled peanuts. Sometimes kitchen mistakes lead to grand results. And it’s even better if those mistakes and results come without setting off the fire alarm.

Smoky Boiled Peanuts

About 1 pound of fresh, green peanuts
5 to 6 cups of water
¼ cup finely ground sea salt
¼ tsp garlic powder
¼ tsp smoked hot paprika

Add the peanuts to a large saucepan and add enough water to cover the nuts. Stir in the sea salt, garlic powder and paprika. Bring the peanuts to a boil over high heat, partially cover the pan with a lid. Reduce the heat to medium to maintain a low boil, just above a simmer.

Let cook for 2 ½ to 3 hours, until almost all of the water has evaporated. There should still be at least a half inch in the bottom of the pan.  Stir to distribute the salt. Let cool before shelling and eating. Store in an airtight container in the refrigerator for up to 2 days. 

Japanese Pickled Ginger Recipe from The Joy of Pickling

August 19, 2013

   Japanese Pickled Ginger Recipe from The Joy of Pickling | Fake Food Free

Two of my favorite condiments are served beside sushi. First, it’s that pleasantly spicy wasabi. Second is the pickled ginger. I could eat that ginger on just about anything. It has crossed my mind that I could probably make it at home, but I have never searched for a good recipe. Fortunately, now I don’t have to because this time around a good recipe found me. 

All summer I have been browsing the pages of one amazing cookbook. It contains recipes for pickled everything! Or at least it seems like just about everything. The Joy of Pickling: 250 Flavor-Packed Recipes for Vegetables and More from Garden or Market by Linda Ziedrich

Pickled-Ginger-Cookbook
 
While you will find a huge variety of cucumber pickles, this cookbook goes well beyond the standard dill. Figs. You can pickle figs?! And peaches? There is even pickled pig’s ear should you choose to go there. There is also page after page of interesting condiments and sauces like Hot Orange Ketchup and Rhubarb Chutney
 
There were so many tempting recipes to try in this book, but I knew I finally had to give Japanese Pickled Ginger a try. The best part about many pickling recipes is that they are so easy to make. Top a few fruits or veggies with a liquid, seal and rest. A few days later you have a crisp, tangy snack or condiment. 
 
That is definitely the case with this ginger. Peeling and slicing takes a little time, but I had this recipe done in less than 30 minutes. Now that I have the ginger down, it may be time to start practicing the sushi. 
 
Japanese Pickled Ginger Recipe from The Joy of Pickling | Fake Food Free
 
This book has been out for a while now and I’m so glad that it finally caught my attention. I can tell it will become a well-used resource book for me every year. If you are spending late summer and early fall wondering what to do with all your garden produce, the chances are good that you can pickle it. This cookbook will show you how. 
 
Japanese Pickled Ginger Recipe from The Joy of Pickling | Fake Food Free
Japanese Pickled Ginger
©Linda Ziedrich 2009. Reprinted with permission from The Harvard Common Press.
 
Makes: About 1 Pint
 
From the book:
Use fresh young ginger for this pickle. Available in Asian markets, young ginger is pale, almost white with very thin skin and pink stem stubs. A mandolin may be useful for slicing the root. Your pickled ginger may turn out faintly pink, but it won’t have the hot pink color you’ll see in commercial versions of this pickle, that color comes from food dye. A traditional accompaniment to sushi, pickled ginger refreshes the palate and cleanses the mouth of fishy tastes
.
Ingredients
1 quart water
½ pound fresh ginger, sliced paper thin
1 teaspoon plus a sprinkle of pickling salt
1 cup rice vinegar
3 tablespoons sugar
1 teaspoon light (usukuchi) Japanese soy sauce
 
Directions
Bring the water to a boil in a saucepan and add the ginger. Bring the water back to a boil and then drain the ginger well in a colander. Let the ginger cool.
 
Put the ginger into a bowl and sprinkle the ginger lightly with salt.
 
In a saucepan, bring to a boil the vinegar, the sugar, the 1 teaspoon salt, and the soy sauce, stirring to dissolve the sugar and salt. Pour the hot liquid over the ginger, mix well.
 
Store the ginger in a tightly covered container in the refrigerator. It will be ready to use in a day or two and will keep for several months, at least. 
 

Disclosure: This cookbook was sent to me for review purposes by The Harvard Common Press. I was not required to post about it and I received no compensation for doing so. 

Petrale Sole with Heirloom Tomatoes and Pesto Recipe

August 15, 2013

After 8 months on the West Coast (and with my struggles for finding farm-direct meat), we decided it was finally time to start exploring local fish. I’ve always said I wanted to live by the water where fresh fish and seafood were plentiful and now, here I am. It’s time to take advantage.

So over the past few weeks, instead of passing by the fish vendors at the Farmers Market, I’ve been stopping, looking and asking questions. Most of the fish I’m finding was caught that morning and filleted soon before it got on ice and to the market.

So far I’ve settled on some beautiful Petrale sole from two different vendors at two different markets. (I’ll branch out soon. I’m slow to take on new fish, apparently.) One pack came from Monterey Bay to the south of us and the other Bodega Bay to the north of us.

I’m not an expert in cooking or eating fish, but I really like this variety. The second set of filets was much thicker which made them ideal for baking so I decided to fancy them up a bit. I scanned some recipes on the web and a found a few that baked the fish over onions. You know I always have plenty of heirloom tomatoes around, and there was also leftover homemade pesto from the minestrone soup. With all that, this super simple recipe came together.

I hope you like it as much as I did! As I continue to explore the markets here, more fish recipes are sure to come in the future. If you have a favorite type of fish or recipe, I’d love to hear about it.

Petrale Sole with Heirloom Tomatoes and Pesto

1 tbsp unsalted butter
1 small onion, sliced
2 cloves garlic, thinly sliced
10-12 oz Petrale sole filets
¼ cup fresh pesto
1 medium heirloom tomato
4 lemon slices

Preheat the oven to 375 degrees F.

In a small skillet, heat the butter over medium high. Add the onion slices and the garlic. Reduce the heat to medium and cook for about 5 minutes, just until the onions start to become tender.

Transfer the onions to a baking dish and spread in a single layer. Top the onions with the sole filets. Spread the pesto evenly over each filet. Top the pesto with tomato slices. Add the lemon slices around the perimeter of the baking dish.

Bake for 12 to 15 minutes, until the fish turns white and flakes with a fork. Serves 2 to 3.

A Day at the San Francisco Cooking School

August 14, 2013

From a distance it doesn’t look like a cooking school. It could easily be mistaken for a boutique, or better yet, an art gallery. But once the glare of the windows clears and you open the door, if you have even the slightest interest in cooking, your heart skips a beat. It’s then that you realize that this is an art gallery, a hands-on gallery for the art of cooking.

Beautifully set, modern tables were the first thing I encountered. A clear sign that lunch would be delicious. Then the colorful Dutch ovens and well-organized white dishes that line each shelf caught my attention. I marveled over the ovens and ranges for a bit, and then I found my work station.


This was my first time visiting the San Francisco Cooking School. The 10 or 12 of us there were the lucky ones who responded quickly enough to an email inviting us to attend a Knife Skills workshop for food media.

We received a condensed version of the class with instruction on the various knife cuts while we prepped the ingredients for Minestrone Soup with Pesto. David taught us about batonnet and julienne while Jodi filled us in on the details of the school and the classes they offer.

What a diverse line up of classes. In addition to Knife Skills, you can take courses in Cooking Fundamentals, Soba Making, French Macarons, Recipe Testing and Development along with their Cook the Book series which features recipes from cookbooks focused on a variety of ethnic cuisines. If you want to take your cooking beyond your own kitchen, they also offer full-time and part-time culinary and pastry arts certificate programs.

As we chopped up the ingredients that we later took home to make our own minestrone soup, David finished up the class by making a rustic pesto. Jodi served up the soup they made earlier which would serve as our lunch along with crusty bread, a delicious salad with seasonal stone fruits, and wine.

I’ll admit, I’m not the biggest minestrone fan, but the pesto on this soup made all the difference. After more enjoyable conversation about the school with David and Jodi, we ended our meal with some of the best cookies I’ve had the pleasure of eating – almond, chocolate, candied ginger, and rosemary and cornmeal. These cookies had me scouring the website to find a course that would teach me how to make them.

Jodi granted me permission to reprint the soup recipe for you. It is the perfect summer-to-autumn transition meal. It is warm and comforting for the cooler days ahead, and it uses up late summer and autumn vegetables. 

Enjoy the soup, and when in San Francisco, check out the San Francisco Cooking School. I assure you there are few more inspiring or enjoyable places to cook.

Minestrone with Pesto

Reprinted with permission from Jodi at the San Francisco Cooking School

Soup:
3 tbsp extra-virgin olive oil
1 ½ cups diced onion
2 medium carrots, cut in ½-inch dice
2 medium leeks, white and light green parts only, finely sliced
2 stalks celery, cut in ½-inch pieces
Coarse salt and fresh pepper to taste
2 potatoes, peeled and cut in ½-inch dice
6 cups hot chicken or vegetable stock
1 (14 ounce) can chopped tomatoes
1 ½ cups Savoy cabbage, thinly sliced
1 ½ cups zucchini, cut in ½-inch dice
1 (14 ounce) can cannellini beans, drained and rinsed

Pesto:
2 cups gently packed basil leaves
1 medium garlic clove, chopped
¼ cup toasted pine nuts
½ cup extra-virgin olive oil
½ cup freshly grated Parmesan

In a large stock pot, heat the olive oil over medium heat. Stir in the onions, carrots, leeks and celery with a pinch each of salt and pepper. Cook until the vegetables are lightly browned and begin to soften, 5-6 minutes. Add the potatoes and cook, stirring occasionally, 2-3 minutes more.

Stir in the chicken broth, tomatoes and a pinch each of salt and pepper and cook until all the vegetables are tender, about 1 hour. Add the cabbage, zucchini and beans. Cook until cabbage and zucchini are just tender with a bit of a bite, about 6 minutes more.

While the soup is cooking, make the pesto. Using your knife, finely chop the basil, garlic, and pine nuts together. Place in a small bowl and add the oil until the mixture is shiny and moist. Stir in the cheese and season to taste with salt and pepper.

Serve the soup with a drizzle of the fresh pesto over the top. Serves 6.

Disclosure:  My visit to the San Francisco Cooking School was part of a free food media event. I was not required to post about my visit and received no compensation for doing so.

Bacon, Corn and Brown Rice Stuffed Squash Recipe

August 8, 2013
Summer Squash Stuffed with Bacon, Corn and Brown Rice | Recipe | Fake Food Free
 

 When I tell people that we moved here from Kentucky I get the usual response. It’s the same response I received any time we traveled while living there.

It is something similar to, “I bet this is (that was) different,” or “This must be an adjustment.”

Now, I don’t get cranky or offended. It’s not like I’m out to defend the upper southern part of the U.S. There are a lot of things that are different here in a very good way, and there are a lot of things that are the same.

Regardless of whether you live in rural Kentucky or Northern California, if you rarely go anywhere else, well, there you are. There are as many people here that haven’t seen other parts of the US as there are people who haven’t in Kentucky. So I don’t blame people for having this perception, but as you know from my blog I had myself in a pretty good food situation back East.

California wins when it comes to variety of produce, growing seasons and ethnic cuisines, but it falls way behind in something else – meat.

Oh, it’s here. It’s grass-fed and finished, pastured, organic, whatever you want. But it’s one other thing.

Impersonal.

I really dislike buying meat here. There are a few butchers, but when you add in the price of a quality product along with the fact that it’s being sold in California, ouch. The Farmers Markets have better prices for similar products, but it’s difficult to talk to people about the meat as a line 10 people deep waits behind you.

When people ask me what I miss most about Kentucky, that’s easy. The farms.

I’ve asked about buying farm direct, coming out for a visit, and so far the answer is that they only sell at the market. Although, some do have a dinner for customers one day a year.

I miss knowing the breeds, conditions and getting things like housemade prosciutto, sausage without the casing and blue/eggs that are mixed right in with the brown ones because they all come from the same group of chickens.

I know – cry me a river, Lori. I see all those Instagram and Facebook pictures of produce and landscape. Life is rough. Boo-hoo.

I get it. I’m not complaining. I realize I haven’t covered every base yet. I’m sure there are options out there. I guess my point is that I will, at least for a while, still have a reason to respond to all those who suggest Kentucky is different with – yes, yes it is.

bacon-ends


With all that being said, the meat I have ventured to get here has been very good. I finally found bacon ends last weekend at the Farmers Market. 


Bacon, Corn and Brown Rice Stuffed Squash Recipe | Fake Food Free
It called for a celebration of summer stuffed squash. Feel free to substitute any grain here. Cue ball or patty pan squash will work the best since this is a loose stuffing.


Bacon, Corn and Brown Rice Stuffed Squash

Makes: 6 stuffed squash


Ingredients

½ cup long grain brown rice
Extra virgin olive oil
6 cue ball or small patty pan (scalloped) squash
½ cup chopped pastured bacon ends
Kernels from 2 ears of corn
2 green onions, sliced, green and white portions divided
1 small bell pepper, diced
½ teaspoon finely chopped rosemary
¼ teaspoon salt
¼ teaspoon ground black pepper
½ cup finely grated cheddar cheese.


Preparation

Preheat the oven to 400 degrees. Lightly coat a casserole dish with olive oil.

Bring 2 cups of water to a boil and add the rice. Bring to a boil and reduce heat to a low boil. Cook for 15 minutes until just barely tender, drain and set aside.

Meanwhile, cut the tops off the squash and scoop out the insides with a spoon. Reserve the flesh. Lightly rub the squash with olive oil and arrange in the baking dish. Pre-bake the squash for about 10 minutes.

In a deep skillet, brown the bacon on medium-high for about 5 minutes. Cook until your desired crispness. I like mine super crispy.

Add the corn, whites of the onions (reserve greens for garnish), the bell pepper and the chopped flesh of the squash. Cook for about 5 more minutes on medium to medium-high, until most of the moisture has evaporated.

Stir in the brown rice. Add the rosemary, salt and black pepper. Stir in the cheddar cheese. Transfer the stuffing to each of the squash.

Bake for 20 to 25 minutes, until the squash is tender. Garnish with reserved onion greens. Makes 6 stuffed squash.


Thanks for reading! All images and content are the property of Fake Food Free unless otherwise stated. Please do not republish full recipes and images without written permission. What is okay? Feel free to Pin images, share links to my posts or share the photo in a round up post with the title of this recipe and a link back to the post. Confused about copyright and food blogs? Here is some helpful information on Recipe Attribution. If you want to use a photo or full recipe, just ask. I’m sure we can work something out.

13 Best Tomato Recipes

August 1, 2013

I did it again.

Every year when the end of May rolls around, I forget. Unlike other bloggers who spend weeks building up to the big day, planning giveaways and making special recipes, it passes me by, and few weeks later I think – oops, I forgot again.

I’m talking about my food blogging anniversary. Fake Food Free has been alive and well for over 5 years. It’s overwhelming to think where this blog has taken me since I began typing my first words in our apartment in Southern Brazil.

Things have evolved through my travel, adventures in food culture and gardening. My photos are a bit better than those dark point-and-shoot images I started with, and I’d like to think my recipe writing has improved as well. I’ve met amazing people, and now I’m at a place where health, food and recipe writing, and taking food photos are my work. As you’ll hear me say often – Life is good.

And it all started with this blog.

While things have changed a bit here, and I don’t get to post as much as I used to, this is certainly not a farewell post. It’s a big Cheers, Prost and Saúde to another 5 and beyond!

What better way to celebrate than with tomatoes! Well, okay, a cocktail might be better, but right now we’re in the heart of summer and all I can think about are beautiful heirlooms, sweet cherries and plump Romas.

After 5 years of blogging, I’ve created and adapted my fair share of recipes using my favorite part of this season.

Here are 13 that you must make before the 2013 tomato season passes us by! (Click on the name and it will take you to the post with the recipe.)

Roasted Garlic, Tomato and Black Bean Soup

Grilled Marinara Pasta

Honey Peach and Tomato Black Rice Salad

Hearty Tomato, Kale and Mushroom Sauce

Roasted Tomato, Black Bean and Arugula Salad

Smoky Tomato Jam

Beer Cheese Tomato Soup

Honey-Pecan Tomato Tarts with Blue Cheese

BLT Spinach Salad with Fresh Garlic Dill Dressing

Heirloom Tomatoes and Cantaloupe

Stuffed Poblano Peppers with Tomato Chile Sauce

Poblano Cilantro Salsa

Sweet and Simple Tomato Pepper Salad

Peanut Pie from Pie by Ken Haedrich

July 18, 2013


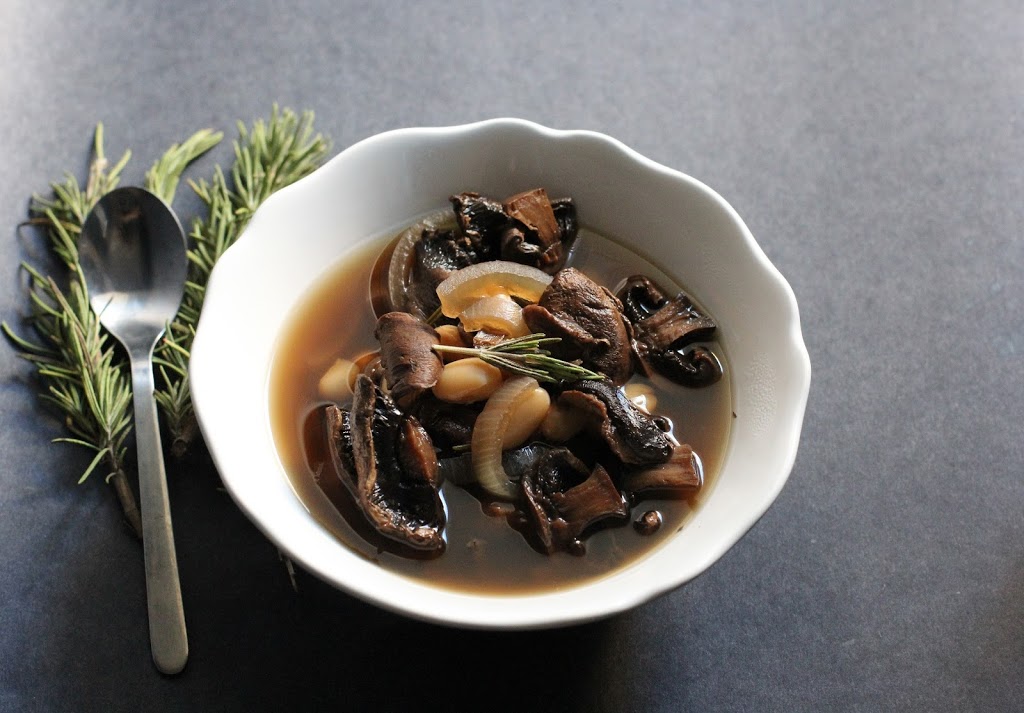
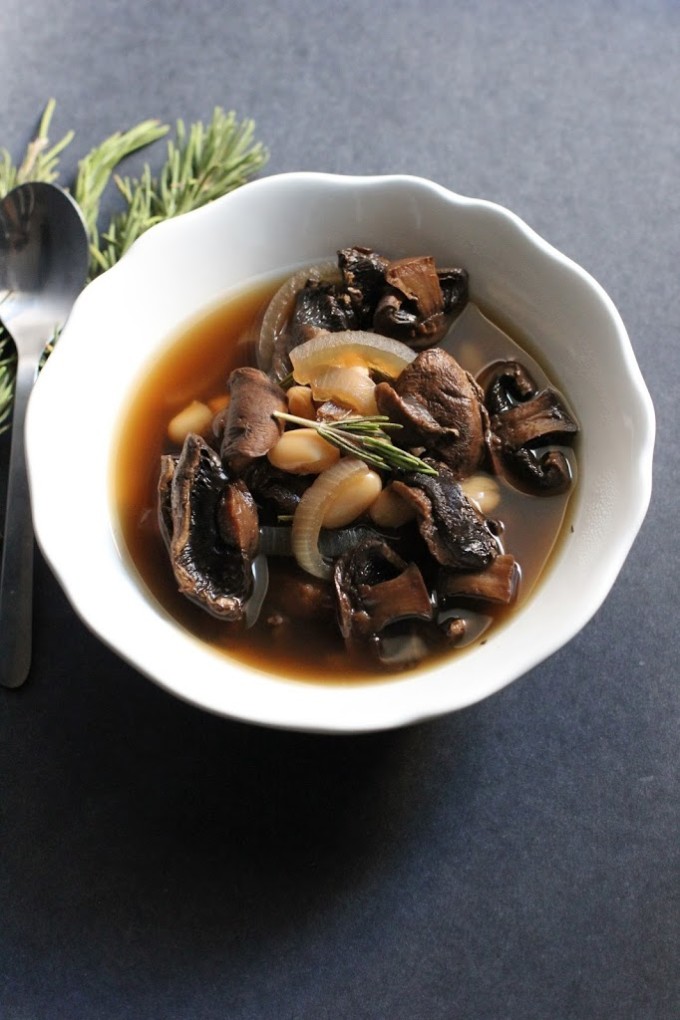
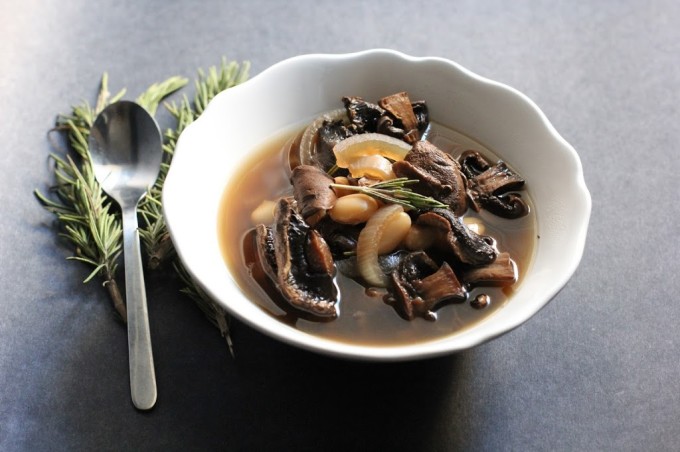
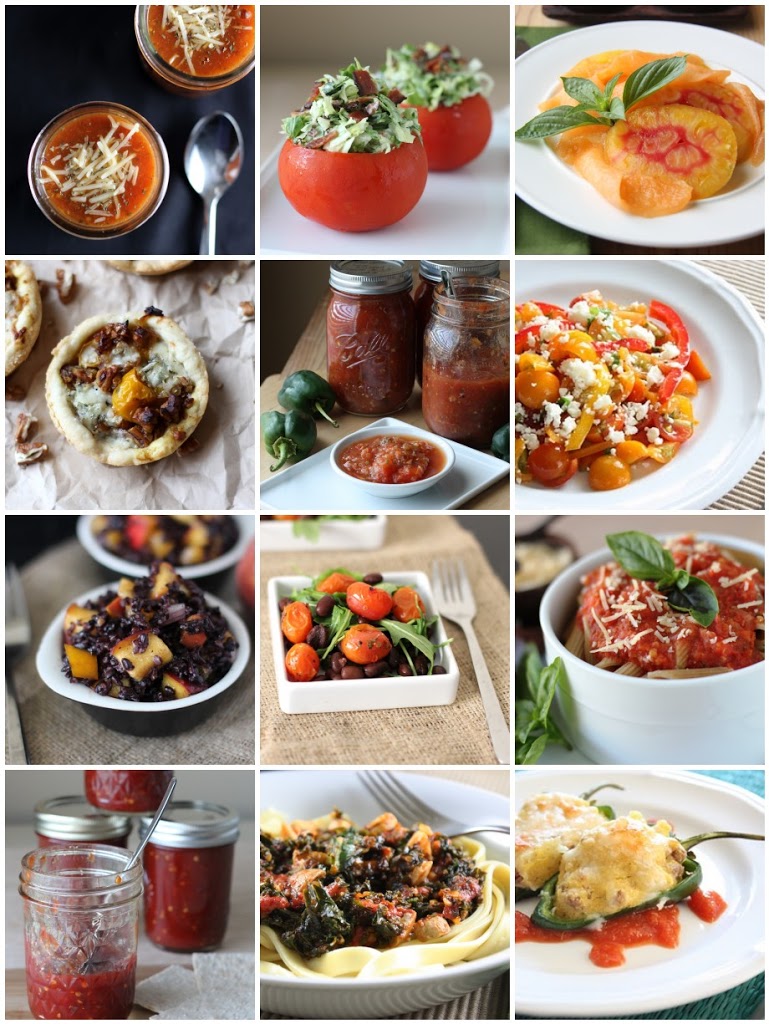
I love food discoveries. Those times when you learn about a food which you never knew existed. A unique food or recipe that hails from a specific area or a local restaurant. It reminds me why I love food culture. It is also the reason why I branch out of the whole grain, raw sugar, fresh vegetable pattern to feature a little tradition and food history.

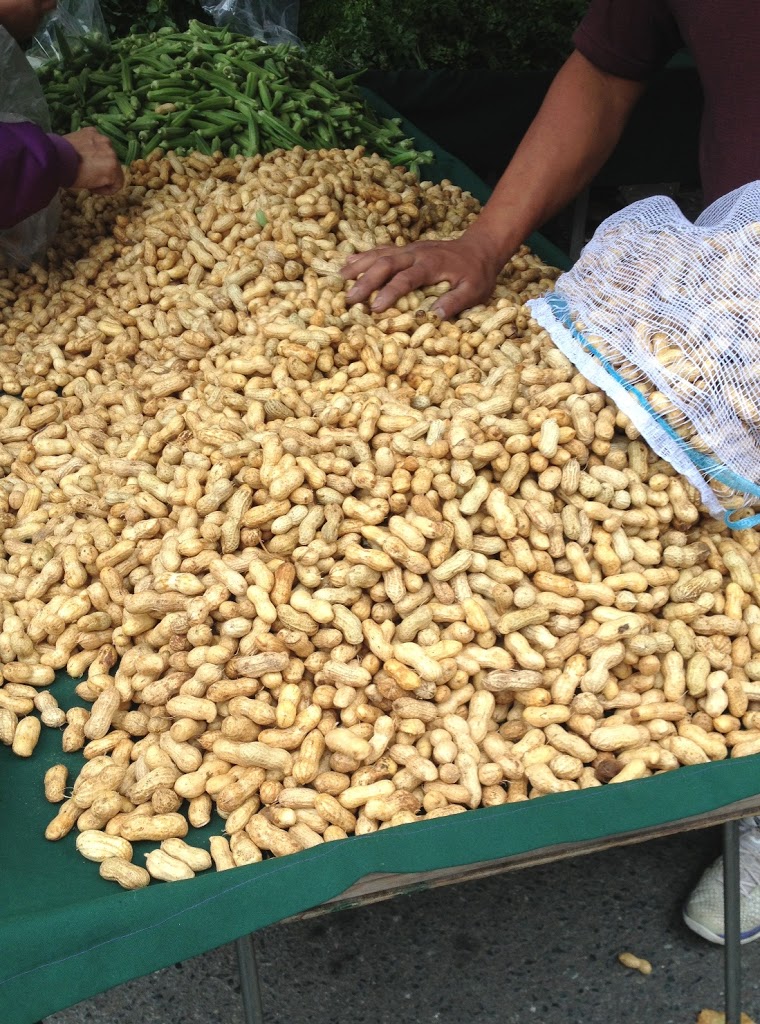
I had one of these food discoveries a few weeks ago. It was one that also just happened to align with my renewed love for peanuts.

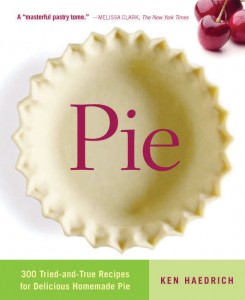
I was flipping through a review copy of the cookbook Pie: 300 Tried-and-True Recipes for Delicious Homemade Pie by Ken Haedrich when I stumbled upon, Like Virginia Diner’s Peanut Pie. Peanut pie? I’d never heard of such a thing.

This cookbook is full of new-to-me recipes. Page after page of everything pie. And I’m no pie novice. I’m not an expert at making them, but my mom is. As a result, I’ve had my fair share of slices. Growing up we were a pie family — from-scratch chocolate pie and butterscotch pie, the most amazing pumpkin pie in the world (my grandmother’s), grape pie, raisin pie (although I wasn’t a fan of this one), gooseberry, strawberry-rhubarb, cherry, apple, pecan, coconut cream. You get the idea.

So finding new pies that impress me isn’t an easy task, but this cookbook accomplished it. There are combinations that I could never dream up like Coffee-Hazelnut Custard Pie, Orange Pie with Pistachio Crumb Crust and Pear and Jalapeno Jelly Pie. Many have an interesting story attached, a region that made them popular or a unique ingredient. Cream, silk, crumble,  flaky, lattice — whatever the pie style, there is a recipe for it in here.

Now this isn’t a picture cookbook, although there are a few pretty photos gathered in the center as examples. It is a pie resource book. The one you turn to when you are curious about a traditional pie or you want something new to wow your guests.

Such as Peanut Pie.

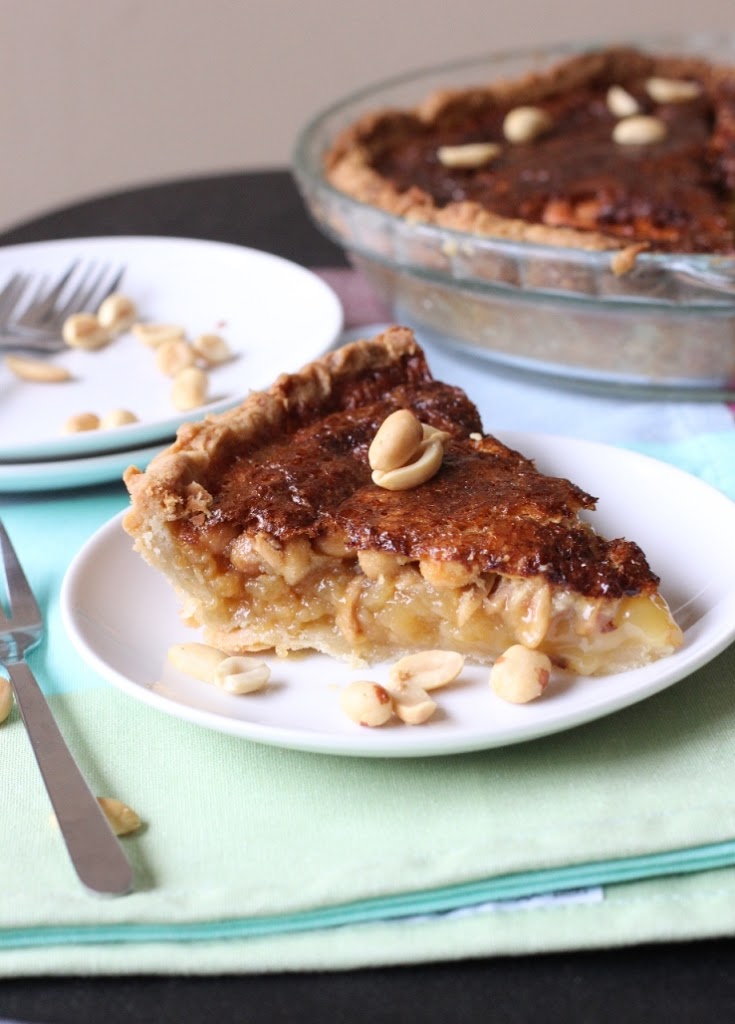
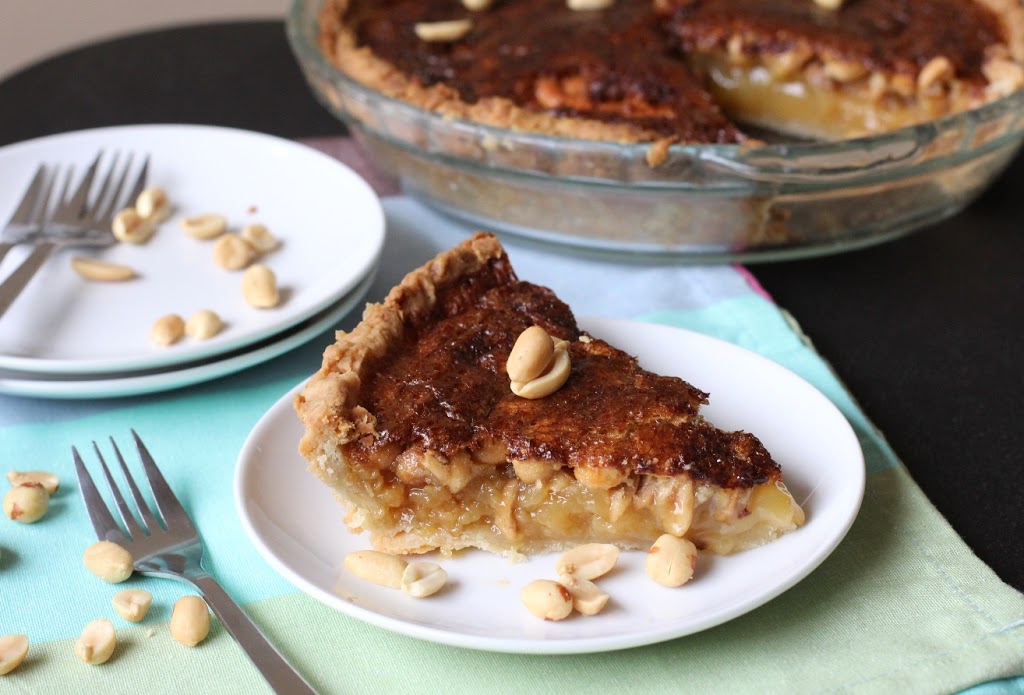
If you are like me, your first thought when you hear peanut pie is peanut butter. Peanut as a dessert always equals peanut butter, right? I have since learned the answer to that is no.

This pie resembles pecan, but it’s different. I couldn’t put my finger on what was different until I was polishing off the last bite of crust. Good thing, or I might have needed a second slice.

Pecans are naturally sweet, making pecan pie a super sweet dessert. I do like it, but it’s the kind of sweet you only want around the holidays, and for me, one slice is enough. In peanut pie, the peanuts provide a more savory flavor that balances the sweetness. The peanuts stay crunchy, the crust flaky — it’s pretty much everything I ever wanted in a pie. To the point that I’ve vowed to make it instead of pecan for the holidays.

I could hear your shrieks of horror from here. Trust me, though. This pie is pretty special.

And if your cookbook shelf is aching for a pie resource. Look no further.

Like Virginia Diner’s Peanut Pie

Recipe © 2013 by Ken Haedrich and used by permission of The Harvard Common Press

From the book:
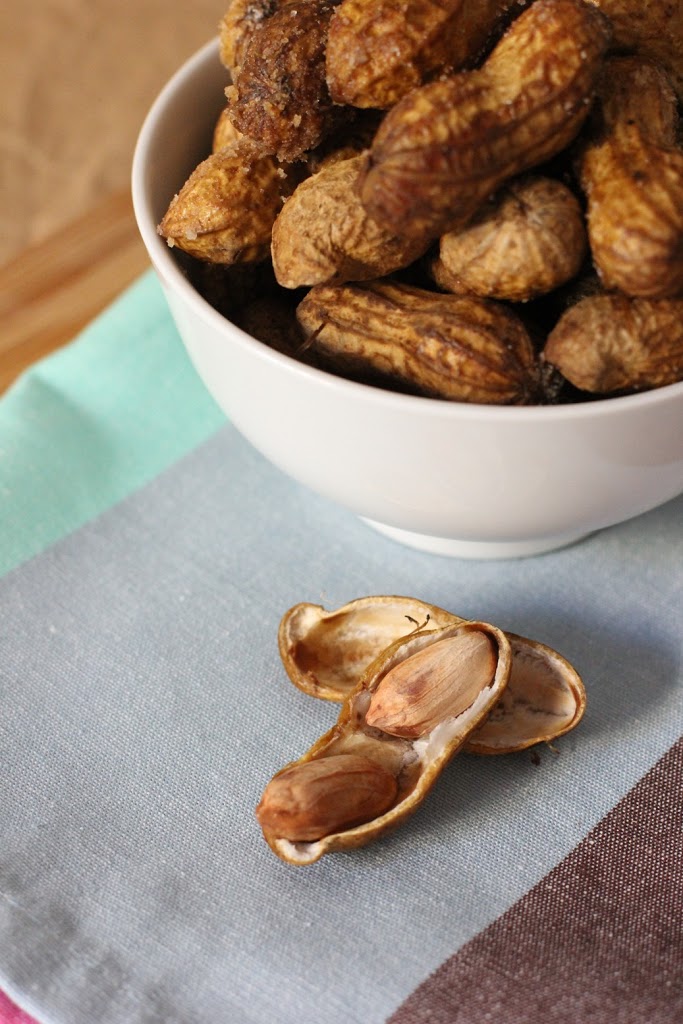
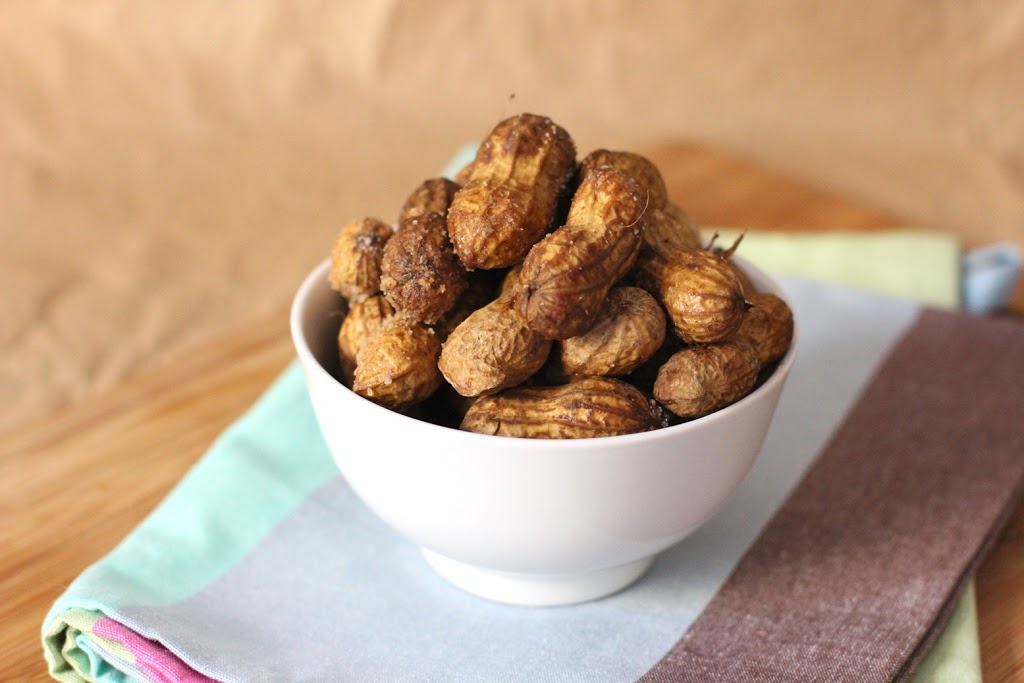
I had been hearing that a restaurant called the Virginia Diner, in Wakefield, Virginia, made the best peanut pie around, so I contacted one of the owners, who was quick to point out that the diner’s peanut pie is indeed deliciously world famous. She described it as “like a pecan pie, only better,” and, of course, she said, it is always made with great homegrown Virginia peanuts.

Having learned that there’s an inverse relationship between the level of self-hoopla and one’s chances of securing a recipe, I held my breath when I finally got around to asking her whether she would be willing to share the recipe with me and my readers. Alas, she would not, but she was kind enough to direct me to a Web site, www.aboutpeanuts.com, which has a recipe for peanut pie that is “pretty similar.” Would she care to enumerate the differences? “Sorry.” Turns out the recipe at that Web site, reprinted here with permission, is so good that I’ve forgiven the Virginia Diner for not sharing theirs. This pie is superlative: a golden layer of roasted peanuts on top of a soft and yummy filling. I always serve it with a scoop of vanilla ice cream and Warm Mocha Sauce (see cookbook).

Makes 8 to 10 servings

Ingredients
1 recipe Basic Flaky Pie Pastry, Single Crust (see below), refrigerated
FILLING:
3 large eggs
1/2 cup sugar
1 1/2 cups dark corn syrup
1/4 cup (1/2 stick) unsalted butter, melted
1/4 teaspoon salt
1/2 teaspoon vanilla extract
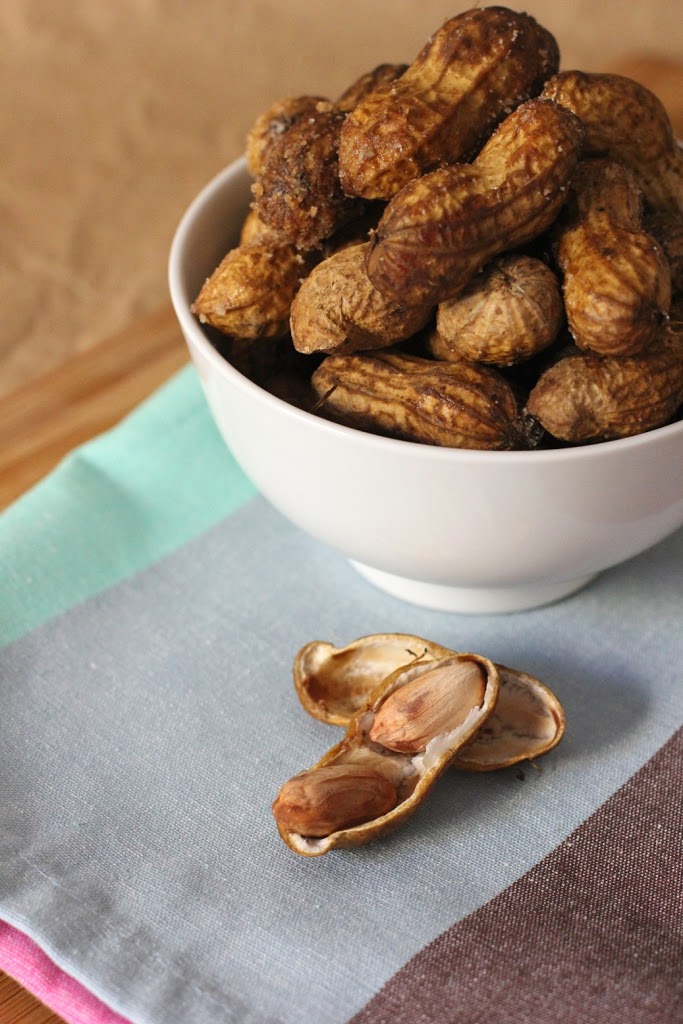
1 1/2 cups chopped salted dry-roasted peanuts

Instructions

  1. If you haven’t already, prepare the pastry and refrigerate until firm enough to roll, about 1 hour.
  2. On a sheet of lightly floured waxed paper, roll the pastry into a 13-inch circle with a floured rolling pin. Invert the pastry over a 91/2-inch deep-dish pie pan, center, and peel off the paper. Tuck the pastry into the pan, without stretching it, and sculpt the edge so it is even with the rim. Place in the freezer for 15 minutes, then partially prebake and let cool. Reduce the oven temperature to 350°F.
  3. In a large bowl, whisk the eggs and sugar together just until frothy. Whisk in the corn syrup, butter, salt, and vanilla until well blended. Stir in the peanuts. Slowly pour the filling into the cooled pie shell. Using a fork, gently rake the peanuts to distribute them evenly.
  4. Place the pie on the center oven rack and bake for 30 minutes, then rotate the pie 180 degrees, so that the part that faced the back of the oven now faces forward. Continue to bake until the filling is set and does not move in waves, about 20 minutes. To check, give the pie a quick nudge.
  5. Transfer the pie to a wire rack and let cool thoroughly. Serve at room temperature, or cover with loosely tented aluminum foil and refrigerate for 1 to 2 hours before serving.

Recipe for Success
Be sure not to use unroasted peanuts here. The roasting really brings out the nut flavor. By the same token, do not use honey-roasted or other sweetened nuts or the pie may be too sweet.

Basic Flaky Pie Pastry

This pie pastry is used frequently throughout this collection because it yields such excellent results. I sometimes call it a half-and-half pastry, referring to the equal amounts of vegetable shortening and butter—the former for flakiness, the latter for flavor. It can be made in a food processor if you have a large-capacity machine. But I’ll repeat my usual advice, which is to make it by hand or with an electric mixer if you don’t. Both methods are quite easy. If you could have only one pastry to work with, this would probably be it.

Makes a single or double crust for a 9-inch standard pie or 9 ½-inch deep-dish pie

Ingredients
For a single crust:
1 1/2 cups all-purpose flour
1 1/2 teaspoons sugar
1/2 teaspoon salt
1/4 cup (1/2 stick) cold unsalted butter, cut into 1/4-inch pieces
1/4 cup cold vegetable shortening, cut into pieces*
1/4 cup cold water

For a double crust:
3 cups all-purpose flour
1 tablespoon sugar
1 teaspoon salt
1/2 cup (1 stick) cold unsalted butter, cut into 1/4-inch pieces
1/2 cup cold vegetable shortening, cut into pieces
1/2 cup cold water

Instructions

To make in a food processor: Put the flour, sugar, and salt in the food processor. Pulse several times to mix. Scatter the butter over the dry ingredients and pulse the machine 5 or 6 times to cut it in. Fluff the mixture with a fork, lifting it up from the bottom of the bowl. Scatter the shortening over the flour and pulse 5 or 6 times. Fluff the mixture again. Drizzle half of the water over the flour mixture and pulse 5 or 6 times. Fluff the mixture and sprinkle on the remaining water. Pulse 5 or 6 times more, until the dough starts to form clumps. Overall, it will look like coarse crumbs. Dump the contents of the processor bowl into a large bowl. Test the pastry by squeezing some of it between your fingers. If it seems a little dry and not quite packable, drizzle a teaspoon or so of cold water over the pastry and work it in with your fingertips.

To make by hand: Combine the flour, sugar, and salt in a large bowl. Toss well, by hand, to mix. Scatter the butter over the dry ingredients and toss to mix. Using a pastry blender, 2 knives, or your fingertips, cut or rub the butter into the flour until it is broken into pieces the size of small peas. Add the shortening and continue to cut until all of the fat is cut into small pieces. Sprinkle half of the water over the mixture. Toss well with a fork to dampen the mixture. Add the remaining water, 11/2 to 2 tablespoons at a time, and continue to toss and mix, pulling the mixture up from the bottom of the bowl on the upstroke and gently pressing down on the downstroke. Dough made by hand often needs a bit more water. If necessary, add water 1 or 2 teaspoons at a time until the pastry can be packed.

To make with an electric mixer: Combine the flour, sugar, and salt in a large bowl. Add the butter, tossing it with the flour. With the mixer on low speed, blend the butter into the flour until you have what looks like coarse, damp meal, with both large and small clumps. Add the shortening and repeat. Turning the mixer on and off, add half of the water. Mix briefly on low speed. Add the remaining water, mixing slowly until the dough starts to form large clumps. If you’re using a stand mixer, stop periodically to stir the mixture up from the bottom of the bowl. Do not overmix.

Using your hands, pack the pastry into a ball (or 2 balls if you are making a double crust) as you would pack a snowball. If you’re making a double crust, make one ball slightly larger than the other; this will be your bottom crust. Knead each ball once or twice, then flatten the balls into 3/4-inch-thick disks on a floured work surface. Wrap the disks in plastic and refrigerate for at least an hour or overnight before rolling.

*Just a note. I don’t use vegetable shortening in my baking so I used all butter in this crust and it turned out great.

*************************

If you are interested in perfecting your pie making skills, I just recently learned about Ken’s The Pie Academy. It is such a great resource with tools, tutorials and recipes focused on pie making. Be sure to check it out!

Disclosure: I received this cookbook for review purposes from the Harvard Common Press. I was not required to write about it and received no compensation for doing so.

Warm Corn and Purple Cabbage Slaw with Coconut Dressing Recipe

July 11, 2013


I was without virgin coconut oil for almost 5 months. How I did it, I have no idea.


Over the past few years it has become my go-to oil – for cooking, baking, to spread on toast. I finished up my last jar before the move in December, thinking I’d get more when I settled into the place. It’s hard to believe it has taken this long. I’m so glad to have it back in the kitchen, and I’m also happy to be able to offer you some for your kitchen too.


Tropical Traditions remains my favorite brand and I’ve done a few giveaways of their products on the blog before. I use their Gold Label Virgin Coconut Oil in my cooking, and aside from the past 5 months, you can always find the 32 ounce jar in my cabinet. Actually, it is even nicer to have around now that we’ve moved to the Bay Area. With the temperatures being more stable and the climate more mild, it always seems to be at the perfect consistency.


Gold Label Virgin Coconut Oil - 32 oz.
I love that this oil comes in small batches, handmade from family producers. If you haven’t checked them out, they have a lot of great products. I’m also a huge fan of their Coconut Peanut Butter. I’ve used coconut oil in many recipes on the blog and I’ve written about the science that convinces me to include it in my diet.


This time I decided to use it in something other than baked goods. In fact, I went a bit crazy with coconut. I love what we always called fried corn in my family, which was basically corn cut off the cob and skillet cooked in butter with onions and bell peppers. I took that idea and added some purple cabbage to make a slaw, and then doused it with some delicious coconut flavor.


Since coconut oil is solid at room temperature, I kept this salad warm. The crazy-with-the-coconut comes in with the dressing. I used coconut oil, coconut vinegar and coconut sugar.


This makes six servings, but I’m not going to lie. I’m pretty sure I ate three for dinner the night I made it. I absolutely love the flavors. I make a lot of recipes I enjoy, but many just don’t make the cut to be repeats in my kitchen. This one will be coming around again, and soon!


Warm Corn and Purple Cabbage Slaw with Coconut Dressing

1 tsp virgin coconut oil
½ medium onion, thinly sliced
3 ears of corn, kernels cut off the cob
½ medium red bell pepper, thinly sliced
1 small head purple cabbage, thinly sliced
3 tbsp coconut vinegar
1 tbsp virgin coconut oil, melted
1 tbsp coconut sugar
¾ tsp salt


Heat the teaspoon of olive oil in a large skillet or wok over medium-high. Add the onion and cook for 30 seconds. Add the corn and cook for 2 to 3 minutes, until the moisture evaporates and corn just barely begins to brown.


Add the red pepper and cabbage and toss to heat the cabbage through. Cook about 30 seconds. You want the cabbage to wilt a bit, but not color the rest of the dish. Remove from the heat.


In a small dish, whisk together the coconut vinegar, 1 tablespoon of coconut oil, coconut sugar and salt. Pour the dressing over the warm vegetables and toss to coat.
Serve warm. Makes about 6 servings.


************************************************
GIVEAWAY CLOSED

So I thought it was about time I give away some coconut oil to you again. And if you haven’t tried it, you are in for a treat! After 5 years of blogging, I’m not much for the bells and whistles of like me here or follow me there. I’m more interested in hearing from you. There are only two requirements to enter.

  • Second, leave a comment here telling me your subscribed AND tell me in your comment what your most memorable experience is with coconut or coconut oil. 
Was it during a trip abroad, or a favorite family recipe? I’ll start. My best memory with coconut is when we traveled to Ubud, Bali and enjoyed a walking tour of a local village. Our guide asked a farmer to climb an amazingly tall palm and cut us a coconut. They then showed us how to cut a spout from the skin and drink it from the coconut. Incredible experience.
I’ll only include valid answers with the required info in the random draw. Leave your comment by Wednesday, July 24th, 11:59 pm PST.
If you’d like to learn more about Tropical Traditions here are some helpful links so you can stay connected.
Tropical Traditions on – Facebook, Twitter, Google+, Pinterest (all appropriate links)
More from Tropical Traditions:
 Win 1 quart of Gold Label Virgin Coconut Oil!
Tropical Traditions is America’s source for coconut oil. Their Gold Label Virgin Coconut Oil is hand crafted in small batches by family producers, and it is the highest quality coconut oil they offer. You can read more about how virgin coconut oil is different from other coconut oils on their website: What is Virgin Coconut Oil?
You can also watch the video they produced about Gold Label Virgin Coconut Oil:
Tropical Traditions also carries other varieties of affordable high quality coconut oil. Visit their website to check on current sales, to learn about the many uses of coconut oil, and to read about all the advantages of buying coconut oil online. Since the FDA does not want us to discuss the health benefits of coconut oil on a page where it is being sold or given away, here is the best website to read about the health benefits of coconut oil.

***************************************

And the winner is:

Meagan of Meagan’s First Kitchen (and you can see what has been keeping her away from the kitchen the past few months at Because Forgetting is Easy). Congrats Megan! Send me your address and I will pass it along to the folks at Tropical Traditions. Your Gold Label Virgin Coconut Oil will arrive soon! 

Farmers Market Photo Tour

July 3, 2013
One of the best things about moving to California has been the Farmers Markets. Throughout the past six months I have been to many, but I still haven’t scratched the surface of the total number that operate each week within walking, biking and driving distance of where we live. 
Life has me pretty busy at the moment, so with no time to make a recipe in honor of the 4th of July, I thought the next best thing would be to celebrate all the wonderful foods I’ve found at the markets. Here is a photo tour of a few of my favorites. 
Over the next few weeks there are fun things to come including more reviews of outstanding cookbooks and a virgin coconut oil giveaway!
Happy Independence Day to all my readers in the States! 

Want to create beautiful food and product photos that you can't wait to share?!
Discover your style, control the light, and shoot using the tool you know how to use (yes, your phone included). Learn about free resources, Live Q&As with Lori, and online courses you can take from anywhere in the world!
We respect your privacy. Unsubscribe at any time.