Archives

Slow Cooker Black Calypso Beans with Beer and Bacon Recipe

October 25, 2013
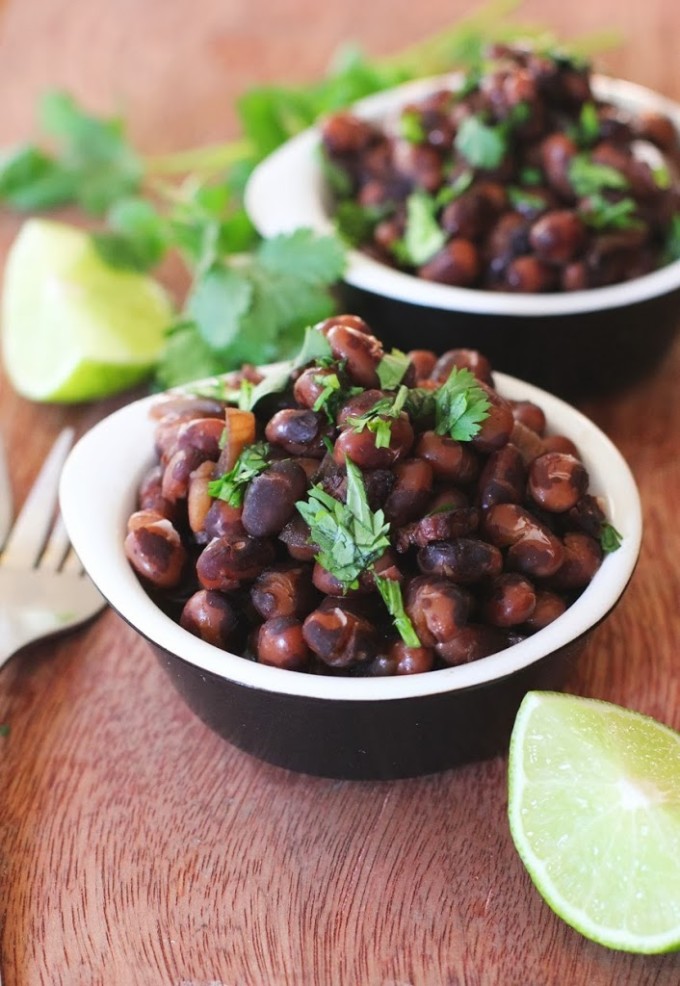
 Pull out the slow cooker and make a pot of these beans with beer and bacon. This recipe uses a wheat beer that pairs well with the cilantro and squeeze of lime for a bowl of comfort food with bright flavors. 
 
   Slow Cooker Black Calypso Beans with Beer and Bacon | Fake Food Free
 
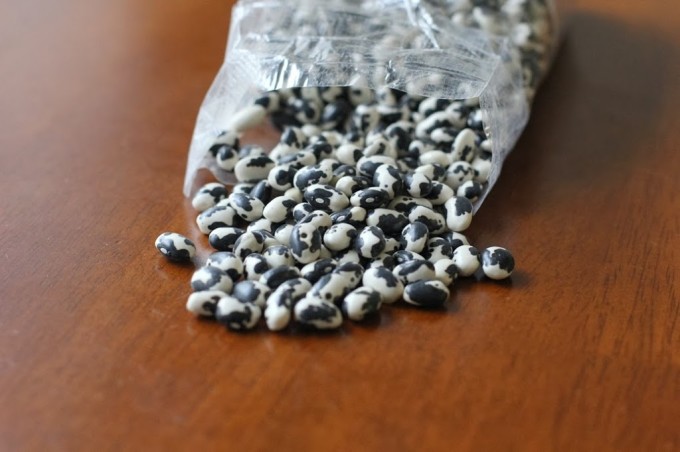
With their black and white patterns, Black Calypso beans look like a bag of little dairy cows. They are my very favorite bean, and while appearance does play a significant role in that, so does the way they cook. With a smooth and creamy texture they stand out among other beans for me.
 
Slow Cooker Black Calypso Beans with Beer and Bacon | Fake Food Free

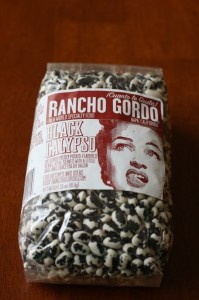
I picked up a bag from Rancho Gordo a while back when visiting the CUESA farmers market at the Ferry Building. Then, on a recent visit I came across a recipe card that combined beer with beans. That recipe added the beer after the beans were cooked, but it sparked an idea for a slow cooker recipe for the Black Calypso beans sitting in my pantry.
 

Black Calypso Beans from Rancho Gordo

I used a wheat beer in my beans because I wanted a lighter, citrus flavor to go with the cilantro and lime I would add later. I think a heavy, dark beer would work great, though, too.

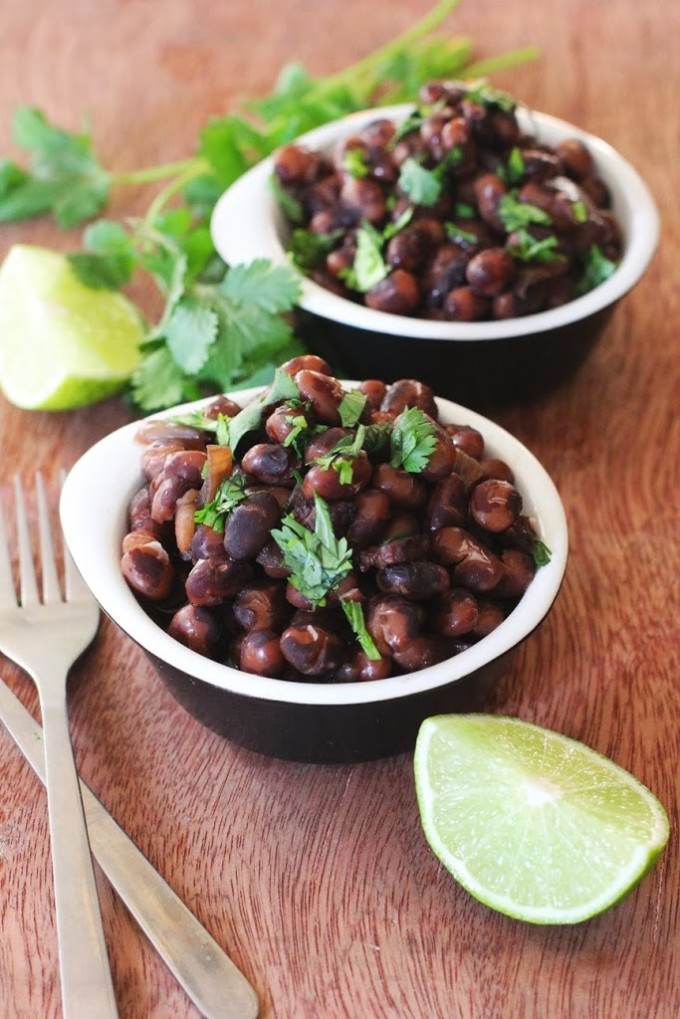
The beans cooked up rich and creamy as expected with that familiar bite that comes from cooking with beer. We’ve been eating them all week with a side of fall vegetables and topped with a fried egg.

Slow Cooker Black Calypso Beans with Beer and Bacon | Fake Food Free


Slow Cooker Black Calypso Beans with Beer and Bacon Recipe

Inspired by Drunken Beans by Elianna Friedman, CUESA Market Chef

Serves: 6 to 8

Ingredients

1 lb. Black Calypso beans, soaked overnight, rinsed and drained
1 small onion, sliced
3 cloves garlic, minced
3 slices thick-cut, pastured bacon, chopped fine
12 oz. wheat beer
5 cups vegetable stock or water (or a combination of the two)
1 to 2 tsp sea salt
¼ cup chopped cilantro
Lime wedges for serving

Prep

Place the beans, onion, garlic and bacon in the bowl of the slow cooker.

Pour in the beer. Add the stock or water (I used a combination of 2 cups of stock and 3 cups of water).

Stir all the ingredients and cook on high for 7 to 8 hours, or until the beans reach your desired tenderness.

Before serving, stir in the salt to taste. How much you need will depend on what type of stock and how much water you used. Stir in the cilantro.

Serve with lime wedges on the side.

Thanks for reading! All images and content are the property of Fake Food Free unless otherwise stated. Please do not republish full recipes and images without written permission. What is okay? Feel free to Pin images, share links to my posts or share the photo in a round up post with the title of this recipe and a link back to the post. Confused about copyright and food blogs? Here is some helpful information on Recipe Attribution. If you want to use a photo or full recipe, just ask. I’m sure we can work something out.

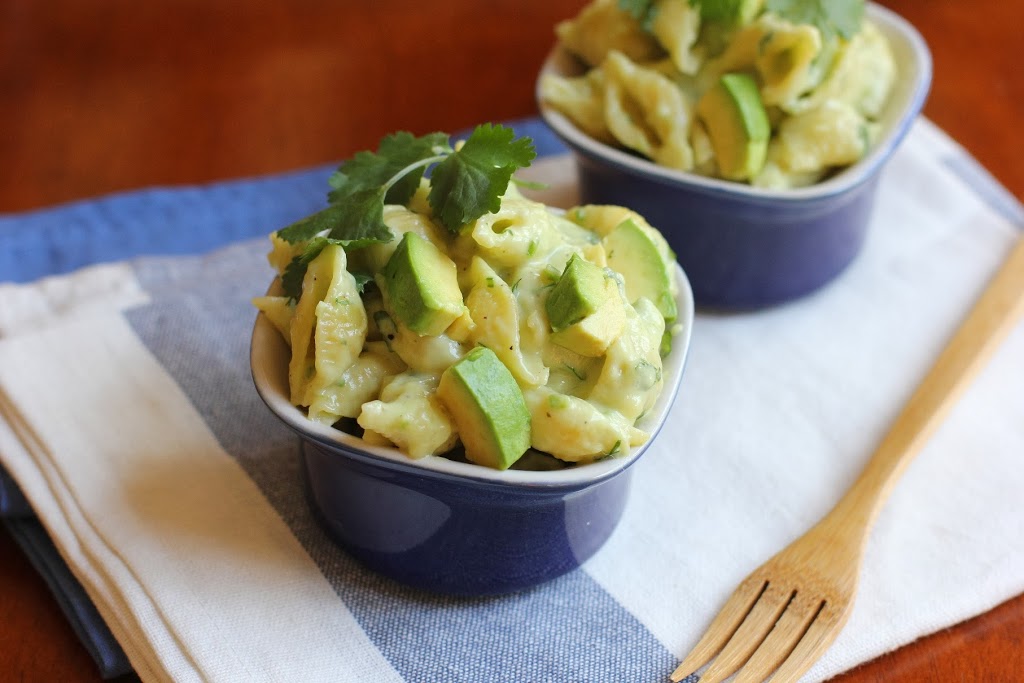
Beecher’s Flagship Cheddar with Avocado, Lime, and Shell Pasta from Melt: The Art of Macaroni and Cheese

October 23, 2013
Cheddar with Avocado, Lime, and Shell Pasta Recipe from Melt: The Art of Macaroni and Cheese on Fake Food Free


I’ve only had the book for a week, but every person I’ve told about it or shown it to has had the same response. It’s something like, “Oh, wow,” accompanied by a deep, long sigh. You know, the kind of sigh that is reserved for thoughts of, and longing for, comfort food.

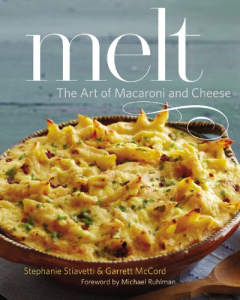
The book is Melt: The Art of Macaroni and Cheese by Stephanie Stiavetti & Garrett McCord, and it deserves every comfort food sigh and oh-wow that it prompts.


I mean, it’s mac and cheese. It’s the heart of the definition of comfort food. Even though most of us grew up with the fake stuff in a box or that made with cheese food, we still have a place in our hearts for the real deal.

If you don’t know what the real deal is, let me explain. 

The real deal is a perfect combination of creamy and pleasantly gooey cheese with well-cooked pasta. It can be straight from the stovetop or out of the oven. Take your pick. It also goes beyond cow’s milk cheddar and Monterey jack to include blue cheese, goat and sheep’s milk cheeses.

The real deal is summed up and well defined by Melt.

Stephanie and Garrett have managed to recreate macaroni and cheese while maintaining its roots and deep traditions. I fell for it within the first few pages as they explain how so many amazing cheeses are reserved for the cheese plate or the wooden serving block, positioned next to a few grapes or figs and a glass or two of good wine. One of their goals with this book is to introduce ways to use these amazing cheeses in your cooking.

I found that goal to be a huge relief. I love cheese. I’ve taken cheese making courses and written an article on making it at home, but I still find cheese overwhelming. This is especially true considering all the cheeses I now have access to here in California, many of which are recommended in this book.

I found myself thinking – you mean it’s okay if I actually cook with these cheeses instead of reserving them for a platter of fruit and crackers?

Yes. It is. And this book will show you some the best recipes and methods for doing just that.

Melt is full of cheese education. But don’t be discouraged if you haven’t heard of the cheeses mentioned in the recipes. Each has a helpful list of alternative cheeses you can use. There are also wine and additional food pairings to help you enjoy your new cheese find even more.

Before you begin to think that this book is only pasta coated in delicious cheese and baked into a comfort-food casserole, let me share the titles of some recipes with you. There are plenty of flavorful twists on casseroles and stovetop versions, but there are also refreshing pasta salads such as Drunken Goat with Edamame, Fennel, and Rotini and side dishes like Point Reyes Original Blue with Pecans, Figs, and Shell Pasta (which will make it on our Thanksgiving table this year). There is even a dessert section with recipes like Fromage Blanc, Chevre, Peach, and Ghost Pepper Cannelloni.

Despite all those wonderful options, the Beecher’s Flagship Cheddar with Avocado, Lime, and Shell Pasta caught my attention for two reasons. First, I just got back from Seattle where I walked by the Beecher’s Handmade Cheese Shop. I reluctantly passed up their mac and cheese because I was on the mission for another food find. (Yes, I regret that decision.) Second, because I am crazy about avocados and I was completely intrigued with the idea of mixing them into a bowl of macaroni and cheese.


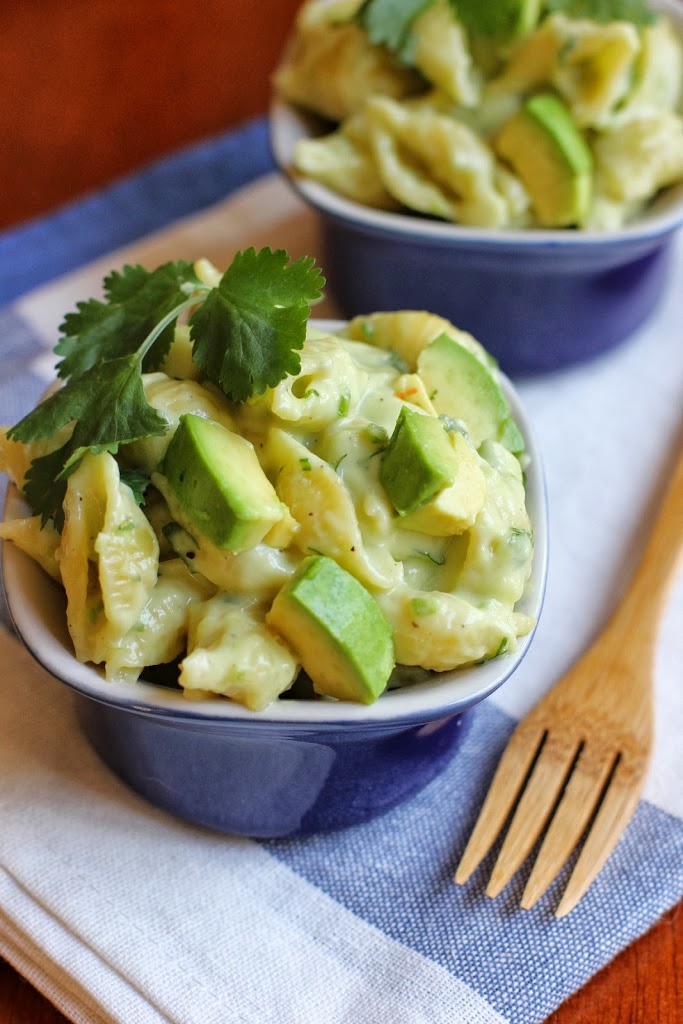
Recipe for Mac and Cheese with Cheddar, Avocado and Lime! | Fake Food Free


One taste of this dish and I was ready to grab my fork and eat it straight from the pan. It’s creamy, tangy, sweet and salty all at the same time with the prominent qualities of traditional, southern-style macaroni and cheese.

Make it. Then consider it a good indicator of what is to come when you get yourself a copy of the book. You may not have realized you needed a cookbook devoted to macaroni and cheese, but trust me, you do.


From the book:
If you ever have the opportunity to wander through the Pike Place Market, the heart of the food scene in Seattle, you’ll likely come across the Beecher’s Handmade Cheese shop. Inside, you can sample their wares and watch the cheesemaking process unfold before your eyes. The proprietors serve what they call the World’s Best mac and cheese; with its jaunty kick of spice and smooth sauce, it’s definitely a contender for the title.

We love to use Beecher’s Flagship—a fierce, creamy paragon of Cheddar if ever there was one—in this avocado macaroni and cheese. The svelte texture of avocado melds so well with this sharp, tangy Cheddar. Smooth and buttery with a slight citrus tang, this jade-colored mac is a casual way to enjoy mac and cheese.

Beecher’s Flagship Cheddar with Avocado, Lime, and Shell Pasta

©2013 Stephanie Stiavetti and Garrett McCord. Reprinted with permission from Little, Brown and Company.

Serves 4 to 6

1 jalapeño pepper
Zest of 1 lime
Juice of 1 lime
2 green onions, green parts only, chopped
2 cloves garlic, chopped
3 ripe avocados, pits and skin removed, divided
10 ounces conchiglie or other medium shell pasta
1½ cups milk
2 tablespoons butter
3 tablespoons flour
1 teaspoon sea salt
½ teaspoon freshly ground black pepper
10 ounces Beecher’s Flagship
Cheddar, shredded
¼ cup chopped cilantro
Lime wedges for garnish

1. Remove the stem from the jalapeño and cut the jalapeño half. Remove the ribs and seeds—or keep them, depending on how much heat you like. Toss the jalapeño into the bowl of a food processor with the lime zest and lime juice. Add green onions, garlic, and flesh of 2 of the avocados. Blitz together into a very smooth paste.

2. Cook the pasta in a large pot of salted boiling water until al dente. Drain through a colander and set aside.

3. To prepare the mornay sauce, heat the milk in a small saucepan over medium heat. As soon as the milk starts to steam and tiny bubbles form around the edges of the pan, turn off the heat. Place the butter in a medium saucepan and melt over medium flame. Add the flour and stir with a flat-edge wooden paddle just until the roux begins to take on a light brown color, scraping the bottom to prevent burning, about 3 minutes. Slowly add the milk and stir constantly until the sauce thickens enough to evenly coat the back of a spoon—a finger drawn along the back of the spoon should leave a clear swath. Remove from heat and stir in salt and pepper. Add cheese to sauce, stirring until completely melted. Add the avocado-onion paste and whisk together until uniform and creamy. The key word here, if you haven’t guessed, is smooth. Season with more salt and pepper to taste.

4. Add the pasta and cilantro to the sauce and stir together. Dice the last avocado and toss together with the mac and cheese. Serve immediately with a splash of lime juice.

Alternative cheeses: Jasper Hill Cabot Clothbound Cheddar, Fiscalini Bandage Wrapped, Cheddar, Shelburne Reserve

Wine pairings: Pinot Grigio, Verdelho, Godello

Additional pairings for the cheese, outside of this recipe:
corn, cooked black beans, persimmons, most chili peppers, winter squashes such pumpkin or butternut


Disclosure: This book was sent to me for review purposes. I was not required to write about it and received no compensation for doing so. Thoughts are my own and this is a really great book.

Places Worth Preserving – The Pumpkin Farm

October 7, 2013
 
          Pumpkin Patch | Fake Food Free
 

I can see them before I pull up to the entrance of the farm. They are specs of bright orange sunshine amid a sea of dry, brown brush. The excitement builds as I get closer and begin to make out the endless shapes and sizes. Some perfectly symmetrical, others with an odd bump here or a groove there that only adds to their character.

Picking a pumpkin is unlike any other garden harvest. It takes a good eye and a good bit of strength to find (and haul) the right one. First, I judge by size. I have to get this thing back to the front register to check out, so as tempting as those extra-large beauties may be, I have to leave those in the field for someone a bit stronger.

Next, they must be analyzed from every angle ensuring there is at least one good side to show off to the neighborhood. It may take a while to find one, but there is nothing I enjoy shopping for more than the perfect pumpkin.

Pumpkin Recipes | Fake Food Free

While I have memories of pumpkin hunting from my childhood, the appreciation of the local pumpkin patch is something I associate much more with as an adult. Fall is my favorite season, and there is nothing better than seeing the first signs in the form of a bright pumpkin.

When I was invited to participate in a special project with Frei Brothers Reserve to celebrate a place that I feel is worth preserving, the opportunity hooked me in right away. It was a tough decision. There are so many. But what is the one place that stands out most for me?

The local pumpkin farm.

Pumpkin Recipes | Fake Food Free
 

It’s not a place that is reserved for a lucky few that live in a specific region. It’s not tucked in the wooded hills of the East or along the rugged coastline of the Northwest. From Kentucky to California, and just about every state beyond and in between, when October arrives you can hear the laughter, smell the spiced cider and see the orange specs among the dry brush. It’s pumpkin season, and for me, this feeling and this special place is worth preserving.

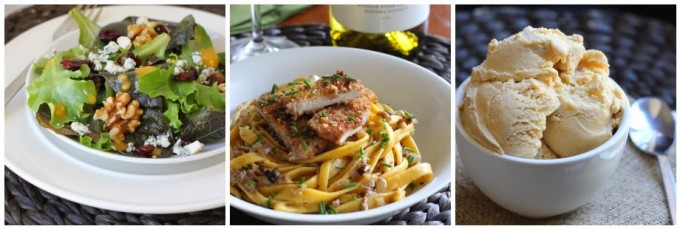
As part of my participation in the Frei Brothers Reserve project, I was asked to create a meal around my place to preserve. So I roasted my first winter squash of the season, blended up the beautiful, sweet orange puree and prepared three courses in celebration of pumpkin with the help of Frei Brothers Reserve Chardonnay.

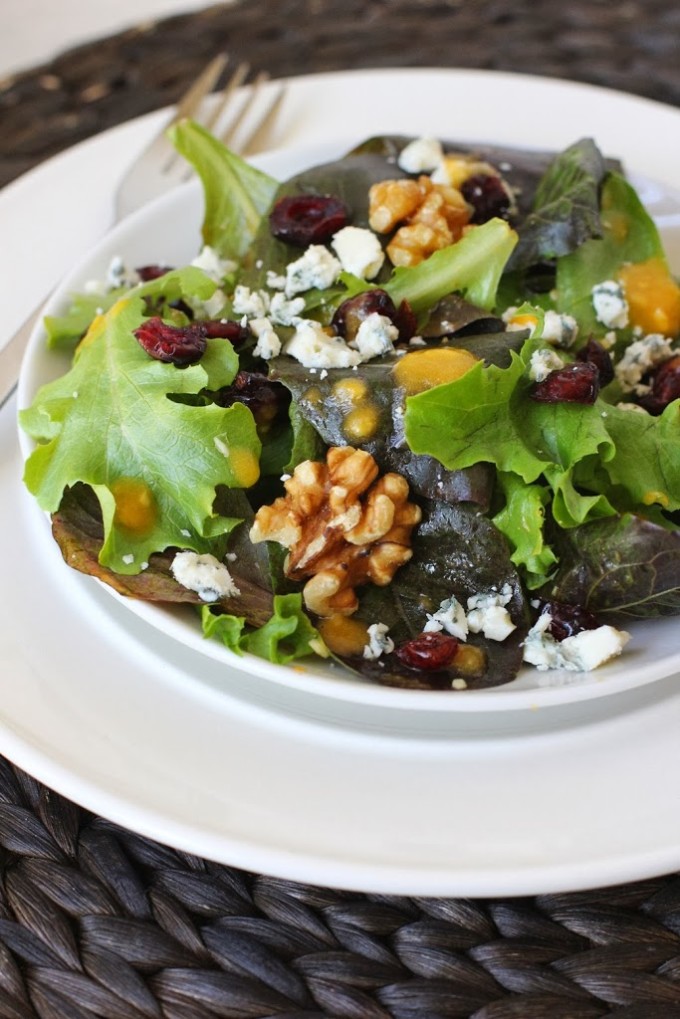
Autumn Salad with Pumpkin-Orange Dressing | Fake Food Free

 Autumn Salad with Pumpkin-Orange Dressing

Serves: 4

6 cups mixed greens
4 ounces blue cheese, crumbled
1/3 cup walnut halves
¼ cup dried cranberries
3 tbsp extra virgin olive oil
2 tbsp fresh orange juice
1 tbsp rice wine vinegar
1 tbsp fresh pumpkin puree
2 cloves garlic, peeled
¼ tsp salt
Pinch ground black pepper

Place the lettuce, cheese, walnuts and cranberries in a large bowl.

Combine the olive oil, orange juice, vinegar, pumpkin and garlic in a small food processor. Pulse until smooth. Stir in the salt and pepper.

Pour the dressing over salad and toss to coat.

Divide into 4 portions and serve.

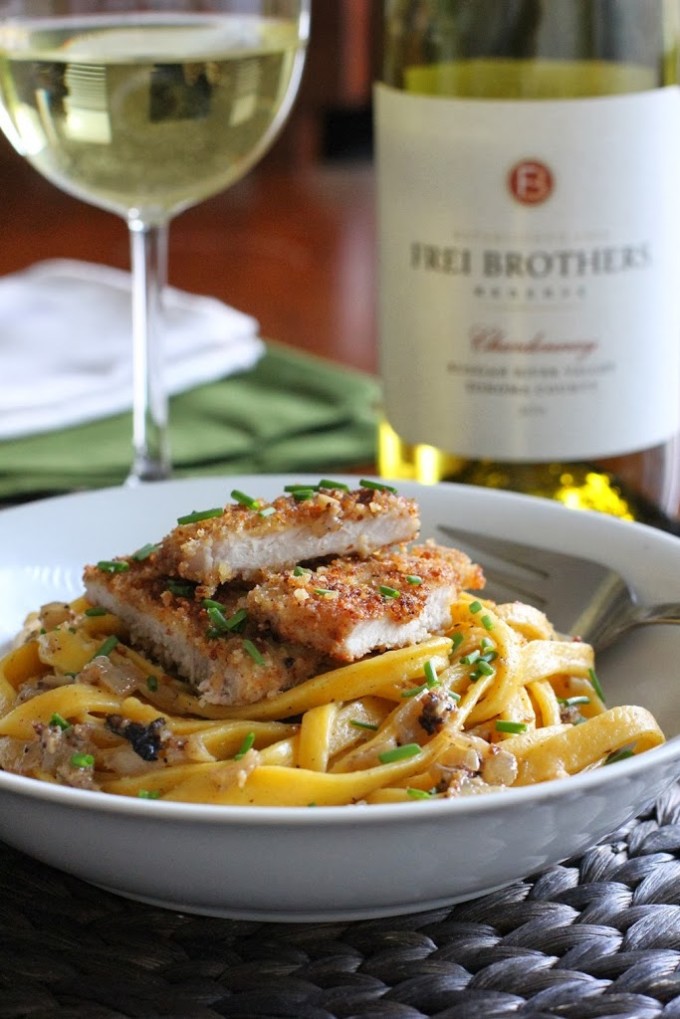
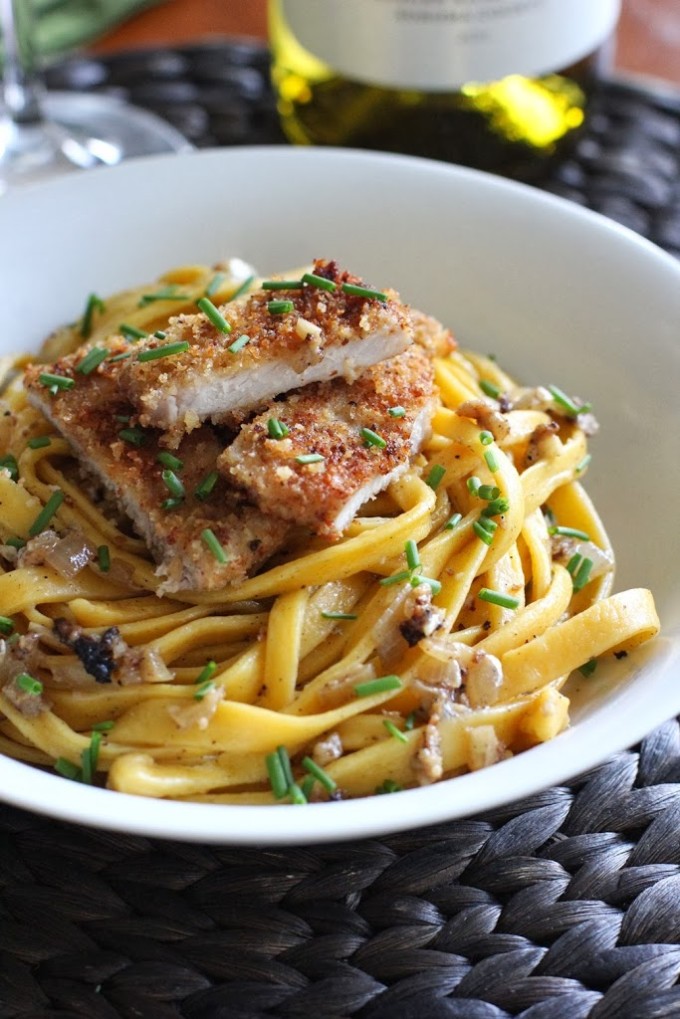
Pork Scaloppini in White Wine Sauce over Handmade Pumpkin Pasta | Fake Food Free

Pork Scaloppini in White Wine Sauce over Handmade Pumpkin Pasta

Pairing tip: pair with Frei Brothers Reserve Chardonnay

Serves: 4

Pasta
2 cups unbleached all-purpose flour
2 eggs
3 ½ tbsp fresh pumpkin puree

Scaloppini
1/3 cup panko bread crumbs
1/3 cup almond meal
1 tsp sea salt
¼ tsp ground nutmeg
¼ tsp ground cayenne pepper
¼ tsp ground black pepper
1 egg
1/3 cup milk
2 tbsp olive oil
1 tbsp unsalted butter
1 pound pork scaloppini (about 8 thin slices)

¼ cup chopped onion
2 cloves garlic, minced
¾ cup Frei Brothers Reserve Chardonnay
1 tbsp unsalted butter
Salt and pepper to taste
2 tbsp chopped fresh chives

Pasta
Combine the flour, 2 eggs and 3 ½ tablespoons of pumpkin puree in a food processor. Pulse until the dough comes together.

Turn the dough out onto a floured surface, and kneaded just until the dough comes together into a smooth ball.

Let rest under a damp paper towel for 15 minutes. Follow your pasta maker instructions for rolling and cutting the pasta, or you can follow my guide for Beginner Homemade Pasta Making.

To cook the pasta, boil for 3 to 4 minutes in salted water, drain and set aside.

Pork

In a shallow dish, combine the bread crumbs, almond meal, salt, nutmeg, cayenne and black pepper. In a separate shallow dish whisk together the milk and the 1 egg.

Heat the olive oil and butter in a large cast iron skillet or a similar skillet over medium-high heat. Dip each piece of pork in the egg and milk, and then into the bread crumbs, turning to coat it evenly.

Working in batches so you don’t overcrowd the pan, add the pork to the hot skillet and cook 2 to 3 minutes on each side, until browned and cooked through.

Transfer to a paper towel to drain.

Once all the pork is cooked, add the onion and garlic to the skillet and carefully pour in the wine to deglaze the pan. Scrape the bottom of the pan well as the wine boils and reduces for about 30 seconds.

Reduce the heat to medium. Add the butter and continue to scrape the pan until the butter melts. Salt and pepper the sauce to your taste.

Add the cooked pasta to the skillet and toss to coat in the sauce.

To serve, add ¼ of the pasta to each serving plate. Top with 1 to 2 pieces of the scaloppini and garnish with ½ tablespoon of the chopped chives.

Pork Scaloppini in White Wine Sauce over Handmade Pumpkin Pasta | Fake Food Free
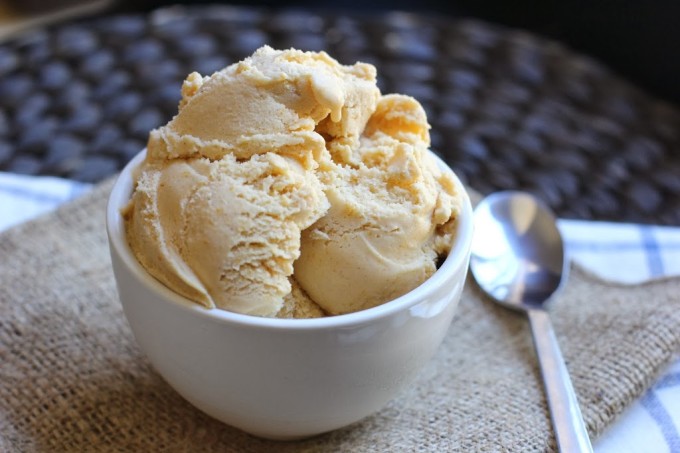
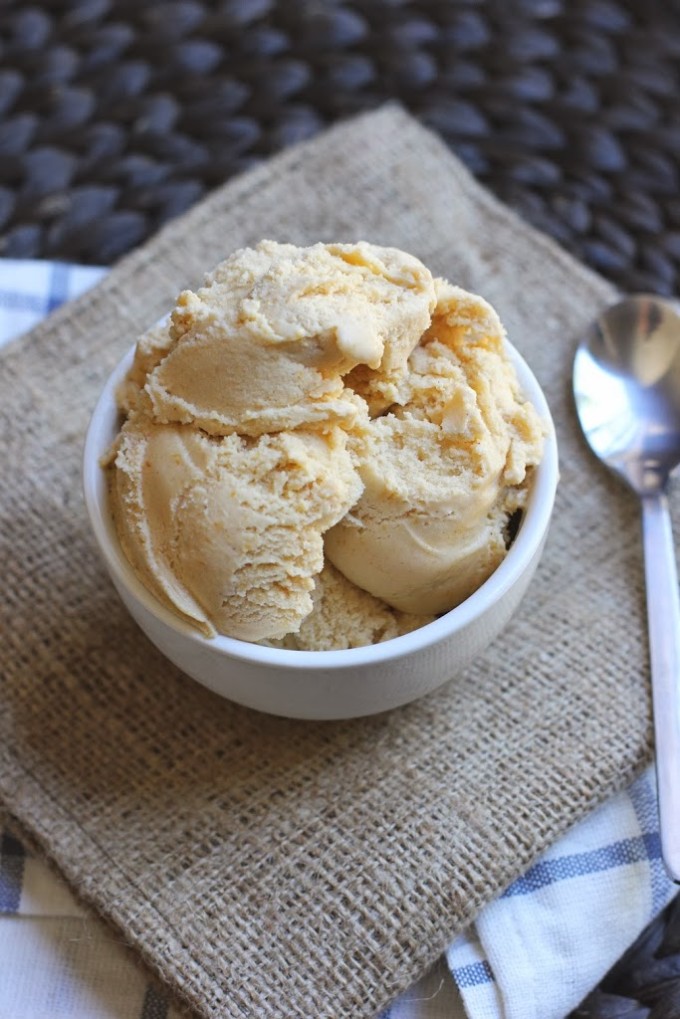
Homemade Pumpkin Ice Cream | Fake Food Free

Homemade Pumpkin Ice Cream

Serves: 4 to 6

2 cups 2% milk
1 cup heavy cream
¾ cup raw sugar
5 tbsp fresh pumpkin puree
2 egg yolks
1 tsp pure vanilla extract
¼ tsp ground cinnamon
Pinch of salt

Combine the milk, cream, sugar and 3 tablespoons of pumpkin puree in a heavy sauce pan. Turn the heat to medium and gently scald the milk, stirring often. The milk should begin to foam on the top, but it should not come to a full boil. Remove from the heat.

In a small bowl, whisk together the remaining pumpkin puree, egg yolks, vanilla, cinnamon and salt. Temper the mixture by slowing pouring in ½ cup of the warm milk, while whisking vigorously.

Transfer the tempered egg mixture back to the pan of warm milk by pouring slowly and whisking constantly.
Return the pan to medium-low heat. Cook stirring often for about 5 minutes, until the milk begins to foam again, but do not allow it to come to a boil.

Pour the mixture through a fine mesh strainer into a heat and freezer safe bowl (such as Pyrex). Place the bowl over a larger bowl filled with ice and stir the mixture until cool.

Refrigerate until cold, at least 1 hour. (I sometimes put it in the freezer to speed up the process.)

Freeze in a counter-top ice cream maker per the manufacturer’s instructions.

Homemade Pumpkin Ice Cream | Fake Food Free
Pumpkin Recipes | Fake Food Free

What is your Place Worth Preserving? Frei Brothers Reserve is currently hosting a photo competition on Facebook for Places Worth Preserving in association with National Geographic Traveler. Every month between now and November, they are giving away prizes for photo entries including a grand prize trip to visit their winery at Frei Ranch in Sonoma County plus a stay in Yosemite National Park.

You can also check out a round-up of all the delicious Places Worth Preserving and wine inspired recipes at Kitchen PLAY.

Discloser: I was invited to participate in the Frei Brothers Reserve Places Worth Preserving project by Kitchen PLAY. This is a sponsored post. I received monetary compensation for this post and a bottle of wine to pair with my meal.
Baking with Coconut Sugar: Spiced Coconut Sugar Cookies Recipe

October 3, 2013

 These cookies were one of my first baking experiments with coconut sugar! It’s now a staple in my pantry. 

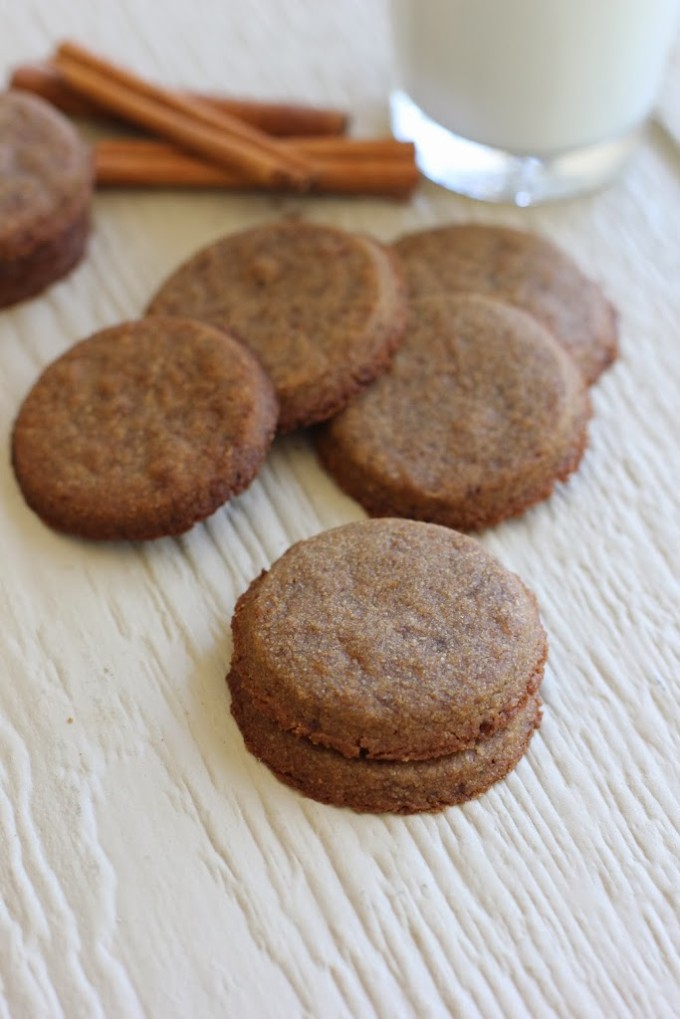
Baking with Coconut Sugar: Spiced Coconut Sugar Cookies Recipe | Fake Food Free

 We finally gave in and went for it.

We got our first Costco membership.

While a household of two has little need for 40 rolls of toilet paper at one time, we were tempted by the travel deals we’d heard about from friends. Not to mention, if you can go at a time when it isn’t swamped, it’s kind of fun just to look around.

I was somewhat surprised to find several foods that will likely make my future shopping lists – avocado oil, unsweetened dried cherries, quinoa in bulk. Ours even carries California craft beer bombers.

Considering the size of everything, I figured I should pace myself. One bulk item at a time. So I had my eye on something specific our past few visits.

Coconut sugar.

I’ve purchased a little in small amounts, but I decided that some baking experiments were in order. So I picked up the size of bag that one can only find at a warehouse club.

I’ve used mascavo sugar ever since we lived in Brazil, but I find it harder to come by here. The coconut sugar is similar in texture and flavor so it is turning out to be a good substitute.

First up, cookies. It’s finally fall and I can barely contain my excitement for the season! I thought this spiced whole wheat cookie would be a great way to celebrate the season.

The dough needs to be refrigerated for one hour so be sure to plan ahead with this one. These cookies bake up crispy around the edges and chewy on the inside. They do spread just a little so instead of cutouts that need an exact shape I’d just go for circles or squares.

Spiced Coconut Sugar Cookies
Makes: 24, 2 inch cookies
Write a review
Print
Ingredients
  1. ½ cup unsalted butter, softened
  2. ½ cup coconut sugar
  3. 1 tablespoon molasses
  4. ¼ teaspoon salt
  5. ¼ teaspoon ground cinnamon
  6. 1/8 teaspoon ground nutmeg
  7. 1/8 teaspoon ground ginger
  8. 1/8 teaspoon ground clove
  9. Pinch of ground black pepper
  10. 1 cup white whole wheat flour
Instructions
  1. In the bowl of a mixer fitted with the paddle attachment, combine the butter and sugar. Cream on medium-high for 45 to 60 seconds, scraping the sides of the bowl as needed.
  2. Add the molasses and mix for 30 more seconds.
  3. Add the salt, cinnamon, nutmeg, ginger, clove and black pepper. Turn the mixer to low and slowly add the flour. Mix just until the ingredients are incorporated, scraping the bowl as needed.
  4. Transfer the cookie dough to a sheet of plastic wrap. Form into a ball, wrap and refrigerate for 1 hour.
  5. Preheat the oven to 350 degrees F.
  6. Roll the dough out on a floured surface or between two sheets of parchment paper to about ¼ inch thickness. Cut into your desired shapes.
  7. Bake on an ungreased baking sheet for 8 minutes. Until the cookies are firm and the edges slightly browned. Cool 5 to 7 minutes before removing them from the baking sheet.
Fake Food Free https://www.fakefoodfree.com/

I should probably mention that if you do a search on coconut sugar, you will find all kinds of opinions on both production and health benefits.  Personally, I like coconut sugar simply because it is a minimally refined, natural sugar that retains some of its mineral content (a sugar we found often throughout Southeast Asia). I’m not into the miracle marketing claims. If you eat natural foods, health tends to fall into place. And regarding the sustainability and farming issues, well, there are many sides to every story.


Thanks for reading! All images and content are the property of Fake Food Free unless otherwise stated. Please do not republish full recipes and images without written permission. What is okay? Feel free to Pin images, share links to my posts or share the photo in a round up post with the title of this recipe and a link back to the post. Confused about copyright and food blogs? Here is some helpful information on Recipe Attribution. If you want to use a photo or full recipe, just ask. I’m sure we can work something out.   

A Run in the Rain and Coffee in Seattle — Closing Out IFBC

September 27, 2013

I woke up last Sunday morning with a food hangover. Have you ever had one of those? It’s not quite the same as the kind caused by alcohol, but it a good indication that you had an enjoyable dinner the night before.

Sleepy and sluggish, I had yet to engage in a workout since I got to Seattle so I made myself get up and run. It was more of a run/walk as I tried to navigate where I was going, but then something awesome happened.

It began to rain.

And I began to bound. Well, I’m sure it didn’t look like bounding to the street-side spectators. Given all the food I’d consumed in the past 48 hours it was probably a heavy shuffle, but it felt like bounding in my mind and spirit. I stopped just short of running down the middle of the street waving my arms in celebration. RAIN.

If you ask me what I miss most after moving to California, the answer is rain. I don’t miss dangerous storms, but I do miss long, gloomy days filled with pouring rain. I was thankful Seattle pulled through for me.

After closing out a great conference, I still had one more food (and drink) adventure before my flight – Storyville Coffee. I’d learned by word of mouth (more like word of Facebook) that this was a new coffee shop opening in Pike Place Market. The official opening day is October 1, but throughout September anyone can visit by emailing for a reservation.

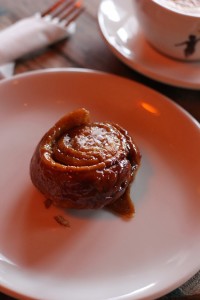
The big surprise is that it is not just a visit. It’s an incredible friendly greeting at check in followed by an invitation to order any drink and pastry you want, all on the house. I ordered a delicious cappuccino and a salted caramel roll that was outstanding.

As I sat in their ultra-cool loft-style space with a cozy fireplace burning up front and gazed out the window at Pike Place Market below, I thought, who does this?! Free coffee? (And excellent coffee, by the way.) Free food? All month before a grand opening? Available to anyone?

Well, Storyville does and it was pretty awesome. I’m so happy I had the opportunity to go during my visit to Seattle.  I can already predict that it is going to be the best place to escape from the craziness of the market. And I mean that in the best possible way, but wow, does Pike Place get crazy with tourists.

When I finally made my way through the long, slow security line at the airport, I was greeted with one of the friendliest TSA agents I’ve encountered yet. Through overhearing his conversations with others, I learned he was from California. He looked at my license, looked back up at me and said, “Did you miss the sunshine?” I said, “No, I actually really miss the rain. I loved it here.” He smiled and said, “Me too. That’s exactly why I moved up here.”

So it turns out not everyone dislikes the weather in Seattle and as you can tell the city can certainly hold its own when it comes to amazing food.

The International Food Bloggers Conference is in Seattle again, by the way. Same weekend, but with a larger group (up to 500), they are moving it to the Westin. Registration is up now for any bloggers who might be reading this.

Disclosure: I was required to write 3 posts about my experiences at IFBC in order to receive a discounted registration fee. This is email 3 of 3. The weekend involved many free products and foods from companies and restaurants that I may or may not write about. Thoughts are my own. I am not required to write about these foods or companies and will receive no compensation for doing so. 

Photography Tips, Wine Pairings and Dining in Seattle – International Food Bloggers Conference

September 24, 2013

It was the reason I registered for the conference in the first place. A session with the well known Andrew Scrivani, food photographer for the New York Times.

In preparation for this big weekend, I caught some of the session he taught on Food Photography for CreativeLive a month or so ago. Inspired is an understatement. The one thing that stuck with me from the online session was when he said (and I paraphrase) – when the door of opportunity cracks open, you don’t peak inside, you kick the door down.

I feel like since we’ve moved to California, I have been kicking down every door that has cracked open for me, and I have my eyes open for more. It was a phrase, an attitude, a piece of advice that had perfect timing for me.

Andrew didn’t disappoint in the live sessions this past weekend. The simplicity of his set-ups and shoots would surprise anyone who has seen some of his intriguing photos that grace pages of the web and print. It also helps that his photography style is spot on with what I aspire for mine to be. The dark shadows, the light flow, the moodiness. Those are the types of photos that draw and keep my extended attention, and also the types of photos I want to more consistently create.

After a hilarious cooking demo with Chef John and Chefs from Blue C Sushi, Andrew shared photo after photo of some of his favorite shots and the stories behind them. A few things I learned:

  • He almost never uses artificial light.
  • Salt glazed pottery does not reflect light.
  • Southwestern light is “absolutely the best” light for food photography.
  • Trade props for credit on your blog. In other words, help spread the word for people who make props that would work well in your photos by mentioning them in your post or on your homepage in exchange for a waved rental fee or a free dish.
  • Use Pinterest boards to collect photos and use them to shop for pottery/plates to recreate the style. (I’ve used this to collect styling ideas, but I’d never thought about using it as a shopping list when I’m looking for the actual props to get the same scene.)
  • Capturing a good photo is about being at the right place at the right time.

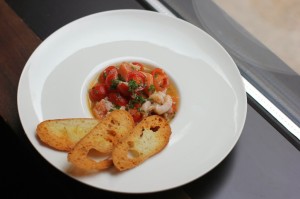
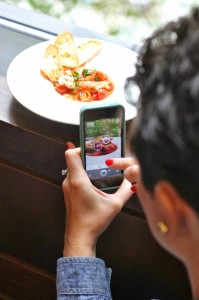
Because of such a large group, only a few were randomly selected to get up and photograph food during the session. Later they brought some plates over to the natural light by the window and a few of us decided to sneak over and take our own pictures.

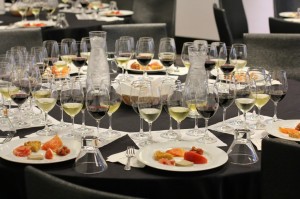
After the food photography sessions, I attended the food and wine pairing session with Chateau Ste. Michelle winery and Culinary Director, John Sarich.

A few interesting tips I learned:

  • Salt water seafood and strong tannin wines do not pair well.
  • Raw fruit and wine do not pair well. The fruit pulls out the acid flavors of the wine.
  • New world reds that are more “jammy” are better with fish.
  • New world reds also pair better with balsamic vinegars and soy sauce.
  • White wine is best served at 54 to 55 degrees F, except Riesling and sparkling white wines which can be served at 40 degrees.
  • Reds should be served at cellar temperature, 64 degrees F, not 73 degrees F (room temperature).
  • Good wine is 20% where you are at, 20% who you are with and 60% the wine itself.
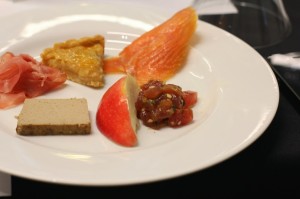
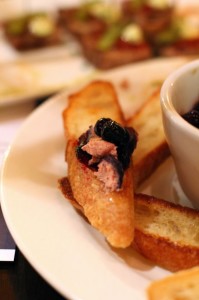
Our tasting plate – duck liver pate, prosciutto, apple tart, smoked salmon, tuna tartar and  fresh apple.

Later that evening, Urbanspoon split all 320 attendees into small groups and we each dined at different restaurants throughout Seattle. It was a really cool concept and each of our restaurants were a surprise until a few hours before. (Eating styles were taken into consideration.)

Our dinner was at Luc, a lovely French-American restaurant. We were served 4 courses, including chicken liver pâté with berry gelée and an amazing Cassoulet made with local white beans, duck confit, sausage and braised lamb (sorry, my photo didn’t turn out due to the lighting). The duck was perfectly cooked, not too dry and the flavor of the beans was rich and comforting.

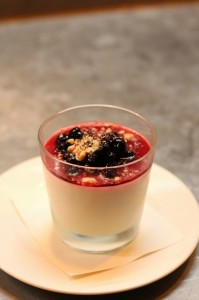
I also got to try Bavarois with Huckleberry. It was described as the French version of a Bavarian cream. It had a rich flavor while also being rather light and airy. The sweet berry topping rounded out the flavor of the dessert nicely.

Another outstanding day.

Disclosure: I was required to write 3 posts about my experiences at IFBC in order to receive a discounted registration fee. This is email 2 of 3. The weekend involved many free products and foods from companies and restaurants that I may or may not write about. Thoughts are my own. I am not required to write about these foods or companies and will receive no compensation for doing so. 

International Food Bloggers Conference Seattle

September 21, 2013

I realized something today. I’m spoiled.
First, I’m currently in Seattle attending the International Food Bloggers Conference with about 300 other food lovers. If you’ve never attended a food blogging conference it’s basically 48 plus hours of eating, drinking, laughing and discussing those things that bore all your other non-food obsessed friends. Complemented by helpful information for blogging, writing and food photography, of course.
I got a good laugh when Mark Briggs, the instructor of the Entrepreunerial Journalism session, said that we (as food bloggers) are different with all our happy attitudes, eagerness to meet people and introduce others. I’ve mentioned this before. You simply can’t be grumpy when it comes to food. We are a great bunch to be around.
So that’s one reason I’m spoiled. The second has to do with my visit to Pike Place Market today. My husband and I visited Seattle several years ago and the one thing I could not wait for was this market. I absolutely loved it.

Fast forward to my life now. I walked to the market today as soon as I got into downtown. I marveled over the gorgeous flowers, the European shops and the seafood. I stopped by the water, snapped a few photos. Then I sighed, feeling disappointed.
What is wrong with me? I’m at one of the most awesome markets in the world and I feel disappointed? How much of a food snob can I be? It was then I realized what has happened.
I’m becoming a full-fledged California girl and California foodie. At that moment it became even more evident to me just how lucky I am. You really cannot beat California agriculture (big and small).
So here I am at the this conference feeling like the luckiest person in the world both because I have access to amazing food, but also because this food is now my job as a freelance writer, recipe developer and food photographer outside of this blog. Life is good.
As part of attending this conference I made a commitment to blog about it, so I’ll be taking a short break from recipe posts to share some of the amazing food and drink from the weekend. And if you are a blogger, I’ll share any great tips I learn, too.
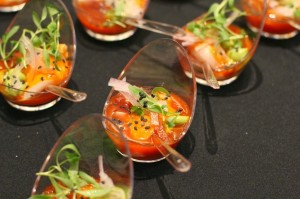
After my self-reflective trip to the market, the conference got off to a great start. We started with food, of course. Burrito bowls from Chipotle (the pickled onions were a tasty touch) and Red Velvet ice cream from a local sweet shop, Cupcake Royale.
Next came an inspiring keynote from Dorie Greenspan (an honor to hear her speak), then a food tasting of natural products from Amazon.com Grocery, and learning sessions. Then a Taste of Seattle and Gourmet Fair. See, more food.
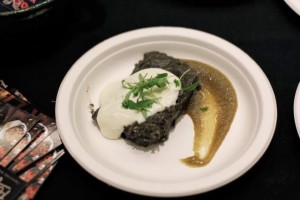
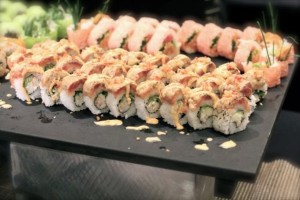
Not to make you hungry or anything, but here are a few highlights from my day.
Sablefish Ceviche with guajillo chile, lime, onion, cilantro, serrano and black sesame, and Huitlacoche Tamale (you know, that Mexican corn that grows fungus), from Poquitos. Both delicious.

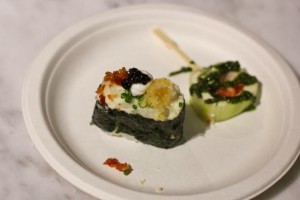
Great sushi from the W hotel.


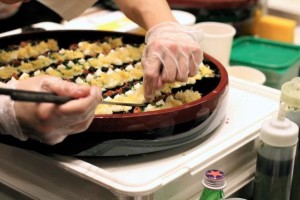
Baked potato and tofu sushi from Blue C Sushi. Interesting, but so good!

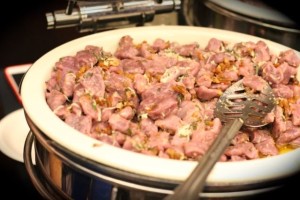
Purple potato gnocchi with pork belly. I had to try this since I’ve played with my own blue potato gnocchi. This version was outstanding!

Sweet Potato Coconut Curry Bisque from Volunteer Park Cafe. One of my favorites!

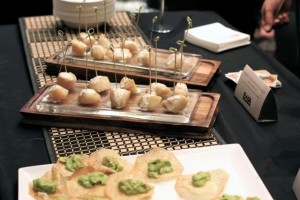
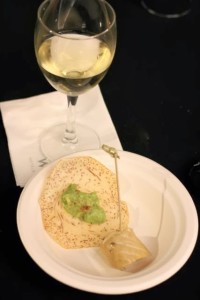
Asian inspired guacamole with ginger. And my very favorite for the night — smoked scallop from Boka. It was one of the best things I have hand in long time, and I told the chef so. The flavor was amazing. Now I want to experiment with smoking scallops.

Disclosure: I was required to write 3 posts about my experiences at IFBC in order to receive a discounted registration fee. This is email 1 of 3. The weekend will involve many free products and foods from companies and restaurants that I may or may not write about. Thoughts are my own. I am not required to write about these foods or companies and will receive no compensation for doing so.  

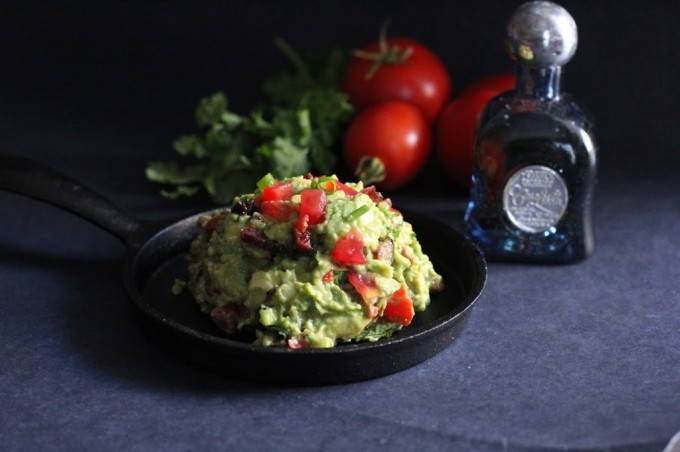
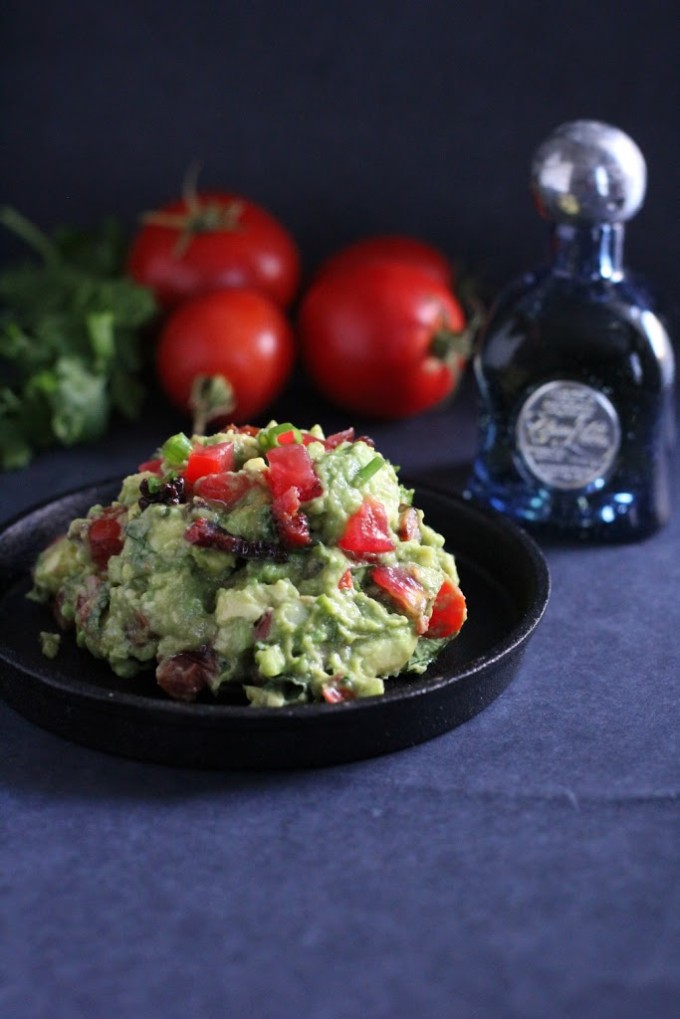
Spicy Spiked Bacon Guacamole

September 16, 2013
Spicy Spiked Bacon Guacamole | Fake Food Free  

I was well into adulthood before I realized that guacamole wasn’t a neon green paste served in a little plastic cup alongside Mexican fast food in the U.S. Fortunately, when friends were in disbelief of my dislike of guac, they took the opportunity to explain the potential of the real, non-processed version. From that point forward, bite by bite, I started trying more and making my own.

Now, I like it chunky, loaded with avocado, onion, jalapeno and cilantro, and I make it every chance I get. With California avocados, that chance comes around much more often than it used to. So this isn’t just a celebration of guacamole, it’s a celebration of living in a placing that is brimming with amazing avocados.

And since we are celebrating, we should make a toast to the drink that goes best with guacamole – tequila! I lived in Kentucky for 10 years, so when it comes to bourbon, I’m pretty educated. We also travel to the Caribbean so I’ve learned a fair share about rum, too.

But tequila? Tequila I have a lot to learn about.

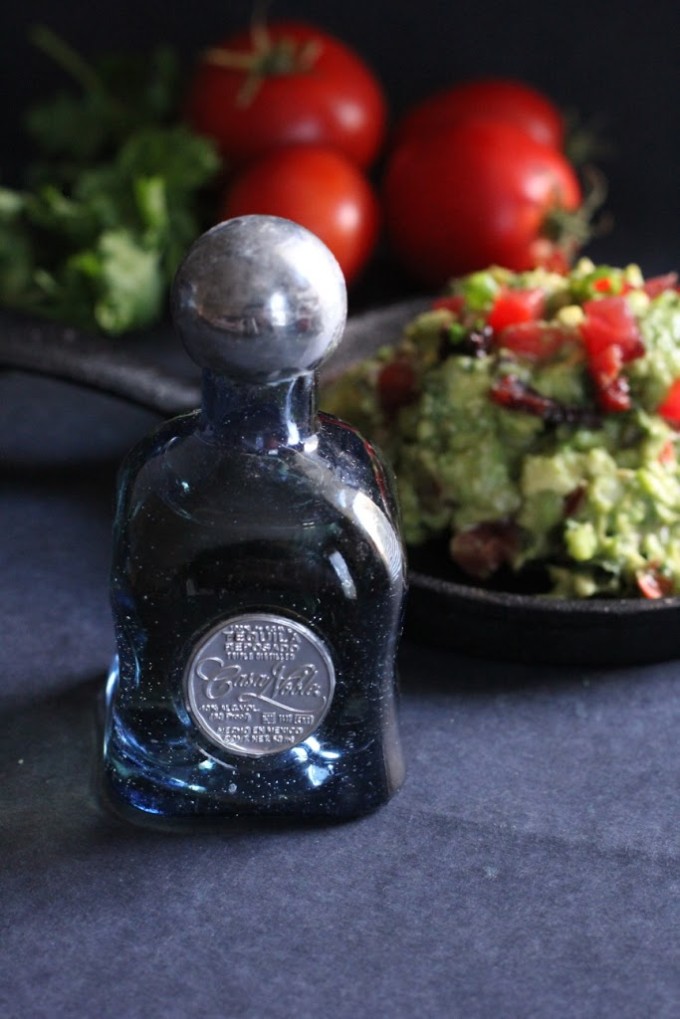
That’s why I was thrilled when Casa Noble sent me some samples to help celebrate this food holiday. I received Casa Noble’s Reposado Tequila which is aged 364 days in French White Oak Barrels. It has won both Gold and Silver in the San Francisco World Spirit competition as well as other numerous awards. (They also make several other award-winning varieties. You can check out those, and their tequila-making process on the Casa Noble website.) 

Spicy Spiked Bacon Guacamole | Fake Food Free

And did I mention how cool their bottles are? Yes, I get sucked in by creative packaging. Especially if it looks good sitting on top of our bar.

After taking a sip, I knew I had lived a sheltered life in terms of tequila. I couldn’t believe how smooth it was; none of that harsh burn that you get from so many tequilas.

There are great tequila cocktail ideas on the company’s website, but to celebrate this day I decided to use the tequila in my guacamole. If you’ve not done this before, it is time to start spiking those avocados. And I know that traditional guac is made with lemon juice, but we are working with tequila here so I dressed it up with lot of lime and salt!

Spicy Spiked Bacon Guacamole

Serves: 4

Ingredients

3 ounces pastured bacon ends, chopped and cooked crispy
1 small tomato, diced
¼ cup chopped cilantro
2 green onions, sliced
1 clove garlic, minced
2 tbsp chopped pickled jalapeno
3 avocados
Zest of 1 lime
Juice of ½ lime
2 tsp Casa Noble tequila
½ tsp sea salt

Prep

Stir together the bacon, tomato, onion, cilantro, garlic and jalapeno in a medium bowl. 

Add the avocado, lime zest, lime juice and tequila. Mash and stir the ingredients together until the avocados reach your desired consistency. (You can also use a mortar and pestle or a food processor.)

Stir in the sea salt and serve.

 
Spicy Spiked Bacon Guacamole | Fake Food Free

Disclosure: Casa Noble tequila was sent to me for celebrating National Guacamole Day. I was not required to post about it and I received no compensation for doing so. Thoughts are my own and it is really great tequila!

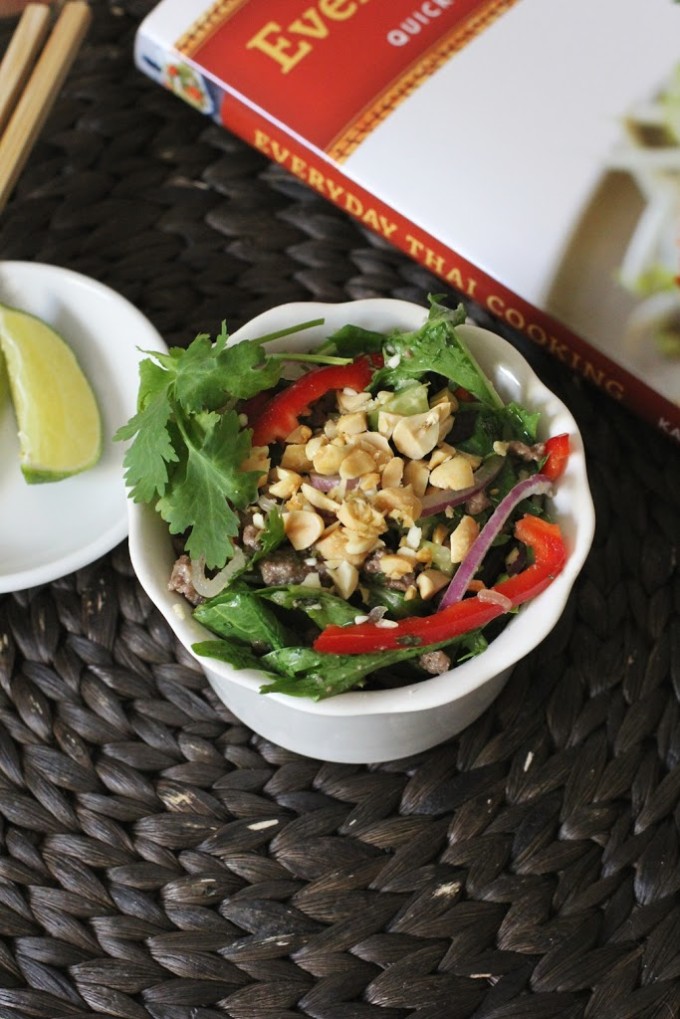
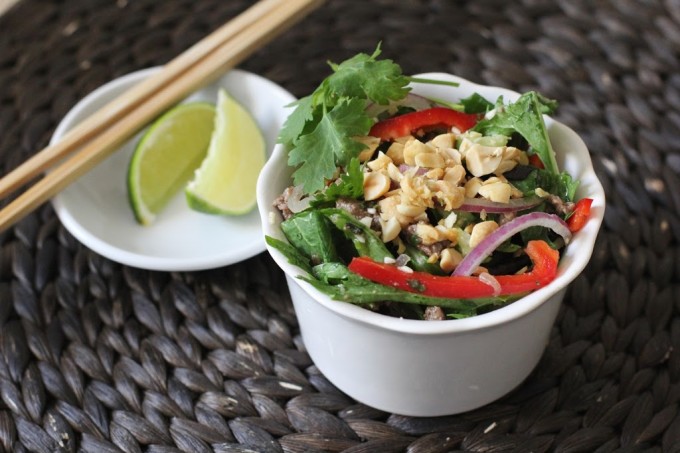
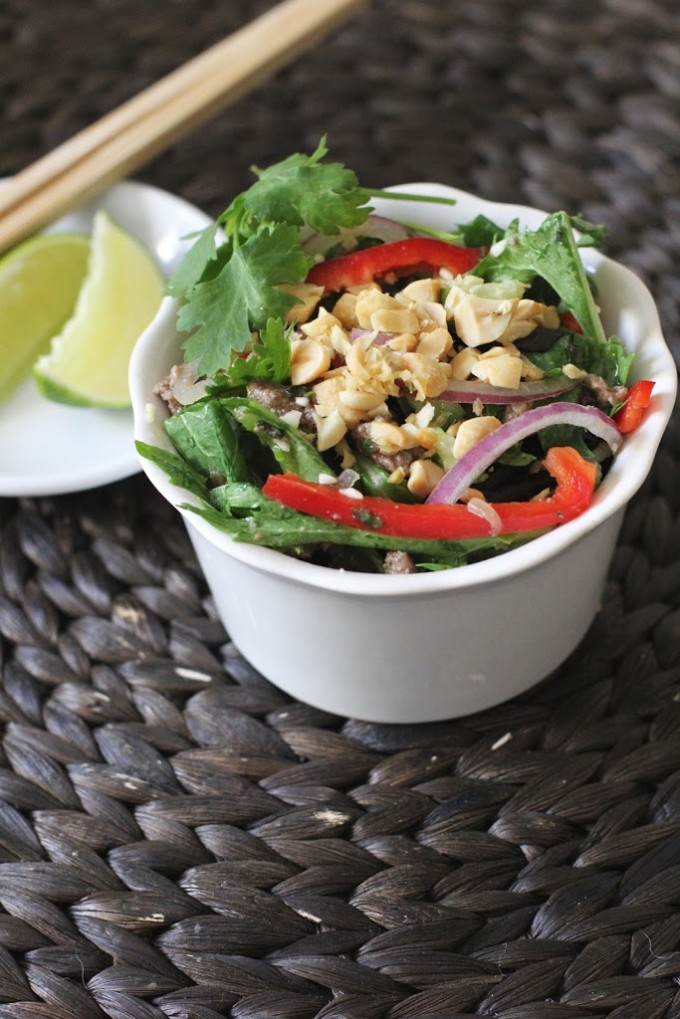
Spicy Thai Salad with Minced Pork (Larb) Recipe from Everyday Thai Cooking

September 13, 2013
 
Spicy Thai Salad with Minced Pork (Larb) Recipe from Everyday Thai Cooking | Fake Food Free
 

The first time I had Thai food was in Thailand.

That seems a little strange to me considering I was 30 years old. (I actually celebrated my 30th in Thailand. Great birthday.)

Most people would probably also try some of the dishes that hail from the country they are about to spend a few weeks exploring, but not me.

It was more of an access issue than anything else. There wasn’t much Thai food in central Kentucky the few years before that, and I also wasn’t an adventurous eater. I was more of a count your calories, eat whole grains and enjoy your fat-free yogurt kind of eater. (I know. I shutter when I think about it, too.) Then we moved to Brazil and there was good food, but no Thai.

So I learned about Thai food, including the infamous Pad Thai, in its home. That is not a bad situation to be in. Although it will leave you constantly comparing every dish you have after that to your original experience. For that reason, even though we took a cooking class while there, I haven’t made much Thai food at home. I play with Pad Thai and curry, but that is about it.

I think that is soon going to change. See, now I have this wonderful cookbook called Everyday Thai Cooking: Quick and Easy Family Style Recipes by Katie Chin. Just flipping through its pages, I feel empowered to bring Thai into my kitchen.

In addition to gorgeous food photography (and scenic photos from Thailand that make me want to go back), the book starts with three sections that I love to see in a cookbook – techniques, ingredients and the basics (all those pastes and sauces that make Thai food so amazing.)

Trust me, this section will have you feeling empowered, too. The book is split into appetizers, soups and salads, entrees based on the meat selection (and vegetarian), followed up by a hefty dessert section. Some things I have on my list include Fragrant Coconut Fish in Banana Leaves, Thai Garlicky Eggplant and Coconut Thai Basil Ice Cream. It’s page after page of both familiar and different Thai recipes that are simply explained for the home cook. 

Spicy Thai Salad with Minced Pork (Larb) Recipe from Everyday Thai Cooking | Fake Food Free

The Spicy Thai Salad with Minced Pork is what caught my eye when I first flipped through the book. It is light and healthy with all the familiar flavors of Thai cuisine. Katie and the publishers graciously gave me permission to share this delicious recipe with you.

The thing I found most interesting about this dish was the roasted rice powder. I’m now going to be making this nutty, slightly crunchy powder to top other dishes. It adds a special touch. You’ll love this recipe. It’s all the tease you’ll need to get your hands on a copy of the book. 

Spicy Thai Salad with Minced Pork (Larb)

©Katie Chin 2013. Reprinted with permission from Tuttle Publishing

Serves 4 as part of a multi-course meal or for lunch

Preparation time: 20 minutes + cooling time
Cooking time: 30 minutes

Ingredients
1 tablespoon long-grain rice1 tablespoon high-heat cooking oil
1 garlic clove, minced
1 small shallot, finely sliced
1 teaspoon minced lemongrass
1 fresh hot red or green chili, preferably Thai (deseeded if you prefer less heat)
½ lb (250 g) ground pork
3 tablespoons Basic Chicken Stock or store-bought
2 tablespoons fish sauce (nam pla)
3 tablespoons freshly squeezed lime juice
1 tablespoon palm or brown sugar
4 cups (350 g) mixed baby greens
1 red pepper, thinly sliced
½ cup (52 g) peeled, seeded, and diced cucumber
12–14 fresh mint leaves
2 tablespoons finely chopped fresh coriander leaves (cilantro)
2 tablespoons finely chopped fresh Thai or Italian basil
½ small red onion, thinly sliced
4 tablespoons crushed roasted peanuts
Fresh coriander leaves (cilantro) for garnish
Mint leaves for garnish
Lime wedges

Prep

Make the roasted rice powder: Heat the rice in a small dry skillet over medium heat, stirring and tossing for 3–4 minutes, until it turns golden brown. Transfer to a small plate and allow to cool. Use a mortar and pestle or a spice grinder and grind the rice into a coarse powder.

Heat the oil in a wok or skillet on medium-high heat. Add garlic, shallots, lemongrass, and chili; stir-fry until fragrant, about 30 seconds. Add pork and stir-fry, while breaking it up with a wooden spoon until cooked through, about 5–6 minutes. Stir in the chicken stock, fish sauce, lime juice, and palm sugar and bring to a boil. Remove from heat and let stand 10 minutes.

In a large bowl, combine the rice powder, baby greens, mint leaves, fresh coriander leaves, basil, and red onions. Add the warm pork mixture and toss with the greens. Sprinkle crushed peanuts on top. Garnish with fresh coriander and mint leaves. Serve immediately with lime wedges.

COOK’S NOTE: Feel free to substitute the fish sauce with soy sauce, the pork with soy protein crumbles and the chicken stock with vegetable stock for a vegetarian version of this salad.

Spicy Thai Salad with Minced Pork (Larb) Recipe from Everyday Thai Cooking | Fake Food Free
 
Also be sure to check out the Dan Dan Noodles from Katie’s Everyday Chinese Cookbook!
 
 
Disclosure:  This book was sent to me for review purposes. I was not required to post about it and I received no compensation for doing so. This post contains affiliate links.
 
 
Thanks for reading! All images and content are the property of Fake Food Free unless otherwise stated. Please do not republish full recipes and images without written permission. What is okay? Feel free to Pin images, share links to my posts or share the photo in a round up post with the title of this recipe and a link back to the post. Confused about copyright and food blogs? Here is some helpful information on Recipe Attribution. If you want to use a photo or full recipe, just ask. I’m sure we can work something out.  

Spicy Pickled Long Beans Recipe

September 11, 2013
 
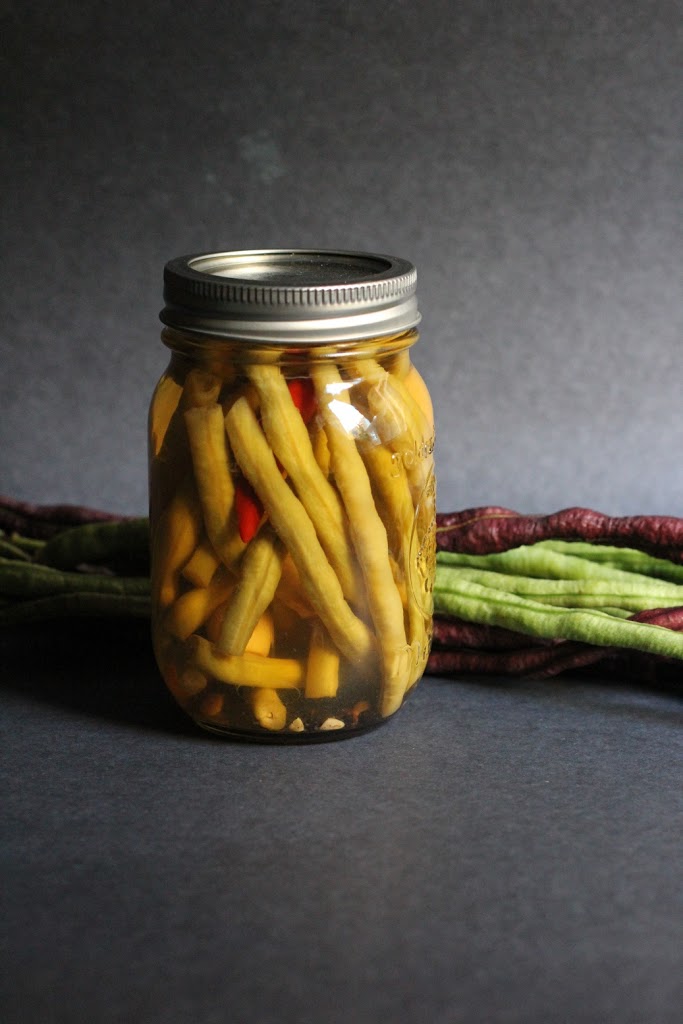
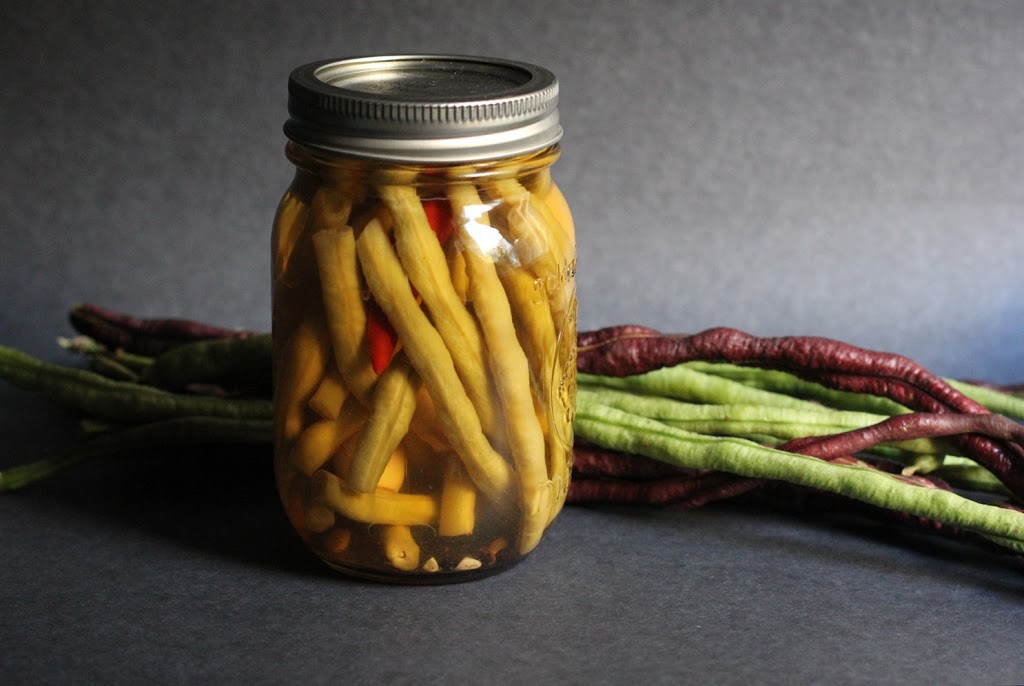
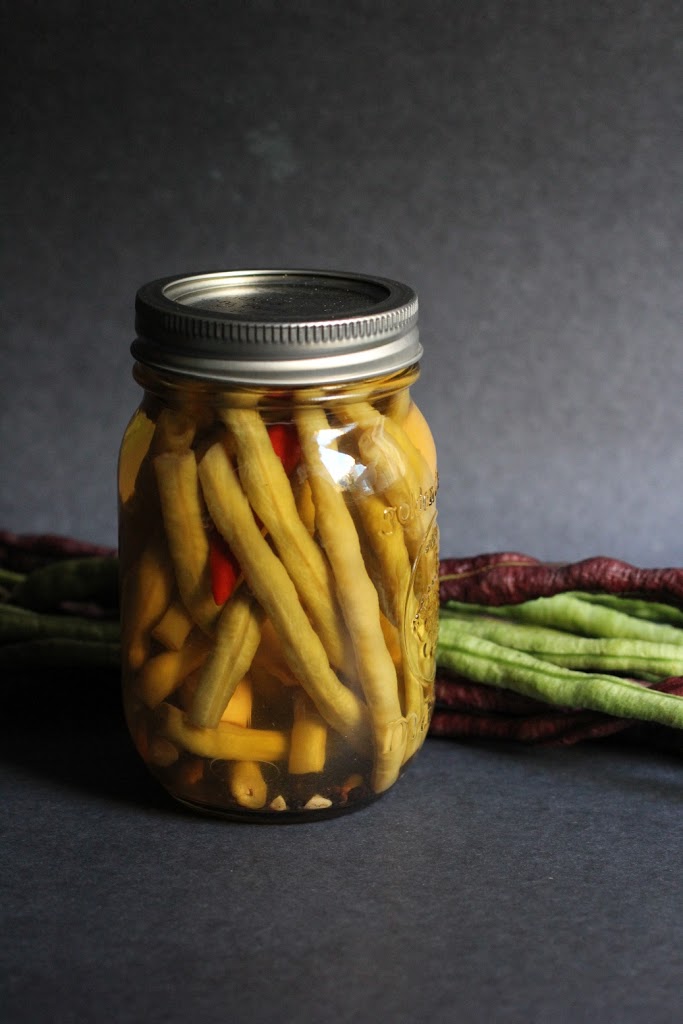
Spicy Pickled Long Beans Recipe | FakeFoodFree.com 
 

I see them on every menu. On the appetizer page for restaurants that proudly serve housemade specialties. On the snack menus of every pub that serves craft beer. And as a half-price small plate at happy hour.

Pickled vegetables.

In case you missed it, they are all the rage. I have to say that I’m fully embracing the trend. I absolutely love pickled foods.

I finally tried pickled ginger a few weeks ago because I had a great cookbook to review. But experimenting with other pickled veggies is something I just couldn’t seem to get around to.

I’d buy a head of cauliflower or some carrots and I’d think — I should try pickling those. It happened over and over again and each time I’d end up using the vegetables for something else.

It wasn’t until I picked up a pound of long beans from the Farmer’s Market that I finally found my motivation to get pickling.

I associate long beans with Asian food (as I think most others do, too). More specifically, I associate them with Thai food because the first time I ever used them was in the green papaya salad we made while taking a cooking class in Chiang Mai.

I’m not that big of a fan of green beans, and since long beans are similar, I haven’t branched out to buy any since that class.

But as you know, I’ve been jumping in head first with buying new and different ingredients in the East Bay. So after seeing piles and piles of them on tables at the market for the outrageous price of $1 per pound, I grabbed some.

That was sarcasm, by the way. There are few vegetables that are not worth $1 per pound to me. You wave a sign saying that over produce and I’ll buy just about anything.

So after the long beans sat in the fridge for a few days a familiar thought popped in my head — I should pickle those. This time I followed through.

I am so glad I did. They turned out so well! We finished an entire jar the second I opened them! Knowing the season is quickly coming to an end, I bought 3 pounds last Friday to make a few more jars to enjoy later in the year.

 
Recipe for Spicy Pickled Long Beans

I used a modified version of Marisa McClellan’s (Food in Jars) recipe that was featured on Serious Eats. She recommends water bath processing the beans to soften their slightly tough exterior. The texture was perfect and I love that this makes them more shelf stable as well.

I modified the recipe by using ginger and a Thai chile as seasoning. The Thai chile was what made them. They were spicy and tangy at the same time. I knew I would want smaller pieces of the bean so I went ahead and cut them into small pieces before I packed them.

We’ve eaten them straight out of the jar and I’ve also been chopping them up to eat over Asian noodle dishes. It’s going to take some serious self-control not to finish all the jars in a few weeks!

Pickled Long Beans Recipe

Spicy Pickled Long Beans

Modified from Pickled Chinese Long Beans by Marisa McClellan

Makes: 2 pint jars

1 lb. Chinese long beans (green or purple), cut into 2 to 3 inch pieces
4 cloves garlic, peeled
4, ¼ to ½  inch pieces fresh ginger, peeled
1 teaspoon black peppercorns
2 Thai chiles
2 cups distilled white vinegar (5% acidity)
2 cups water
2 tablespoons pickling salt

Pack the long beans into each of two sterilized pint jars. Add two cloves of garlic, two pieces of ginger, and ½ teaspoon of peppercorns to each jar. Cut a slit in the side of each of the chiles and place one in each jar.

Bring the vinegar, water and salt to a boil in a medium saucepan over medium high heat. Pour half of the hot brine into each of the jars, leaving ½ inch headspace. Wipe the rim of the jar with a clean, damp towel. Seal with a new lid and a band. Process in a boiling water bath for 10 minutes.

Remove from the water bath and set jars on a cooling rack. After one hour, check to make sure the jars have sealed. Let rest for 12 hours before labeling and storing. Let sit for at least 2 weeks before eating.


If you need help with safe canning practices, please check out the resources from National Center for Home Food Preservation at the University of Georgia.

Want to create beautiful food and product photos that you can't wait to share?!
Discover your style, control the light, and shoot using the tool you know how to use (yes, your phone included). Learn about free resources, Live Q&As with Lori, and online courses you can take from anywhere in the world!
We respect your privacy. Unsubscribe at any time.