Archives

Homemade Poutine with Bacon Gravy Recipe

January 7, 2014
 

Last year offered several opportunities to try new ways of cooking, but the one that stuck with me the most was learning how to fry. Not just sizzling a piece of fish in a pan with butter, but the real deal – deep frying.

I’d never been a fan of deep frying both from a nutritional and cooking standpoint. Nutritionally, I’m still not one, if it’s coming in mass quantities from drive thru windows. But at home, when you control the ingredients and frying times, it’s beginning to grow on me.

It’s also impossible to enjoy some of the best ethnic foods like Brazilian pastel, Filipino lumpia and Irish fish and chips without embracing a little deep frying in your life.

From the cooking side, I was scared. A vat of boiling oil still scares me, but I’ve gotten better at managing that fear.

Last year I made several things, including gingerbread doughnuts and egg rolls, but there was still one thing I wanted to try.
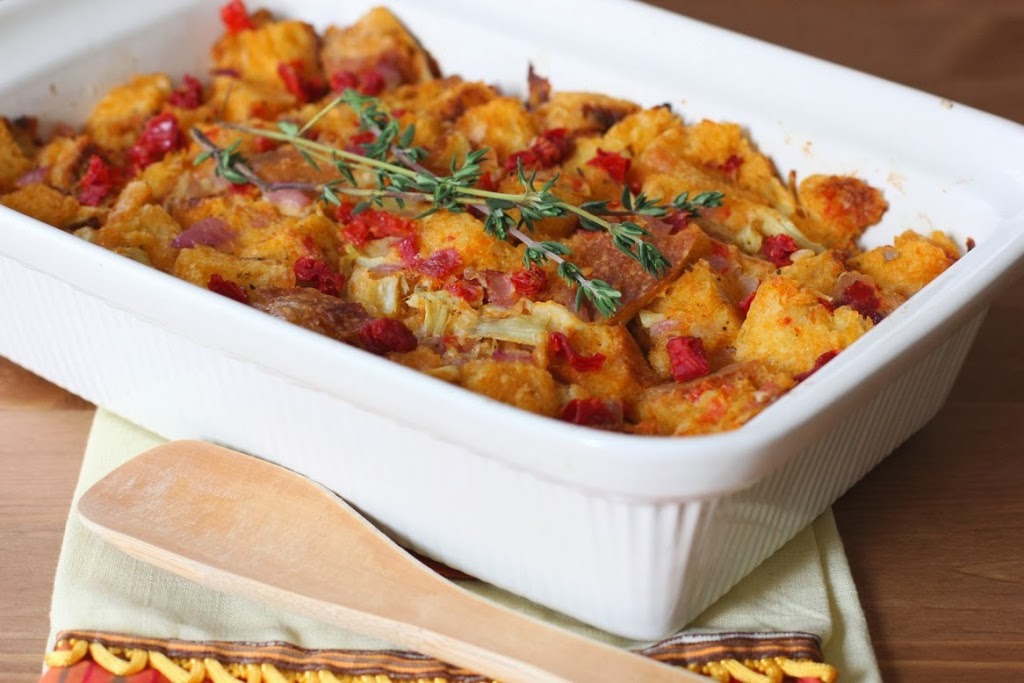
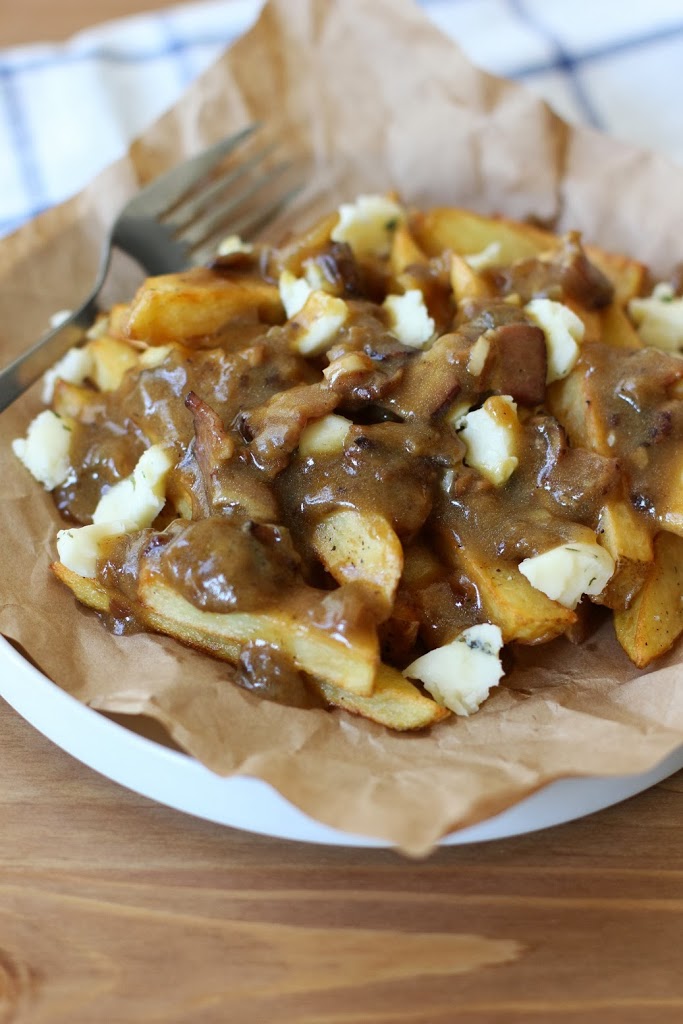
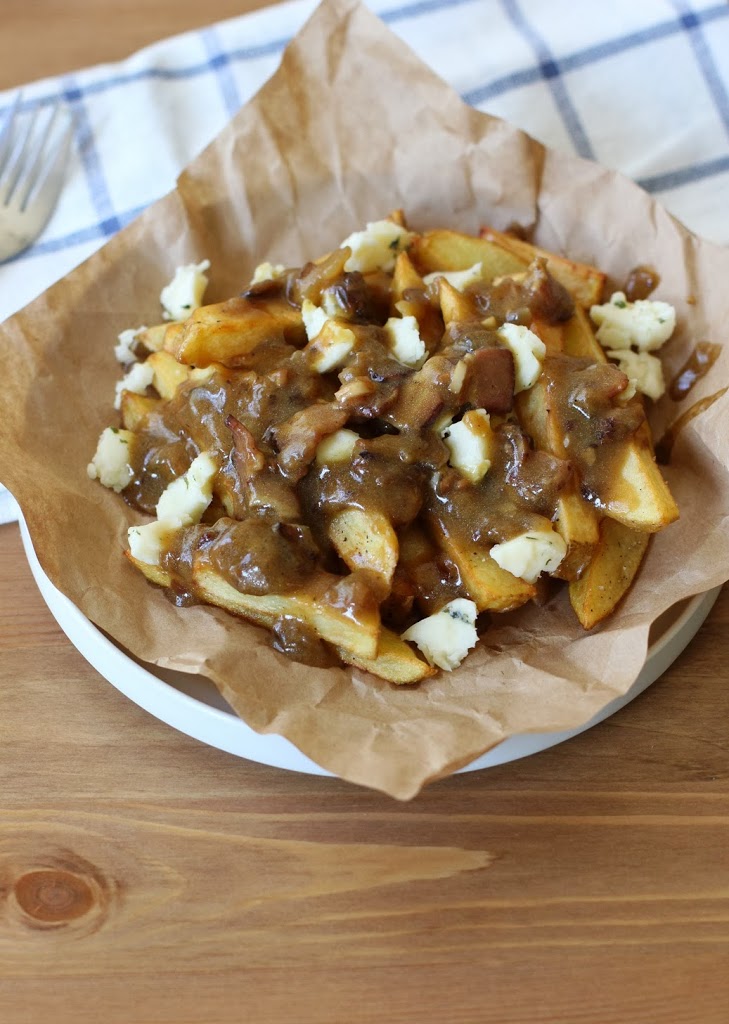
Homemade poutine.

I’ve learned that most people have a love or hate relationship with poutine. I think it’s probably the gravy. Mine has been a love at first bite. We tried poutine for the first time last summer on a trip in Toronto. I have to admit, I’m not a big gravy fan, but throw in cheese curds and French fries and I completely overlook that detail.

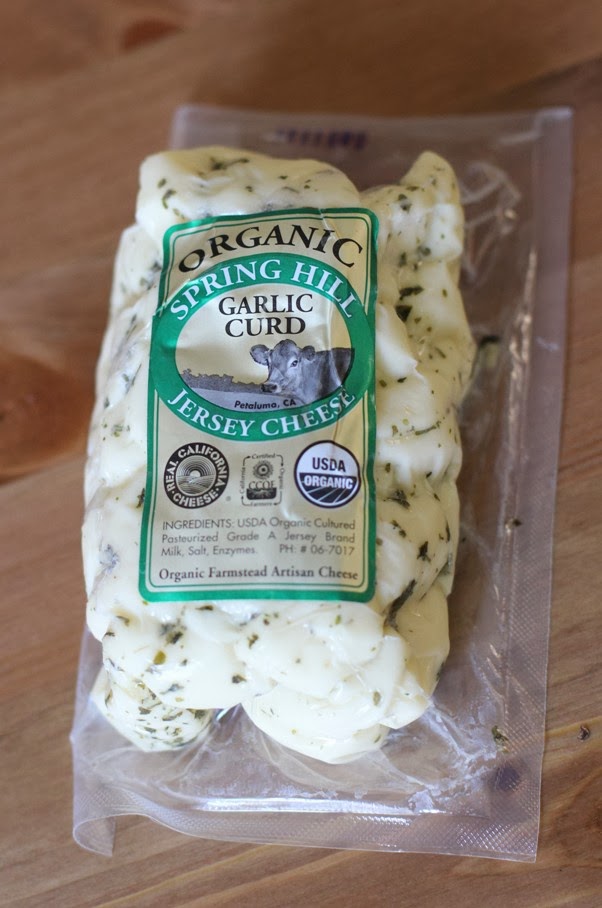
So I heated some oil and set out to make my first homemade poutine for New Year’s Eve. My version used some cheese curds we picked up in Petaluma. After opening the package, I was a little disappointed because they weren’t true cheese curds. As in the kind that are firm and resist melting in dishes like poutine. They were more like pieces of regular cheese that melted a bit with the gravy, but they were still pretty tasty.

The gravy in this dish is a simple combination of bacon and chicken stock. The fries are quick and easy, even when cut by hand. I dropped them in the deep fryer twice for extra crispiness. They’ll just need to soak an hour in cold water before you fry them so plan ahead.

Poutine has been hard to find despite all the foods we have access to here in the Bay Area. This recipe will prove to be the perfect solution when a craving hits.


Homemade Poutine with Bacon Gravy

Serves:  3

4 medium potatoes, cut into fries, soaked in cold water for 1 hour
3 to 4 cups oil for deep frying (peanut, avocado or corn work well)
3 slices bacon, chopped
⅓ cup onion, chopped
2 cloves garlic, minced
1 tbsp unsalted butter
1 tbsp unbleached all-purpose flour
1 ¾ cup chicken stock
1 tbsp cornstarch (optional)
3 oz. cheese curds

Drain the water from the potatoes and turn them out onto a clean dish towel. Pat with the cloth to dry them well.

Heat the oil in an electric deep fryer or a 4 to 5 quart pot (the oil should not fill the pan more than half way to prevent the oil from boiling over). Heat the oven to 250 degrees F to keep the fries warm after frying.

Fry the potatoes in about 4 batches to avoid overcrowding the pan. Fry for 3 minutes. Transfer to a plate covered in paper towels to drain the oil. Fry again for 3 to 4 minutes until evenly browned and crispy. Keep the fries on a pan in the warm oven while you make the gravy.

Heat the bacon in a medium, deep skillet over medium-high heat. Cook for 5 to 7 minutes until the fat is rendered and the bacon begins to crisp. Add the onion and garlic, reduce the heat to medium and cook 2 to 3 more minutes.

Add the butter. Once it melts sprinkle the pan with the flour. Let cook for 30 to 60 seconds. Stir or whisk the flour and butter to create a roux. As you stir, gradually pour in the chicken stock. Return the heat to medium-high.

Stir the gravy occasionally as it heats and thickens. If your gravy does not thicken enough, in a small dish, combine the cornstarch with 1 tablespoon of water. Pour the slurry into the gravy and continue to heat and stir for 1 to 2 more minutes, or until the gravy reaches your desired thickness.

When ready to serve divide the fries into three servings, top each with an equal amount of cheese curds. Then pour an equal amount of gravy over each portion.

8 Best Cocktails for New Year’s Eve

December 30, 2013
 
After two weeks of travel to visit New York City, explore the Christmas markets in Vienna and Krakow, and spend time with family in Indiana and Kentucky, I’m back at my computer. 
2013 has been so amazing I can hardly put it into words. I’m sure I’ll miss some things, but here are a few highlights.
Aside from how wonderful it is to now be a California resident, I also live by the water with access to fresh seafood and salty air. Something I’ve always wanted to do.
I ran my first marathon. (And I ran it across this.)
My husband and I celebrated 10 years of marriage.
I landed my first magazine column. (You can find it at Hobby Farm Home.)
I’ve finally (successfully) transitioned into a full-time freelancer. Writing about food, developing recipes and taking food photos is now my job. 
I got to gaze in awe at Lake Tahoe for my 35thbirthday. 
I was able to show my family around the Bay Area on their first visit to California.
I saw New York City at Christmas time.
I explored the Christmas markets of Vienna and Krakow.
What a year! I have no idea how 2014 is going to top it, but I’m convinced that it will.
A great year deserves a special toast. So here are 8 of my favorite cocktails to help you close out 2013 and ring in the New Year. Some are here on Fake Food Free, and others are from the work I’ve done for the blog the Daily Squeeze. 
(Just click on the drink name to get to the recipe.)
Grapefruit Moon Beer Cocktail 
The Spicy Citrus
Cherry Margarita
Red Wine and Navel Orange Sangria 
Spiced Old Fashioned 
Coconut Lime Dessert Martini
Orange Bourbon Apple Cider 
Orange Cosmo on the Rocks  

What will you be toasting to on Tuesday night? Any favorite memories from 2013?
Happy New Year!!

Ginger Molasses Cookie Bars Recipe

December 13, 2013

I can’t get enough of ginger flavored treats during the holiday season. These cookie bars are a recreation of one of my favorite cookies made with fresh ginger and molasses!

 Ginger Molasses Cookie Bars | Fake Food Free

This past summer, I discovered my favorite cookie. It’s sold at Blue Bottle Coffee in Oakland. I’ve always been a fan of gingerbread-like desserts, but this cookie takes it to a new level. It’s made with fresh ginger and ground black pepper. It’s slightly crunchy on the inside, but soft and chewy on the inside. Darn near perfect when it comes to cookies.

When I tried it, the idea of both fresh ginger and black pepper in a cookie were new to me. I’ve wanted to try making something similar ever since. I think creating the right cookie texture is going to take me much more practice than I am able to commit to this holiday season, so I went the easy route and incorporated the flavors into a bar.

It’s certainly not an exact replica, but for someone who can’t get enough gingerbread this time of year, these chewy, spicy cookie bars hit the spot.

Ginger Molasses Cookie Bars

Makes: 16 bars

Ingredients

1 cup unsalted butter, softened
1/3 cup coconut sugar
1/3 cup + 1 tbsp turbinado sugar
2 tbsp molasses
1 large egg
½ tbsp grated fresh ginger
1 cup white whole wheat flour
½ tsp baking powder
¼ tsp salt
¼ tsp ground black pepper
1/8 tsp ground cinnamon
1/8 tsp ground nutmeg
1/8 tsp ground clove

Prep

Preheat the oven to 350 degrees F. Grease an 8 x 8 inch baking pan lightly with unsalted butter.

In the bowl of a mixer fitted with the paddle attachment, add the butter, coconut sugar and 1/3 cup of the turbinado sugar. Cream together on medium to medium-high speed, about 2 minutes. Add the molasses and mix for about 30 more seconds, scraping the sides of the bowl as needed.

Add the egg and mix 30 more seconds. Mix in the fresh ginger.

In a small bowl, stir together the flour, baking powder, salt, pepper, cinnamon, nutmeg and clove. With the mixer on low, gradually add the dry ingredients. Increase the speed to medium and mix just until all ingredients are combined.

Transfer the cookie dough to the prepared pan and spread evenly with a spatula. Sprinkle the top with the remaining 1 tablespoon of turbinado sugar.

Bake for 18 to 20 minutes, until the edges begin to brown and a toothpick inserted in the center comes out clean. Let cool completely and cut into 16 bars.

Ginger Molasses Cookie Bars | Fake Food Free


Thanks for reading! All images and content are the property of Fake Food Free unless otherwise stated. Please do not republish full recipes and images without written permission. What is okay? Feel free to Pin images, share links to my posts or share the photo in a round up post with the title of this recipe and a link back to the post. Confused about copyright and food blogs? Here is some helpful information on Recipe Attribution. If you want to use a photo or full recipe, just ask. I’m sure we can work something out.


Holiday Gift Ideas: My Favorite Things for Food Lovers

December 10, 2013

It has been such a great year in food around here! I’ve been exposed to so many new ingredients through California farmers markets. I’ve enjoyed even more cuisines of the world with all of the restaurants around our new home. Networking in the food industry and at food conferences has exposed me to new people and new types of work. I’ve also had the pleasure of reviewing some outstanding new cookbooks over the past few months.

It’s been a good year.

So as we approach the season of gift-giving, I thought I would jump on the gift guide bandwagon and share a list of my favorite things. I figure there are enough of us food lovers out there that one can never have to many gift ideas.

These are a few things I’ve encountered this year that I highly recommend. And if you have any favorites to add to the list, I’d love to hear about them.

Oregon Olive Mill Extra Virgin Olive Oil


I learned of Oregon Olive Mill only a few short weeks ago and I was immediately drawn to the company. It is the only estate olioteca in the Pacific Northwest. This family owned company was started by fourth generation Oregon farmers. A 120 acre olive farm in Oregon? What an unexpected surprise! I received a sample and did a little tasting of my own. This is the kind of oil that your mixed green salads and sliced tomatoes are begging for. My favorite was the Arbequina, a Spanish variety. It’s described as being fruity with hints of green grass, banana and a nice spicy finish.

Trader Joe’s Nut Oils

If you can’t tell yet, it’s been an oil year for me. I’ve been exposed to so many delicious new oils. This variety pack came out for the holidays at Trader Joe’s, so I’m not sure on the availability, but I wanted to share it in case you can find it. These are unrefined nut oils produced in California using French expeller-pressing methods. I haven’t used many nut oils and this 3-pack has been a wonderful introduction. They are so good drizzled on veggies, oatmeal or popcorn.

Navitas Naturals Cacao Goji Power Snacks 

When it comes to food products, I usually only feature those that can be used as ingredients in my recipes, but for these, I make an exception. I was introduced to these cacao goji snacks at the International Food Blogger Conference in Seattle. At first, I wasn’t sure how much I liked them, but as I ate more, I got hooked. I’m always on the lookout for something low in sugar and free of soy protein isolate that I can eat before my runs. I eat one or two squares before I head out. They worked so well for me and caused no stomach stress at all.

Homemade Hand Scrubs

This year I’ve been doing a lot of recipe development and food photography for the Daily Squeeze blog and it has been a blast! Some of my posts there have me experimenting with turning my food into beauty products. Something I’ve not done much of before. One of my favorite products so far is this Coconut-Citrus Sugar Scrub. The coconut oil makes your hands so soft and the citrus has such a pleasant aroma. It is a great, easy-to-make gift.

Chef’s Coat

Earlier this year, The Chef’s Emporium sent me this lovely monogrammed chef’s jacket. No, I’m not a chef, but I do a lot of cooking for my work and this has proved to be such a nice tool to have. I’ve found myself at local cooking classes and media events that involve cooking, and it is a plus to have my own jacket instead of using what is provided. This one has the perfect fit with ¾ length sleeves and I love that it is black instead of white. (I tend to be messy in the kitchen.) You can check out more about why I like it in my review on the Chef’s Emporium website.

2013 Cookbooks

So many great cookbooks have come out this year. Below is a list linking to my reviews here on the blog. I would recommend each and every one I’ve had the opportunity to explore. These authors and photographers just keep dishing out amazing food and stunning photos. It’s truly inspiring for the food lover.

Melt: The Art of Macaroni and Cheese by Stephanie Stiavetti & Garrett McCord
The Adobo Road Cookbook: A Filipino Food Journey-From Food Blog, to Food Truck, and Beyond by Marvin Gapultos
Everyday Thai Cooking, Quick and Easy Family Style Recipes by Katie Chin
I Scream Sandwich by Jennie Schacht
Flavored Butters by Lucy Vaserfirer
Bakeless Sweets by Faith Durand
Home Made Summer by Yvette van Boven
Bountiful by Diane Cu and Todd Porter

Disclosure: Most of these products were sent to me for review purposes. I was not required to post about them and received no compensation for doing so. 

Roasted Golden Acorn Squash and Coconut Soup Recipe

December 5, 2013
Roasted Golden Acorn Squash and Coconut Soup Recipe | Fake Food Free

It happens every year. I buy way too much winter squash and about the time that everyone is switching over to gingerbread and eggnog, I’m still enjoying my pumpkin. There are worse problems to have, but this week I’ve been trying to use it up.

Right now I’m down to two pie pumpkins, two mini pumpkins, one butternut squash, one delicata squash and a golden acorn squash. I started with three golden acorn squashes, but two of them became this delicious soup.

Roasted Golden Acorn Squash and Coconut Soup Recipe | Fake Food Free

It’s simple to make and full of creamy, coconut flavor. It’s one of those recipes that gets you ready for winter as you struggle to let go of a beautiful fall.

The recipe uses two squash. To prepare them, half them and remove the seeds. Rub them lightly with olive oil and place them cut-side down on a baking sheet. Pierce the skin in a few places with a fork. Bake at 425 F for about 30 minutes or until tender. Let cool and scrape out the flesh to use in the soup.

Roasted Golden Acorn Squash and Coconut Soup Recipe | Fake Food Free
Roasted Golden Acorn Squash and Coconut Soup
Makes: 4 servings
Write a review
Print
Ingredients
  1. 1 tablespoon virgin coconut oil
  2. ½ large onion, diced
  3. 3 cloves garlic, minced
  4. 2 golden acorn squash, roasted and flesh removed, about 4 to 5 cups
  5. ½ teaspoon salt
  6. ¼ teaspoon ground cloves
  7. ¼ teaspoon crushed red pepper
  8. 1 ½ cups vegetable stock
  9. 1 (13.5 oz) can coconut milk
  10. Garnish options: shredded coconut, chopped pistachios, chopped cashews
Instructions
  1. Heat the oil in a soup pot over medium-high heat. Add the onion and garlic. Cook until tender, about 5 minutes.
  2. Add the squash, salt, cloves and red pepper. Cook for 1 to 2 minutes more.
  3. Stir in the vegetable stock. Use an immersion blender to puree the soup, or transfer the soup to a blender and puree until smooth, and return to the pot.
  4. Once the soup is pureed, stir in the coconut milk and cook until heated through, 2 to 3 more minutes. Top with shredded coconut or nuts before serving, if desired.
Fake Food Free https://www.fakefoodfree.com/

Thanks for reading! All images and content are the property of Fake Food Free unless otherwise stated. Please do not republish full recipes and images without written permission. What is okay? Feel free to Pin images, share links to my posts or share the photo in a round up post with the title of this recipe and a link back to the post. Confused about copyright and food blogs? Here is some helpful information on Recipe Attribution. If you want to use a photo or full recipe, just ask. I’m sure we can work something out.

Minced Pork with Garlic and Mustard Greens Recipe

November 14, 2013
Minced Pork with Garlic and Mustard Greens Recipe | Fake Food Free

I was at the farmers market last Saturday browsing the leafy greens when I heard the vendor answer a shopper’s question with, “They’re mustard greens.”

I immediately thought back to the first time I had mustard greens, which wasn’t all that long ago. I was out to dinner with a good friend at a new favorite spot for Chinese food back in Kentucky. She ordered the pork and mustard greens.

I was pleasantly surprised by their bitter spiciness and I’ve wanted to recreate that dish ever since. After overhearing that conversation at the market, I knew that I should finally go for it.

Minced Pork with Garlic and Mustard Greens Recipe | Fake Food Free

This is a super simple dish that is full of flavor. You can pair it with rice or use a different meat or tofu, but I think pastured pork with the spicy greens by itself is the way to go. The only problem is that I didn’t make nearly enough. Next time I will double it so there are plenty of leftovers!

Minced Pork with Garlic and Mustard Greens

Makes: 2 to 3 servings

Ingredients:

½ tbsp. olive oil
5 cloves garlic, minced
¼ cup chopped onion
½ lb. ground pastured pork
4 to 5 cups sliced mustard greens (about 1 large bunch)
1 tsp. grated fresh ginger
2 tsp. soy sauce
1 tsp. rice vinegar
1 tsp. dark sesame oil
¼ tsp. crushed red pepper

Preparation:

Heat the olive oil in a large skillet or wok over medium-high heat. Add the garlic and onion and cook for 1 minute.

Add the pork and cook for 5 to 7 minutes breaking it up with a spatula, until it is browned and cooked through. Drain any excess grease if necessary.

Add the mustard greens and cook for 1 to 2 minutes until they begin to wilt. Add the ginger and cook 1 more minute.

Stir in the soy sauce, rice vinegar, sesame oil and crushed red pepper. Serve warm.


Thanks for reading! All images and content are the property of Fake Food Free unless otherwise stated. Please do not republish full recipes and images without written permission. What is okay? Feel free to Pin images, share links to my posts or share the photo in a round up post with the title of this recipe and a link back to the post. Confused about copyright and food blogs? Here is some helpful information on Recipe Attribution. If you want to use a photo or full recipe, just ask. I’m sure we can work something out.  

Lettuce Wraps with Almond-Basil Chicken from Bountiful by Todd Porter and Diane Cu

November 8, 2013
Thoughts on the stunning cookbook, Bountiful, and a recipe for delicious lettuce wraps with almonds, basil and chicken. 
Lettuce Wraps with Almond-Basil Chicken from Bountiful by Todd Porter and Diane Cu | Fake Food Free

If you ever have the pleasure of listening to a conference session or class instructed by Diane Cu and Todd Porter, the main message will stay with you.

Tell your story.

It’s a mission statement that drives beautiful work. It only takes one look at their blog to prove it. It is a theme that comes through in their new cookbook, Bountiful.

When I opened its stunning cover I was immediately drawn into the story. Diane’s story, Todd’s story and the foods and photos that tell the story of time with friends and two of cutest pups you’ve ever laid eyes on.

Bountiful overflows with simple dishes that are full of fresh flavor straight from Diane and Todd’s California garden. It’s inspiring. During a time when food has started to feel more complicated to me, this book brings back simplicity. It’s a welcomed reminder, especially right before the holidays.

I probably don’t have to mention how stunning the photography is, but I will anyway. Moody, intriguing, comforting, rustic — the pictures are everything I love about food photography. I could study them for hours and still discover new details, new stories.

The photo of the Lettuce Wraps with Almond-Basil Chicken grabbed my attention from the start. After reading through the recipe, I knew I wanted to give them a try. Light and refreshing with that familiar tang of Asian flavors, these could not be easier to make. I’m already planning how to fit them back into our dinner rotation.

Whether you are a new cook, well seasoned in the kitchen or looking for ways to turn garden harvests into simple meals, this book is the perfect fit. It is an asset to any cookbook collection, but I’ll warn you now. This one you’ll want on the coffee table so you continue to be inspired by the photos.

Lettuce Wraps with Almond-Basil Chicken from Bountiful by Todd Porter and Diane Cu | Fake Food Free

Lettuce Wraps with Almond-Basil Chicken

©2013 Todd Porter and Diane Cu. Reprinted with permission from Abrams Books.

SERVES 4

From the book:
Rarely are we without a head of lettuce in the fridge or a new batch of lettuce seedlings in the garden. Lettuce is the starter or base for many of our meals, particularly those with Asian-inspired menus. Our Vietnamese noodle salads or wraps will always be accompanied by a huge platter of raw lettuce, and often the lettuce dish is the decorative centerpiece of the table. In this versatile recipe, you can substitute shrimp,beef, pork, tofu, or chopped vegetables for the chicken.
 

2 tablespoons grapeseed oil or other cooking oil
1 small onion, minced
2 medium cloves garlic, minced
1 pound (455g) chicken cutlets, diced small
1 small red bell pepper, halved, seeded, and diced
1 teaspoon honey
2 teaspoons fish sauce or soy sauce
2 tablespoons hoisin sauce
½ teaspoon rice vinegar
1 head fresh lettuce leaves, broadleaf variety, for wrapping
½ cup (20g) chopped fresh basil
¼ cup (23g) roasted almonds, sliced

1 In a large sauté pan, heat the oil over medium heat. Add the onion and garlic and cook until soft.

2 Add the chicken and cook until browned, about 5 minutes.

3 Stir in the bell pepper, honey, fish sauce, hoisin sauce,and rice vinegar. Continue cooking until the chicken is fully cooked, 10 to 15 minutes.

4 Serve the chicken in a shallow dish alongside a plate of the lettuce leaves. Fill the leaves with the chicken mixture, and top with a sprinkling of basil and almonds.

Disclosure: This book was sent to me for review purposes. I was not required to write about it and received no compensation for doing so. 


Thanks for reading! All images and content are the property of Fake Food Free unless otherwise stated. Please do not republish full recipes or images without written permission. What is okay? Feel free to Pin images, share links to my posts or share the photo in a round up post with the title of this recipe and a link back to the post. Confused about copyright and food blogs? Here is some helpful information on Recipe Attribution. If you want to use a photo or full recipe, just ask. I’m sure we can work something out.

Sourdough Stuffing with Artichokes and Sundried Tomatoes Recipe

November 5, 2013
Stuffing is my favorite dish on the holiday table! This recipe for sourdough stuffing combines local flavors with a traditional favorite.
 Sourdough Stuffing with Artichokes and Sundried Tomatoes | Fake Food Free

When I first started thinking about this year’s Thanksgiving menu (and believe me, I’ve been thinking about it a while), I was set on traditional. I didn’t cook at all last year. I was visiting my husband here in California, in the midst of our move, and we ate Thanksgiving dinner at a local restaurant.

Knowing this year would be different, I started planning early. Sweet potato casserole, my usual cranberry pecan stuffing — it had all been penciled in. But then I considered all the new ingredients I have access to. It seemed silly not to take full advantage and incorporate them into some new traditions.

So I’ve shifted gears a bit. There will still be some old favorites, like my grandmother’s pumpkin pie. But otherwise, I want avocados, artichokes, dates and figs to make an appearance. I’ve never had such access to these foods and it seems to me they should fit right in with what we are used to this time of year.

I’ve been experimenting a little so that the big day isn’t a big fail. My first challenge was the stuffing (my favorite thing on the menu, next to cranberry sauce).

It had to be sourdough. No exceptions. Then I came across some California sundried tomatoes and I thought they would be the perfect partner for the artichoke hearts I’d been considering.

Sourdough Stuffing with Artichokes and Sundried Tomatoes | Fake Food Free

The result? What a winner! The sweet sundried tomatoes and the tart artichoke hearts were meant to be with the tangy sourdough. I don’t always add an egg white to my stuffing, but this time I was glad I did. It created a soft, but solid center that was balanced by the crispy, crunchy edges on top.

I may not go back to my old favorite. Or I might have to start making two stuffings. I haven’t decided yet.

Sourdough Stuffing with Artichokes and Sundried Tomatoes

Makes: 4 servings

Ingredients

1 ½ tbsp olive oil
½ cup red onion, chopped
3 cloves garlic, minced
2 tbsp finely chopped sundried tomatoes
3 canned, unseasoned artichoke hearts, chopped (marinated would work, but it may add a different flavor)
3 ½ cups toasted sourdough bread cubes (I cut my own from a stale loaf and broiled for about 5 minutes)
1 ¼ cups vegetable stock
1/8 ground black pepper
1/8 tsp poultry seasoning
¼ – ½ tsp salt
1 egg white

Prep

Preheat the oven to 375 degrees F. Lightly grease a 1 quart casserole dish or loaf pan with your oil of choice.

Heat the olive oil in a medium skillet on medium-high heat. Add the onion and garlic. Cook, stirring occasionally, for 4 minutes, until the onion begins to soften.

Add the sundried tomatoes and artichoke hearts. Cook for 1 more minute. Turn off the heat.

Place the bread cubes in a large bowl. Add the cooked vegetables. Add the vegetable stock a little at a time as you stir the stuffing. Continue to stir until the bread cubes are well saturated.

Stir in the black pepper and poultry seasoning. Add the ¼ to ½ teaspoon of salt to taste (you may need less if your stock is salted).

Once you’ve added the right amount of salt, stir in the egg white. Continue to stir until it is incorporated into the stuffing.

Transfer the stuffing to the baking dish. Press it gently into the dish to smooth the surface.

Bake for 20 minutes, until the edges are browned and the top has a nice golden color. Serve warm.

Sourdough Stuffing with Artichokes and Sundried Tomatoes | Fake Food Free

Thanks for reading! All images and content are the property of Fake Food Free unless otherwise stated. Please do not republish full recipes and images without written permission. What is okay? Feel free to Pin images, share links to my posts or share the photo in a round up post with the title of this recipe and a link back to the post. Confused about copyright and food blogs? Here is some helpful information on Recipe Attribution. If you want to use a photo or full recipe, just ask. I’m sure we can work something out. 

Happy Halloween!

October 31, 2013

The pugs say, Happy Halloween! If you could use a laugh with your treats today, you can check out some more of their costume photos at The Macy Dixie Line.

Breakfast Farro with Kabocha and Coconut Milk Recipe

October 29, 2013
Breakfast Farro with Kabocha and Coconut Milk Recipe | Fake Food Free
 

When it comes to grains at breakfast, I love taking things beyond oats. A little sweetness and a few spices, and almost any whole grain makes a delicious morning meal. It can really break you out of an oatmeal rut.

I’ve made Gingered Pear Quinoa with Walnuts for breakfast, but this time around I had a new grain to work with – farro. I’m familiar with farro (a version of whole wheat), but this was my first time cooking it. It’s quickly becoming a new favorite.

I also had a kabocha squash that has been staring at me from the counter for a while, so I roasted it up to use throughout the week. The puree added the perfect touch to a sweet farro dish. Despite all the winter squashes I have tried, this was my very first kabocha. The texture and sweetness can’t be beat. I can definitely see what all the hype is about.

So there were a lot of firsts in this dish, but this won’t be the last time I make it. This was exactly the type of fall-inspired breakfast I’ve been craving.

Breakfast Farro with Kabocha and Coconut Milk

Makes: 4 servings

Ingredients

½ cup kabocha puree, warmed
2 tablespoon pure maple syrup
½ teaspoon cinnamon or pumpkin pie spice
Pinch of salt
2 cups cooked farro, warmed
1/2 cup coconut milk, warmed
2 tablespoons chopped walnuts for garnish

Prep

In a small bowl, stir together the kabocha, maple syrup, cinnamon and salt.  

In each of 4 serving glasses, add about 1 tablespoon of the kabocha. Top with 1/2 cup farro and 2 tablespoons of coconut milk. Finish with 1/4 of the remaining kabocha and sprinkle with a 1/2 tablespoon of walnuts. 

Thanks for reading! All images and content are the property of Fake Food Free unless otherwise stated. Please do not republish full recipes and images without written permission. What is okay? Feel free to Pin images, share links to my posts or share the photo in a round up post with the title of this recipe and a link back to the post. Confused about copyright and food blogs? Here is some helpful information on Recipe Attribution. If you want to use a photo or full recipe, just ask. I’m sure we can work something out.

Want to create beautiful food and product photos that you can't wait to share?!
Discover your style, control the light, and shoot using the tool you know how to use (yes, your phone included). Learn about free resources, Live Q&As with Lori, and online courses you can take from anywhere in the world!
We respect your privacy. Unsubscribe at any time.