Welcome to the first cocktail week on Fake Food Free. This week I’m recapping some of the excellent cocktail mixers I discovered at the Fancy Food Show in San Francisco in January. This is post two of three. Check out post one for more great drink ideas!

The first place I stopped while at the food show was the new products pavilion. I love this area because it is full of passionate small companies who are excited about their products and they hope that you will be, too.
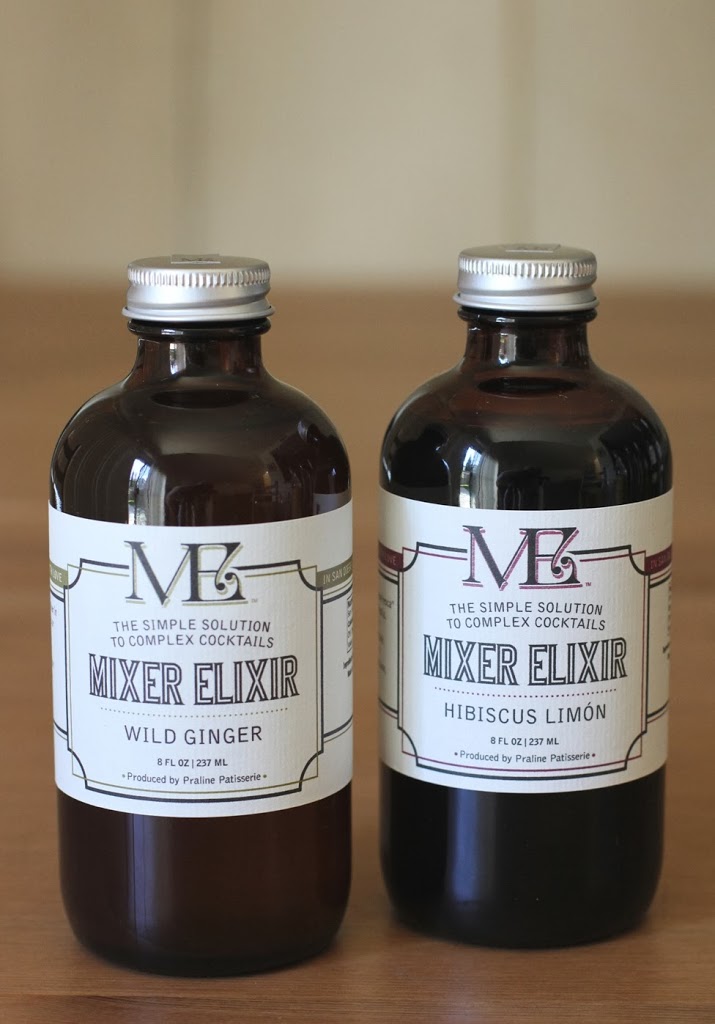
Nicely displayed in a corner booth, Mixer Elixir was a product that immediately caught my attention. I loved the trendy jars and logo design, and I think it’s been pretty well established that I like cocktails.
These drink mixers are from the San Diego-based company Praline Patisserie, created by pastry chef, Cruz Caudillo. They use few ingredients like fresh herbs, fruits and pure cane sugar to create a syrup that can be used to flavor seltzer water, teas, and of course, cocktails.
I had two varieties to try – Hibiscus Limón and Wild Ginger. Each has cocktail suggestions on the bottle.
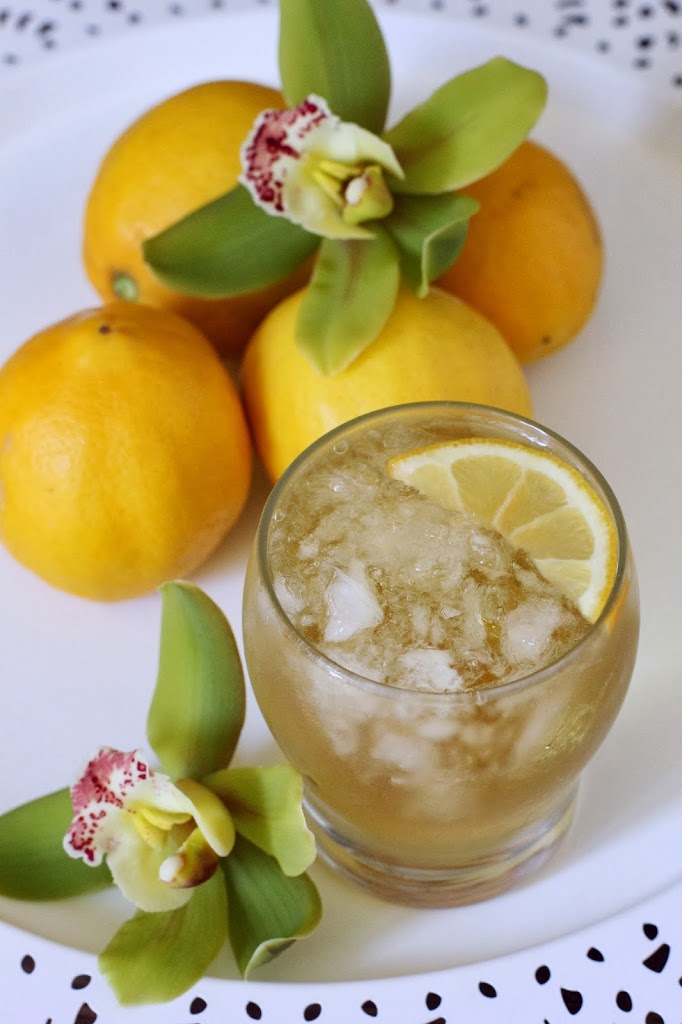
For the Hibiscus Limón, a margarita with orange juice was suggested. But because I can’t think of hibiscus without thinking about Jamaica, and I also associate grapefruits with Jamaica, I added my own twist with grapefruit juice. Yes, I know we’re talking tequila and not rum (which I also associate with Jamaica), but trust me, a margarita is a winner with this one. The Hibiscus Limón is rich, sweet and tangy. It would make a unique soda mixed with seltzer or club soda as well.
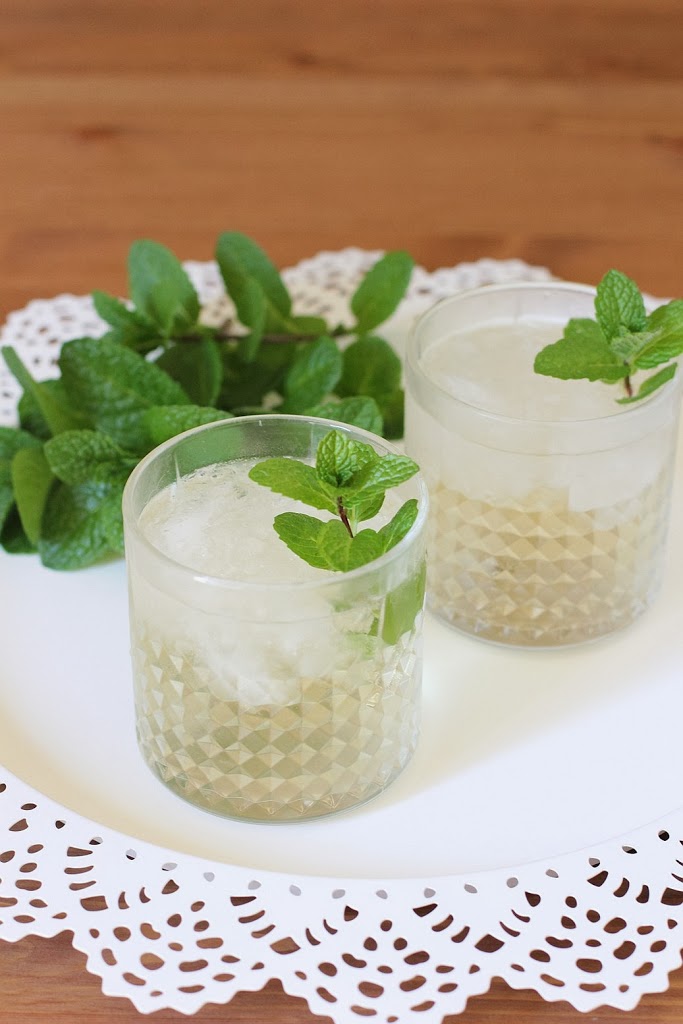
The Wild Ginger has a wonderful spicy flavor and bourbon was the first thing that came to my mind. So I spiced up one of my favorite drinks, the Mint Julep. I may make all my Mint Juleps like this from now on. The kick from the ginger isn’t lost in sweetness like it can often be with sodas. I might even venture to use this Elixir as a flavoring in desserts.
In addition to keeping one around for myself, Mixer Elixir is going on my gift-ideas list. I like that both non-alcoholic and cocktail options are offered on each bottle making them perfect for just about everyone.
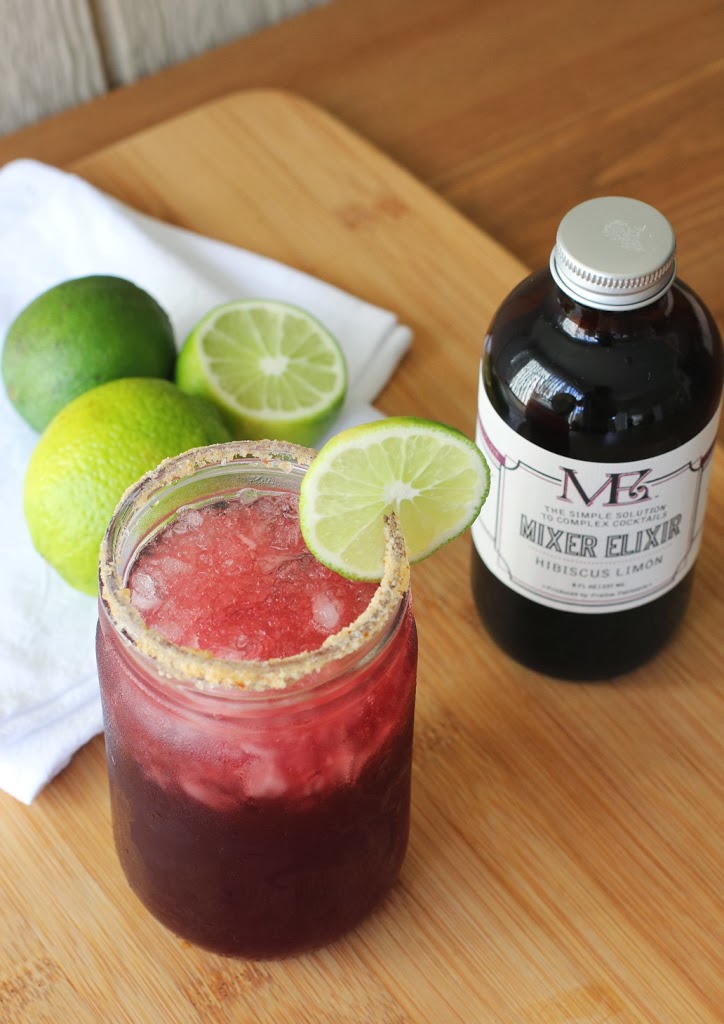
Hibiscus Limón Grapefruit Margarita
Makes: 1 drink
3 oz. red grapefruit juice
2 oz. gold tequila
2 oz. Mixer Elixir Hibiscus Limón
.5 oz. lime juice
Ice
Salt for rim of glass (I used this grapefruit sea salt)
Lime slices for garnish
Place the grapefruit juice, tequila, Mixer Elixir and lime juice in a cocktail shaker. Add ice, cover and shake until cold.
Fill a salt-rimmed glass with ice. Strain the margarita into the glass. Garnish with a lime slice and serve.
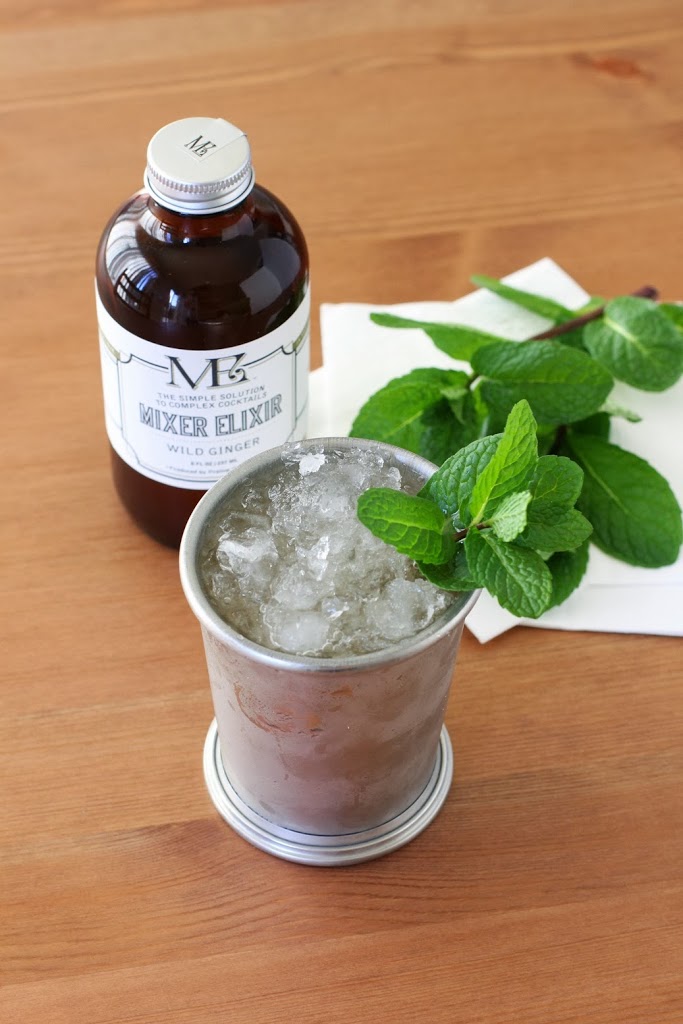
Wild Ginger Mint Julep
Makes: 1 drink
2 oz. Kentucky bourbon
2 oz. Mixer Elixir Wild Ginger
2 sprigs fresh mint
Crushed Ice
Place the bourbon in a cocktail shaker with one sprig of the mint. Mull the mint with the bourbon to extract the oils. Add the Mixer Elixir and stir.
Pack a mint julep glass full with crushed ice. Strain the cocktail into the glass, over the ice. Garnish with the second mint sprig and serve.
Disclosure: This product was provided to me for review purposes. I was not required to write about it and received no compensation for doing so.