Archives

Apple Peanut Dog Treats Recipe

August 2, 2014

This post continues my series on peanut flour. If you’d like to read more, check out the Peanut Chile Rubbed Pork Chops and the Nectarine Coconut Peanut Flour Scones

Apple Peanut Dog Treats | fakefoodfree.com

As soon as I read that peanut flour would make a nice addition to dog treats, I knew I couldn’t leave the pugs out of my recipe experiments. I hadn’t made homemade treats in a while and I got the feeling they were missing them.

They had no idea that what was going on in the kitchen had anything to do with them. I mixed, I baked, but then, I got ready to photograph.

Continue Reading…

Pineapple Mint Chutney Recipe

July 25, 2014

Friday is cookbook review day throughout the summer here at Fake Food Free. If you have a love of cookbooks be sure to swing back by for plenty of new ideas and recipes.

Pineapple Mint Chutney Recipe | fakefoodfree.com

I don’t like to call it an addiction. That makes it sound as though it’s a bad thing.

Let’s go with attraction.

Yes. I have a strong attraction to canning and preserving cookbooks.

I have my mom’s old ones, I collect new ones and I never turn down the offer to test one out. Regardless of how simple or complex the recipes in the book may be, I always manage to find something I have never canned before.

Continue Reading…

Nectarine Coconut Peanut Flour Scones Recipe

July 24, 2014
Nectarine Coconut Peanut Flour Scones Recipe | fakefoodfree.com
 
 
After Tuesday’s pork chop post, I decided to switch gears with my peanut flour experiments and try something sweet and baked.


Scones remain my favorite type of pastry and recipes for them are also very easy to play around with. While breads and cakes can be tricky for getting the right rise and texture when mixing in alternative flours, scones are much more forgiving.


Peanut flour in scones creates delicious results. Even if you modify a recipe just a little by adding some, it gives them a lighter, crumbly texture and that expected mild nutty flavor.


Nectarine Coconut Peanut Flour Scones Recipe | fakefoodfree.com


For these scones, I modified a recipe from my book and I decided to incorporate coconut flour in this mix. It is another ingredient I’ve been testing out lately. If you haven’t used it, know that it has a bit of a grainy texture that really comes through when a baked good is warm. Once it cools, I find the density, texture and flavor it adds to be a winner. Just don’t expect these to be exactly like a standard bakery scone made with all-purpose flour.


They are delicious in their own unique way.


I kept some whole wheat flour in the mix to help with the binding and then studded the whole dough with chunks of sweet white nectarines and finely shredded coconut. Once they are out of the oven, let them cool completely before serving and handle carefully to prevent crumbling.


Nectarine Coconut Peanut Flour Scones

 
Makes: 8 scones


½ cup coconut flour
½ cup 28% light roast peanut flour
¼ whole wheat flour
2 tbsp unsweetened medium shredded coconut
2 tbsp coconut sugar
2 ¼ tsp baking powder
¼ tsp salt
¼ cup cold unsalted butter, cubed
2 small white nectarines, pitted and chopped
½ cup half and half
1 tbsp raw sugar


Preheat the oven to 400 degrees F.


In a large bowl, stir together the coconut flour, peanut flour, whole wheat flour, coconut, coconut sugar, baking powder and salt.


Add the butter and use a pastry blender or two knives to incorporate the butter into to the flour until it is well distributed and in pea-size pieces.


Gently stir in the nectarines. Add the half and half and stir until a dough forms. Shape  it into a ball and place it on a greased baking sheet, or a baking sheet lined with a silicone mat.


Press the dough into a circle with about a 6 ½-inch circumference.  Spread the raw sugar over the top and gently press it into the dough.


Nectarine Coconut Peanut Flour Scones Recipe | fakefoodfree.com


Use a dough cutter or knife to cut it into 8 equal pieces (like a pie).  Bake for 12 to 14 minutes until the edges begin to brown and scones are firm.


Remove from the oven and let cool completely before removing from the baking sheet to serve.


Nectarine Coconut Peanut Flour Scones Recipe | fakefoodfree.com

 
Disclosure: I was provided samples of peanut flour from Golden Peanut Company. I was not required to post about them and received no compensation for doing so. 
 
 
Thanks for reading! All images and content are the property of Fake Food Free unless otherwise stated. Please do not republish full recipes and images without written permission. What is okay? Feel free to Pin images, share links to my posts or share the photo in a round up post with the title of this recipe and a link back to the post. Confused about copyright and food blogs? Here is some helpful information on Recipe Attribution. If you want to use a photo or full recipe, just ask. I’m sure we can work something out. 

A Guide to Peanut Flour and Peanut Chile Rubbed Pork Chops Recipe

July 22, 2014
A Guide to Peanut Flour and Peanut Chile Rubbed Pork Chops Recipe | fakefoodfree.com

I am crazy for peanut flour. I discovered it last year after attending a nutrition and cooking retreat with The Peanut Institute. After doing a little web research, I found it mentioned around the web a couple of years ago (likely because Trader Joe’s carried it for a while), but it was a new ingredient to most of us at that retreat.

I’ve always been a huge peanut and peanut butter fan so it’s logical that peanut flour is my new favorite thing. It’s light and powdery without the graininess you find in some flours. It adds a pleasant nutty flavor and when stirred into oatmeal or a shake, it is super smooth and creamy.

It has quickly become my plant-based protein powder, but as I hope to show you over the next few posts, it is incredibly versatile in all types of recipes.

Peanut flour is made using raw high-oleic peanuts (about 80 percent oleic acid) that are cleaned, blanched and roasted. Then they are pressed using a natural oil extraction process (without the use of solvents) to produce a flour that is either 12 percent fat or 28 percent fat, depending on the amount of oil extracted. The process is similar to making cocoa powder and as a result you can sub peanut flour to cocoa powder at a 1:1 ratio.

At the Fancy Food Show in San Francisco last January, I had the opportunity to meet a representative from Golden Peanut Company. They supply bulk peanut products to manufacturers and restaurants. After discussing my interest in experimenting with more peanut flours, they sent me a sample of 4 varieties and I’ve been working with the ingredients ever since.


I received the four flours pictured above – 12 percent Light Roast, 28 percent Light Roast, 28 percent Certified Organic Medium Roast and 28 percent Dark Roast. You can see the color differences in the photo based on the roasts.

Peanut flour is great for dry rubs, sauces, baked goods, pet treats and as a stir in for shakes, yogurt and oatmeal. The 28 percent fat varieties are 40 percent protein and can be used for just about everything. The 12 percent fat varieties are 50 percent protein and are good for when you want less peanut flavor, but plenty of protein. (I like to use the 12 percent in shakes.)

The light and medium roasts work better in baked goods because the baking will roast the flours further. The dark roasts were developed for cold uses and they add a nice flavor to uncooked sauces or dressings and confections.

According to Golden Peanut Company, their peanut flour is gluten-free, GMO-free, all natural and kosher. I should disclose right now that the fact that it is gluten-free isn’t the reason I use it. It can be a great option for those on a gluten-free diet, but I don’t have a gluten intolerance so you will find that some of my recipes for baked goods do include some wheat flours for binding.

If you’d like to try peanut flour yourself the best resource for consumer purchases is Byrd Mill online. I’ve mentioned them before because we received their peanut flour samples from The Peanut Institute after the retreat. A tip when you buy your own — because peanut flours use high-oleic peanuts they are more shelf stable than traditional peanuts. They should be stored in a cool and dry place, preferably the refrigerator, and last 9 to 12 months.

So now that you know a little more about the flour, let me show you one of my favorite ways to use it — as a dry rub. These pork chops are coated in light roasted 28 percent peanut flour, chile powder and ginger before being seared in the skillet and finished off in the oven. The result is a juicy chop with a little heat and a mild nutty flavor.

If you have some questions about peanut flour, send them my way. There are many more recipes to come!

A Guide to Peanut Flour and Peanut Chile Rubbed Pork Chops Recipe | fakefoodfree.com

Peanut Chile Rubbed Pork Chops Recipe

Makes: 4 servings

2 tbsp 28 percent Light Roast Peanut Flour
1 tbsp ancho chile powder
2 tsp coconut sugar (or your favorite dark sugar)
1 tsp ground ginger
1 tsp medium roast ground coffee
1 tsp salt
1 to 1 ¼ lb. center cut loin chops (4 chops about ½-inch thick)
2 tbsp olive oil (or your favorite cooking oil)

Preheat the oven to 400 degrees F.

In a small dish, stir together the peanut flour, chile powder, sugar, ginger, coffee and salt. Pat the pork chops dry with a paper towel and then coat each evenly with the dry rub.

Heat the oil over medium-high in a large cast iron skillet. Place the pork chops in the skillet (they should sizzle). Cook for 1 minute and flip. Place the skillet in the oven and baked for 6 to 7 minutes, until the chops are cooked through. (Pork should reach an internal temperature of 145 degrees F.)

Let rest 2 to 3 minutes and serve.

A few references if you’d like to explore:
How to use peanut flour from Golden Peanut Company (pdf)
In a Nutshell: A Better Peanut
More About Specialty Peanut Flour, Aromatic Oil and Extract from Golden Peanut Company 

Disclosure: I was provided samples of peanut flour from Golden Peanut Company. I was not required to post about them and received no compensation for doing so. 


Thanks for reading! All images and content are the property of Fake Food Free unless otherwise stated. Please do not republish full recipes and images without written permission. What is okay? Feel free to Pin images, share links to my posts or share the photo in a round up post with the title of this recipe and a link back to the post. Confused about copyright and food blogs? Here is some helpful information on Recipe Attribution. If you want to use a photo or full recipe, just ask. I’m sure we can work something out. 


Spiced Balsamic Pickled Cherries Recipe

July 17, 2014
Spiced Balsamic Pickled Cherries Recipe | fakefoodfree.com
 
Last Friday I loaded up on gorgeous Washington State cherries at the Whole Foods one-day sale. By loaded up I mean I bought 10 pounds. I am a sucker for specials on fruit, and cherries freeze well, so I convinced myself to add a few extra bags to my cart.
 
By Tuesday, I realized my cherry pitting hack of using a hard plastic straw wasn’t going to cut it so I broke down and bought a pitter. By Wednesday, they were all pitted and waiting to either be used or frozen.
 
I made a double batch of Kentucky Bourbon-Vanilla Soaked Cherries, but I still had about a pint left in the fridge. A pint that was decreasing at the rate of about one cherry per hour every time I opened the fridge and ate one.
 
I wanted to make something else with these cherries, but I really didn’t want a bunch of baked goods around. Then I spotted a recipe (via Pinterest) this morning for Spiced Quick-Pickled Cherries, which randomly ended up being from Whole Foods as well.


Spiced Balsamic Pickled Cherries Recipe | fakefoodfree.com
 
 
I’d seen recipes for pickled cherries before, but this one convinced me to give them a try. It sparked an idea for my own version. I had some other spices on hand and I really wanted to use star anise because I love the flavor. I also wanted to try using some rich balsamic vinegar instead of white vinegar.
 
This recipe comes together very quickly, but that is only part of it. After you drown the cherries in the spiced, syrupy, vinegar goodness they have to sit in the fridge and you have to wait patiently on the other side of the door.


Spiced Balsamic Pickled Cherries Recipe | fakefoodfree.com
 
It was hard work, but I tasted them every few hours because I wanted to know the minimum they could sit to get the best flavor. As a result, I suggest letting them soak for at least 12 hours before serving, and 24 would be even better. They tasted good after just a few hours, but the spiced flavors get stronger and more delicious as they sit.
 
I’ve been snacking on them straight from the jar, but the original recipe suggests serving pickled cherries with charcuterie and I think that would be an excellent way to use them. Cocktails and ice cream topping come to mind as well.


Spiced Balsamic Pickled Cherries

Inspired by Spiced Quick-Pickled Cherries
 
Makes: 1 pint
 
Ingredients
½ cup water
¼ cup sugar
5 cardamom pods
5 whole cloves
2 whole star anise
1 cinnamon stick
¾ cup balsamic vinegar, or enough to fill the jar
1 pint fresh cherries, pitted
 
Prep
Combine the water and sugar in a medium saucepan over medium-high heat. Bring to a simmer and cook for 2 to 3 minutes, until all the sugar is dissolved the liquid thickens a little.

Add the cardamom, cloves, anise and the cinnamon stick. Stir, remove from the heat and let cool for 2 to 3 minutes.

Pack the cherries into a clean pint jar, leaving at least a 1-inch head space. Pour the syrup and the spices into the jar. You might need to push the whole spices around to help them fit.

Pour the vinegar into the jar to cover the cherries, leaving a 1-inch head space. Seal the jar with a lid and band. Gently shake it a bit to mix and coat all the cherries.

Place the jar in the refrigerator and give it a shake every few hours, or when you think about it. Let chill in the fridge for at least 12 hours before serving.


Thanks for reading! All images and content are the property of Fake Food Free unless otherwise stated. Please do not republish full recipes and images without written permission. What is okay? Feel free to Pin images, share links to my posts or share the photo in a round up post with the title of this recipe and a link back to the post. Confused about copyright and food blogs? Here is some helpful information on Recipe Attribution. If you want to use a photo or full recipe, just ask. I’m sure we can work something out. 

Las Vegas Eats and Drinks in iPhone Photos

July 16, 2014


Las Vegas | fakefoodfree.com
Las Vegas — you either love it or hate it. After about 11 years of traveling there, I’ve given up on arguing with anyone in the hate it category. I just enjoy the fact that we love it. We take it in small doses. I only want to be there a couple nights at a time, but I still want to be there.

Knowing that I’m not anything close to a high roller, everyone always asks — what do you do?

First, we walk.

As touristy as it is, I love the Bellagio fountains and the botanical garden. I like to see what gorgeous flower arrangements the Aria and Palazzo have on display. We’ve seen the majority of the Cirque de Soleil shows on the strip. This time we went downtown to the new Smith Center to see The Book of Mormon. We’ve also taken a drive around the area on the trips that we’ve rented a car. Then we each sit down at our favorite machines — an animated bonus slot for me — and spend barely $20 in a night while drinking a few (free) cocktails.


It’s always a nice break from my day to day reality. Yes, you have to deal with lots of tourists, but you get to do it while carrying around a beer to help ease the frustration.


This trip we booked Spirit airlines for the first time. We took the extra charges for overhead baggage as a challenge and each packed a shoulder bag for the weekend that fit snugly under the seat.


That meant no camera, but it turns out that we had some really great food and food experiences this visit. So I committed to taking the best iPhone photos I could manage to ensure I could share the highlights of our food and drink adventures.


The good thing about coming from the Bay Area is that we arrive by 7:30 am, so after checking in, we went straight to breakfast. Like most tourists, we’ve visited Serendipity 3 for the frozen hot chocolate. This time we learned that you can have a very pleasant, calm and delicious breakfast there before 9:30 am.


The menu said that the Fried Eggs Benedict was two poached eggs that had been rolled in cornmeal and fried (I know!) on top of biscuits and Canadian bacon with hollandaise AND sausage gravy. It sounds so heavy, right? But you are probably thinking of a loaded diner version, like I was, and not this.


Las Vegas Eats and Drinks in iPhone Photos | fakefoodfree.com
 Yeah, I had to order it and I am so glad I did. The flavors were beautifully balanced and now I have a new project – fried poached eggs.


Oh and I love their coffee, too. They add cinnamon and nutmeg!


We’re big on dropping in the ABC store or a drugstore for an inexpensive beer and we were pleased to find some craft options this trip. Namely, Oskar Blues that we just visited in Colorado a few weeks ago.


Earl of Sandwich in Planet Hollywood is our go-to place for cheap eats and they are open 24 hours. As a result, I had my favorite sandwich for breakfast on our second morning — the Holiday Turkey. Yes, everything is on there that you are thinking — turkey, cranberry, stuffing and gravy. But like my meal at Serendipity 3, it’s well done. Just a little of everything so it’s not too filling or a big mess. Okay, it looks like a big mess, but it’s so good!


Las Vegas Eats and Drinks in iPhone Photos
We swung in Grand Lux Cafe in the Palazzo for a light lunch. This is usually a safe bet for good food and their portions are massive so we always split something. We went for the Asian Nachos and they were so much better than I was expecting! Fried wontons with chicken in a peanut sauce. I already have the wheels turning in my head for a version with homemade wontons.


Las Vegas Eats and Drinks in iPhone Photos
We have yet to have a bad meal or bad service at Mon AmiGabi in Paris. Both are always excellent, which keeps us coming back when we want a high quality, mid-priced meal (for the Strip). I’m not a huge fan that they like to serve grain-fed beef as I prefer grass-fed, but the food is always delicious. One of my long time favorites is this warm brie with honey, black pepper, roasted garlic cloves and hazelnuts.


Las Vegas Eats and Drinks in iPhone Photos
Now on to one of our most fun and memorable meals in Vegas. I always go on about how great blogging is for introducing me to outstanding people, and it’s happened again with Tracey of Salty Sweet Life. We met online and ended up taking Todd Porter and Diane Cu’s photography course in Orange County in May where we met in person.


She and her husband live in Las Vegas so we met up with them for drinks, dinner and dessert. They took us to the The Lady Sylvia for drinks and while I didn’t snap any photos, trust me, this is one cool bar. It has a relaxing lounge-slash-library feel and we both had delicious beer cocktails. I had the The Dapper Don with Hendricks Gin and Ballast Point IPA.

Dinner was at Lotus of Siam. This is one place off the Strip that we had actually been to before. It was five years ago and before I had such a strong interest in Thai food and before we’d traveled to Thailand. That was long before I’d heard about the Northern Thai menu from both Tracey and by watching the Vegas episode of Parts Unknown.


Las Vegas Eats and Drinks in iPhone Photos
We ordered a selection of Northern Thai treats and every bite was delicious. My favorite was the Sai Oua (pork sausage) — nice and spicy and packed with the flavor of Kaffir Lime.


When our hosts told us they were going to take us to a new place for dessert, I thought okay, cool, we’ll grab frozen yogurt or something.


Um, not quite. Wow, were we in for an experience.


We headed to Sweets Raku. A dessert bar with the creations of Japanese dessert artist, Mio Ogasawara. We were greeted with the option of a prix fixe menu or ordering ala carte, all printed on an edible menu of rice paper and a candy ring. We were later given a raspberry sauce for dipping the menu.


Las Vegas Eats and Drinks in iPhone Photos
Needless to say, we did the prix fixe. The first course was pre-set, a refreshing pineapple sorbet with white wine jelly.


Las Vegas Eats and Drinks in iPhone Photos
For the second course, Tracey and I chose the Carib. A coconut panna cotta that included so much good stuff that I won’t be able to remember it all. Here’s what I do recall — cantaloupe sorbet, kiwi and a brûléed banana slice. A white chocolate disk was set on top of the glass and just before serving a warm mango sauce was poured through it to melt it. Outstanding.


Las Vegas Eats and Drinks in iPhone Photos
My husband had the Stella (strawberry tiramisu), a mix of fresh strawberries and cream over cake. We also had a great seat for the action to watch its intricate construction before serving.


Las Vegas Eats and Drinks in iPhone Photos


The final course was a cream puff with our choice of cream and fruit sauce. I chose vanilla with black currant. The puff was served with two gelled cube, one of which was passion fruit, my favorite.


As you would expect, it was an unforgettable experience and more proof to support my argument — visit Las Vegas. Stay on the Strip and get off the Strip. There is good stuff to be found just about everywhere.


Old Fashioned Peanut Butter Cookies from Beach House Baking

July 11, 2014
Friday is cookbook review day throughout the summer here at Fake Food Free. If you have a love of cookbooks be sure to swing back by for plenty of new ideas and recipes.
 
Old Fashioned Peanut Butter Cookies from Beach House Baking | fakefoodfree.com
 
Baking isn’t the first thing that comes to mind when I envision the beach. Usually it’s rum drinks and ice cream cones.
 
But now that I think of it, during just about every beach vacation I’ve enjoyed, tucked somewhere in the line of swim shops and shaved ice is a quaint bakery with a window of cookies, brownies and candies. It’s always a highlight of the trip.
 
It’s a lot like how Beach House Baking: An Endless Summer of Delicious Desserts by Lei Shishak is a highlight to a summer of new cookbooks.
 
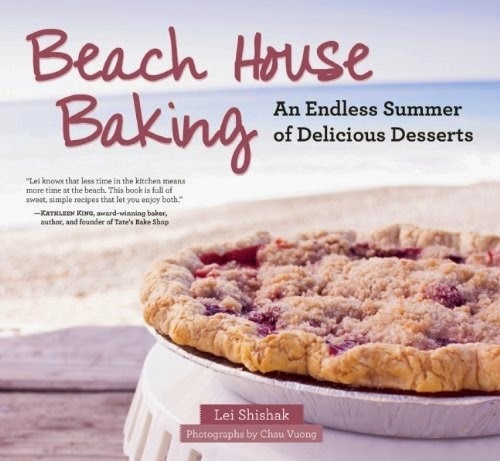
“I wasn’t always a beach girl,” she writes. “In fact, growing up in rural Pennsylvania I was more of a country bumpkin.”
 
Now how can I not love that? Just replace Pennsylvania with Indiana and Kentucky and bingo — you’ve got me.
 
Lei goes on to tell the story of how her love of food drew her from a non-food career to opening her own bakery. And how a love of the beach drew her to California. Minus the bakery, it’s a story I can most definitely relate to.
 
This cookbook was also a reminder of how diverse beach life can be. I grew up with vacations to the hot beaches of Florida and North Carolina. I never knew California beaches until two short years ago.
 
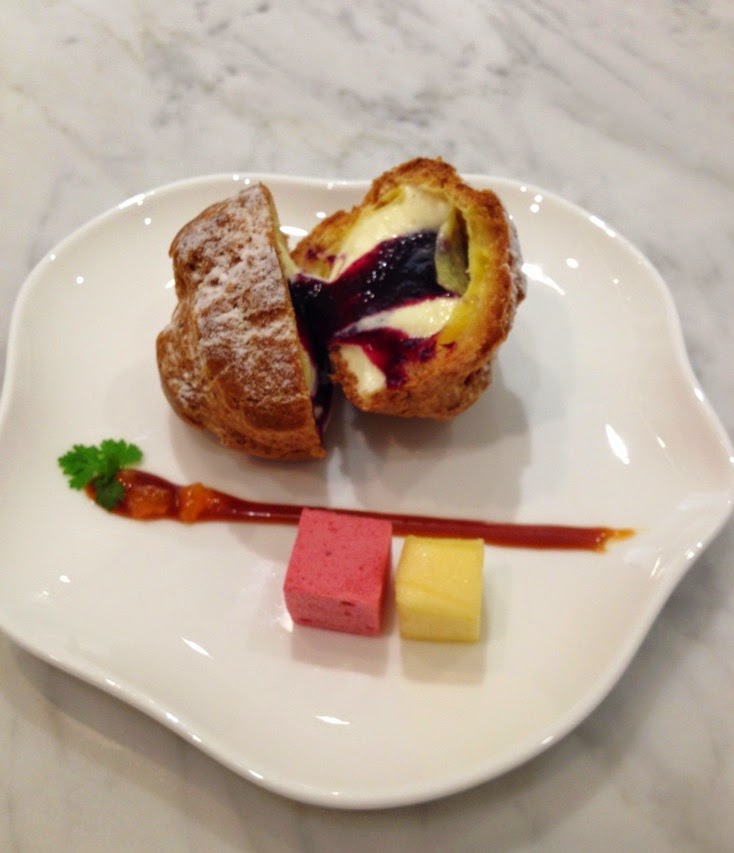
Here in the Bay Area we have beaches that are warm during the day (maybe) and breezy and cool at night. It’s weather that beacons a little baking. Maybe something like the Coconut Apricot Oat Crisps or one of the Happy Hour cupcakes like the Red, Red Wine Cupcakes with Blackberry Mascarpone Mousse in this book.
 
If you feel it’s just too hot to turn on the oven, the added Beachy Beverages section and the Peach Green Tea in the Frozen Pops section will get you through until you can bake up the cookies for the Malibu ice cream sandwiches.
 
Either way, a great perk of this cookbook is that the recipes are simple and straightforward. Each one fits to a page, and while there is no shortage of creativity, there aren’t any super long lists of ingredients and complicated steps either.
 
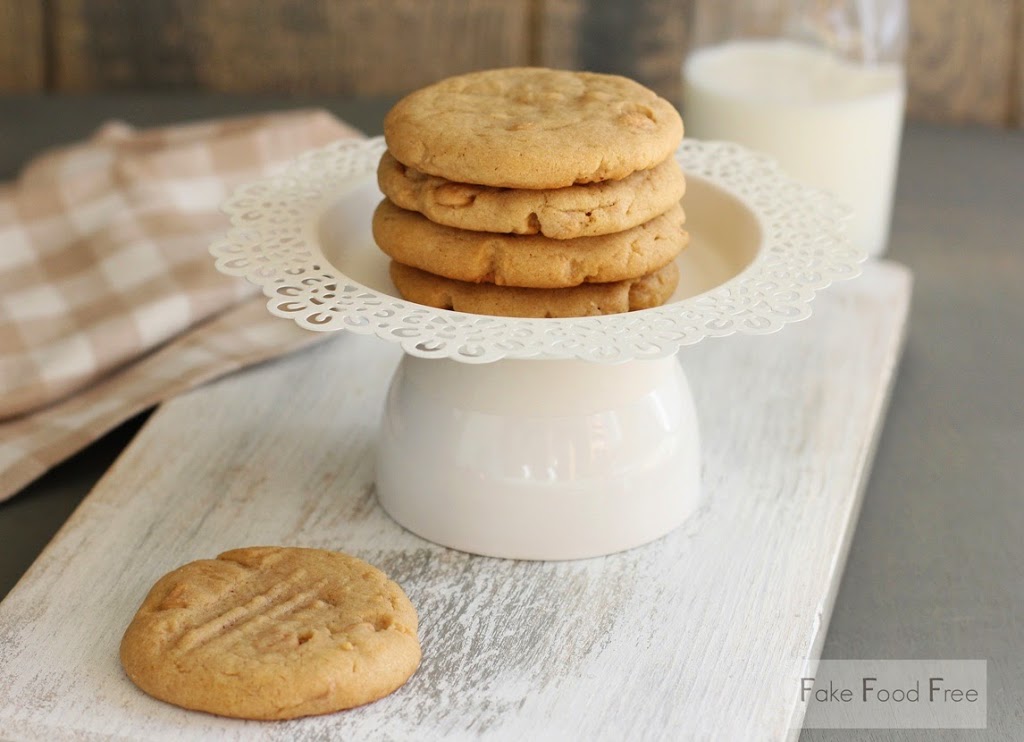
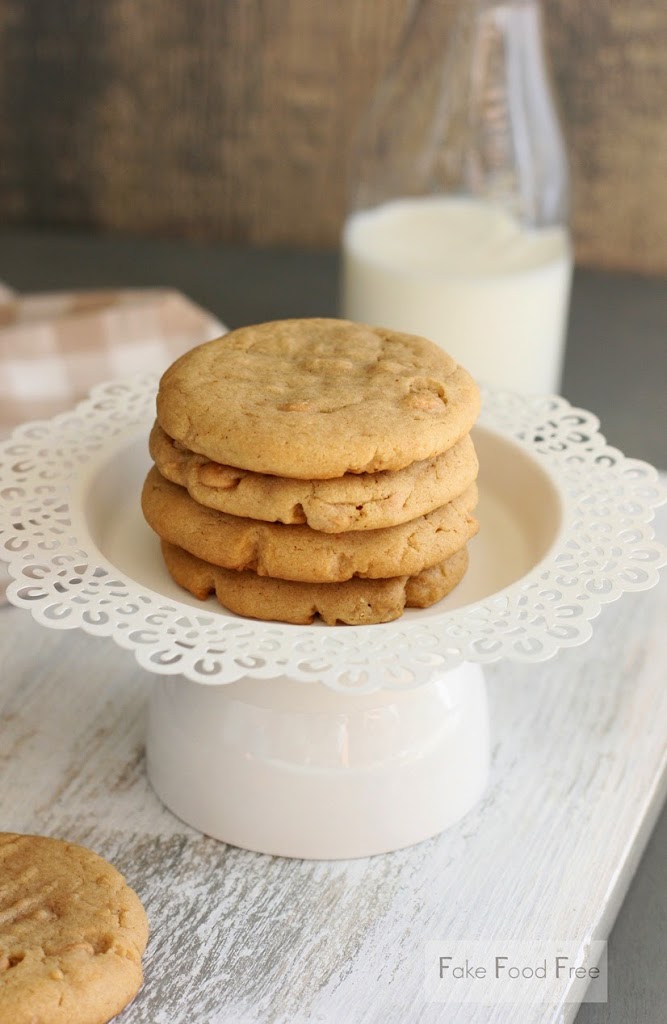
Being fortunate to have cool evenings in the summer that are perfect for firing up the oven, I had to go for something true to the baking theme of the book — cookies. Not just any cookie though, Old-Fashioned Peanut Butter Cookies.
 
Old Fashioned Peanut Butter Cookies from Beach House Baking |fakefoodfree.com
 
My quest for good peanut butter cookie recipes has been going on since high school when I worked in a bakery that made the most outstanding version. I like peanut butter cookies every which way you can bake them – crisp and crumbly, soft and tender, with chopped nuts or without. I love that this recipe incorporated a few peanut butter chips, because it’s something I don’t normally do. I’ve been using Trader Joe’s peanut butter chips. I’d sworn off peanut butter chips in the past, but these have very few ingredients and work well in desserts.
 
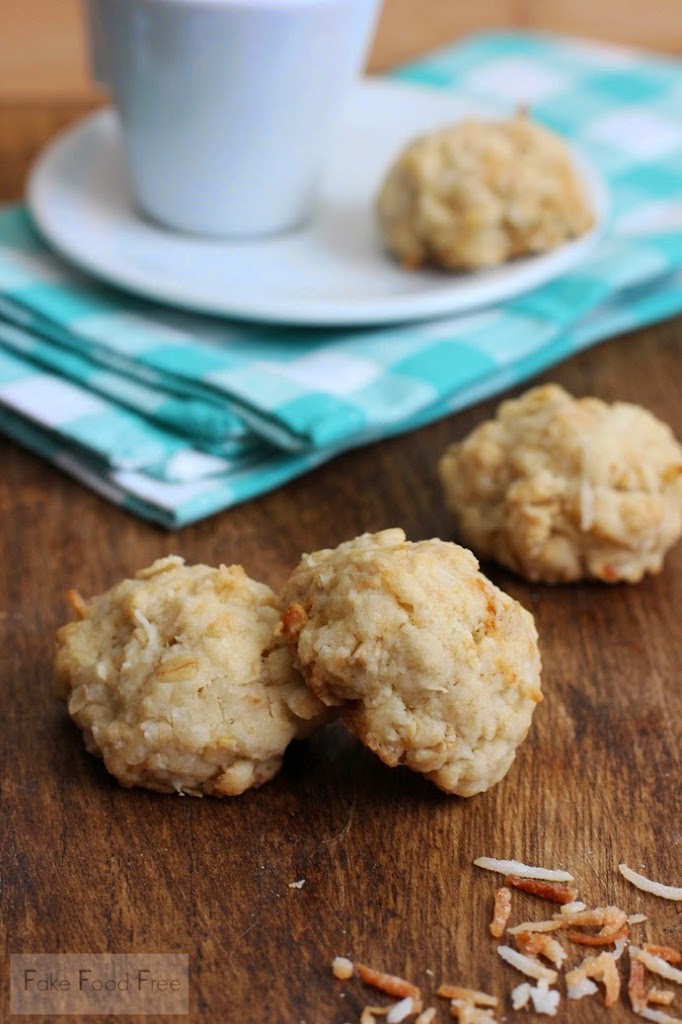
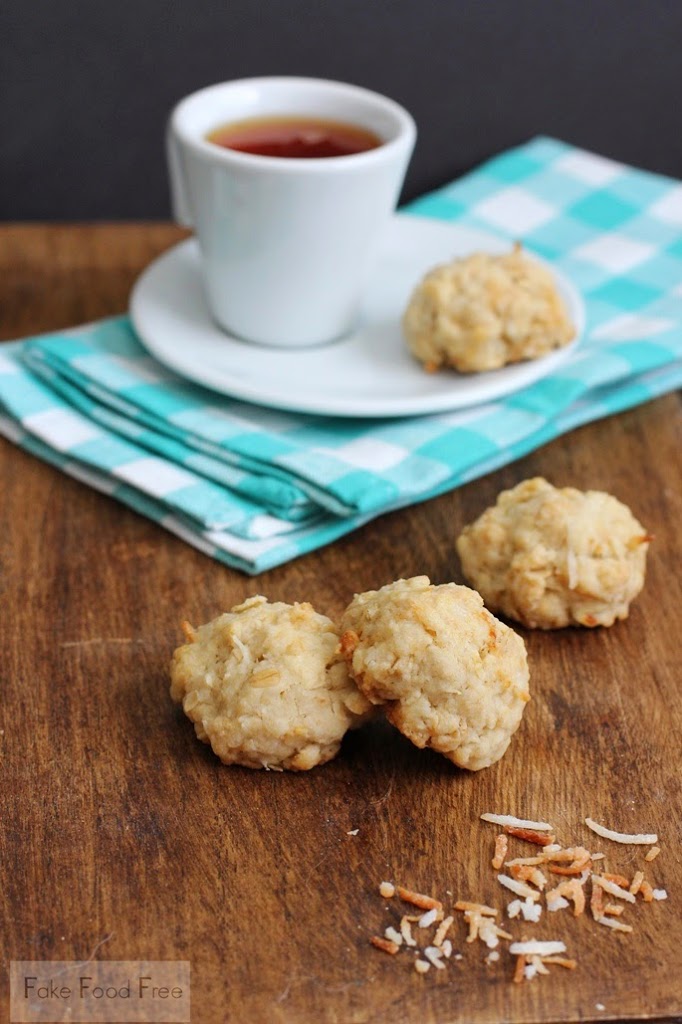
These cookies have a firm, crumbly edge and a rich, tender middle. A perfect combination when it comes to peanut butter cookies. I used natural peanut butter with only salt and peanuts, because aside from a few favorite flavored versions, that’s about all I keep around. It worked perfectly so don’t be afraid to substitute it if that is what you use, too.
 

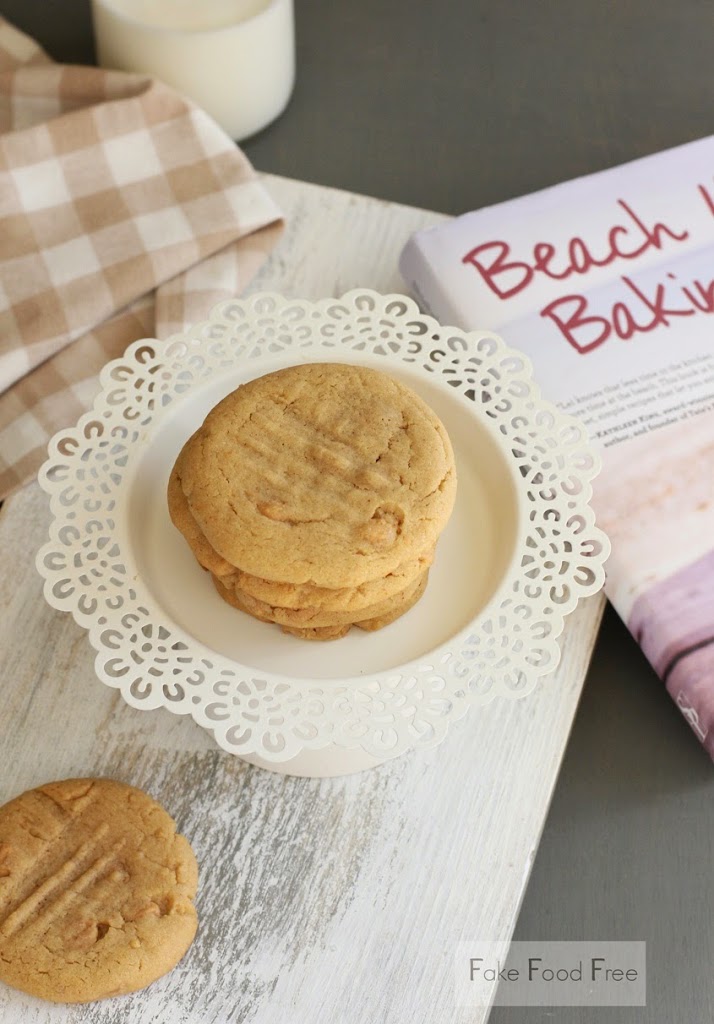
Old-fashioned peanut butter cookies

Makes about 23 cookies
 
From the book: Growing up on the East Coast, I would often head to Virginia Beach during spring break. This popular tourist destination boasts miles of sandy beaches as well as amazing fishing and boating opportunities. It’s also famous for its peanut specialties, including peanut brittle, peanut pie, and fried peanuts. When I hit the beaches these days, I love packing these soft and chewy cookies in my beach bag.
 
The heat of the sun warms the cookie just enough to bring out the aroma of the peanut butter and melts the peanut butter chips embedded in the dough. It’s like taking a bite out of a just-baked peanut butter cookie that’s melt-in-your-mouth delicious, all while being at the beach.
 
½ cup (1 stick) unsalted butter, at room temperature
½ cup smooth peanut butter
½ cup light brown sugar
½ cup sugar
1 large egg
1 tablespoon half-and-half
1 teaspoon pure vanilla extract
1½ cups all-purpose flour
Heaping ½ cup peanut butter chips
¾ teaspoon baking soda
¼ teaspoon salt
 
1. In a mixer fitted with the paddle attachment, cream the butter, peanut butter, and sugars on medium speed until light and fluffy, about 2 minutes. Add the egg, half and- half, and vanilla extract, and mix for an additional minute. Mix in the flour, chips, baking soda, and salt until incorporated. Cover the bowl and place in the refrigerator for 1 hour.
 
2. Preheat oven to 375 degrees. Line a couple baking trays with aluminum foil or parchment paper.
 
3. Scoop the dough onto the prepared trays (I use a 1-ounce ice cream scoop). Flatten slightly with palm. Mark the dough with the back of a fork in a crisscross pattern.
 
4. Bake for 9 to 10 minutes, or until edges are just set. Cookies will look underbaked. Remove from oven and let the cookies cool completely on the sheet trays.

Old Fashioned Peanut Butter Cookies from Beach House Baking |fakefoodfree.com


Disclosure: This cookbook was sent to me for review purposes. I was not required to write about it an received no compensation for doing so. 


Thanks for reading! All images and content are the property of Fake Food Free unless otherwise stated. Please do not republish full recipes and images without written permission. What is okay? Feel free to Pin images, share links to my posts or share the photo in a round up post with the title of this recipe and a link back to the post. Confused about copyright and food blogs? Here is some helpful information on Recipe Attribution. If you want to use a photo or full recipe, just ask. I’m sure we can work something out. 

Picnic Chicken Salad with Blueberries and Pecans

July 7, 2014
 
Picnic Chicken Salad with Blueberries and Pecans | fakefoodfree.com
 
I like my chicken salad loaded. It’s  to the point that I want it to contain equally as many other ingredients as it does chicken. Nuts, grapes, dried cranberries, celery, onion, bell peppers – you name it and I’ll mix it in.
 
My favorite part is the fruit. I love that little touch of sweetness against all the other savory ingredients. Grapes and dried cranberries are my standards, but this time of year, nothing says summer like fresh blueberries.
 
Picnic Chicken Salad with Blueberries and Pecans | fakefoodfree.com
 
Normally when I get my hands on some I ask around on social media as to what other people would do with them. The response is always to eat them fresh, and believe me, I’ve got that covered. But after I’ve downed a couple gallons, I still need a few good ideas that aren’t jam.
 
So when I got hungry for chicken salad last week, I decided to use blueberries in place of my old stand-bys. It was my first time trying it and it beat my old versions by a mile. Not to mention that there is something so pretty about those deep blue berries no matter what you use them in.
 
I use a mix of Greek yogurt, mayonnaise and spicy brown mustard as a dressing for my version of chicken salad. It’s become my favorite combination not only for chicken, but for potato salads and slaws, too. If you have your own favorite, don’t hesitate to stick with that and just add the blueberries. They are the real star here, but I do have to admit I am loving them with both the pecans and dill in this recipe.
 
Picnic Chicken Salad with Blueberries and Pecans | fakefoodfree.com
 

Picnic Chicken Salad with Blueberries and Pecans
Makes: 2 to 3 servings
Write a review
Print
Ingredients
  1. 6 to 7 oz. roasted chicken, shredded
  2. ¼ cup finely diced onion
  3. ½ tablespoon chopped fresh dill
  4. ¼ cup full-fat or 2% plain Greek yogurt
  5. 1 tablespoon mayonnaise
  6. 1 teaspoon spicy brown mustard
  7. ½ teaspoon sugar (any type - white, raw, brown, etc)
  8. ¼ teaspoon ground black pepper
  9. Pinch of salt
  10. ¼ cup chopped pecans
  11. ½ cup fresh blueberries
Instructions
  1. Place the chicken, onion and dill in a medium bowl. In a separate bowl, stir together the yogurt, mayonnaise, mustard, sugar, salt and pepper. Pour the dressing over the chicken and stir well until the chicken is coated and the dill is distributed throughout the chicken salad.
  2. Stir in the pecans. Add the blueberries and very gently stir just until all ingredients are combined. Refrigerate until ready to serve.
Fake Food Free https://www.fakefoodfree.com/


Disclosure: The Sierra Cascade organic blueberries used in this recipe were provided by Whole Foods Oakland. I was not required to write about them and received no compensation for doing so.

Thanks for reading! All images and content are the property of Fake Food Free unless otherwise stated. Please do not republish full recipes and images without written permission. What is okay? Feel free to Pin images, share links to my posts or share the photo in a round up post with the title of this recipe and a link back to the post. Confused about copyright and food blogs? Here is some helpful information on Recipe Attribution. If you want to use a photo or full recipe, just ask. I’m sure we can work something out. 

Carrot and Radish Salad with Peanut Ponzu Dressing Recipe

June 21, 2014

I made this carrot radish salad a few years ago when I received a bottle of ponzu. New to me at the time, I was an instant fan and it made a delicious peanut dressing for this seasonal side dish.

Carrot and Radish Salad with Peanut Ponzu Dressing Recipe | fakefoodfree.com

The thing that draws me to food the most is that I’m always learning something. No matter how much I travel, cook or eat, I will never know everything.

A good example — I learned of ponzu just last year when I was in the Seattle for the International Food Bloggers Conference. Considering my love of all types of Asian food, I’m not sure how this one got past me.

Ponzu is a Japanese citrus-based sauce often mixed with soy sauce. It was on my list to try when Marukan offered to send me a bottle earlier this year. I already use their rice vinegars so I gladly accepted the offer.

Marukan’s version of ponzu is made with sudachi juice, a sour Japanese citrus fruit used to flavor foods. The result is a tangy, salty sauce that makes an excellent dressing for summer vegetables.

With some carrots in the fridge and radishes I picked up at the market this week, I set out to see what I could come up with using this new-to-me ingredient.

I must admit that carrots are not my favorite vegetable. I kind of eat them like cookies — in moderation. I’m not sure what it is. It’s not that I dislike them. It’s more because their flavor quickly overpowers other foods to me.

Carrot and Radish Salad with Peanut Ponzu Dressing Recipe | fakefoodfree.com

That being said, I love this salad! The combination of the carrot with crunchy radishes and the tangy, nutty dressing is really delicious.

Don’t feel like you have to cut the carrots in ribbons, although it makes for a pretty presentation. You can shred or chop them if you like. If you decide on ribbons, it’s really easy. Just use a vegetable peeler to peel off thin strips. You’ll eventually reach a point where you have a thin piece of the center of the carrot. At that point, just reserve it as a carrot stick snack for later.

I’m still on the lookout for more ways to use ponzu so if you have any ideas, please share!

Carrot and Radish Salad with Peanut Ponzu Dressing
Serves 4
An ideal spring side dish, this carrot radish salad is tossed in a flavorful dressing made with tangy ponzu.
Write a review
Print
Ingredients
  1. 4 medium carrots, peeled and sliced into ribbons
  2. 6 radishes, thinly sliced
  3. 2 green onions, sliced
  4. 1 tablespoon natural peanut butter (unsweetened)
  5. 1 tablespoon ponzu
  6. 1 teaspoon dark sesame oil
  7. ½ teaspoon sugar (I use mascavo)
  8. 1 tablespoon warm water
  9. 3 tablespoons lightly salted peanuts
Instructions
  1. Place the carrots, radishes, and green onions in a medium bowl.
  2. Whisk together the peanut butter, ponzu, sesame oil, and sugar in a small bowl. Whisk well until a smooth, thick dressing forms. Whisk vigorously as you add the warm water. This will thin and lighten the dressing.
  3. Pour the dressing over the vegetables and toss well to coat all ingredients. Stir in the peanuts just before serving.
Fake Food Free https://www.fakefoodfree.com/
Carrot and Radish Salad with Peanut Ponzu Dressing Recipe | fakefoodfree.com

Disclosure: The ponzu in this post was sent to me for review purposes. I was not required to post about it and received no compensation for doing so.

Thanks for reading! All images and content are the property of Fake Food Free unless otherwise stated. Please do not republish full recipes and images without written permission. What is okay? Feel free to Pin images, share links to my posts or share the photo in a round up post with the title of this recipe and a link back to the post. Confused about copyright and food blogs? Here is some helpful information on Recipe Attribution. If you want to use a photo or full recipe, just ask. I’m sure we can work something out. 


Dainty Ladies from Edwardian Cooking

June 13, 2014
My favorite scenes from Downton Abbey are always in the kitchen or the dining room. These Dainty Ladies from Edwardian Cooking bring those scenes to life, allowing us to serve some foods of that time at our own (less fancy) tea times and dinner parties!
 
Dainty Ladies from Edwardian Cooking | fakefoodfree.com
Have you ever envisioned what it would be like to live during a different time in history?
 
As a kid I can remember being crazy about Little House on the Prairie. I really wanted to be that Laura Ingalls. At that point, food didn’t play a part in my fascination, but the rustic kitchen, farm life and fishing by the creek did. Despite the cold nights and TV drama, it looked like so much fun!
 
Given that little piece of my past and my love of travel you’d think I would have been a shoo-in for Downton Abbey. I was such a late blooming fan. I didn’t see the draw at all for the first two seasons. Then I watched my first episode and it all went down hill.
 
Hooked, binged watched and I’m anxiously awaiting what will happen next like everyone else.
 
I bet you can guess my favorite scenes. Yep, the kitchen. I love catching glimpses of what might have been prepared and served during that time.
 
It’s one reason why I’ve found Edwardian Cooking by Larry Edwards so interesting! Like the show, it’s a bit of fantasy meets history and it’s just plain fun!  
 
 
Even though Downton Abbey is fictional, similar scenarios existed during that time and the book goes into detail about the foods that were likely eaten. It is history lesson slash cookbook and provides 80 recipes inspired by Downton Abbey’s elegant meals so that you can recreate them.
 
I was drawn to the section devoted to High Tea recipes – the crumpets, finger sandwiches and cookies. I decided to make the one recipe that is direct opposite of my personality.
 
Dainty Ladies.
 
I’ve been described with many words, but dainty certainly isn’t one of them. Aside from giving me a giggle, the ingredients were right up my alley and I love the story about how ladies were reminded to remove their gloves to prevent getting butter stains. You can read about that below.
 
These little tea biscuits are just barely sweet. It reminds me of my favorite scones from Ireland. They are nothing like the scones here in the States. Just a touch of sugar and fruit make them sweet, just like a touch of sweetener and coconut takes the edge off the savory, buttery flavor of these little ladies. They have a nutty, shortbread-like taste and texture making them perfect for a tea or coffee break.
 
A note on ingredients. I had sweetened coconut on hand from another recipe so I used that. The recipe doesn’t clarify, but if you want them to be more of a cookie, I’d do the same. It adds just a little more sweetness.
 
Dainty Ladies from Edwardian Cooking | fakefoodfree.com


Dainty Ladies

(makes 32 small cookies)
From the book:
A staple of the drawing rooms and salons that served High Tea, these sweet sensations truly lived up to their feminine name. Served primarily to the female guests, Dainty Ladies are very buttery rich and have a wonderful texture, all of which was created to accentuate the taste of tea. When Dainty Ladies appeared on the table, the guests knew something special was about to happen. This is one of only a few dishes of the Edwardian era to feature coconut and the reason for this is rather simple. Obviously, you couldn’t grow coconut anywhere in Great Britain. It had to be imported at great cost. When (and if ) an abbey had coconut, it was locked up with only the butler of the house having the key. You might have noticed when watching Downton Abbey that quite often during High Tea or a social gathering featuring food, the women would wear white gloves. If Dainty Ladies were one of the featured sweets, the footman presenting the cookie would inform the guest and the guest would remove here right glove and with her thumb and forefinger, retrieve a cookie. The reason for this is the amount of butter used to make Dainty Ladies would soil the gloves.
 
Ingredients needed to make Dainty Ladies:


2 cups flour
1 cup flaked coconut
1 cup rolled oats (oatmeal)
1 tsp. baking soda
2 tsp. cream of tartar
1 cup butter
1 Tbs. corn syrup
2 Tbs. water
1 Tbs. vanilla
 
Steps:
1. Preheat the oven to 325°F. Line the bottom of a baking sheet with parchment paper
or a silicon sheet.
2. In a large bowl, whisk together the flour, coconut, rolled oats, baking soda, and
cream of tartar.
3. In a small pan over medium heat, melt the butter into the corn syrup and water.
Once the butter has melted, stir in the vanilla.
4. Pour the butter mixture into the flour mixture and stir until it is combined.
5. Let the dough sit 5 minutes for the oats to soak up the butter mixture.
6. Remove walnut-size portions of the mixture and roll into a ball.
7. Place the balls onto the prepared baking sheet.
8. Place into the oven and bake 12 minutes.

9. Remove from the oven and place the cookies on a wire rack to cool.

Disclosure: This book was provided for review purposes. I was not required to write about it and received no compensation for doing so. 


Thanks for reading! All images and content are the property of Fake Food Free unless otherwise stated. Please do not republish full recipes and images without written permission. What is okay? Feel free to Pin images, share links to my posts or share the photo in a round up post with the title of this recipe and a link back to the post. Confused about copyright and food blogs? Here is some helpful information on Recipe Attribution. If you want to use a photo or full recipe, just ask. I’m sure we can work something out. 

Want to create beautiful food and product photos that you can't wait to share?!
Discover your style, control the light, and shoot using the tool you know how to use (yes, your phone included). Learn about free resources, Live Q&As with Lori, and online courses you can take from anywhere in the world!
We respect your privacy. Unsubscribe at any time.